Film noir is a cinematic type of photography and the word “film noir” evokes a feeling that represents dark scenes in movies that are typical of crime and thriller stories. This photography style can be used to portray fearful, dramatic and dark cinematic scenes. Film noir photography suits particular styles of photos and situations and the photographer needs to keep an eye on the light, subjects and elements that will be included in the frame. Here are some tips and techniques that will help you capture interesting film noir photographs.

What Is Film Noir?
According to dictionaries, noir is a genre of crime film or fiction characterized by cynicism, fatalism, and moral ambiguity.
Noir is the French word for the color black and film noir are dark films that are known for their negative elements and suspicious characters. The term film noir was used in France during the post war years (1940s) to describe Hollywood movies based on American crime fiction that portrayed dark mood and cynicism. Some argue that film noir is a genre of film, while others say that it is a tone or visual style to portray a particular mood in the film.
While there are many interpretations and arguments about the term film noir in photography, this particular effect can be used for various genres of photography like portraits, street, urban, environmental, indoor, etc.
Film noir photography is praised for its dark, moody and/or dramatic images that can have the look and feel of dark scenes from movies made in the 40s, 50s and 60s. The composition and lighting are quite specific and give these images a bold look. There is a huge contrast between the darks and the lights, and the shadows are quite dramatic.

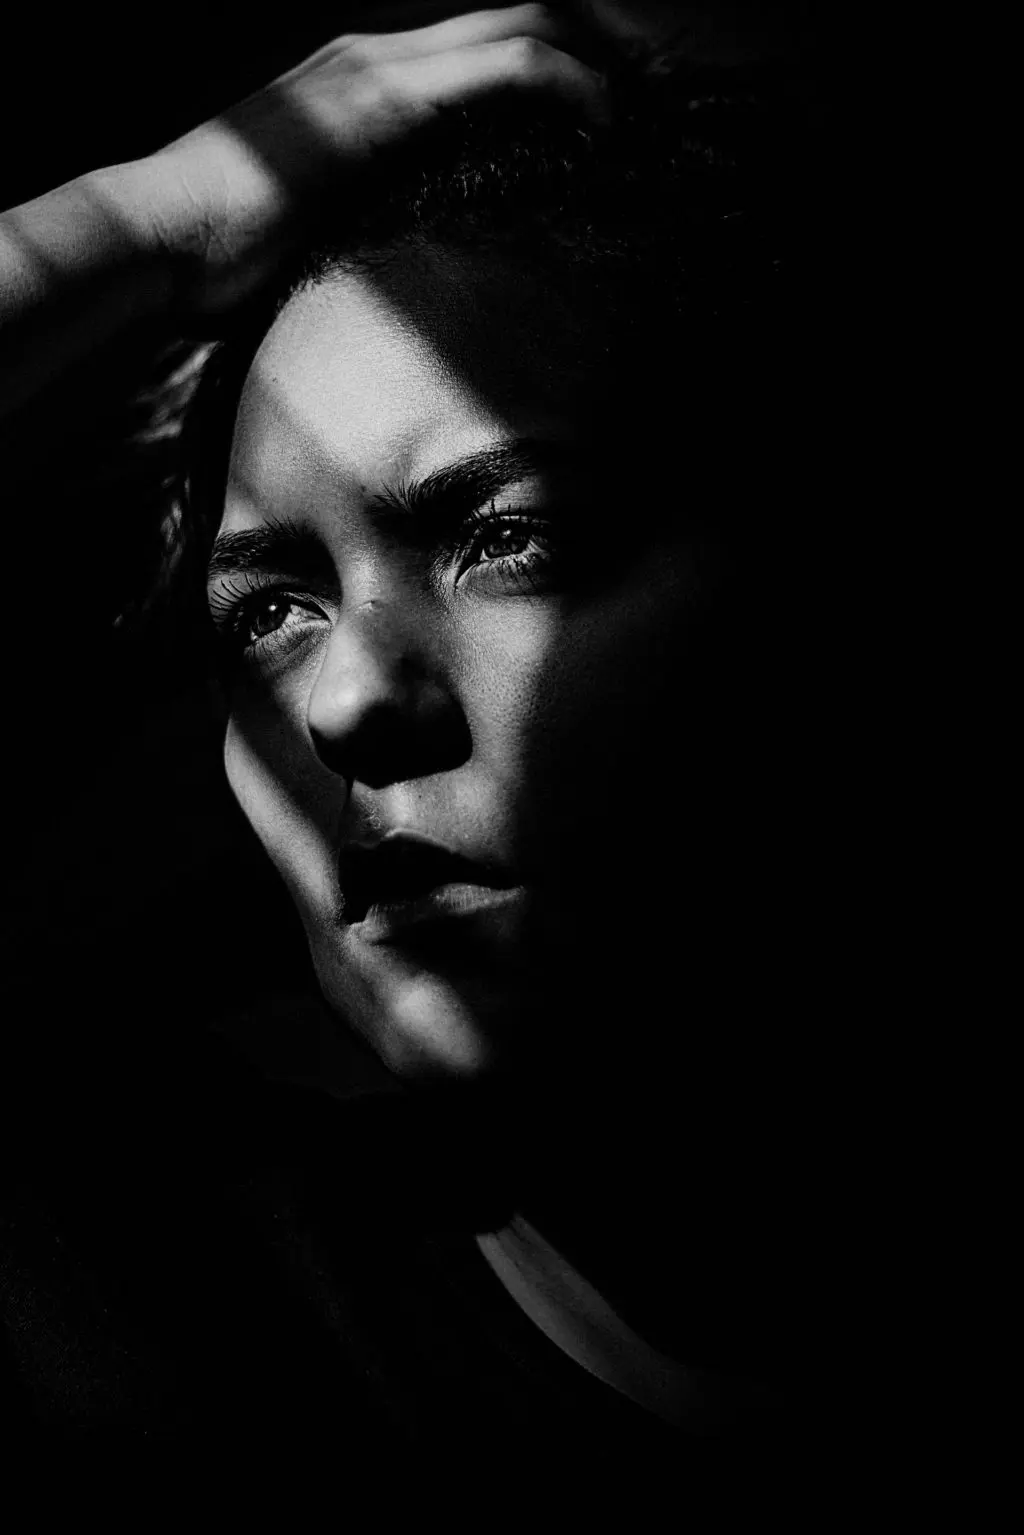
Most of the time, in film noir photography, the subject would be partially thrown into darkness revealing only parts of them. The dramatic shadows cast by strong lighting helps create a mysterious effect.
In this article we will look at a few tips that will help you achieve the film noir look in your images.
Film noir look can be achieved with the help of low key lighting, so you do not need a complicated studio setup or expensive lighting equipment to achieve the film noir effect. You can experiment with the gear you have in your hand, basically a camera, lens and a single light source, to achieve the film noir effect. This way you illuminate your subject, part of the scene or part of your subject and throw everything else into darkness which adds drama and mystery to your photograph.
Color Or Black And White?
Typically film noir photos are photographed or edited to black and white. Some photographers however like the vintage or retro colors of film and produce color versions of images that have a dark mood. Basically it's up to you to decide how you want your images – color or black and white and then proceed to work on the image based on your visualization.
Either way, film noir images need to be dark with high contrast and not have a light and airy mood in them.
The images below are presented in color, but they still portray a mysterious mood.

Ideas For Film Noir Photography
Where can you find ideas and inspiration for film noir photography?
You can watch a few movies that belong to this genre and pick some of your favorite scenes. Closely observe the scene to see what kind of locations suit this type of photography, how the subject/s have been lit, their facial expressions, body language and how the scene has been created.
You do not usually see a relaxed or dreamy scene in film noir, but dark, moody, somber kind of scenes. There is a mystery, imbalance, and tension in these photographs. You can learn by recreating a scene if you are beginning with photography, or you can begin with your own ideas once you get a hang of what a film noir photograph is.

Tips For Film Noir Photography:
Here are some film noir tips and suggestions that you can follow for a fun shoot with intriguing results!
- The most important factor that you need to pay attention to is the lighting.
- Natural light is good but if it is not available in the location at the time you are trying to shoot, then go for artificial lighting.
- Film noir can be shot indoors or outdoors but you need to get the mood and the lighting right with whichever light you are using.
- You need to use the right amount of lighting (neither too harsh nor too soft) to illuminate your subject at an angle and keep other areas in darkness or partial darkness to invoke a mysterious mood.
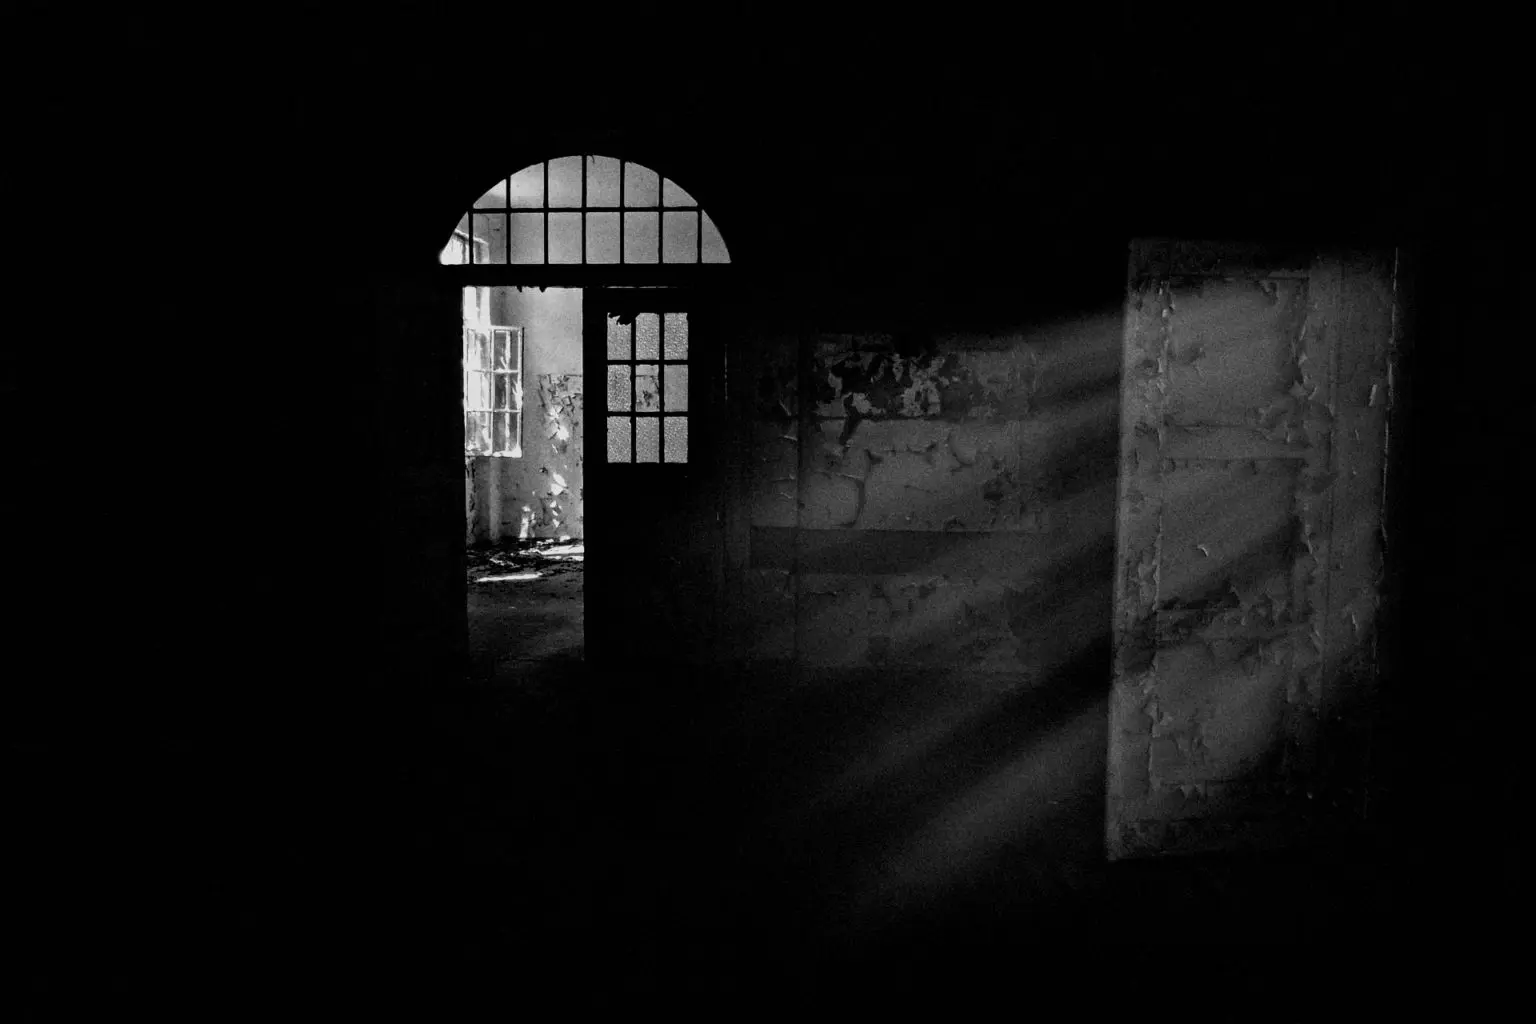
- Location: You can shoot film noir photos in your studio, but if you are going for a darker atmospheric mood, look for interesting places like abandoned areas or other old buildings that have weathered walls and windows/doors that let in beams of light that can be used to light your subject.
- Give importance to the expression and pose. There should be feelings of fear, anger and the pose needs to be kind of intense or fierce and not relaxed.
- Do not shoot your image in black and white. It is good to shoot colour and then convert it to black and white while post processing. This way you can create the look you are after by working on various colours individually in your film noir photograph.
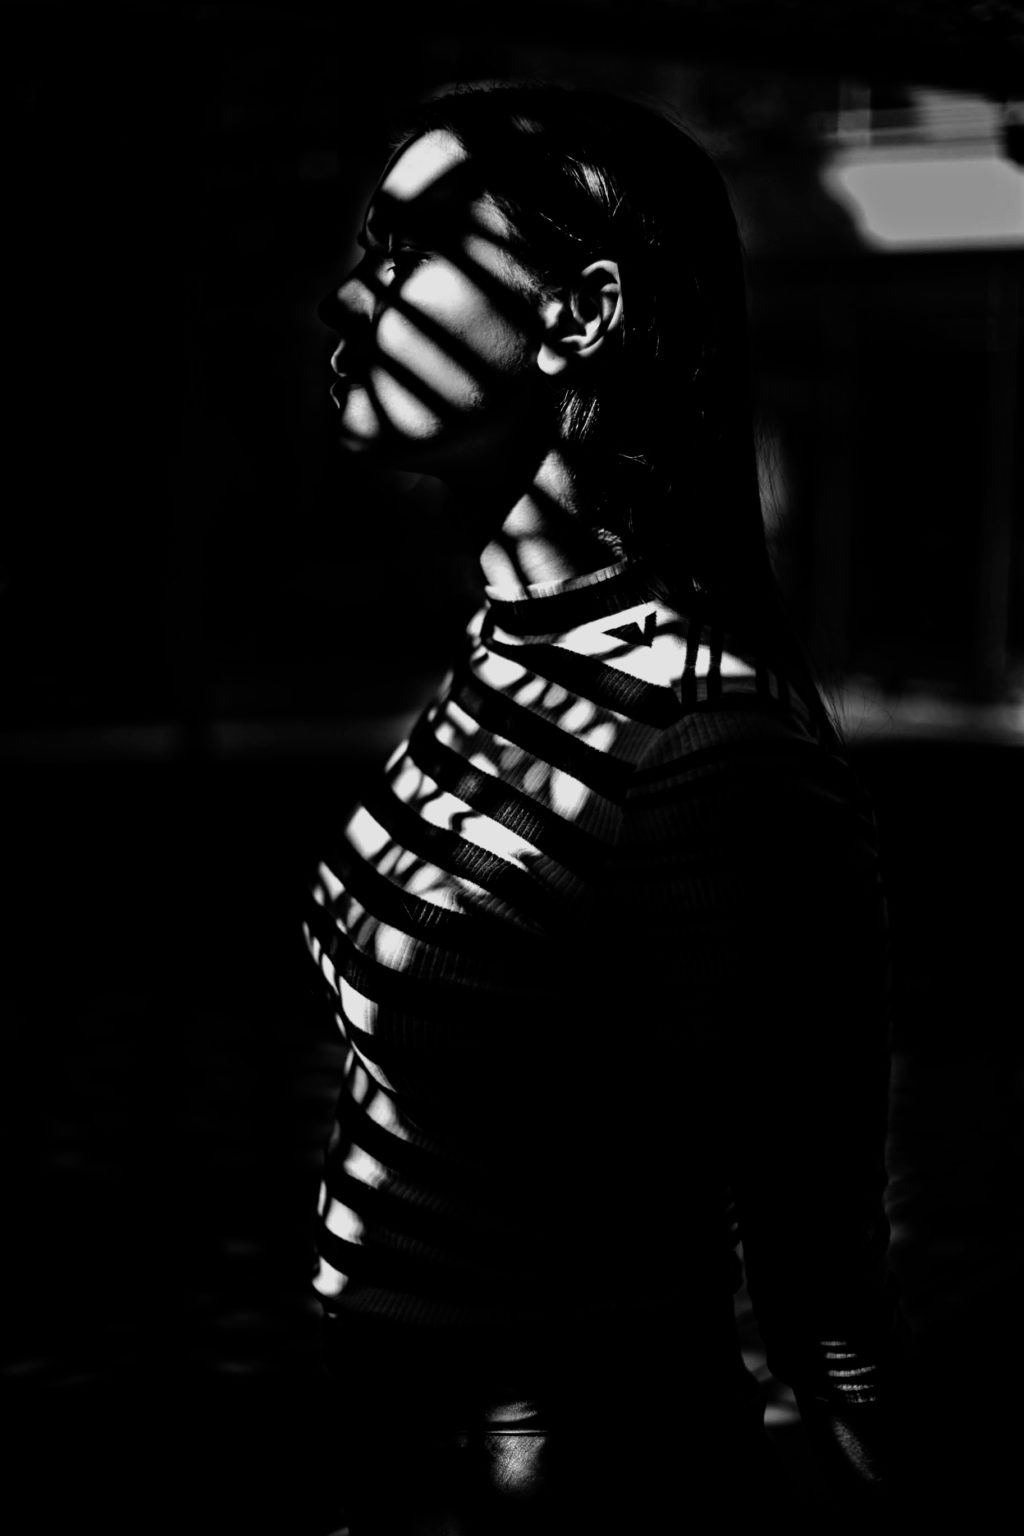
- Harsh shadows are great for film noir photography. Whether it is dappled light or light through blinds and curtains, fences, netting material, the strong shadows from bright light like the afternoon sun can result in high contrast images. Allow the light to fall on a part of your subject to create a mysterious effect. Use the light wisely so that no part of the image is overexposed leading to unwanted highlights.


Shooting Setup For Film Noir Photography
The setup for film noir photography needs to be peculiar because this is what gives the image its dark look or mood.

You can shoot your subject near a window that has a curtain or for even more dramatic portraits, you can shoot near a window that has blinds. Light through the blinds will create an impressive film noir look and is one that is most often used in films.

Depending on the story you are trying to tell through your photograph, you will need to dress your model accordingly and give them suitable props.


Here Are Some Ideas You Can Try
- Shoot Through Interesting Materials: Shoot through a transparent material like cloth, curtains, glass, frosted glass, glass with condensation, or transparent wraps to create a spooky feel. This can lead to abstract film noir portraits where you just show the outline of your subject, depending on your creativity.
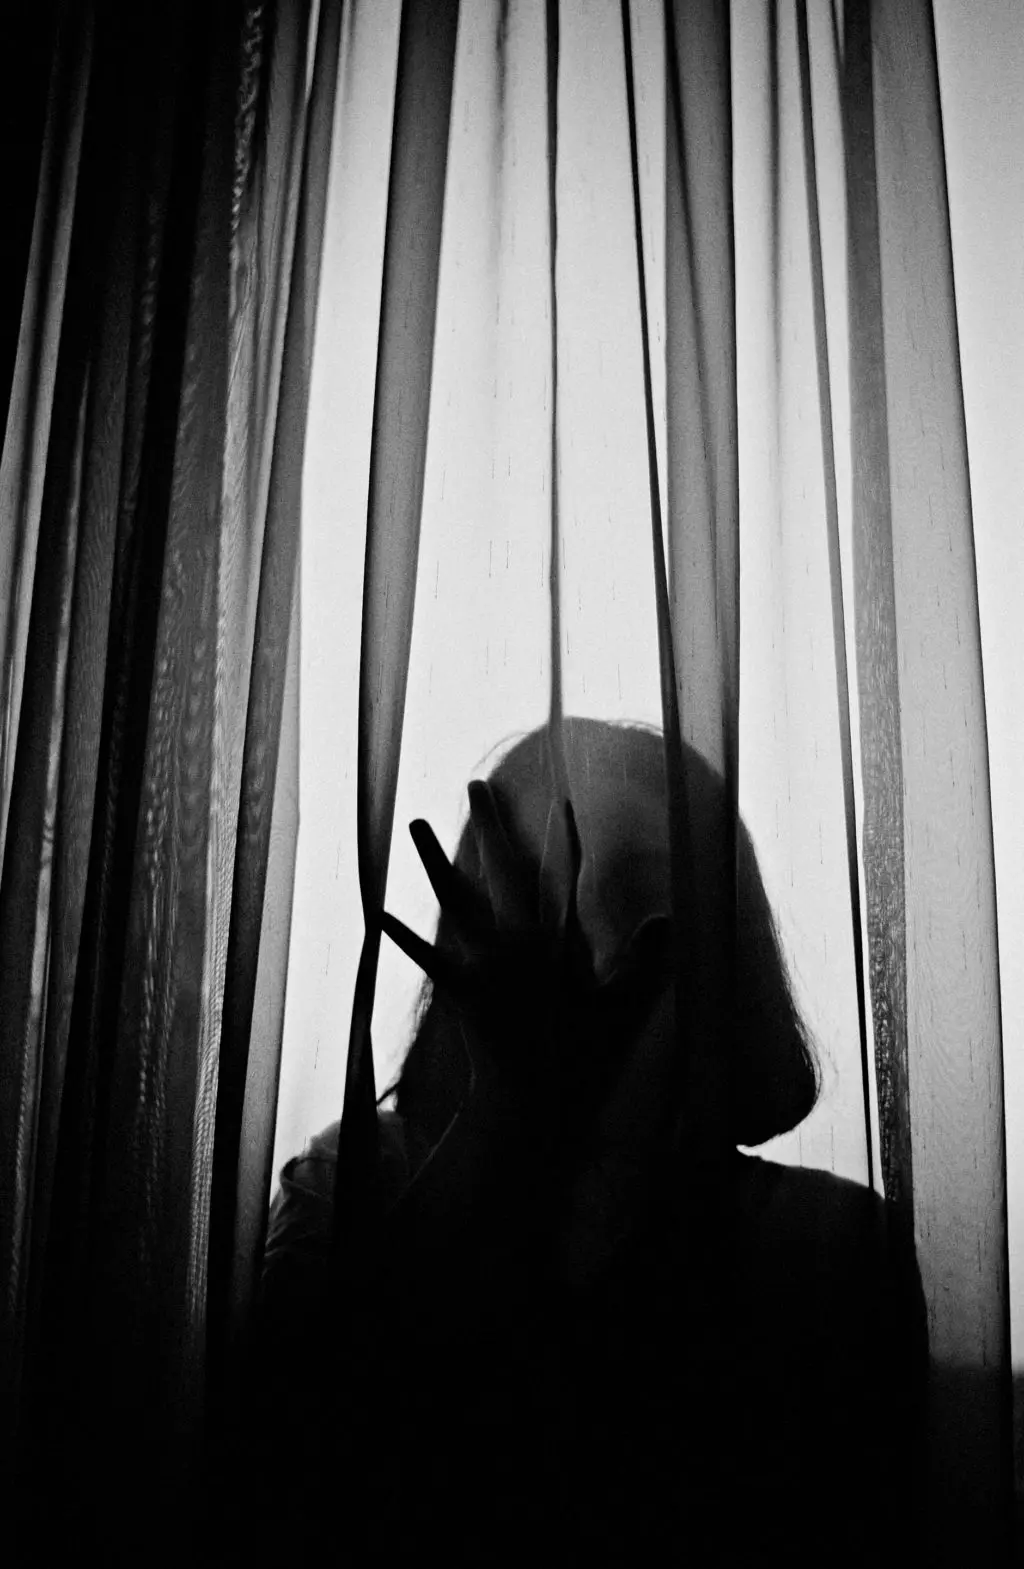
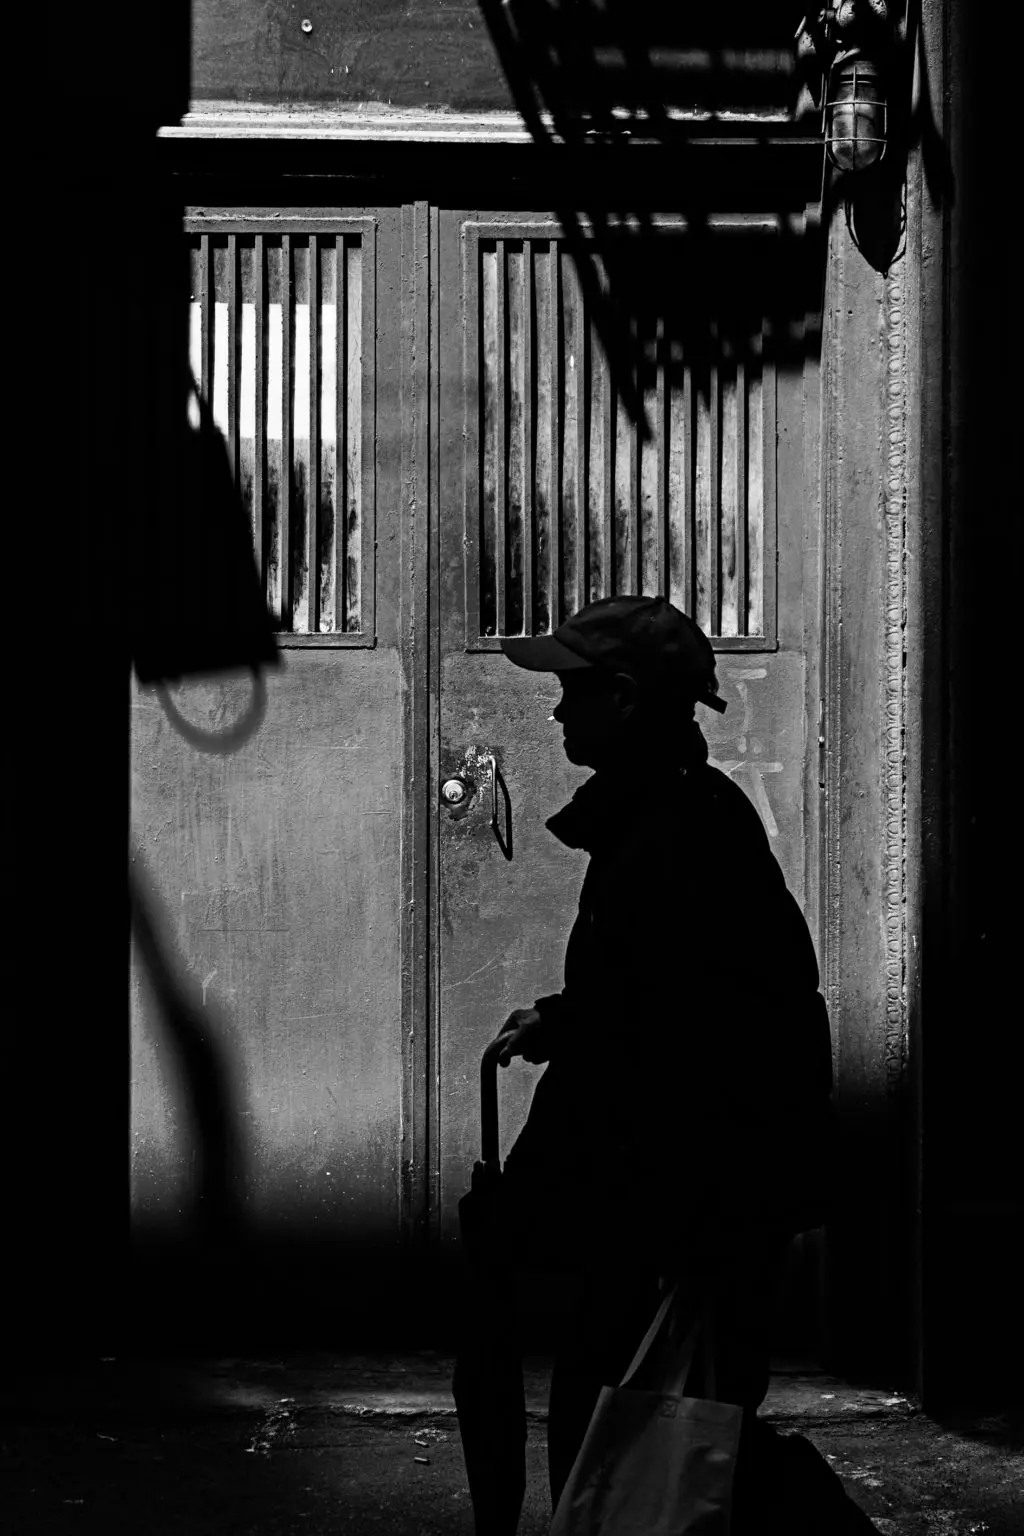
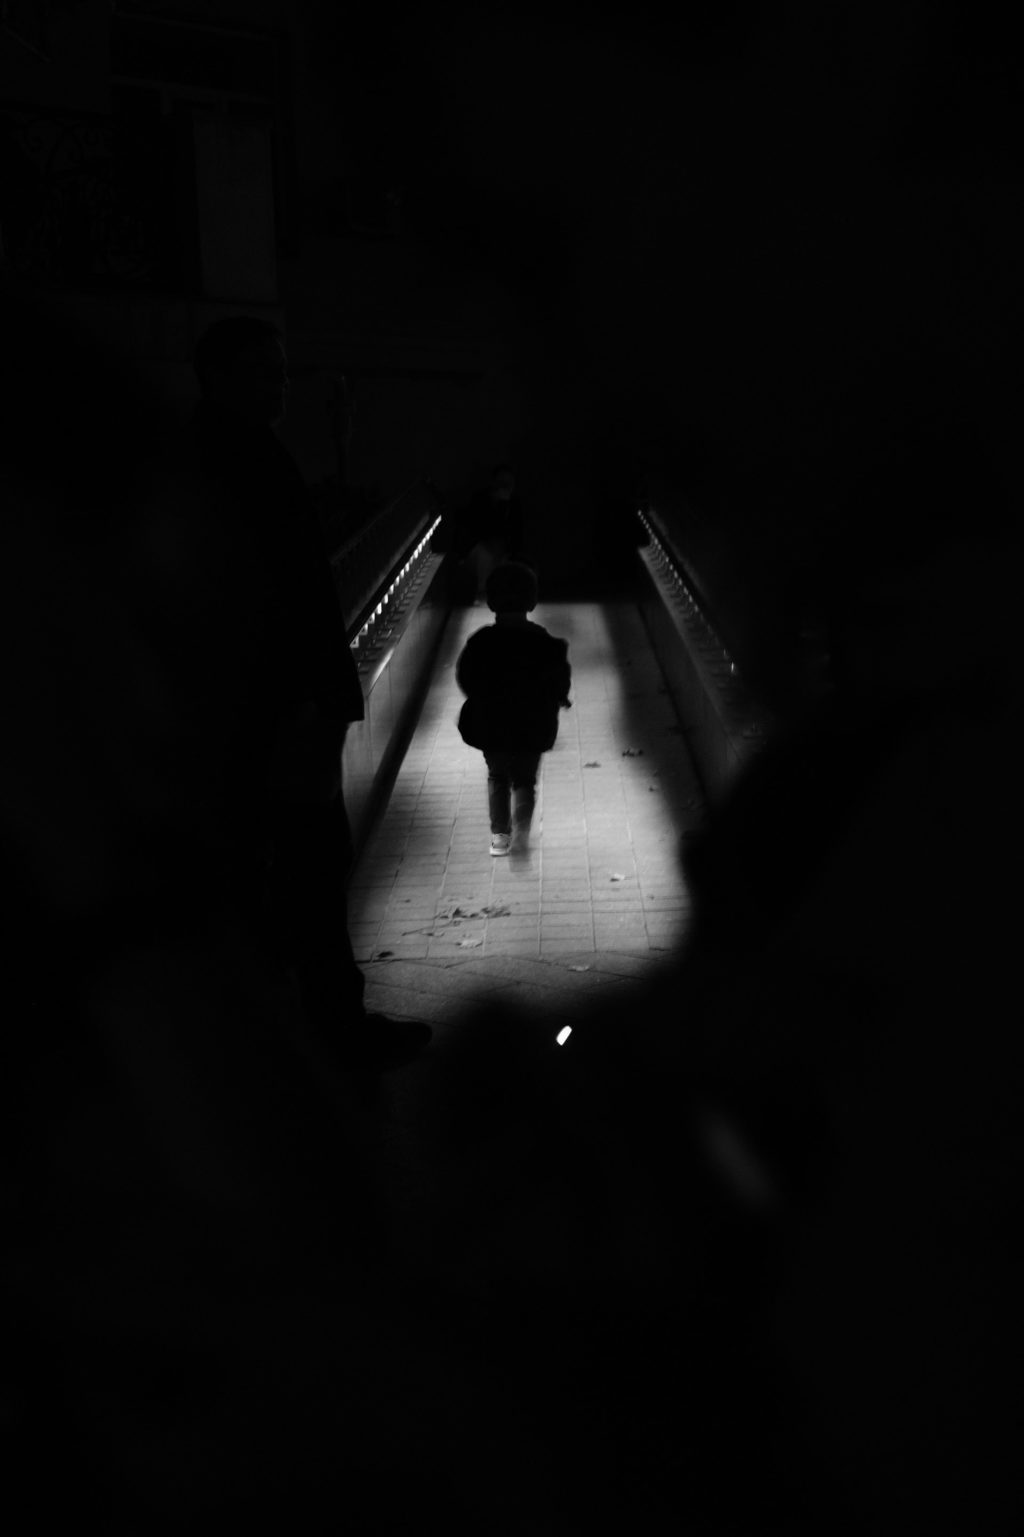
- Try Dark Silhouettes: Film noir is characteristic of scenes that have silhouetted shots in urban environments. Such shots tend to create a feeling of tension in the viewer because one does not know what the subject is up to.
- Use silhouettes to add mystery or anxiety to your film noir photograph and shooting silhouettes in a foggy location can create an eerie atmosphere in the images.

In order to do this, you will need to backlight your subject. This will give an emphasis to the subject's features and a slight idea of the location.
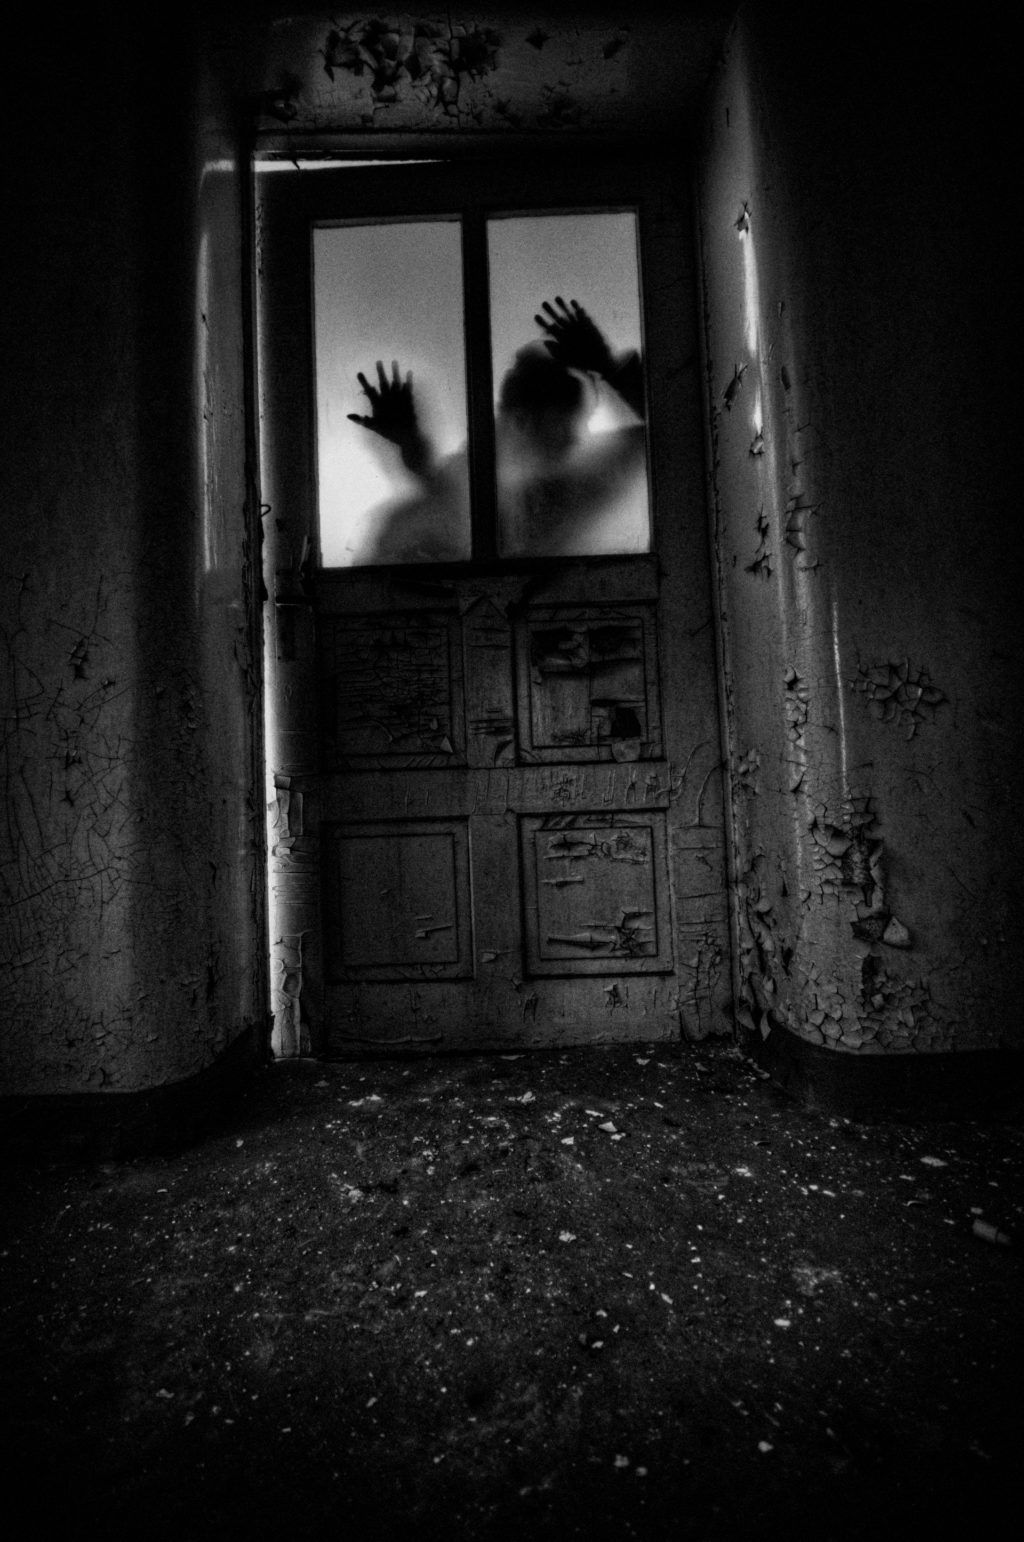
- Look For Interesting Places: Shoot in locations that are abandoned in order to give a spooky or haunted feel to your images. When setting up or looking for the frame to shoot, make sure to position your subject in such a way that the light falls from an angle to create a dramatic mood.


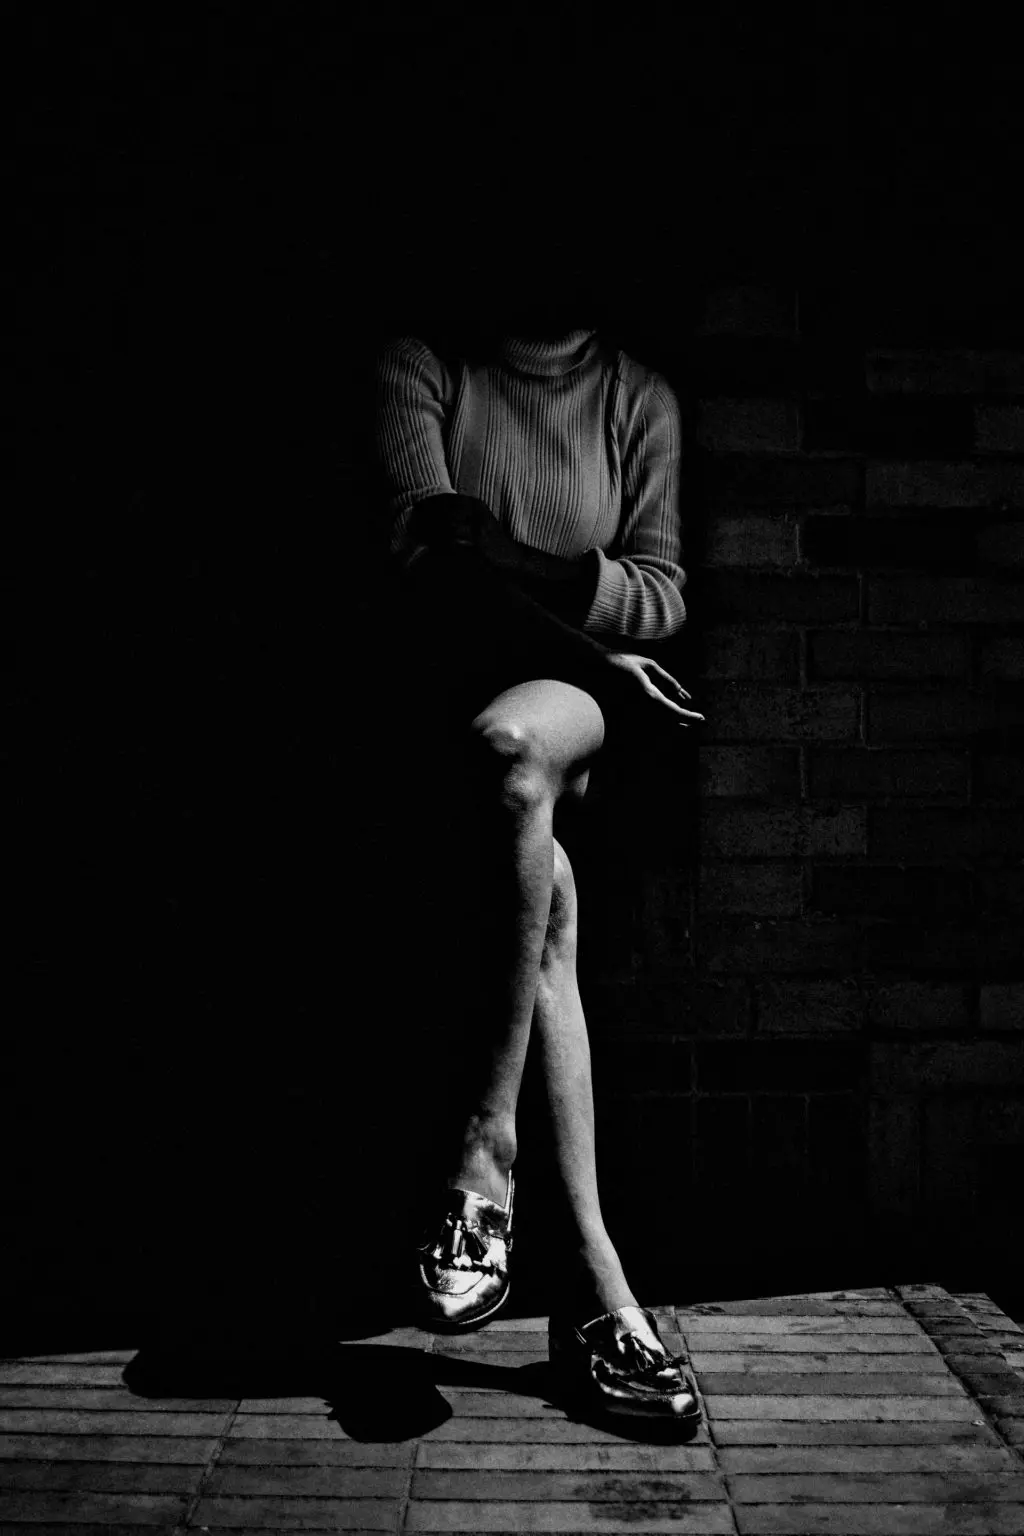
- Show Mystery: Photograph just parts of your subject's body like chin, legs, hands, etc. to give an intriguing mood to the image.


- Play With Shadows: You may need to use a high intensity light to get strong shadows and projecting the shadow onto a light background can create an intense mood in the image.

- Photograph Your Pets For A Change: Try film noir photography with your pets. Their looks or expression can make for interesting film noir photographs.

- Shoot From A Lower Perspective: Lighting and shooting your subject from a lower perspective can add drama and mystery to your film noir photograph.
- Try Dutch Angle: Techniques such as Dutch angle can create an imbalance in the images making the scene edgy. It is a way to manipulate a scene or reality to create a feeling of tension.

Camera Settings For Film Noir Photography
In film noir photography the focus is on the subject and the light should be directed towards your subject. The settings really depend on what type of photograph or scene you are shooting. So here are some settings that you can start with:
- Aperture: If you are shooting portraits, keep the aperture around f/4 to f/5.6 and this depends on how you want the photograph to look. Make sure you get the focus tack sharp on the eyes of the subject. For street and other wide scenes, you can shoot using the same aperture value, but if you need more depth of field, narrow down the aperture accordingly.
- ISO: Choose the lowest ISO possible, 100 or 200 depending on what your camera allows. If you need to increase the iso, keep it within desirable limits. This will help with photographing darker but noise free images.
- Shutter Speed: Have the shutter speed greater than (1/focal length) taking into account the crop factor so you can avoid blur. Adjust shutter speed as necessary for the desired lighting effect.
- Metering Mode: Spot metering works great for film noir photography because we are focused on just having our subject lit in low key portraits and other areas dark, so you get the exposure calculated right on your subject.
Lighting Setup For Film Noir Photography
For film noir photography, you can use either natural or artificial light. There are various ways in which you can light your subject. Here are some types of lighting that you can try!

Side Lighting
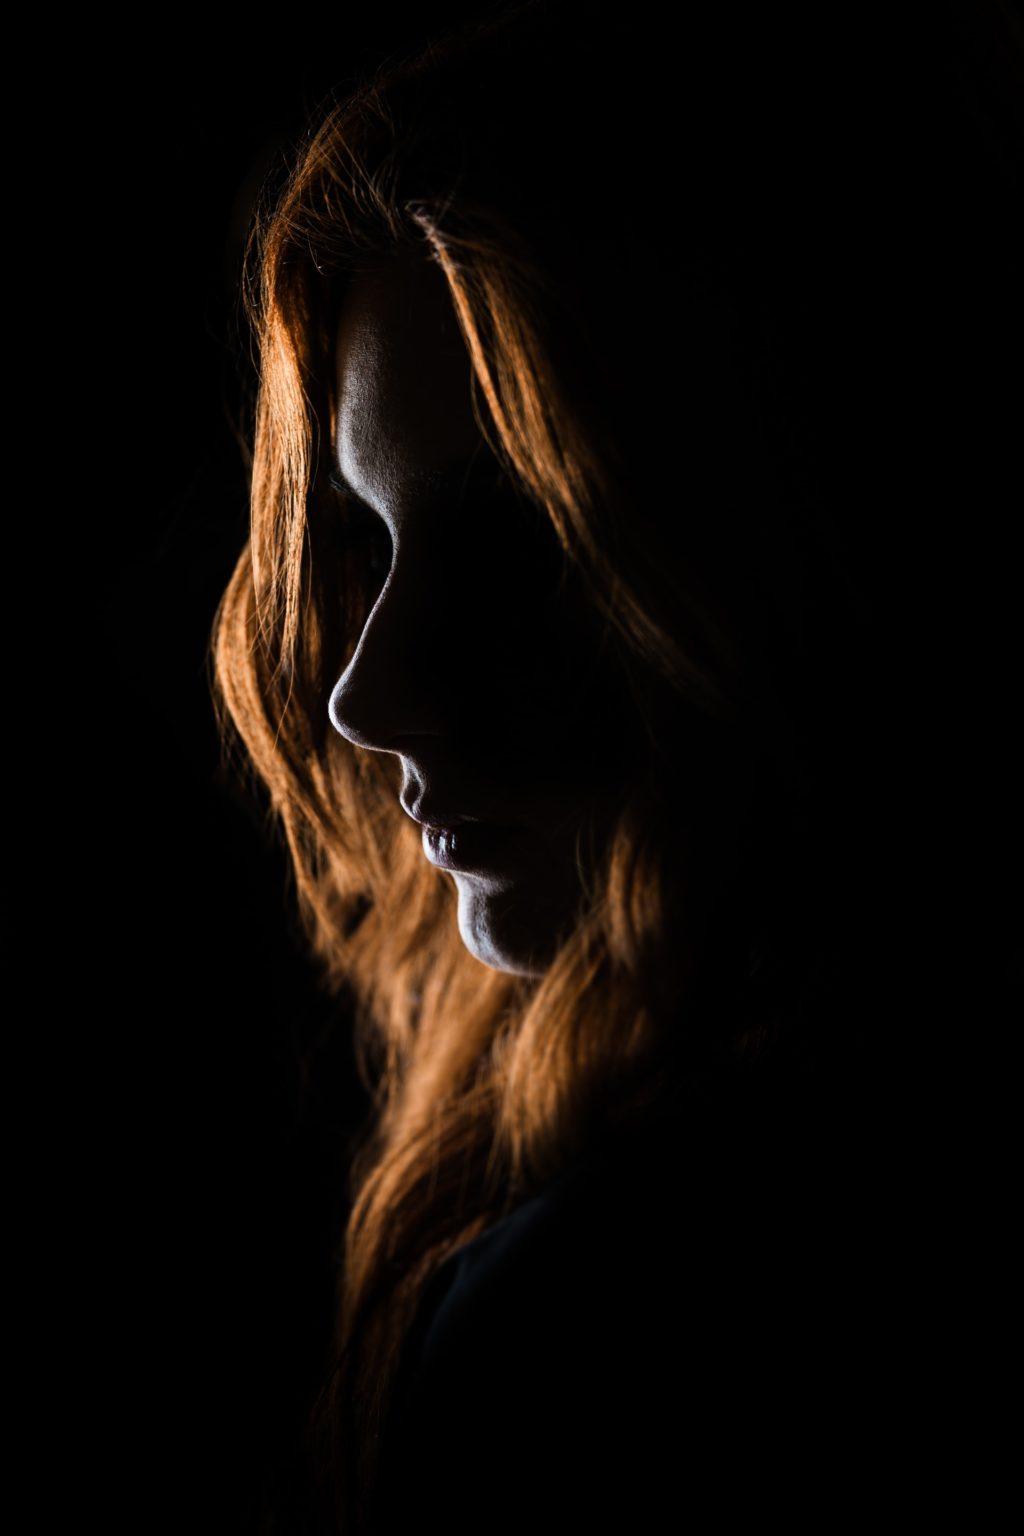
The best and most preferred lighting for film noir photography is side lighting and something very similar to what you would do for low key photographs. This does not mean that you should not experiment with other types of lighting. Work with any type of lighting set up that can emphasize shadows, to create a sense of depth in your images. You can even try film noir under harsh lighting conditions.
Why Side lighting? This is the type of lighting that can highlight the features of your subject. This way you will be able to create a mysterious outline of your subject in the photograph. Side lighting at a slightly lower perspective will add more drama and mystery to the image.
For side lighting, you will need a key light that illuminates your subject from one side and if required a reflector or fill light to bring out some details on the opposite side. The key light is the main light in this set up and you need to get this setup right before moving on to anything else.
- If you are shooting in a studio under artificial light, you need to set the key light at an angle and not straight at your subject. This will help with a dramatic mood and enhance shadows.
- Place the key light at an angle of about 45 to 60 degrees to the right or left side of your subject, depending on how you have visualized the shot.

- Also, if you are going to be shooting film noir portraits in your studio, you can adjust the key light at a slightly lower angle to your subject's face so it increases the drama in the scene. You can add a prop like a blind in between the key light and your subject to get the classic film noir look. This is only an example and you can try various other props depending on your visualization.
- Besides the key light, you may also need to use a reflector or another low intensity source of light to bring out some details on the other side of your subject. Again, this is totally up to you. If you want to work with a single light source, that is perfectly fine too.

- If you are using natural light, shoot when you have the right amount of light coming in through a window or door hitting your subject at a good angle. This light shouldn't be too harsh or too soft because harsh light can create unwanted highlights and too soft light can take away the dramatic mood leading to soft images. Depending on how your subject is lit, you can add reflectors to fill any unwanted shadows if you need, on the opposite side of your subject.

- With side lighting, make sure you illuminate your subject at an angle that does not reveal their entire face. Experiment with various angles. With natural light, you will need to move your subject and camera around to find the right angle.

Backlighting
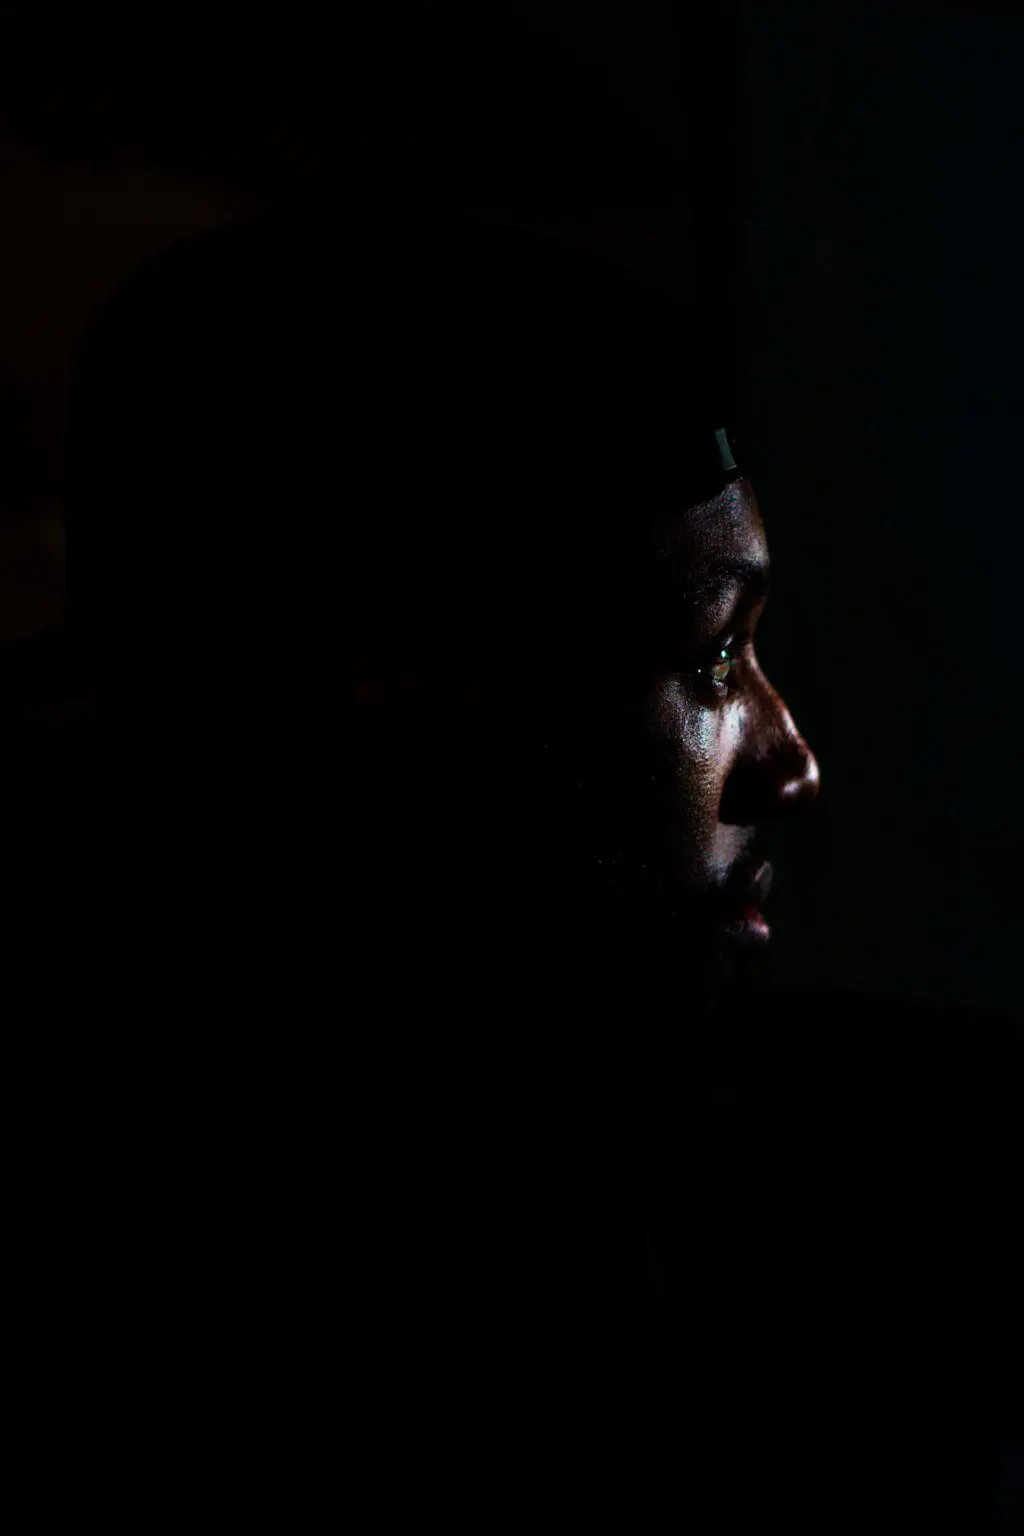
Backlighting can be used to photograph silhouettes of your subjects. You can capture your subject as a mysterious outline that will evoke questions like what the subject is up to.
- In order to backlight your subject, you need to be in a place without stray lights. You can illuminate your subject right from the back or at an angle from the back, so that their face is hidden but some of their features are still visible.


- In the image below, the subject has been illuminated by two back lights from either side, that leaves their face in darkness. This is another way to create partially silhouetted film noir images.

Low Angle Lighting
- For an intriguing and mysterious effect in the image, instead of lighting your subject from their face level, especially for portraits, try lighting them from a lower angle. This way there are mysterious shadows on the subject's face that can evoke a fearful or dangerous mood.

You can add a low angle lighting from the side like the image below.

Or right from the front like in the image below.

If you are shooting in a natural environment, you will need to wait till you have the desired light conditions for film noir photography.
Post Processing Film Noir Photos
Film noir images look very effective if they are converted to black and white. Here are some quick steps to create a great film noir photograph:
- Convert The Image To Black And White: For this process, you can use the HSL panel in Lightroom or Camera Raw to convert the image to black and white, or, drag the saturation all the way down to the negative side and then adjust the color values in HSL to get the desired look.
- Most applications have a “Convert to greyscale” option that you can use to get a basic black and white image. You can then work with the various tones or colors to get the desired look. For example, if you are working on portraits, adjust the orange color slider to get the correct skin tones in the image.

- Enhance Contrast: Film noir images need a lot of contrast. So in basic adjustments, make sure you add a lot of contrast to your image to bring a dramatic mood. You can then enhance contrast for the mid-tones with the help of the clarity slider.
- The curves tool is very powerful and can be used to create contrast in your image. You can play around with the RGB channels separately as well. Either way, do not overdo the contrast.
- Adjust Shadows, Highlights and Exposure: If required, play with the shadows, highlights and exposure sliders and if you need to bring out details locally in any part of the image, make use of the brush tool to apply local adjustments.
- Add A Subtle Vignette: Use vignette to bring more focus to a particular area in the frame. Do not overdo this as it can look unnatural.
- Other Tones: Apart from black and white, you can also try monochromatic edits like sepia, selenium tones, etc. This will give a classic and vintage touch to your film noir images. You will need to work with split toning to achieve these effects.

- Make It Gritty: Finally add some grains or grit and dust to your images to give it a more classic look. Do not overdo this step!
With film noir photography, it is about trying different lighting techniques, practicing and improving your shots in the process. There is no hard rule on what you should and should not do. Use the techniques that go well with how you have visualized the shot.
Have you made film noir photographs before? If you have any suggestions, please share them in the comments section below.


9 Comments
Dahlia thank you so much for this very detailed , this is a genre i have a keen interest in learning more about ..much appreciated 🙂
Hi Patrick, thank you. Looking at your recent works, I feel they are great ideas for Film Noir 🙂
Thank you for an excellent and thorough overview Dahlia, very useful.
Thank you Elin. Glad you found it helpful 🙂
Have never read much about “Noir” nor tried it. The explanations, examples and tips very helpful.
Thank you Pat. Glad you found the post helpful 🙂
Hallo
As I see when you shoot lighting you are suppose to place the subject on front whereas the lights on each side, are we also not suppose to put the back light too?
You can use or not use back light and it depends on the scenario and look you are going for. We have discussed back lighting in the article 🙂
Hi, I have been experimenting with film noir photography for a few years nows. I have recently found articles stating that three or four speed lighters are the best to achieve this affect. I am already a published photographer but would like to know the specific gear I should buy, flash heads, speed lights and their attachments ie; grids, snoots, etc. or if there is a particular lighting system (reasonably priced) that I should look into.
Than you,
Richard Longo Burrows