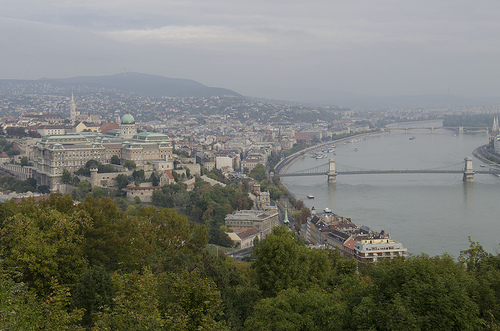
It happens to us all at some time or another, we arrive at a wonderful location to find that the light is flat and uninspiring and the resultant images are somewhat disappointing. So what can we do about it? Well these days, it is quite simple to to create a striking image from something quite lackluster. Bear in mind though, a badly composed picture will always look badly composed – you should only look to liven up a well composed but flat image if you want to get a good result.
In this tutorial we liven up a particularly dull, flat morning image of Budapest. As with many areas of digital imaging you may get better results using RAW files, and the initial step of this tutorial is processing the original RAW.
Create a HDR Image from a Single File
So, the first technique we are going to use is to create an HDR image from a single RAW file.
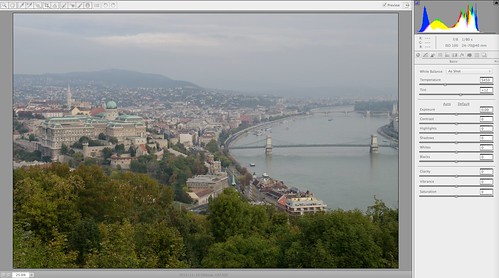
With the original open in Adobe Camera Raw we can see the image is quite flat and has little definition in the sky, so what we will do is produce two files from the original RAW.
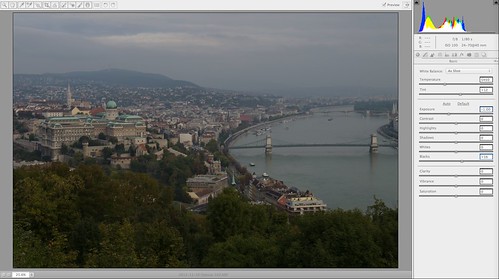
The first will be the image as shot, without adjustments. Save the image as a TIFF file in a folder of your choice. Now we will use the exposure slider to under expose the RAW by one stop. Because the blacks have slid off the histogram a touch, we will bring them back by sliding the black slider to the right until the graph is fully inside the left side of the histogram.
Once again, save the image as a TIFF. Now close ACR
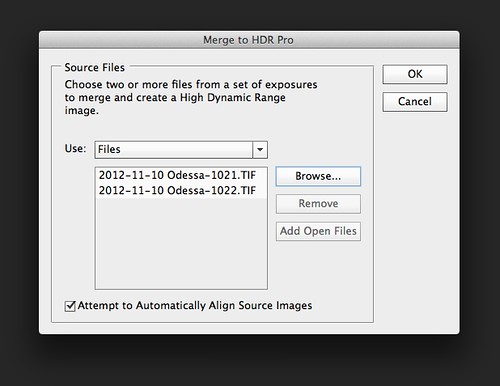
Next in Photoshop we will open the HDR script from FILE – AUTOMATE – MERGE TO HDR PRO. Using Browse, select the two TIFFs we have just created and click OK. Ignore the warning about RAW files, this is only relevant to HDR shot with multiple images.
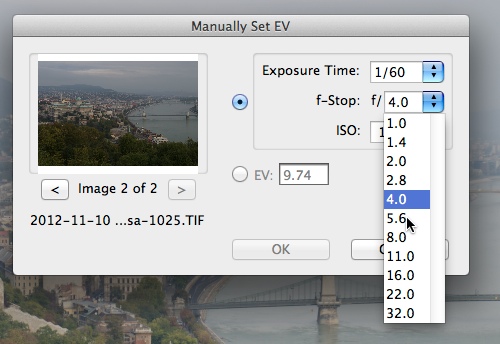
Because metadata of both images is the same, we need to tell HDR PRO that one is under exposed. Select the darker of the two images and change the aperture to one stop smaller e.g. from f4 to f5.6 then click ok.
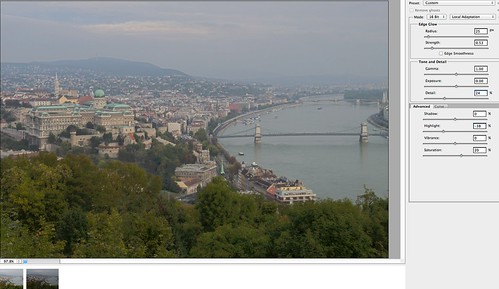
In HDR PRO we will now do some minor adjustment, we are not looking for the over the top HDR look, just bringing a bit of definition to the sky. To do this, bring the Highlight slider a little to the left until the sky is a bit darker, don't go too far or you will start to see problems in areas of high contrast. You can also carefully increase the detail slider as well to add further definition to the whole image, try not to go past +20%.
When you are happy, click ok.
The image already looks a little better but now we are going to add some contrast and vibrancy to it. Now we are going to use a cinematic technique called crushing the blacks to and some punch to the image.
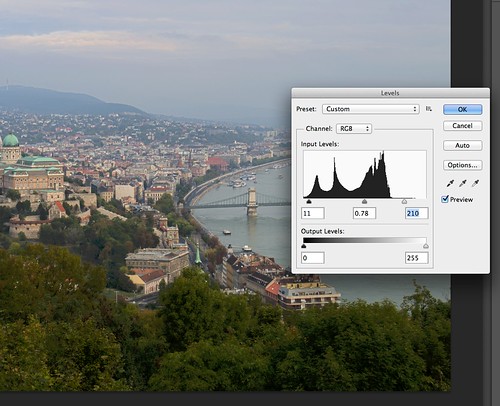
Go to IMAGE – ADJUSTMENT – LEVELS, and from the histogram, slide the shadow slider (left side) to the right a little. Don't’ go too far – make sure you still have some shadow details.
Next we will add a touch more contrast by bringing in the Highlight slider to the left a little. Again don’t go too far. Lastly if required, move the mid-tones slider to change the overall density of the image.
Click OK when happy.
Next using the IMAGE – ADJUSTMENT – VIBRANCE tool add a little vibrance, 5-20% and saturation 5-10%. Now from IMAGE – ADJUSTMENT – SHADOW/HIGHLIGHTS set about 5% each for shadows and highlights.
For the last stage we are going to add a graduated sky to give that dawn feeling to the image.
Go to LAYER – NEW LAYER, give your layer a name and click OK.
Select the Gradient tool from the Toolbox and then click on the Gradient Editor at the top left of the screen.
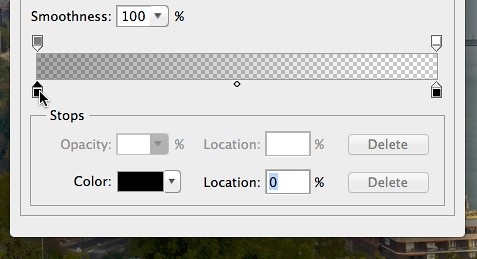
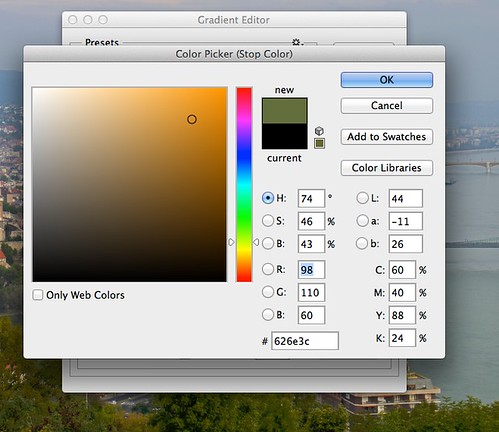
Select the Neutral Density filter and then click the lower left color box on the Gradient box. Select Color and the Color palette will open. We are looking to change the color to a red/orange similar to a dawn sky.
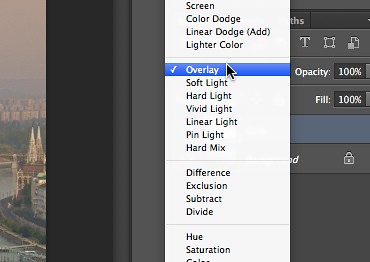
With the Gradient tool selected, draw the gradient from top to bottom on the new layer. Set the layer blend mode to Overlay and you will now have a pleasing morning sky to your image. You can make subtle changes to the graduated filter by using the levels controls to lighten or darken the effect of the filter on the image.
Once you are happy with the adjustments, flatten the image and save it.


5 Comments
The final photo looks great thanks for the sdvice
Great article, thoroughly enjoyed it! I can’t wait to go back over some older shots and rescue a marginal shot!
I am using Photoshop CS3 for Windows and I have a couple of questions:
1) It only says Merge to HDR rather than Merge to HDR Pro – is Pro a different option, or something only available in later versions of Photoshop?
2) When you say “Select the darker of the two images and change the aperture to one stop smaller e.g. from f4 to f5.6 then click ok.” how do you do that? I don’t see any options for that anywhere obvious.
Thanks.
You Have To go for Photoshop CS6
The CS3 Is To Old.!!
Do you mean those facilities are not available in CS3, particularly the second one?