Great reflections can really make an image. The problem is, that like buses, there is never one when you need one. Of course these days it is possible to cheat, using Photoshop or similar and in this brief tutorial we will take a look at how to create reflections in Photoshop, although the steps will be the same for most decent image processing software.
How to Find the Right Image
To make a decent reflection, you are going to need the right type of image. Golden hour or Blue hour images work well, artificial light making for more realist reflections. You also need some symmetry, the subject needs to be fairly square on with enough space below the main subject to see the reflection. With the right image selected, let's get started.
Let's Get Started
The first thing we need to do is to select the area that we wish to reflect. To do this use the Rectangular Marquee Tool and draw a box across the whole width of the required area.
We will now copy that to a new layer, from the Menu bar select Layer – New – Layer Via Copy.
In the image you will see nothing has appeared to have happened but if you take a look at the Layers Palette, you will see your new layer positioned above the Background.
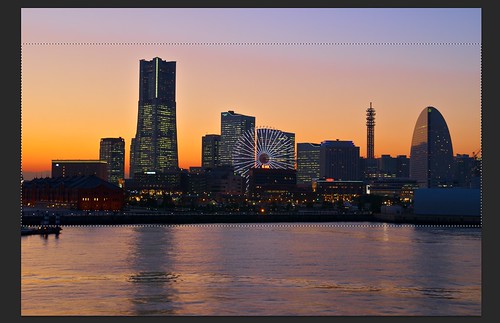
Find a suitable image and make a selection by Jason Row Photography, on Flickr
With this layer selected, we will now flip the selection upside down. To do this from the Menu bar select Edit – Transform – Flip Vertical.
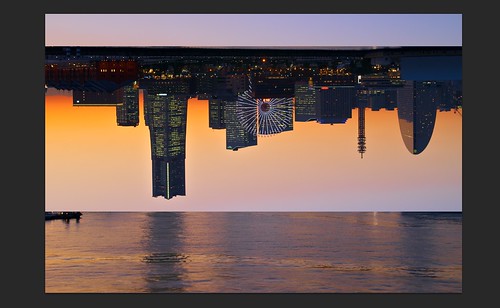
Flip the image by Jason Row Photography, on Flickr
Next we need to drag the inverted selection into place using the Move Tool at the top of the Tools Palette. Drag the selection down until the bottom of the original and the top of the new layer align.
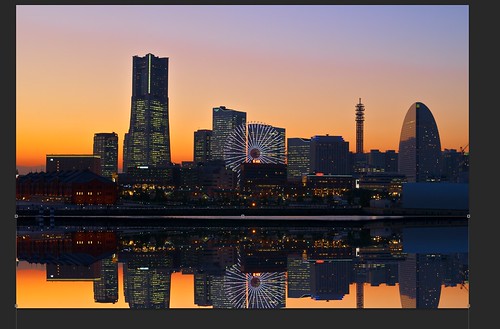
Align the selection by Jason Row Photography, on Flickr
If you find the two layers are not aligning too well, you can use the Warp tool to mould the reflection into place. This can be found under Edit – Transform – Warp.
Now the reflection is in place but looking a tad unrealistic so we need to modify the Blend mode on the layers palette.
With the reflection layer selected, change the Blend mode to one of the following: Lighten, Screen, Color Dodge, Linear Dodge or Lighter Color. Choose the Blend mode that works best with the image you are using. In the case of the example, we are using Lighter Color.

Blend the layers by Jason Row Photography, on Flickr
The reflection now looks more realistic but it is by no means perfect. Reflections in real life, taper off the further they are from the subject and we can replicate this effect in Photoshop.
First, we need to add a layer mask to the reflection layer. This done by clicking the Layer Mask tool at the bottom of the Layers Palette. Now we will use the gradient tool to bleed the reflection off. Select the Gradient tool from the Tools Palette. Set your foreground color to black and background color to white. Drag the Gradient Tool from the top of the reflection down to the bottom of the image. You can now use the Opacity tool to back the reflection off if required.
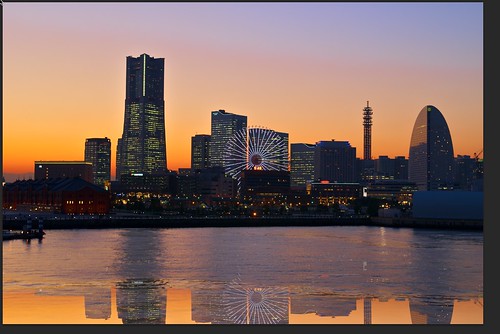
Grad Added by Jason Row Photography, on Flickr
And Now For The Details
As many Photoshop added reflections will be on water, there is one further tip to add some realism – adding some motion blur to the water areas.
To do this, we need to duplicate the reflection using Layer – Duplicate Layer. With the new layer selected, hover your mouse over the layer mask, right click and select Delete Layer Mask. Now from the menu bar select, Filter – Blur – Motion Blur. From the window that opens keep the angle at 0 degrees and change the distance figure to get the right effect. A good starting point for this is around twenty pixels but depending on the image results may vary.
Once happy, click ok and save your image.
Whilst Photoshopping a reflection is no substitute for the real thing, it is a great way to liven up a dull image, giving it a wow factor. Be careful with your image selection, and blending modes and you could end up with a realistic reflection.


2 Comments
Thanks, Jason. That was very helpful. Your tut was easy to follow step by step (except I didn’t know where the blend mode options were located, but I googled it). I created a reflection of the Boston skyline using your instructions. https://www.flickr.com/photos/timshel2010/9889065384/
Very nice & useful article.. Will use this in my perfect photograph where it suits… anyhow.. thanks for writing this article 🙂