RawTherapee is a photo editing program that can be used to edit raw photos. It is a powerful software, but a free opensource program and is available for MacOS, Windows and Linux. In this article, we will discuss how to make basic adjustments like Exposure, Shadow and Highlights and White Balance, using RawTherapee
Exposure Tools
To quickly get to the Image Editor, double-click any image in the file browser. You will see on the left side of the screen that you have now entered the Editor tab and on the right will be an overly complex looking set of tools. Don’t worry too much about their complexity, the majority work in much the same way of those in Photoshop, Lightroom or any other image editing software.
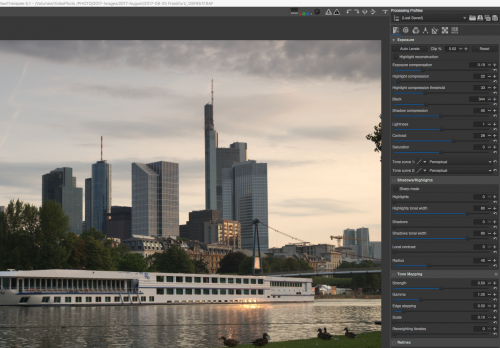
The top section of the editing tools is Exposure. Like other apps, you can show where there are compressed highlights and crushed shadows To do this, go to the two warning triangles top right of the actual image and set them on. Blown highlights will be shown in black, shadows in white. You also have the highly useful histogram to the top left of the screen.

The Exposure compensation slider simply raises or lowers the overall density of the image. Sliding to the right will increase exposure, to the left reduce it. Moving to the slider right to 1.00 is the equivalent of adding one stop of exposure.
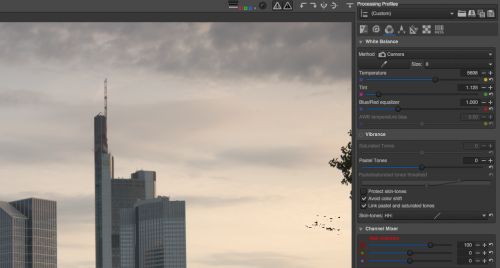
The Highlight Compression slider is similar to Highlights in Photoshop or Lightroom. It will raise or lower the density of the highlight areas, allowing you to pull back clipped whites. The Highlight Compression Threshold tool basically regulates the strength of the Highlight Compression slider.
Black is used to change the density of the darkest parts of the image. Sliding it right will make the blacks darker, sliding left will make them become more grey.
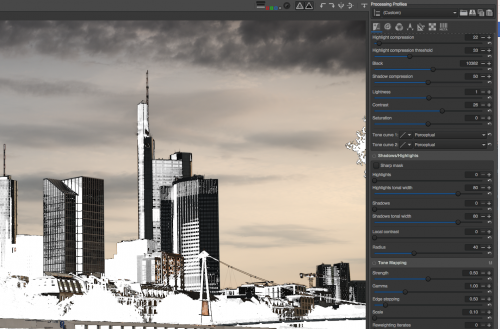
Shadow Compression tempers the effect of the Black tool and is used to lighten or darken the shadow regions of the image.
Lightness works in a similar way to Exposure Compensation in that is lightens or darkens the image. However, it keeps both the pure black and pure white points fixed so only changes exposure in the tonal regions of the image.
Contrast will push the darker regions out towards the left edge of the histogram and lighter areas towards the right edge of the histogram, posting overall contrast. Like with other editing apps you will get more control over contrast using the Highlight Compression, Black and Shadow Compression tools.
Shadows/Highlights Tool
Strangely to use the Shadow/Highlight tool you have to switch it on. That is done by clicking the on switch top left of the tool. Unlike the general Exposure tools, the Shadow/Highlight tools work only in their specific tonal ranges.
Sliding Highlights to the right will reduce exposure in the brightest parts of the image without affecting the dark areas. The Shadows slider does the same for the dark areas of the image. The Tonal Width sliders define how aggressive the Shadow or Highlight tool is working on an area.
Local Contrast boost contrast slightly across the whole image without moving the black and white points out to the edge of the histogram.
White Balance
To get to the color tools you need to click the third icon from the left at the top of the Editor Tools. We will deal with just the White Balance tools in this article, the others we will look at in some more advanced tutorials.
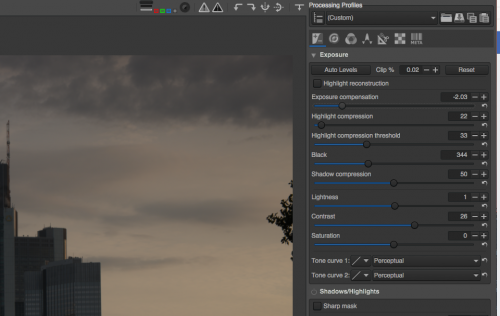
Temperature is used to change the color temperature of an image. It works best on RAW files where a temperature has not been embedded into the image. It works on the usual degrees Kelvin scale. Sliding left to the lower numbers will make an image more blue. This is because it is compensating for warm light such as tungsten. Sliding to the right will add warmth to the image compensating for colder light such as overcast and flash.
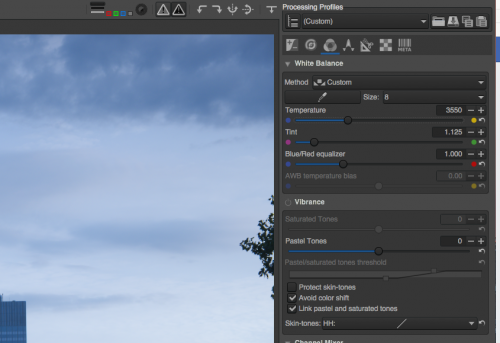
Tint allows to fine control the green/magenta tint of the color balance whilst the Blue/Red equalizer changes the effective strength of the Temperature tool.
This tutorial has concentrated on getting some basic edits into an image using RawTherapee. For the next article, we will look at how to sharpen, resize and export an image. After that, we will take a look at some of RawTherapee’s more advanced functions.
If you are interested in more RawTherapee tutorials, see our earlier article An Introduction to RawTherapee – A Free Photography Software Alternative to Photoshop and also RawTherapee: How To Resize, Sharpen and Export


2 Comments
Thanks for this article. I missed the earlier one; but will read now. I had been using Photoscape, but when I started shooting in RAW, need for such a soft ware arose. I installed both RT and GIMP and try and use them. I’m still a learner and have not decided in favor of one or the other. This article helps. Please do continue. Incidentally, does it have utilities for adding borders and watermark?
Thanks once again. Will look forward to the next article.
Sincerely yours,
I am a new user and I dont know how to use or edit photos with Raw therapeed Just learn how to take photos and is the first time using this kind of tools or is there for beginers thank you