As you get into photography post-production in RawTherapee, you will almost certainly want to start learning how to resize, sharpen or export your images. We have got you covered. Welcome to our third tutorial on the basics of RawTherapee. Our first installment, An Introduction to RawTherapee – A Free Photography Software Alternative to Photoshop, sparked a lot of interest and you can see the second tutorial featuring some basic editing techniques here.
If you are just joining us, RawTherapee is an open source image management and RAW processing app for Windows, Linux and Mac. Being open source, it is free, but this does not mean that it is any less capable than it’s more expensive rivals. In our last tutorial, we looked at the basics of editing, exposure, shadow/highlights and white balance. Today we will concentrate on preparing your image for output.
Cropping Images
We have finished editing our image, now we wish to output the file for printing or for display on the Internet. If you are not already in the Editor window you can get there either by double-clicking the image you wish to work on in the File Browser or clicking the Editor tab on the left of the screen.
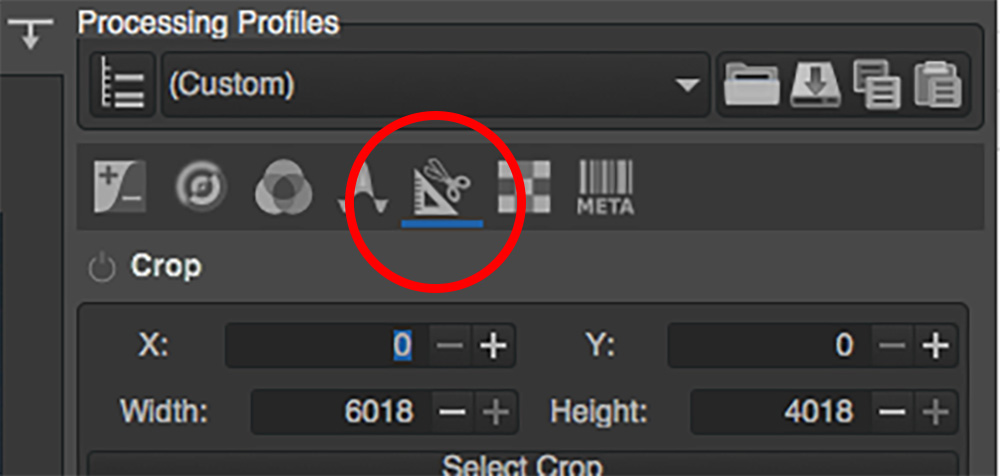
The resize and crop tools are found together in the tabs at the top right of the Editor window. You are looking for the icon that looks like a protractor with a pair of scissors called Trasform. The upper section deals with cropping the image. Clicking on the word crop will open or close the crop dialogue. With crop open, you need to click on the Select Crop bar in the toolbox. You can now draw your crop on the screen, fix it to a certain ratio and from the Guide, type drop-down, select a compositional overlay.
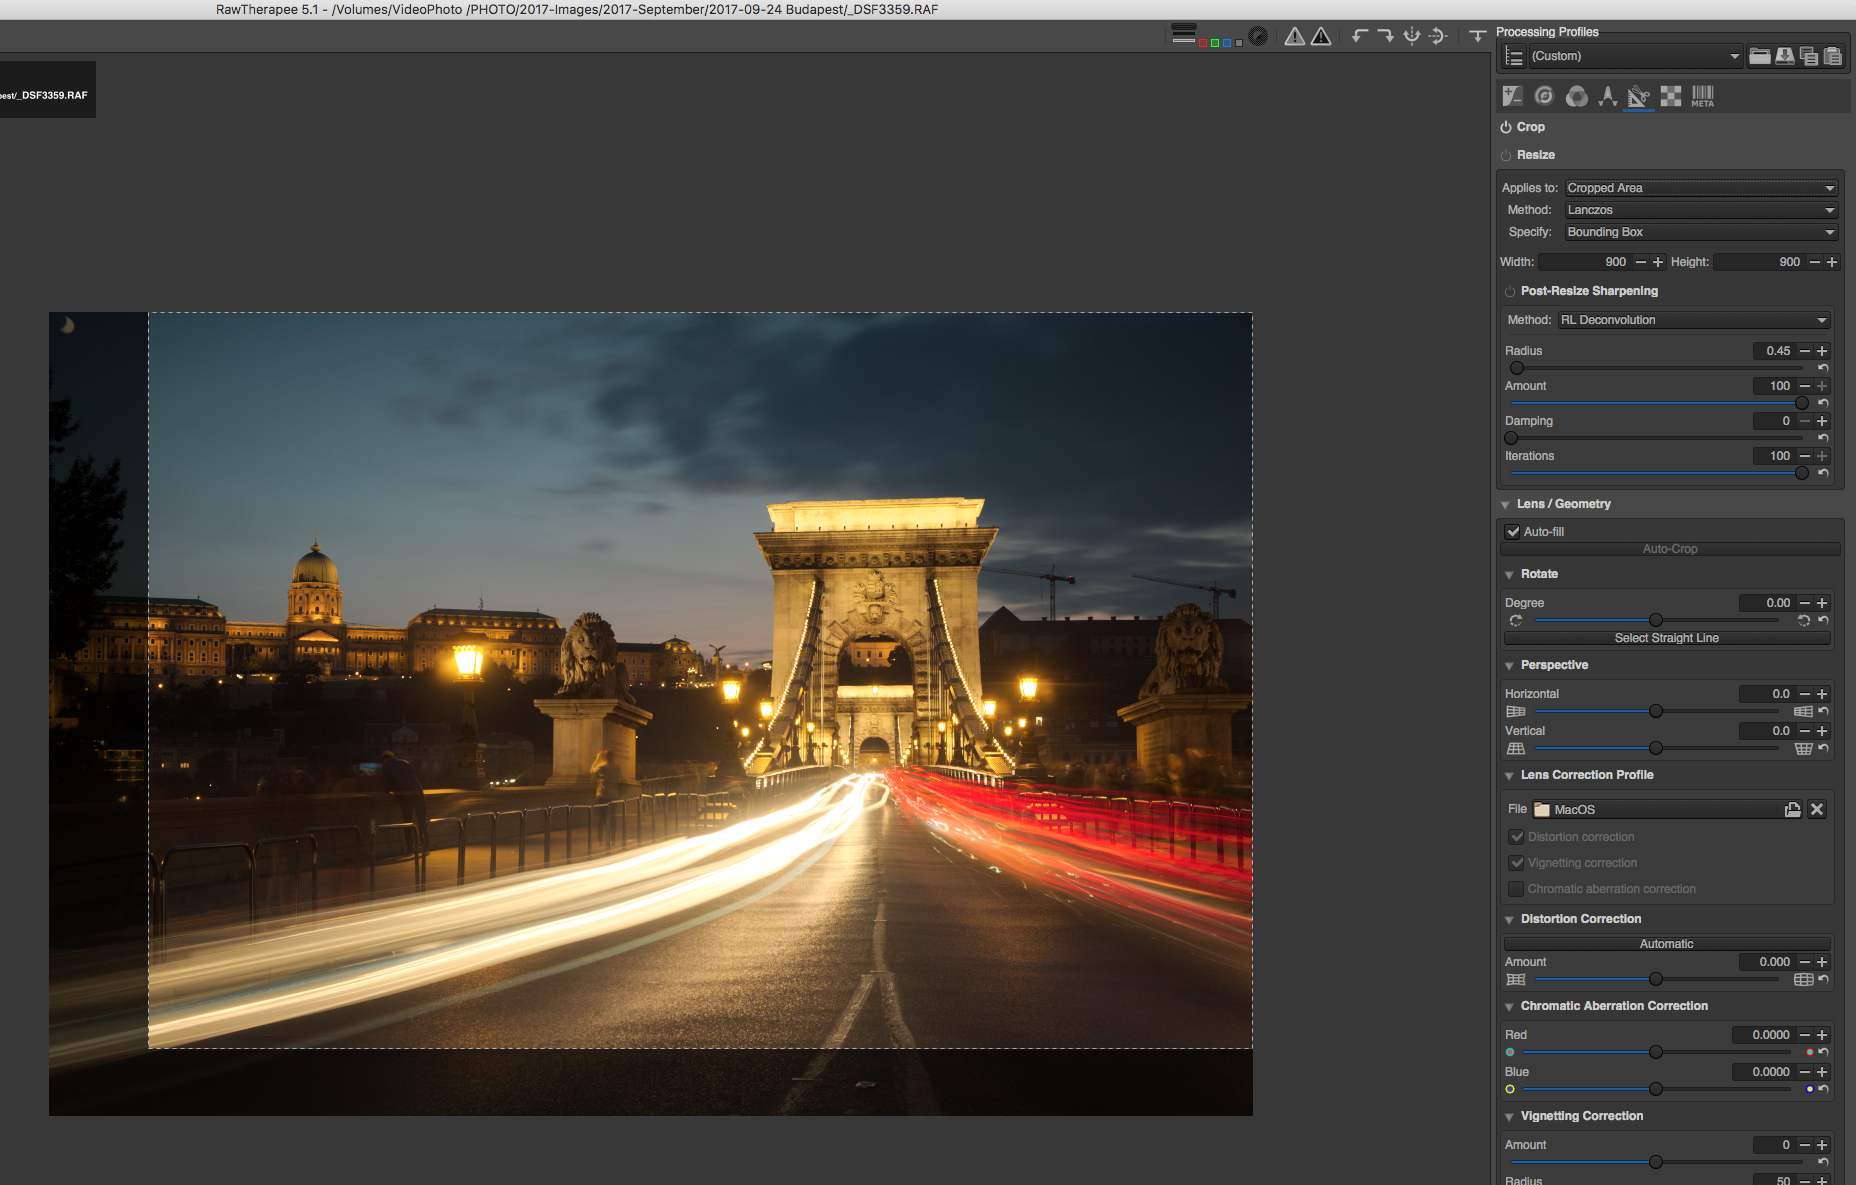
One thing you will find is that you do not need to click enter to apply the crop. Unlike other programs, RawTherapee maintains the entire image and only crops the final output.
Resizing For Output
Assuming you have cropped as required, it’s time to resize.
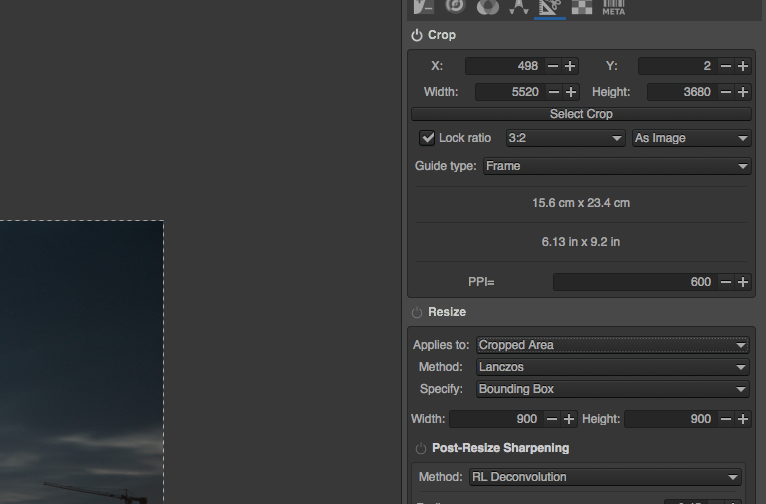
Click on the Resize Bar in the toolbox to show the resize options. The first drop-down asks whether you wish to apply the resize to the cropped or full image. Select cropped if you have previously cropped the image. For the method, select Lanczos, this is recommended by RawTherapee. The Specify option allows you to choose how to resize the image. This can be by scale, width height or bounding box. Bounding box allows you to specify a maximum height or width and will resize to maintain the current image ratio. You can specify Post-Resize sharpening but we will look at the main sharpening options instead.
Sharpening Images
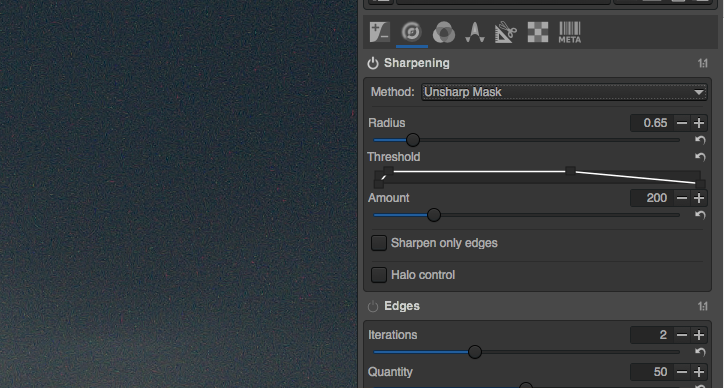
The sharpening tools come under the Detail tab top right of the screen. Under the drop-down, there are two options, the familiar Unsharp Mask and RL Deconvolution. As with all sharpening, you should zoom into 100% of the image. This can be done from the mouse scroll wheel or via the +/- icons at the bottom right of the screen.
Unsharp Mask is usually the best option, RL Deconvolution is best suited to images with Gaussian blur. The radius tool defines the size of the details to be sharpened. For most images, this is best set to between 0.5 and 0.7. Amount is the strength of the sharpening effect and Threshold tempers the effect of noise and halos.
With your radius set appropriately, increase the Amount until you are happy with the sharpness. If you see halos or noise appearing in the image, slide the Threshold. Sliding to the right reduces the sharpening effect in the shadow areas only while moving the sliders left reduces sharpening in highlight areas. There is some further complexity to the Threshold tool that we may look at in a more advanced tutorial.
Output The Image
Assuming we have cropped, resized and sharpened the image for our intended final use, how do we now output the shot? The save dialogue itself is a little obscure compared with other image apps. It is found bottom left of the Editor screen as a small hard drive icon. Clicking on this will open the Save window. The upper part of this window is a finder/browser that allows you to define the destination of your saved file. The very top is where you define the file name.
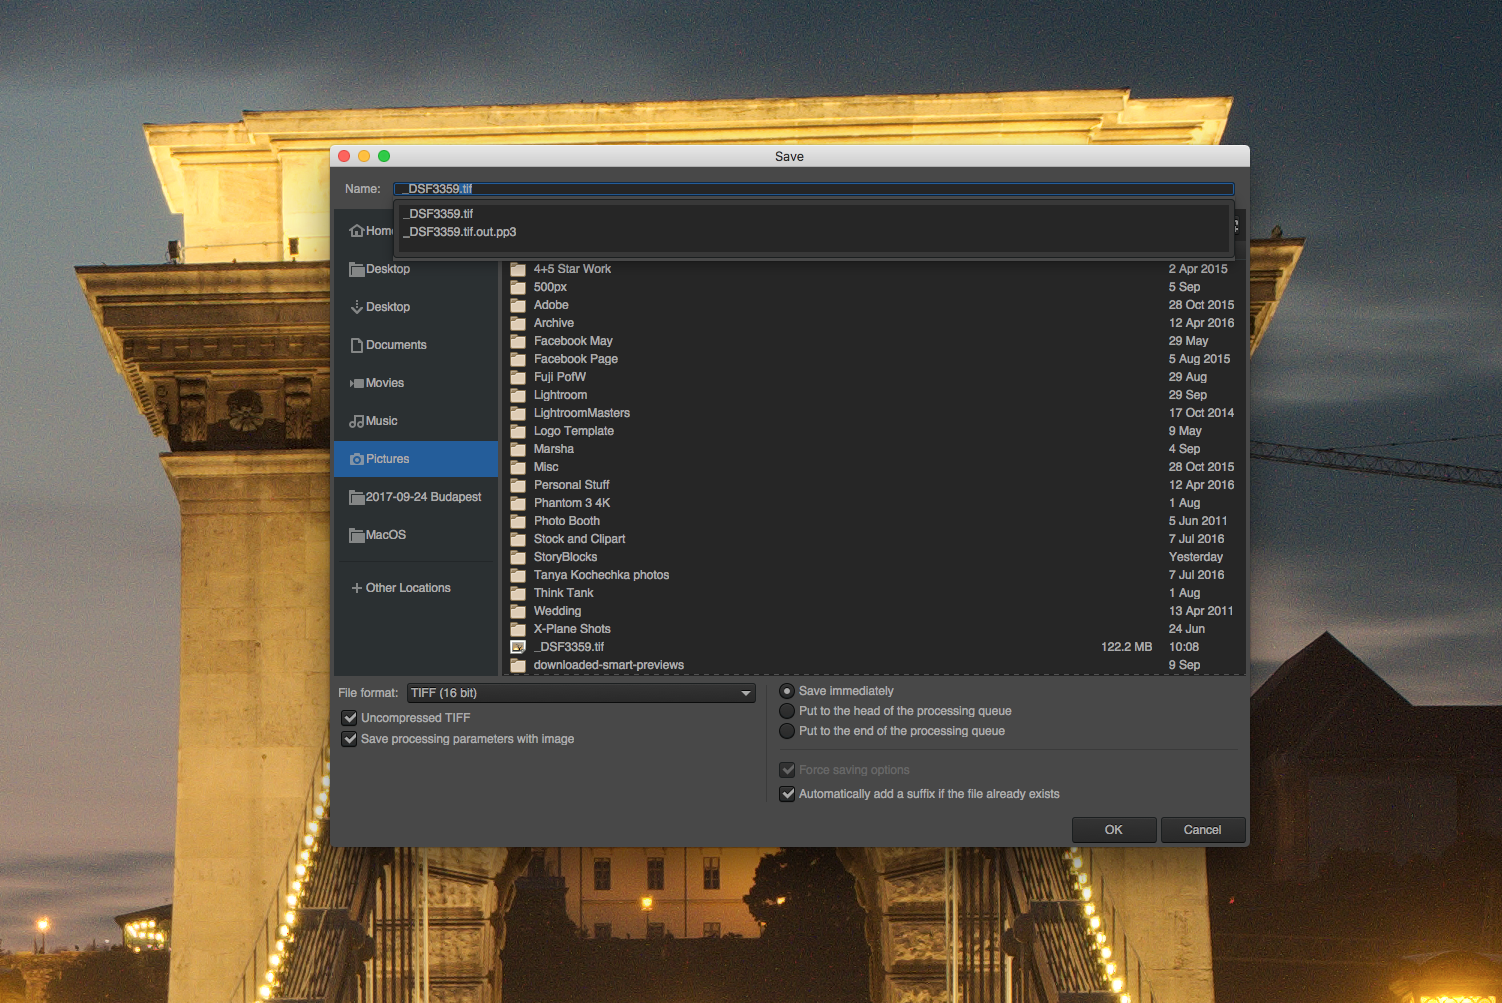
Beneath this, we have the save file options. These are Jpeg, Tiff, and PNG. The latter two are available in both 8 bit and 16 bit. Jpegs are 8 bit only. For the Jpeg option, you can define the compression rate via the quality slider. The higher the slider the lower the compression and hence better the final image quality. You can also choose to fine tune this compression with the Subsampling dropdown. Tiff files can be either compressed or uncompressed and PNG files have a compression slider like Jpegs. To the right of these options, you can choose to save immediately or to add to a batch queue for saving later.
That is the basics of getting a final image out of RawTherapee for final use. In a future tutorial, we will take look at some more advanced features of this interesting image processor.



10 Comments
Dear Jason,
Thanks for the article. I liked it and learned from it as I did from the previous two.
Now that we have edited, cropped, resized, sharpened and saved the images, the next step is to put a watermark on them and border them.
Would you deal with this in the next article?
Thanks.
Sincerely yours.
I tried to do a resize with lanczos. It didn’t seem to work. When I saved the image, the file was much larger. When I loaded the saved file into Photoshop, It was the same size according to Image Size. The photo also looked weird in Photoshop. Not sure what I did wrong. I would like to figure out Lanczos because it is said to be the best program for upsizing. There seems to be little documentation on Lanczos.
Thanks so much, appreciate it (disabled part-timer abused by Adobe customer service and monthly fees).
Hello,
This does not work for me. When I save the image, it retains the old size. Maybe there is something else that I am supposed to do. The UI on this program is really bad.
The reason it does not work for people, is that you actually need to Activate the options! Yes, sound crazy, but RawTherapee has most options disabled, by default, including the resize options, and you need to toggle the button left of the title for the section you are interested in (like Resize).
Great Guide! Thanks for making it simple and easy to follow 🙂
Sorry, but no hard drive button found. spent half a day, but cannot save file. Exremely frusttrating…
When exporting in JPEG, the file is in dpi 72×72 – when exporting in tiff 8 bit only, the file is in dpi 300×300. Is it possible to export JPEG in dpi 300×300 all over ?
oops, set square and scissors 😉
For anyone struggling with this. First you have to click the set square and scissors tool tab, click the ‘Resize’ text. Select ‘Applies to Full Image’, Select ‘Specify: width’. Enter the width in pixels you want. Now click the icon next to ‘Resize’ to activate the parameter. To save the file resized click the floppy disk icon with a down arrow in the bottom left corner of screen (for those under 30 a floppy disk is a square shape). Then you’ll get the export dialogue up where you can save.