It’s pretty safe to say that Adobe have cornered the market in the image management and editing section of the photographic market. Sure there are worthy contenders that pack a hefty punch in a heavyweight battle against Adobe but for the moment Photoshop and Lightroom rule supreme in the payware market – something reflected in our own table of the best photography software around right now.
Not everyone however, wishes to pay the Adobe rent or even use Adobe products. Not everyone has a budget or a need for high end professional photographic software. Fortunately we live in great times for photographers. There are a wealth of free or open source products. Many of these have features that rival their paid counterparts and can become powerful tools to those that take the time to learn their quirks. Today we are going to take an initial look at one such program, RawTherapee. For this article we are not going to delve into how to use it, rather give a brief outline of its capabilities and interface. In future articles we will go a little deeper into it’s capabilities with some “how to” articles.
What is RawTherapee?
Primarily RawTherapee is a powerful non destructive RAW image processing app. It also features some basic image management features such as color coding, rating and searching according to parameters. Its current incarnation is version 5.2 and it available on Windows, MacOS and various incarnations of Linux. It is free to use, released under a General Public License. You can download either a current stable release or beta versions, the later potentially being more buggy.
The RawTherapee Interface
Lets take a look at the interface. As free software, don’t expect the polish of programs such as Lightroom or Capture Pro. It is however with a little practice quite logical and well laid out. Like Lightroom it is split in to modules, called tabs. There are three of these tabs arranged, a little confusingly, vertically on the left side of the opening screen.
The first tab is the File Browser and in order to see your images you will need to point the browser to the relevant directory. On MacOs this means looking through a UNIX style hierarchy of folders. In my case my image library is on a separate drive to my operating system so I had to look in the Volumes folder and point to the relevant hard drive. Once you have selected the relavent folder you can click the add button under Places. This will allow RawTherapee to remember it is a favourite location.
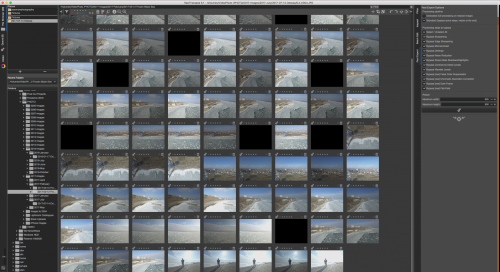
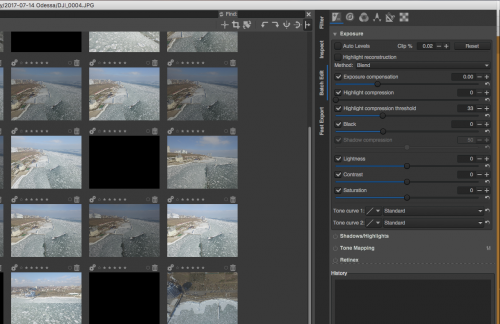
To the right side in the Browser tab are four further vertically arranged tabs. These are Filter, a search tool, Inspect, this magnifies the images, Batch Edit, which as the name suggests allows you to apply certain corrections multiple images and Fast Export, which allows you to set up certain exporting presets.
Returning to the left side tabs, the next one is Queue. Here you can see all the images you have previously selected in the browser ready to have the Batch Edit corrections applied to them. You can also choose what format in which to save the batched images.
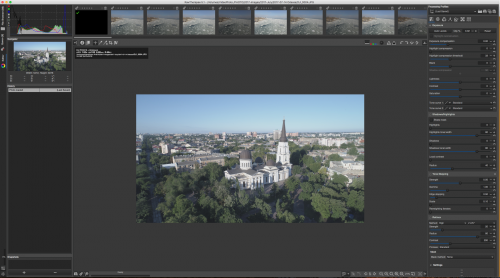
Lastly we have the Editor tab. This is the main RAW processing section of the program. To the left of screen we have both the Navigator and Histogram. The Histogram allows you to select Red Green and Blue channels as well as Luma.
In the centre of screen we have the main editing window with the selected image in it. Above this we have a filmstrip of images in the currently selected folder. The filmstrip can be hidden using the tool top right of the image viewer, giving more screen real estate for editing.
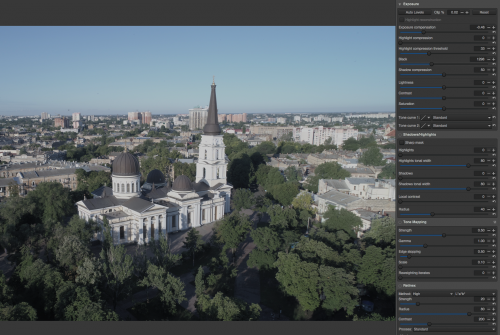
To the right of screen we have a very comprehensive set of editing tools. At the top of the tools are several icons. These break the tools into the following categories. The first icon is Exposure, next is Detail then Color, Wavelet, Transform, Raw and finally Metadata. Under each icon you will find a relevant set of editing tools. To the very top of the editing section are the save and load icons.
The editing tools themselves are very powerful and comprehensive, perhaps significantly more so that Lightroom. Where it does fall down somewhat is in selective editing. Lightroom has become a very powerful tool in that respect.
What Next?
This is a very brief introduction to RawTherapee and it’s interface. It is undoubtably a powerful tool, made even more appealing by its price tag of free. In future articles we will delve a little deeper into its many capabilities with some how to articles. Let us know in the comments if you have tried RawTherapee and what types of tutorials you are interested in.
If you are interested in more RawTherapee tutorials, see How to Do Basic Editing on Your Photos In (Free) RawTherapee Editing Software and also RawTherapee: How To Resize, Sharpen and Export



6 Comments
I’ve been using RT for a couple of years, strictly an amateur without enough time as I’d like to learn. One thing I have had trouble finding is detailed explanations of how certain tools work. Noise reduction, for example…I have success with it, can use it, but have never seen any actual explanations about what the settings actually control, and how they work.
More generally, learning to use the curves instead of sliders is pretty high on my list of skills to develop.
Thank you very much for adding RT to your topics. I can’t be the only person using it. 🙂
Dear Mr. Row, thanks for this article. I use RT, or rather have started using it about a month back. Naturally I’m struggling with it. I have no experience of PS or LR. That makes the learning curve steeper, especially because there are limited resources for learning.
Up till now, I was shooting in JPEG and using Photoscape for editing. But even then I was aware of the power of both RT as well as GIMP. When I experimented with RT I was very happy with the results and wish to continue with it, especially now that I shoot RAW.
I would appreciate detailed articles on all aspects of RT, especially handling of curves.
I am very happy that you have taken this up and am grateful to you. I look forward to your future articles.
Very much looking forward to this series. I’ve used RT on and off for several years, and there are still some things I haven’t figured out and I really have the sense it could do so much more than I’m using it for.
I fill refreshed to see some one paying attention to some other non Adobe programs.
As a Liunx user is frustrating to see over ans overs tutorials about very expensive tools not available for my OS.
I personally use Darktable, but will give RawTerapee a try.
Thanks and keep this way.
I have Raw Therapee and would love to find a tutorial that covers how to use it properly as I am relatively new to post-processing.
I want to shoot in RAW and use RawTherapee to learn post processing. I cannot afford Adobe Tools