In the early days of digital, one of the biggest criticisms was that black and white images were nowhere near as good as their film based alternatives. To a certain extent this criticism has continued, but not because digital sensors are not capable of producing good black and whites. They are, but it is more due to the way people create those black and whites in post production, most commonly simply by desaturating the image. The problem with this is that you often end up with flat looking shots and there is no control over individual colors before converting to black and white.
The great black and white film photographers would often use color filters to punch out various elements of their shots, darken the skies or lighten the foliage for example. Desaturating in Photoshop does not allow us to replicate these film techniques. However, there is a great tool in Photoshop that does – it's called the Channel Mixer and today we are going to take a look at it in the form of a brief tutorial.
Choosing the Right Image
One of the secrets to success in converting an image to black and white is choosing the right image in the first place. There is no point is picking a flat, low contrast image with little definition. You need something that’s bold, with good contrast and plenty of interest in it. In this case, I have a stormy antarctic scene – it is almost monochromatic already, has good contrast and definition in all areas of the scene.
Creating a Channel Mixer Adjustment Layer
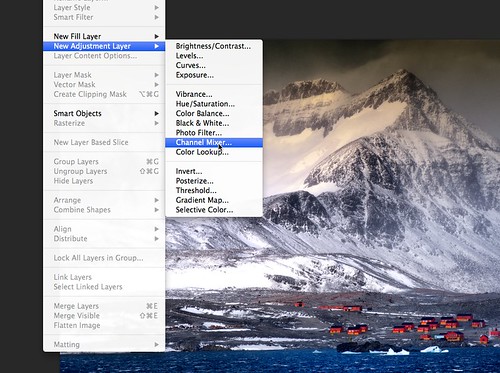
Now to tie with our recent article on adjustment layers we will use the Channel Mixer adjustment layer. From the Photoshop menu go to Layer – New Adjustment Layer – Channel Mixer. We can now give our new layer a name, in this case I will call it Monochrome. The mode and opacity settings can be left at default settings. Click OK.

Create a new channel mixer adjustment layer
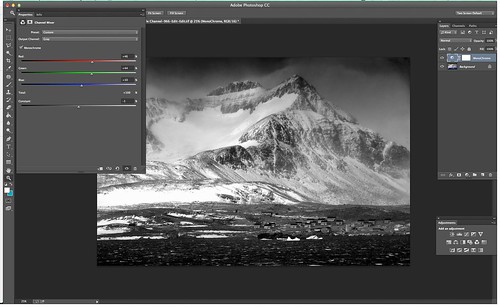
The new adjustment layer palette will appear on screen. At the top you will see there are already a number of black and white presets and these are fine if you are short of time but if your want to have more control over the look of your image, check the monochrome box. You will now see that your image has converted to black and white so it is time to make it look the way we want it to, and that is by using the Red/Green/Blue sliders and the Contrast slider.
Working with the Channel Mixer
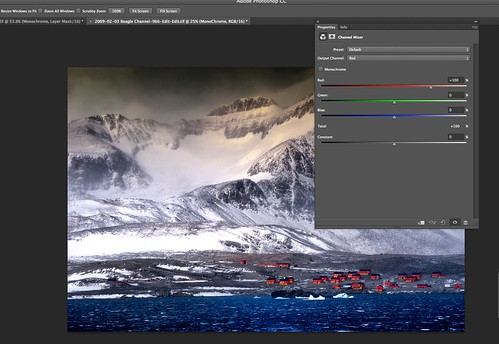
So how a channel mixer work? Because the image still retains it’s color information we can control the tonal densities of the Red, Green and Blue Channels. The first thing I have done is move the Red Channel slightly to the right, this is to lighten up the reds on the buildings in the foreground I have also slide the blue slider towards the left, this has the effect of subtly increasing the definition in the clouds.
Now there is one thing to bear in mind when using these sliders, if you want to maintain the same exposure density, you need to make sure that the percentages of the sliders still add up to 100%. If it's less thank that, it will darken the image overall, more will lighten it and potentially blow the highlights. To aid this, you will see a small total percentage indicator below the RGB sliders. To see the effect of each individual color slider, don’t be afraid to move the sliders full left and right. Because we are on an adjustment layer, the effect is non-destructive and can be easily returned to a more normal setting.
Lastly if you are using later incarnations of Photoshop you will also see that the Channel Mixer contains a contrast slider. Sliding this will increase or decrease the contrast without effecting the overall density.

The final image with the corrections
When finished we can save the image as a PSD to maintain the layers if you wish to do further work on them at a later date. You can also back off the Channel Mixer layer using the Opacity slider on the Layers palette to give that desaturated color look. If you are happy with the final result you can flatten the image from the bottom of the Layers Menu and save to JPG.
The Channel Mixer is a powerful way to create stunning black and white images from color digital shots. By manipulating each individual color channel, we can replicate the filters that traditional black and white photographers use.


