When perusing photography articles and tutorials across the Web it’s not uncommon to encounter various takes on “getting it right in camera.” From exposure to white balance to composition, the idea is to get as many things as possible right in camera, thereby reducing your reliance on software after the fact. While getting right in camera can certainly save you some time, it simply isn’t always possible for your photos to be perfect straight out of camera. That doesn’t mean, however, that you have to spend hours on end working on an individual image.
You can whip a photo into shape in 8 (or less) steps.
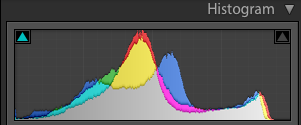
Check the Basics
Before you get into any actual image editing, you will want to be sure the photo in question is worth keeping — from a technical perspective, at least. All you need to do is take a look at the histogram. If there is any serious clipping of either highlights or shadows, you may want to discard the shot. There are, of course, exceptions: high key images or very low light shots/night shots will show a histogram that’s shifted almost entirely to one side or the other, but that would be appropriate under those circumstance. In general, the idea is to make sure your photo contains enough tonal range so that you can adjust exposure and contrast without losing too much detail or introducing too much noise.
Crop and Straighten
As a rule, photos don’t come out perfectly level (unless your camera features an electronic level and you actually use it). The same might be said of composition, but that is one element that’s a bit easier to control. Looking at your photo on a big screen will provide you with a better frame of reference and might lead you to make a few tweaks.
When it comes to straightening, some image editors will do it automatically; if you’re not happy with the results, you can rotate the image manually until it’s straight.
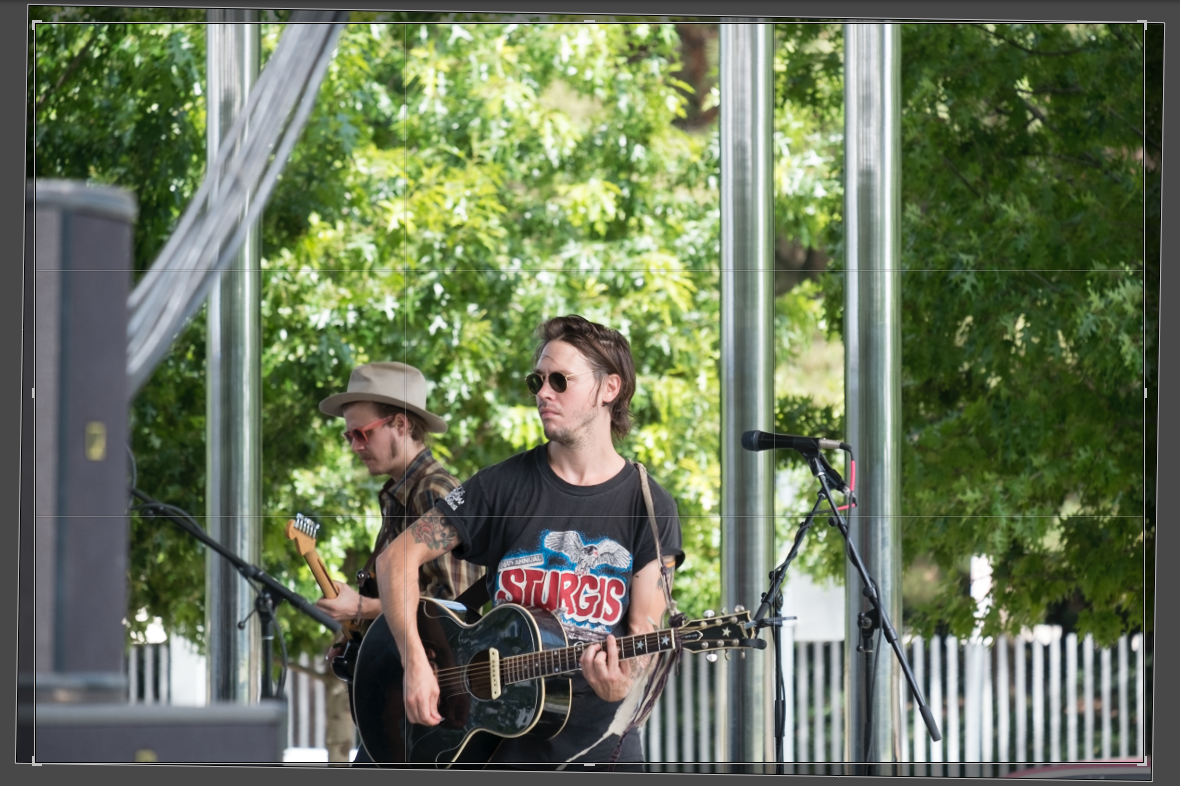
If you didn’t get the composition you wanted in camera, you can typically achieve it with great ease in software — sometimes the goal is simply to minimize distractions and make more effective use of space.

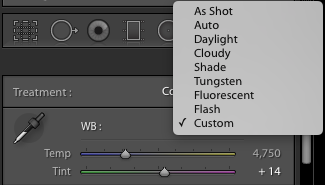
Fix White Balance
There's a good chance the auto white balance setting on your camera yields perfectly acceptable results; if not, it's an easy fix in Lightroom, probably even a one-click fix. You can, of course, fine tune white balance manually using the available sliders.

Adjust Exposure
The concept of “perfect” exposure is relative. For the sake of ease, think of exposure as simple brightness; not every photo needs the same level of brightness. So, while the automatic exposure adjustment featured in image editors is convenient, it by no means works well for every image. Generally it’s better to manually adjust exposure until your image has the level of “brightness” you want.
The other tonal adjustment you will want to make at this point is contrast. For a “flatter” image, decrease contrast; for an image with some pop to it, increase contrast.
When manually adjusting exposure/contrast, keep an eye on the histogram to avoid clipping.
Basic exposure and contrast adjustments are usually all you need to improve just about any image; for more advanced control, use an editor that features levels and curves adjustments.

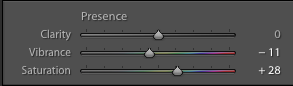
Touch Up the Colors
Raw files tend to exhibit rather flat colors. This is easily solved by adjusting vibrance and saturation. The saturation slider globally increases or decreases the intensity of all colors present. In contrast, vibrance affects the intensity of just the more muted colors. There are sure to be differences among various image editors, but the vibrance slider in Lightroom seems to be be biased to keep skin tones as natural as possible.
Making the most of the colors in your photo will take some experimenting, but a good rule of thumb to start with is to use the saturation slider to boost all colors, then tone down and refine the strongest colors using the vibrance slider.
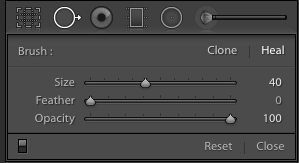
Remove Dust Spots and Other Imperfections
Far too often a photo will end up containing things that you wish weren’t there, usually little things like sensor dust, skin blemishes, or stray cats. Luckily, all of these things can be taken care of without much hassle using the spot removal tool or clone tool. Which one you use will depend on your software and the complexity of the task — blemishes and sensor dust can be made to disappear with a simple click of the spot removal tool; this is generally the case for any imperfections that occur on a relatively plain background. If there’s a lot going on around the object you wish to eliminate, you will need to use the clone stamp tool, which takes a little more time and skill. Decided if it’s worth your effort first.
Reduce Noise and Sharpen
If you’re working in Lightroom, you will probably be perfectly happy with the sharpening and noise reduction capabilities found within.
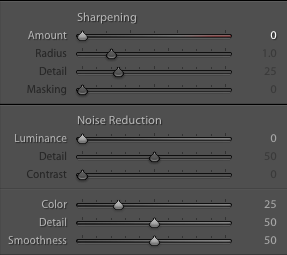
Sharpening and noise reduction options are found under the Details panel.
There are essentially two sets of sliders to control noise reduction in Lightroom; one set controls luminance noise, the other controls color noise. Luminance noise is, in simplistic terms, “general noise” that tends to look a little more like film grain; color noise appears as colored specks, usually occurring when you shoot at very high ISO levels.
The key to successful noise reduction is to strike a balance between minimizing noise and retaining detail (thus, the presence of detail, contrast, smoothness sliders). This will take some trail and error, but it helps to be able to recognize what kind of noise is present in your image. And, of course, you can always choose to leave noise untouched.
The sharpening tool consists of four separate sliders:
- Amount – The amount of sharpening you want to apply to an image.
- Radius – Controls edge sharpness, or how far from the center of an individual pixel sharpening is effected. Use a smaller radius for a softer edge, a larger radius for a harder edge.
- Detail – Sharpens the fine details in an image.
- Masking – Allows you to control where sharpening should occur by masking out areas that should not be sharpened. This makes it easier to keep your background soft and out of focus while sharpening just the subject.
When reducing noise and sharpening, it is better to be conservative with your adjustments so that you avoid creating an image that looks unnatural.
Conclusion
Once you become more adept at editing your images and establish a workflow that best suits your needs, you may want to make use of more advanced techniques. The basic steps presented here, while executed in Adobe Lightroom, apply broadly to nearly any image editing software. In addition to the standalone application of your choice, there may be a variety of plug-ins available that expand the usability of your image editor. In short, there are many options available to photographers, but the techniques above can easily take any image from flat to fantastic.


