Gimp as a freeware has always been a rival for its paid counterpart, Photoshop. Photographers who do not need to use paid softwares like Photoshop often in their workflow, can use Gimp which is a powerful software and since it is free, it makes it an ideal app for beginners or photographers who are on a budget. We have discussed Gimp's features like basic adjustments, using graduated filters, etc., in our previous articles and in this article, we will go a bit further into some advanced features like layers and blend modes.

The Layers Dialogue
Unlike Photoshop, which names calls its toolboxes palettes, Gimp names them Dockable Dialogues. When you open an image in Gimp by default the Layers Dialogue will be open on the right side of the screen. If you do not see it however, you can add it by going to the menu and selecting Windows – Dockable Dialogues – Layers. You will see it looks very similar to the Photoshop equivalent. At the top right is a small triangle. Click on this will allows you to modify the look of the Dialogue or access all the Layer menu items.
The Mode selector tool is Gimp’s equivalent of Blend Modes in Photoshop. Clicking on it will reveal a host of familiar looking blend modes. Beneath this we have the opacity tool. Unlike the Adobe product, there is no Fill mode. Underneath this we can choose to lock individual layers and then we come to the main Layer section where all the different layers are displayed.
The icons at the bottom allow us to create, group move or delete layers.
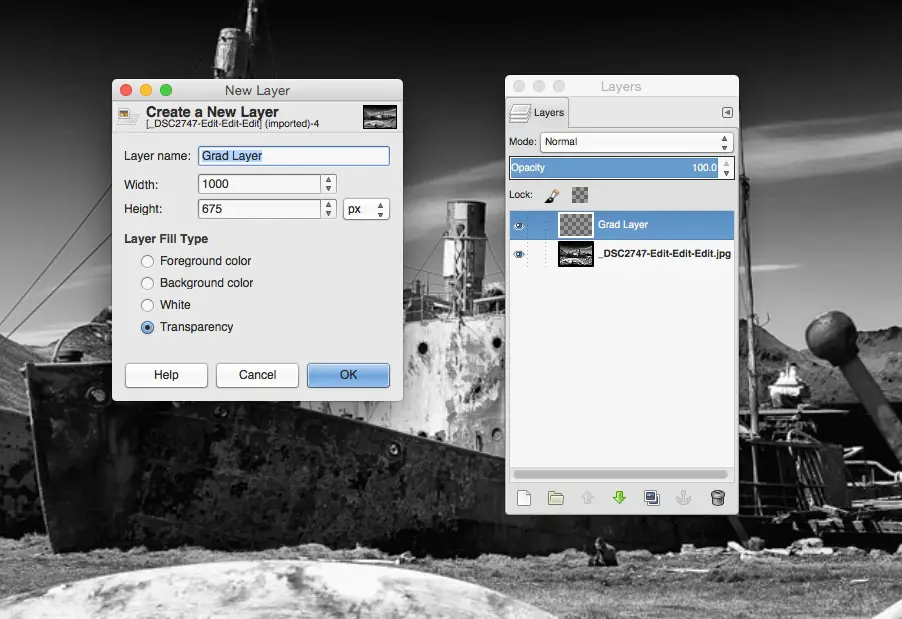
Click on the New Layer icon bottom left of the Dialogue. In the window that opens, you can name it, define its size and choose whether to fill the layer with color or have a transparent layer. We will choose the Transparency option. When you click OK, you will see the layer now appears in the Layer Dialogue above our original image.
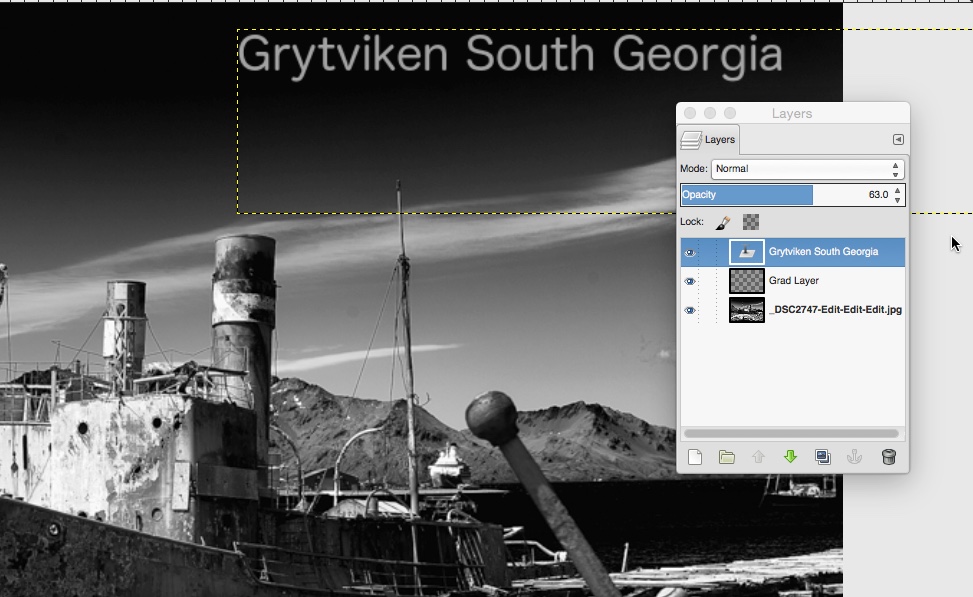
Let's create a very simple text overly for a photo. Choose the text tool from the Toolbox on the left of screen and add a text overlay. As you type onto the image, you will see that the text tool automatically creates another new layer. We can now change the opacity of our text by either clicking on the down arrow under opacity or by typing an opacity percentage into the box and hitting Enter.
The Layer’s Dialogue is quite simple and straightforward so lets have a look at the Blend modes available to Gimp users. To understand how they work we are going to do a single shot HDR merge.
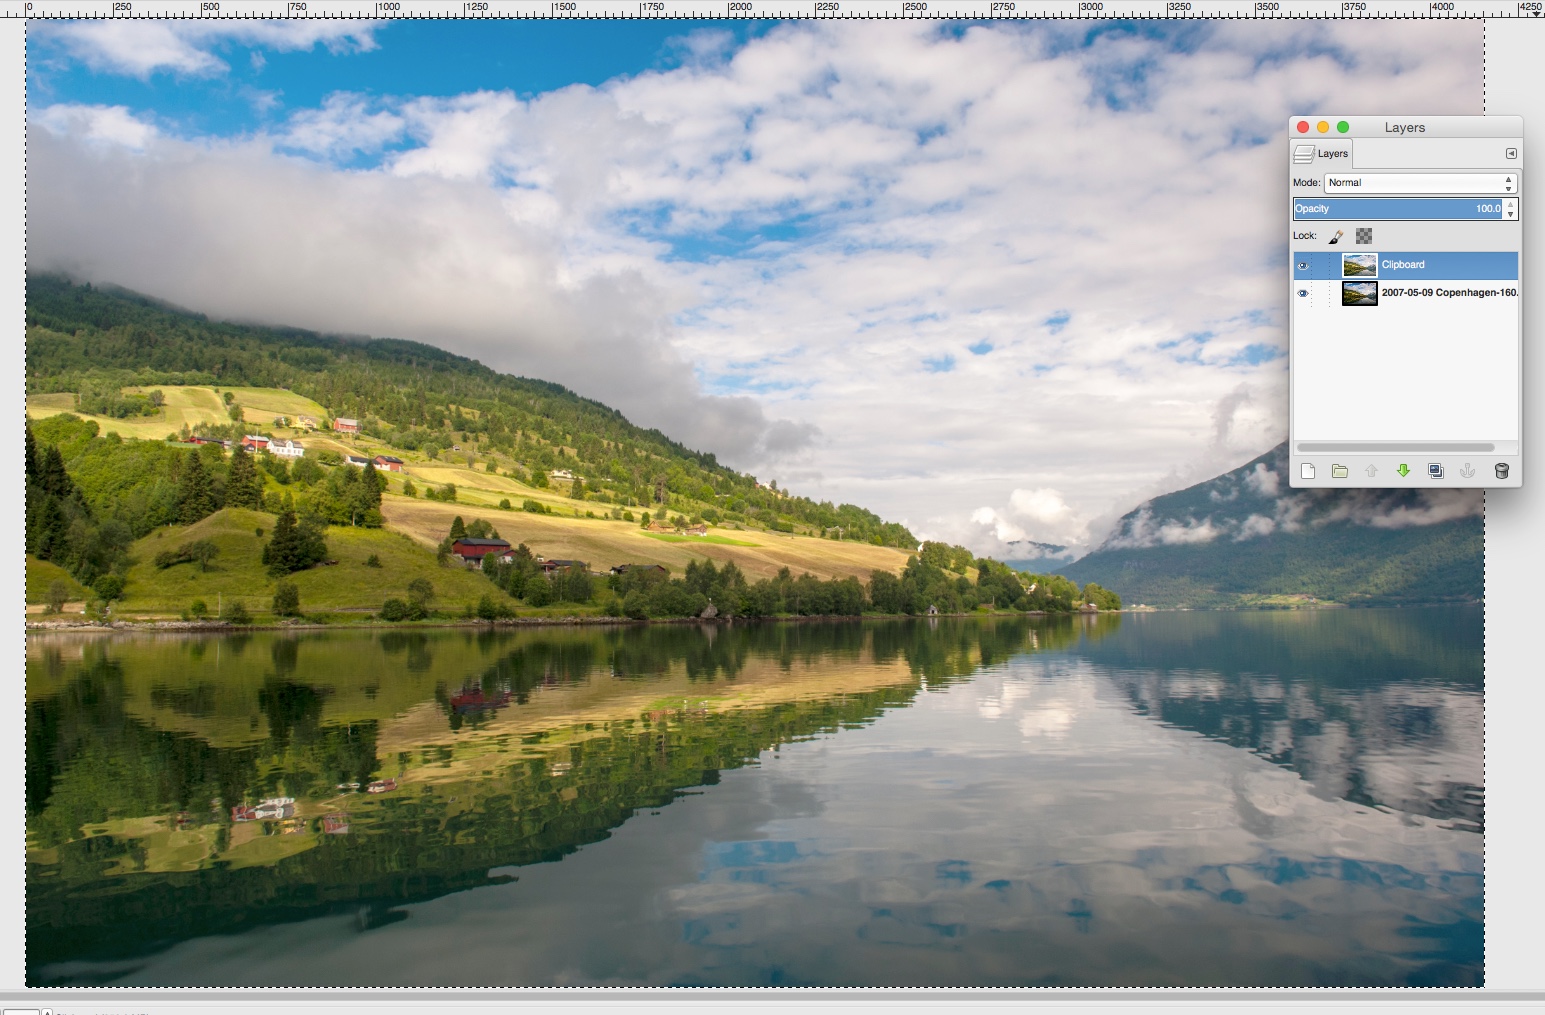
Open a suitable shot in Gimp, then from the menu select Select – All. Then go to Edit – Copy – Paste As New Layer. You will see an identical layer. An alternative way to do this is to click the little triangle on the Layer Dialogue and select Layers Manu – Duplicate Layer.
Make exposure adjustments to the new layer to make it lighter, revealing shadow details.
Working With Blend Modes
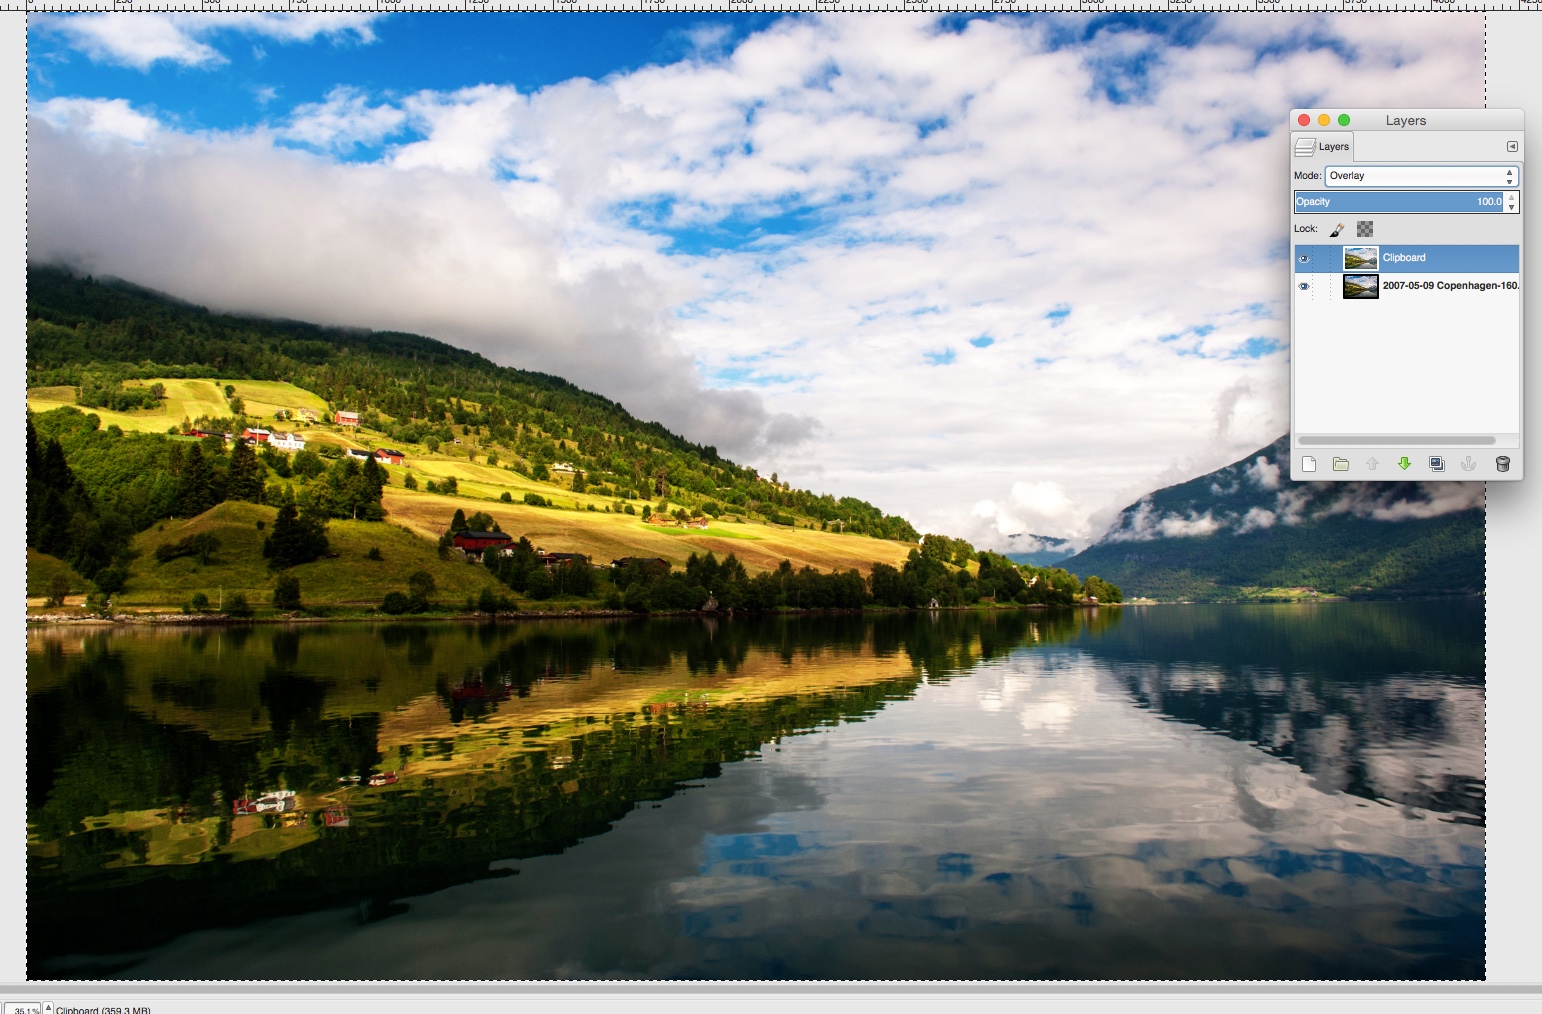
Now let’s see what the different Blend modes do. Make sure you select the upper layer and then cycle through the blend modes.
- Dissolve reveals the lower layer through random pixels, much like the dissolve transition in video and slideshow editing.
- Lighten Only, Screen, Dodge and Addition only effect the light or white parts of the image, making the overall merge lighter overall.
- Darken Only, Multiply and Burn are the opposites of the lighten modes and will effect only the dark or black pixels resulting in an overall darkening of the image
- In the three overlay modes, Overlay, Soft Light and Hard Light, Gimp makes the dark pixels darker and the light pixels lighter. In Soft Light, the edges are softened and colors desaturated a little. The opposite is true in Hard Light
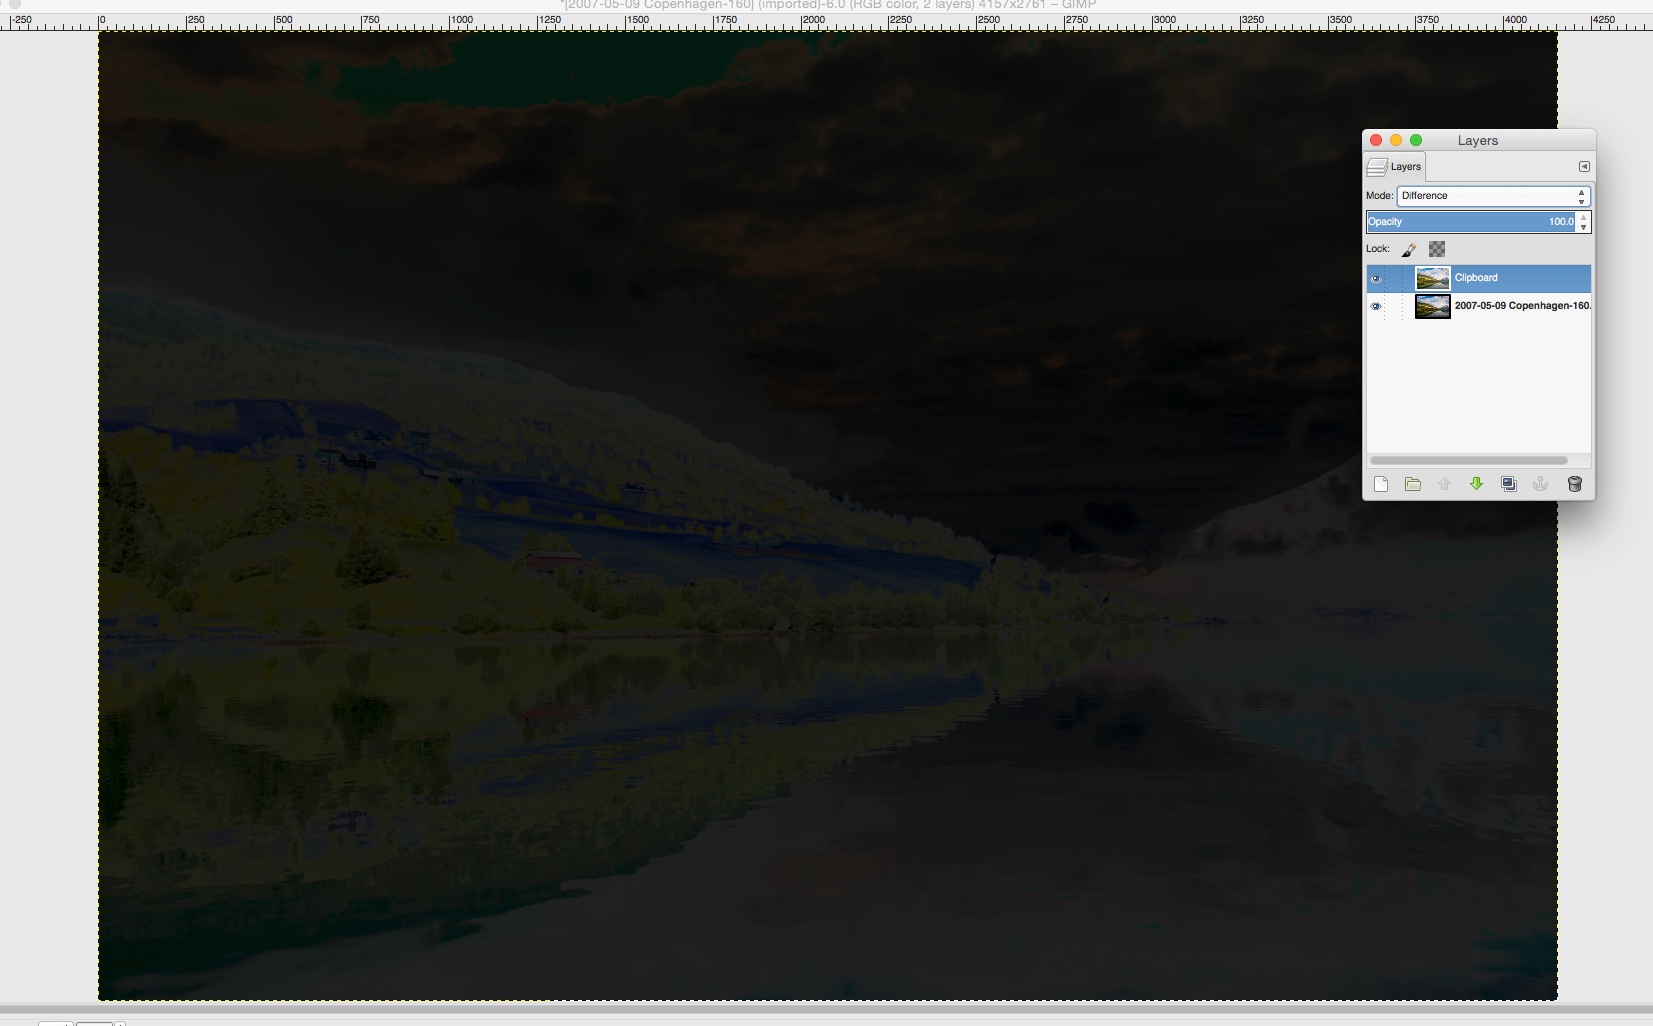
- Difference, Subtract, Grain Extract, Grain Merge and Divide are all quite extreme blend modes that can dramatically change the way your image looks
- The Color Mode, Hue, Saturation and Value are much more subtle. Taking the values from the foreground image and applying them to the background image. For example Saturation will take the saturation value of the foreground image and apply them to the background resulting in a overall saturation boost in parts of the image that are already saturated.
How To Choose The Right Mode
The blend mode you choose is entirely down to what you are trying to achieve. In my example we are trying an HDR merge from a single image so the Overlay modes such as Soft Light will tend to work better.
Like in Photoshop not only can you change the opacity of the blend, by changing the opacity value, you can drag and drop layers into a new order, delete them, lock them and group them.
The addition of Layers to Gimp has made it a real contender to Photoshop, giving photographer access to many of the features of it’s paid equivalent.
To learn more about Gimp, check out the links below.
Further Reading:
- An Introduction To GIMP Photo Editing: 9 Things You Need To Know
- GIMP basics: Best Tips And Tricks For Beginners
- Learn GIMP: From Greenhorn To Guru In 19 Lessons
- How to Use Layers In GIMP
- 3 Videos to Get You Started with GIMP Layers
- 20 Best Free GIMP Plugins


