How often do you use Lightroom's local adjustment tools? These three powerful tools rock the smallest adjustment to big details across areas of your image.

The main sliders in Lightroom's Develop module apply changes to the total image. When working with local adjustment tools, you're making changes to targeted areas within the image.
What are Lightroom's local adjustment tools? We're referring to the Radial Adjustment Tool, Graduated Adjustment Tool and the Local Adjustment Brush (see graph below).
They add huge impact to your images with little tweaks. Less is more.
The more you work with these tools, the more you may want to dive in to your archives to rework some of your older images.
Lightroom's Local Adjustment Tools Overview
There are also 3 other tools in this panel that you'll see on the left. These include the cropping tool, the spot removal tool and the red-eye reduction tool.
The local adjustment tools we are referring to are the three on the right in the panel below.
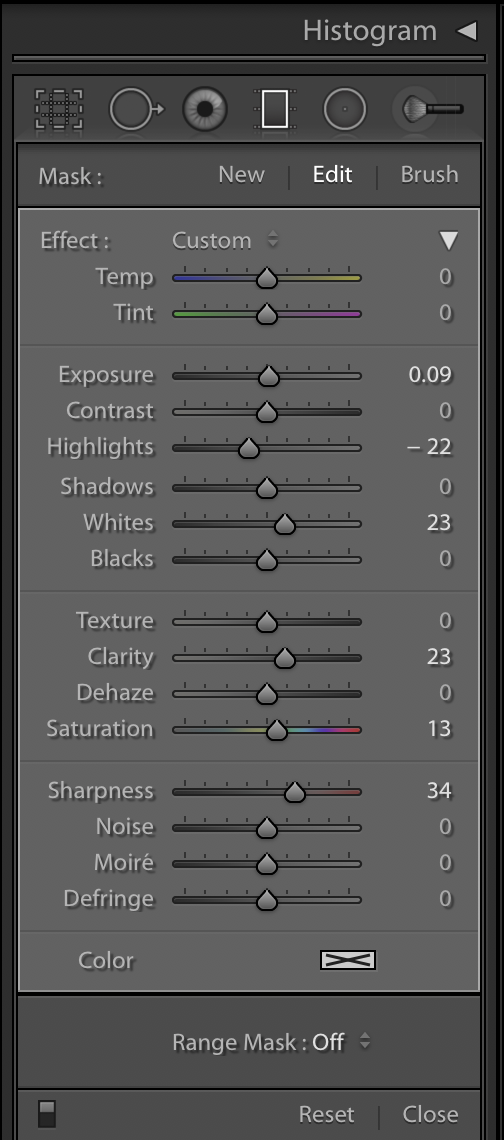
First, we'll provide a quick recap of each tool. Then, we'll show how to use them for big and small edits. Use one or all of them on any given image.
- Radial Tool – Use the circular adjustment tool to create dramatic vignettes to subtle changes.
- Graduated Tool – As the name applies, apply adjustments across a gradient. From a corner to the whole image, you choose how much of the image to apply the gradient.
- Local Adjustment Brush – Paint small, large or multiple areas.
What Adjustments Can You Apply Locally?
Each of these tools are also found in Lightroom's Basic panel for global image edits. These include the sliders found in Temp, Tint, Tone and Presence.
These local adjustment tools apply other corrections that may not be needed in other areas. They include:
- Sharpness – Is there an element that is over or under sharpened?
- Noise – Is there a corner or area that has too much noise? Try reducing spot noise with one of these adjustment tools
- Moire – Have subtle patterns turned into an off-colored rainbow or ripples? I think you're getting the idea!
- Defringe – Do you still have purple or green fringing even after checking the Remove Chromatic Abberations checkbox? (This is located in the Lens Corrections Panel). If yes, try removing locally.
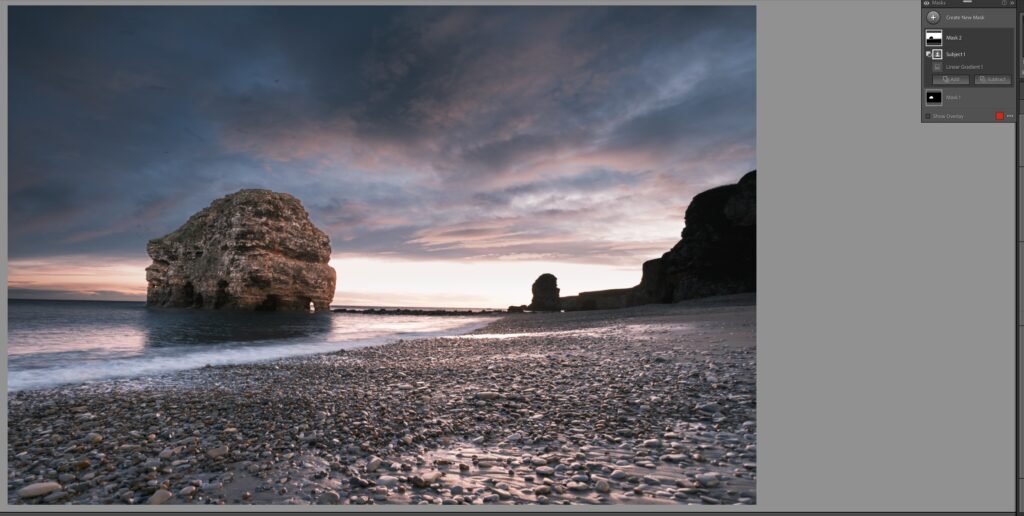
You'll also notice red shading in each of the images below. The red is the mask or area where you're applying the tool. The red is toggled on and off by checking the bottom left corner: Show Selected Mask.
#1 The Gradient Filter
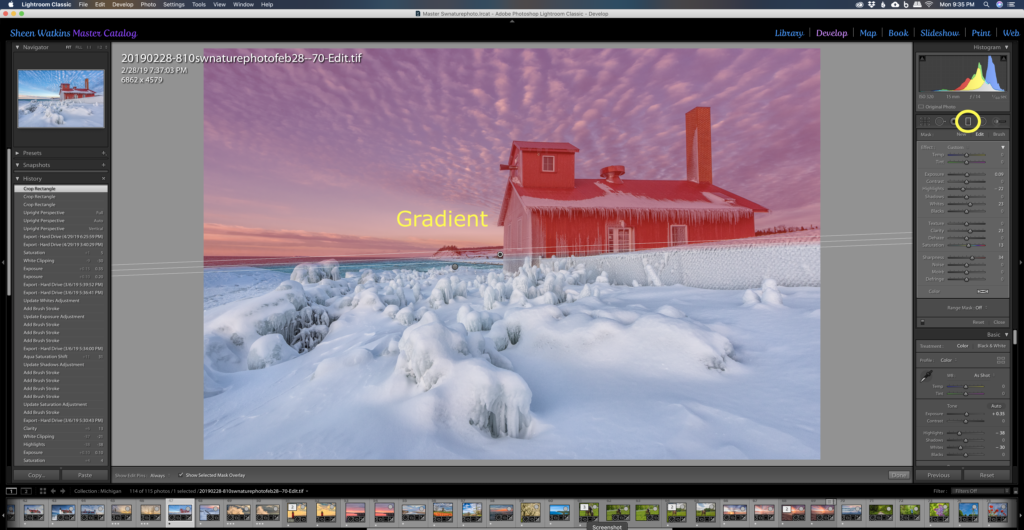
The gradient filter applies linear adjustments. They may be from top to bottom, bottom to top, sideways or diagonally.
When using the gradient tool, you'll notice that the tool has three lines. The initial section starts at 100% opacity and then gradually goes to 0%.
You select the width of the gradient across the entire image or part of the image. You also choose if the adjustments are gradual and even. Or, you may choose to create more dramatic adjustments to a large area. See the image above.
When to use the Gradient tool? Examples include landscapes, big skies, when there's a significant contrast between the foreground and background.
#2 The Radial Filter
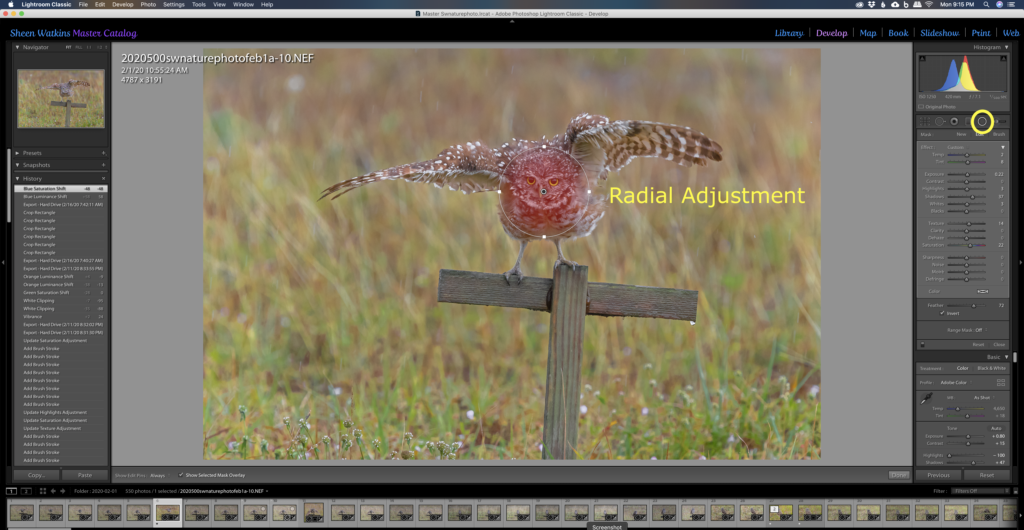
From bold vignettes to gentle adjustments, use the radial filter to bring out one or more areas in an image. Brighten eyes, highlight a subject or soften a busy background. The burrowing owl above needed a few minor adjustments in his expressive face.
Select the size, feathering of the radial filter and applying adjustments within the radial area. Or, deselect invert and apply changes outside of the radial tool.
When to use the Radial tool? An easy method of gradually emphasizing a subject. I use this in wildlife photography, flowers and portraits.
#3 The Adjustment Brush
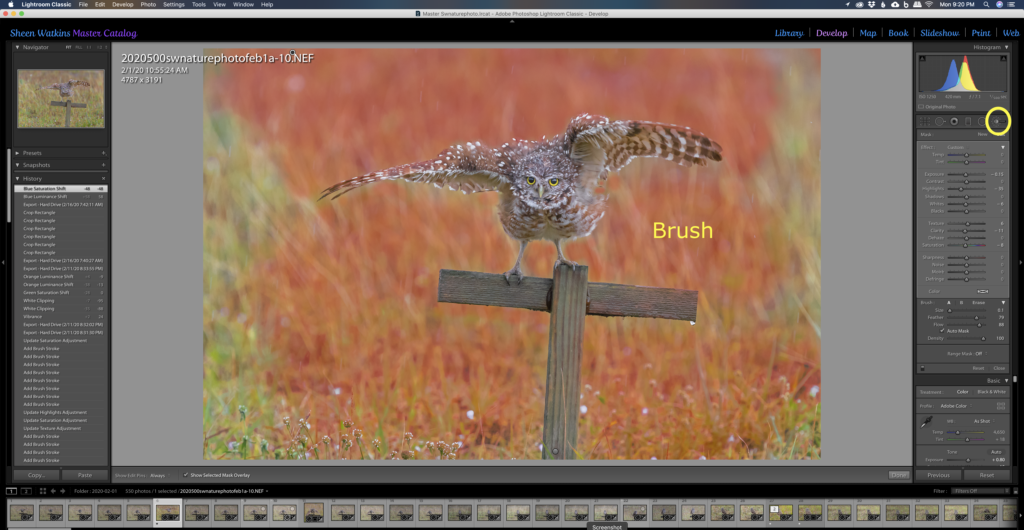
Just like a paint brush, use the brush tool to paint large or small areas. Lightroom offers two brushes. I have one brush that's larger in size and one that's smaller. You can easily change the brush sizes using the [ and ] when the each brush is active. Another option is to adjust the slider to increase or decrease the brush size.
The Feather slider chooses how hard or soft you'd like the edges to be. The Flow slider increases or decreases the opacity of your brush. The Density slider sets the maximum amount that a brush paints.
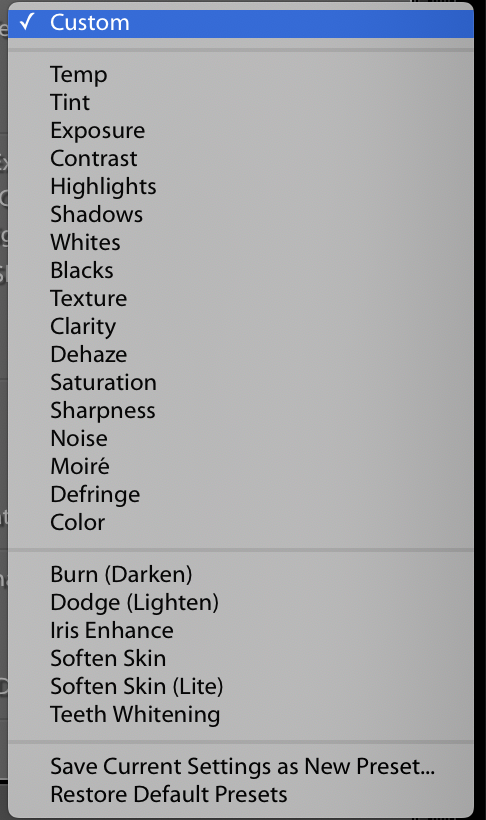
The adjustment brush also has presets, such as teeth whitening to speed up commonly used edits.
What if you make a mistake? The beauty of Lightroom is that it is non-destructive. You can go back in your adjustment history (left side of the image) to any step and restart. If it's a local adjustment, use the eraser brush or select the pin on the screen and hit delete.
Working with the local tools takes practice to refine your techniques. The good news is that it's fast and easy to learn, use and make quick impact.

