Have you been on a weekend hike and regretted that you didn’t capture an Instagram-worthy shot of the mountains against an astonishing sunrise background, something that you mostly see in an online gallery?
Perhaps you tried but just couldn’t seem to get it right?
Take it from us; mountain and nature photography takes more than just beautiful views, stunning sunsets, and breathtaking landscapes.
Many have tried and terribly fallen short of their expectations.
As a landscape photographer, you need to do more work to capture powerful mountain landscape images as it is slightly different from capturing other landscapes. You have to learn more about camera settings, angles, shots, and equipment you need to shoot unique photos.
Luckily, it doesn’t have to be a back-breaking process to capture the best images. We’ve done all the dirty work for you. With these mountain photography tips, you’ll be well on your way to grasping this art at your fingertips. You may be even able to sell some fine art pieces as metal and acrylic prints which work well for mountain photography.

Location Scouting
Many amateur mountain photographers want to recreate iconic work they’ve seen before from established photographers. As such, many of them flock to the same mountains with amazing views and shoot from the very same spots in national parks.
However, this can never surpass the famous shots that are already familiar to us.
Embrace jumping out of your comfort zone and finding breathtaking scenes along paths less traveled.
What makes a mountain photogenic is the type of rock, the shape it forms in the mountain ranges, and its age.
Here are a few locations you can scout:
- Grand Teton national park
- Denali national park
- Glacier national park
Embrace using Google Earth to get a general idea of the landscape before you pack your gear and book the next plane.
Once you’re at the location, you should also avoid shooting from the same spots used by other photographers.
Become more experimental and explore. If this means heading away from the viewpoints and hiking for days in search of the best scene and a refreshing view, go for it.
You’ll enjoy the fruits of your creativity.

Gear
What shooting gear should you pack?
In all honesty, there’s no one-size-fits-all answer to this question. It depends.
Your shooting gear will be influenced by the kind of images you want to photograph and any limitations that may stand in your way.
For example, you don’t want to load 30 pounds of gear into your backpack and then hike up to a 4,000-foot mountain peak.
Here’s a breakdown of the basics you’ll be needing:

Camera
Smartphone cameras can produce really decent landscape images these days. But, they’re still a long way from and yet to catch up with professional cameras.
Professional models have better technology and better sensors that help produce high-quality images. You can choose to bring either a DSLR or a mirrorless camera with you. Either way, it’s essential that you have a backup camera as you never know what could happen to your first choice.
Lens
You can decide to carry as many camera lenses as you’d like, but they better be optimized to capture quality landscape images. There are two primary lenses that you should never lack. Carry a wide-angle lens for shooting panoramic mountain shots and a telephoto lens for when you want to closeup and capture sharp details of the mountains.
Tripod
A tripod has to be one of the most underrated pieces of equipment for mountain photography. Many photographers will shoot as they hold their camera then feel disappointed when the smaller details are magnified.
A tripod can help you solve this. It’ll hold the camera steady, especially when shooting with slower shutter speeds. In a darker setting, a tripod lets you shoot with a low ISO and avoid noise. Get a tripod strong and stable enough so it won’t shake when shooting outdoors, yet be light enough not to be a burden when carrying it.
Shutter Release
Beginner (and even experienced) landscape photographers may not always consider this. However, a shutter remote or cable is essential, so you don’t risk blurring your images as you press the shutter button. It comes in handy when you’re shooting long exposures.
This type of photography will also require you to get polarizing and UV filters.
Remember that there’s a lot of ultraviolet light in mountainous areas that can damage your lenses. A UV filter will help you protect your lenses, especially when sunny.
Polarizing filters on the other hand will help you manage reflections and minimize glare. This can help you a lot when shooting lakes or if there’s a lot of snow.
Camera Settings
You might get all the equipment right and scout for the best location with stunning scenery, but your efforts won’t be worth it if you don’t get the right camera settings.
There are many variables and camera settings that’ll depend on the situation and the kind of shot you desire to get. Here’s a breakdown of some settings that’ll have you photograph stunning images in one shot:
| Camera Setting | How To Use |
| Shutter Speed | The shutter speed should be the reciprocal of the focal length or faster. For a focal length of 30mm, set shutter speed at 1/30th of a second. If you’re shooting a waterfall or clouds, you can set a low shutter speed to show some movement. A 1/4th of a second is suitable for the waterfall. |
| ISO | Use the lowest ISO setting possible. Keep it between 100 and 200. You can use this as the starting point and increase it if you need to boost the shutter speed. |
| Aperture | You need to have everything in the scene in focus. Set your aperture to a large number. The most suitable settings are f/13, f/16, or f/22. However, if you’re using smaller lens apertures, diffraction could cause some issues. |
As for the exposure mode, Aperture Priority works most of the time with landscape photos. You set the aperture and leave the camera to devise the rest of the exposure.
However, it doesn’t mean that you can’t experiment and play around. Set the camera to manual mode and see what you can do.
You should also shoot in RAW. Why? Because RAW files preserve more details in the images.
This gives you much more freedom during post-processing, as you can play around with the shadows and highlights. They might take up more memory card space, but it’s worth it.
Camera settings for mountain photography might look like an uphill task when you’re a beginner, but with plenty of practice, it eventually becomes a breeze.

Best Time And Seasons For Photographing Mountains
The best season to shoot a mountain depends on the mountain itself and the environment. For example, some mountains may provide you with powerful photographs during the winter, while autumn may be the best season for others.
The rule of thumb here is to always plan ahead. Make use of Google Earth and other resources to locate the mountain and see whether the light might be blocked by any other mountain.
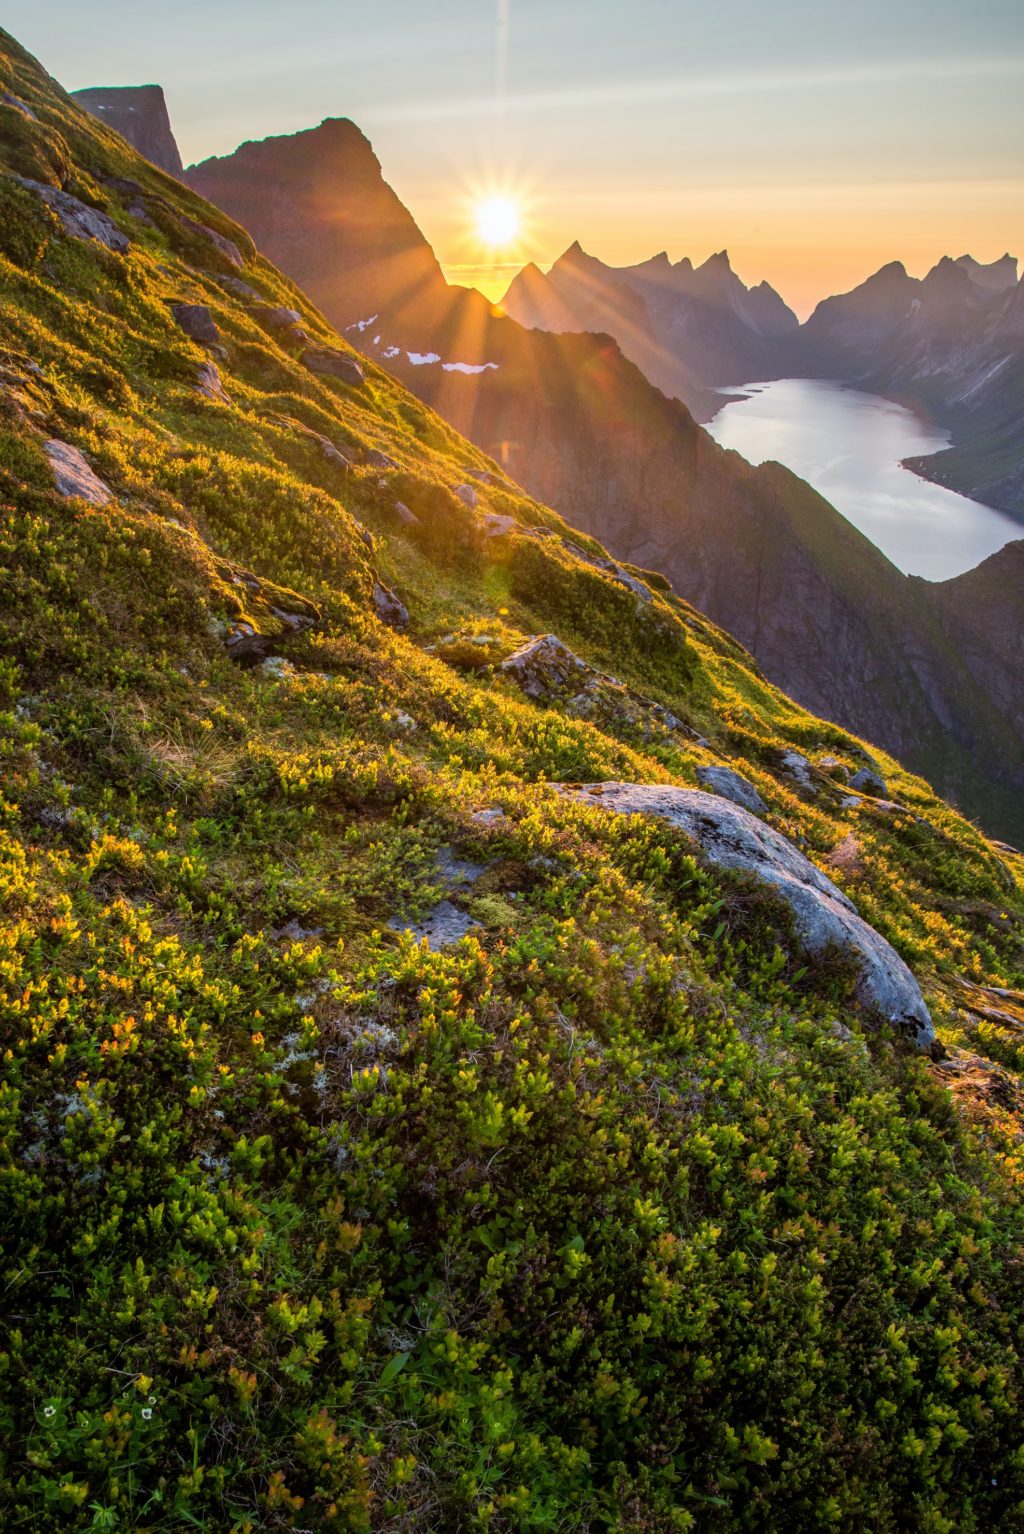
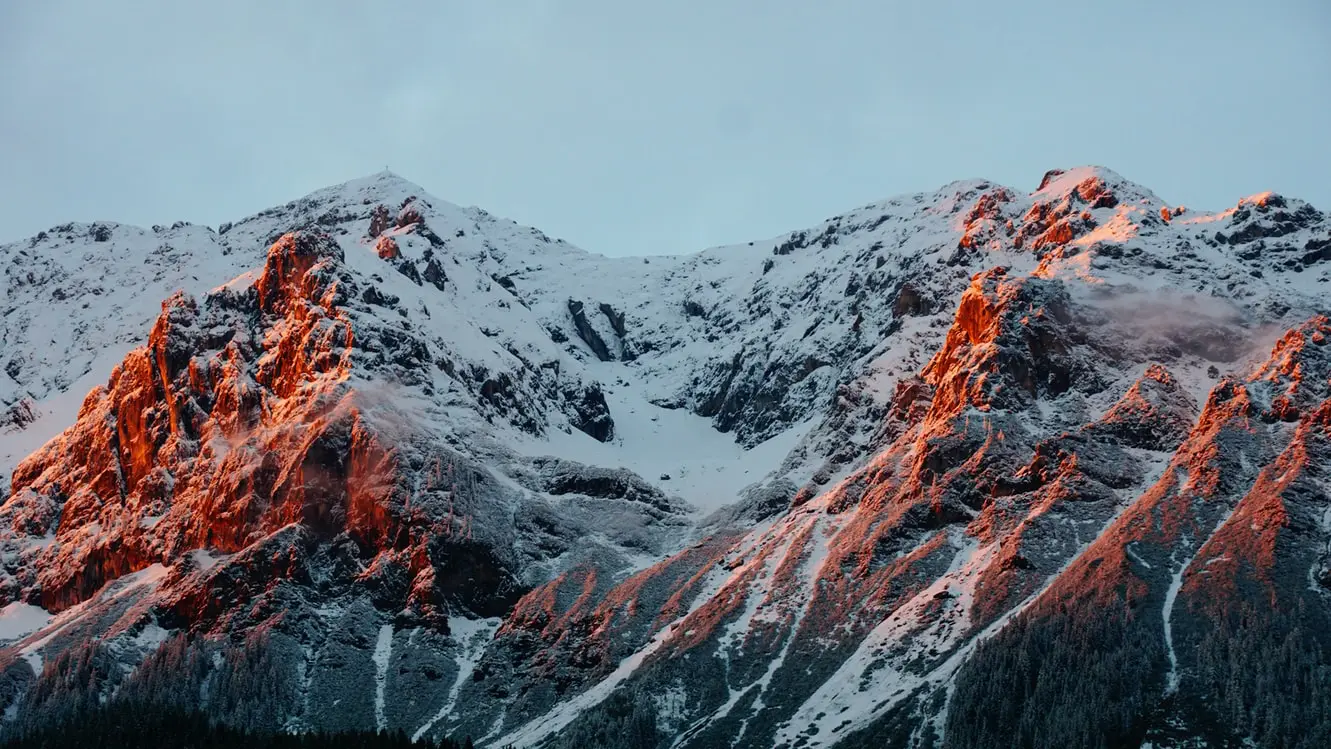
As for the best time to shoot mountains, the golden hour is your best bet. In order to get these shots, depending on how long it takes to reach the location, you may have to hike the day before with your camping gear, so you can get a good shot during sunrise when the beautiful light from the rising sun, hits the mountain peaks.
During sunrise and sunset, the sun is lower on the horizon and at sea level. This sets the perfect scene with orange/yellow lighting that also forms long shadows against a clear blue sky backdrop.
This can take more impressive shots compared to when the sun is high.
Mountains are some of the most remote places on earth, meaning no artificial light hits the mountain peaks. Shooting at night is also worth considering, as you could capture the milky way in the sky and some clouds in the foreground.
While the golden hour and during the night might be the most suitable times to shoot, sometimes you don’t have that option. What would you do if you summit at noon? Of course, you have to embrace the challenge and get creative with those jagged peaks.
Composition For Mountain Photos
Good composition and excellent lighting work in a complimentary way. Without the best composition, your image may not come out perfectly, even in the best light. You’ll get the same outcome if you have good composition but the light isn’t great.
Pay keen attention to how you compose your image. A basic photo can drastically change when shot from a different vantage point.
A combination of better compositions and light will set your shot apart from the poor images you want to avoid.
As a beginner to landscape and mountains photography, invest plenty of time learning about the rules of composition. They’re essential and go a long way to creating stunning images.
This doesn’t mean you can’t break the rules of composition, though.
You can use the environment, say trees, as the foreground to frame the mountain as your point of interest. You can also use the mountain’s reflection on a lake to add a playful abstract and almost painted texture to your image.

Mountain photography can be a challenging genre as you need to put in a lot of work and effort to get the best images possible. You need to be patient, creative and use other principles, ideas, in order to come home with unique photos of the mountains.
Don’t be afraid to trust your instincts and get creative. The end result might evoke more emotion than you expect!


1 Comment
Awesome article. A great help for beginner landscape photographers. Thanks for sharing!