When Adobe’s subscription plan was announced, a few short years ago, there was a lot of consternation. Adobe, however, tempered the blow with the promise of more frequent updates to its software.
Under the paid license model Photoshop and Lightroom might receive major updates once a year, and you would have to pay for those updates. Under the subscription model, Adobe has been true to their world and updated both apps more frequently.
One of the most recent updates for Lightroom Classics was, by any standards a huge one. In their own words, it was a re-imagination of the masking tool.
Of course with any “re-imagination” comes change and to that end, the interface we use for masking has changed somewhat. So today, we are going to take a quick guide to just how that new masking interface works.
What’s Changed In Lightroom Classic Masking Tools
At first glance, everything looks the same. It’s only when you look a little closer at the top of the Develop panel that you might notice it. Gone are the radial, graduated and spot tools to be replaced by just four icons below the histogram. From left to right they are the crop overlay, the spot removal, red eye correction, and the new star of the show, masking.
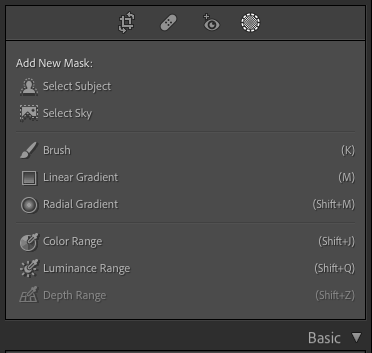
As we are dealing with the new masking tools, let’s click on the masking icon. You will now see that a new window opens underneath with a raft of new tools. Most of those you will be familiar with. The Linear Gradient, Brush, and Radial are all throwbacks to the previous incarnations of Lightroom. However, at the very top are two new tools, Select Subject and Select Sky. Let’s take a closer look at each of these, starting with Select Sky.
The Select Sky Tool
For this demonstration, we are going to use this shot of a church dome in Lviv, Ukraine. It’s a Fuji Raw, the exposure is spot on but there is so much more we can do with this sky.
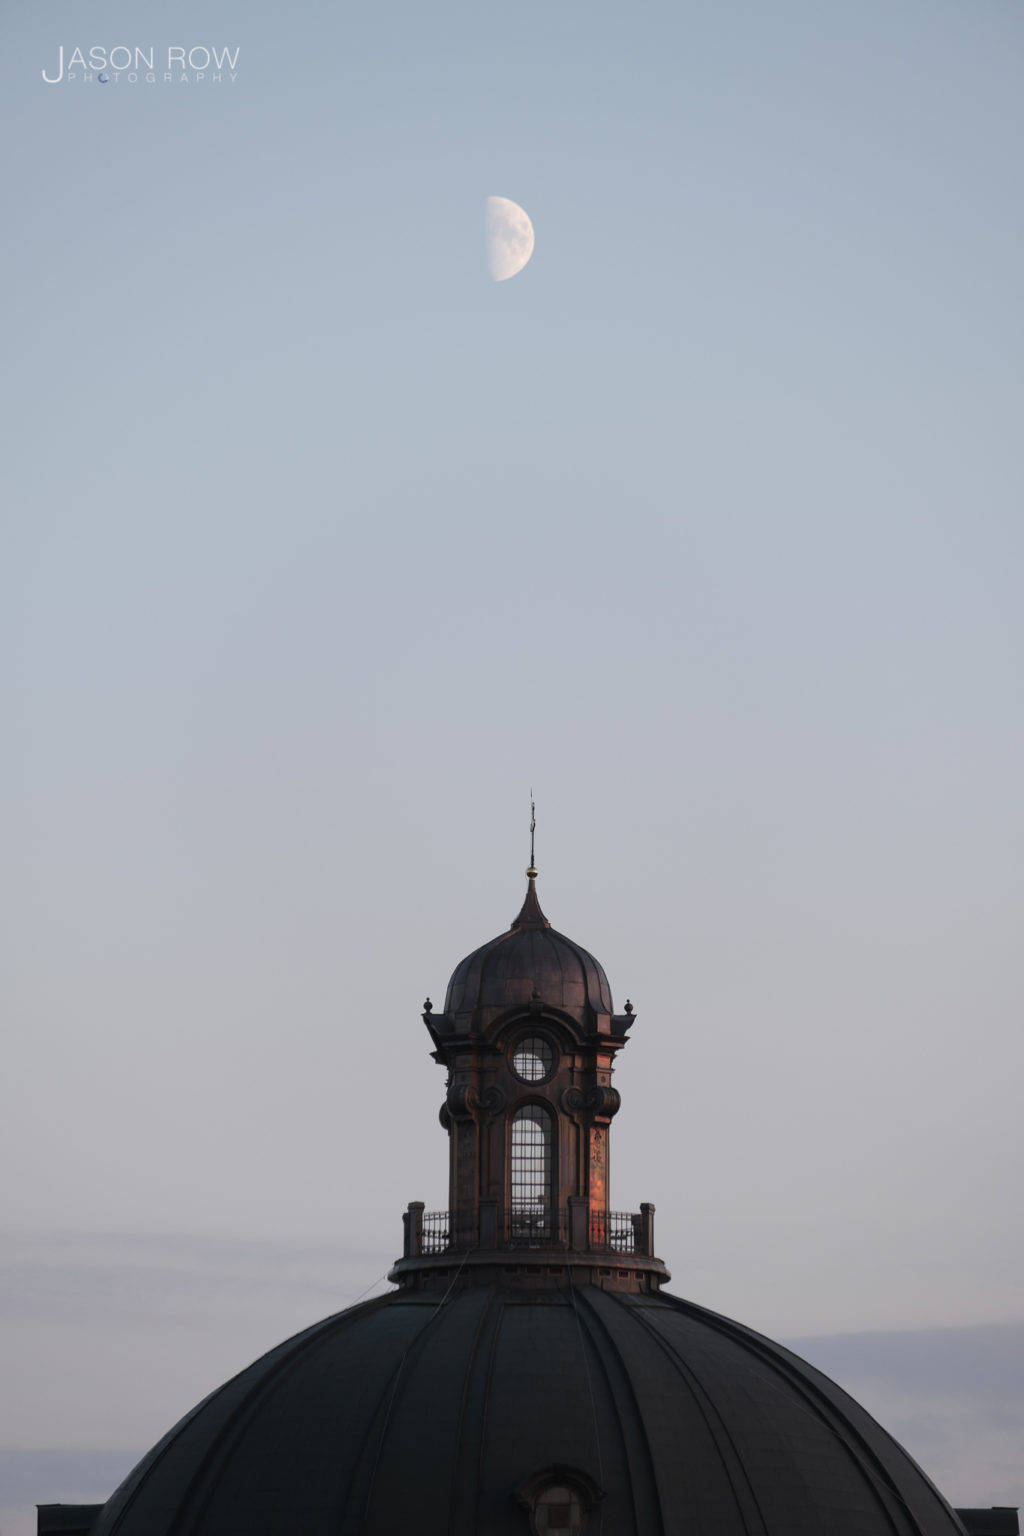
The first thing we do is simply click on Select Sky. Immediately, you will see a new pop-up window with the sky automatically masked as a new layer. However, as we can see, whilst it’s done an amazing job overall, it has left out the bottom parts of the sky.
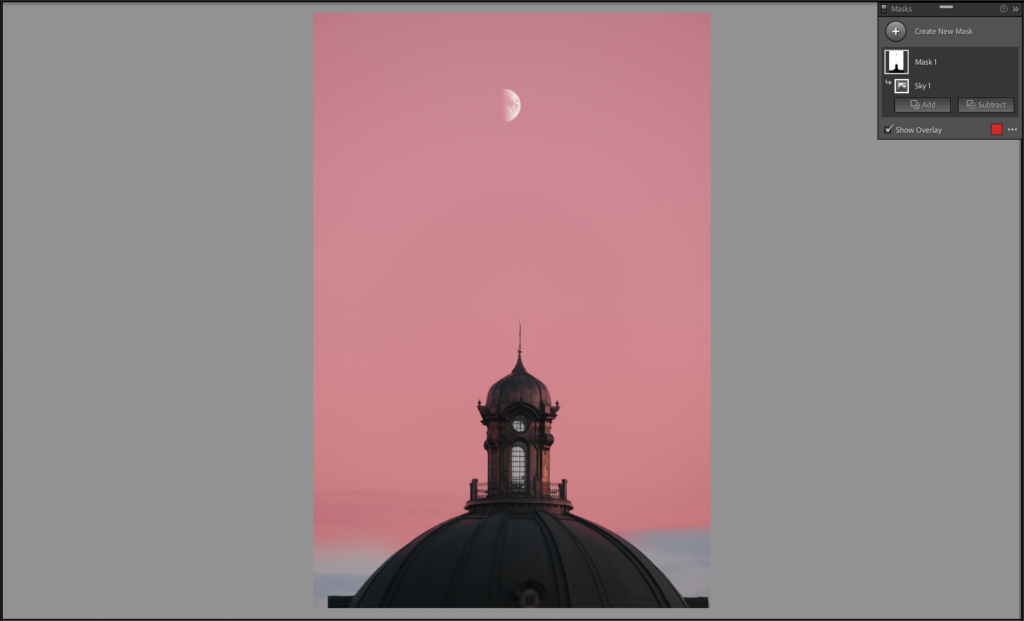
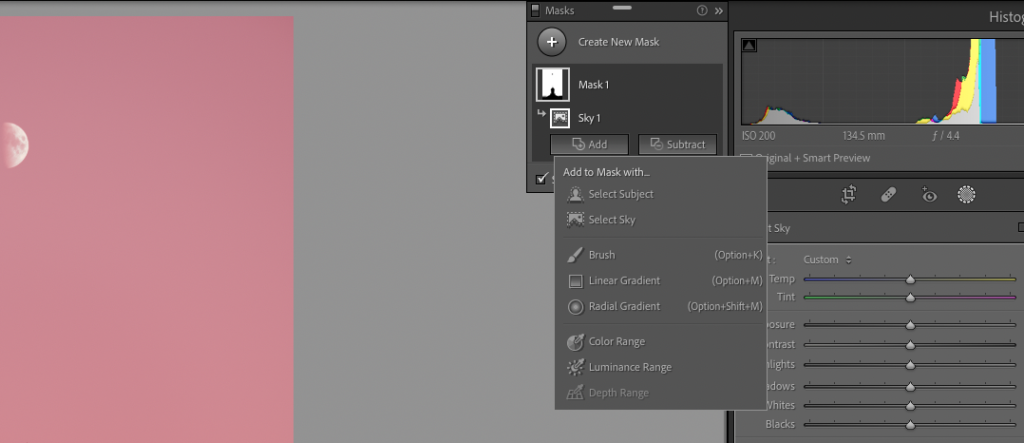
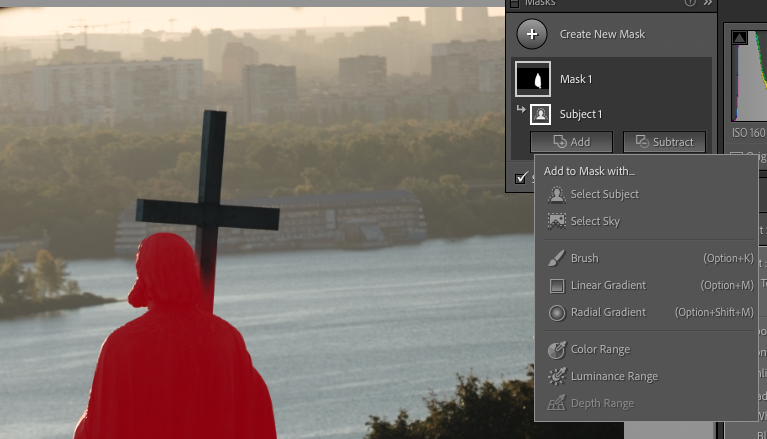
Clearly, we want to do something about that and fortunately, Adobe has made that easy for us. At the bottom of the pop-out window, we can see Add and Subtract. These do exactly what their names suggest. As we need to add more masking to the bottom of the image, we hit the Add button. You will now see a duplicate of the options that we saw on the main panel.
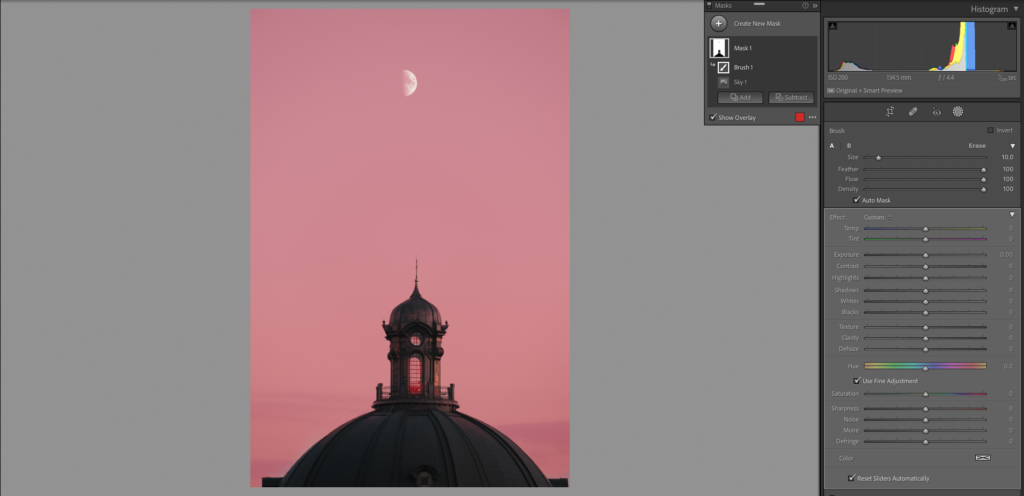
The tool that we need to use is the good old brush tool. We select that, change the size of the brush using our mouse’s scroll wheel and make sure that Auto Mask is checked.
In my image, I have carefully painted in the mask at the bottom of the sky but also through the windows of the dome.
Now with the mask complete, we can carry out the adjustments. As you can see from the right panel on the develop module, we have access to many of the controls we would find editing the default, full picture. However, this time when we move the sliders, they will only affect the areas that we have masked off.
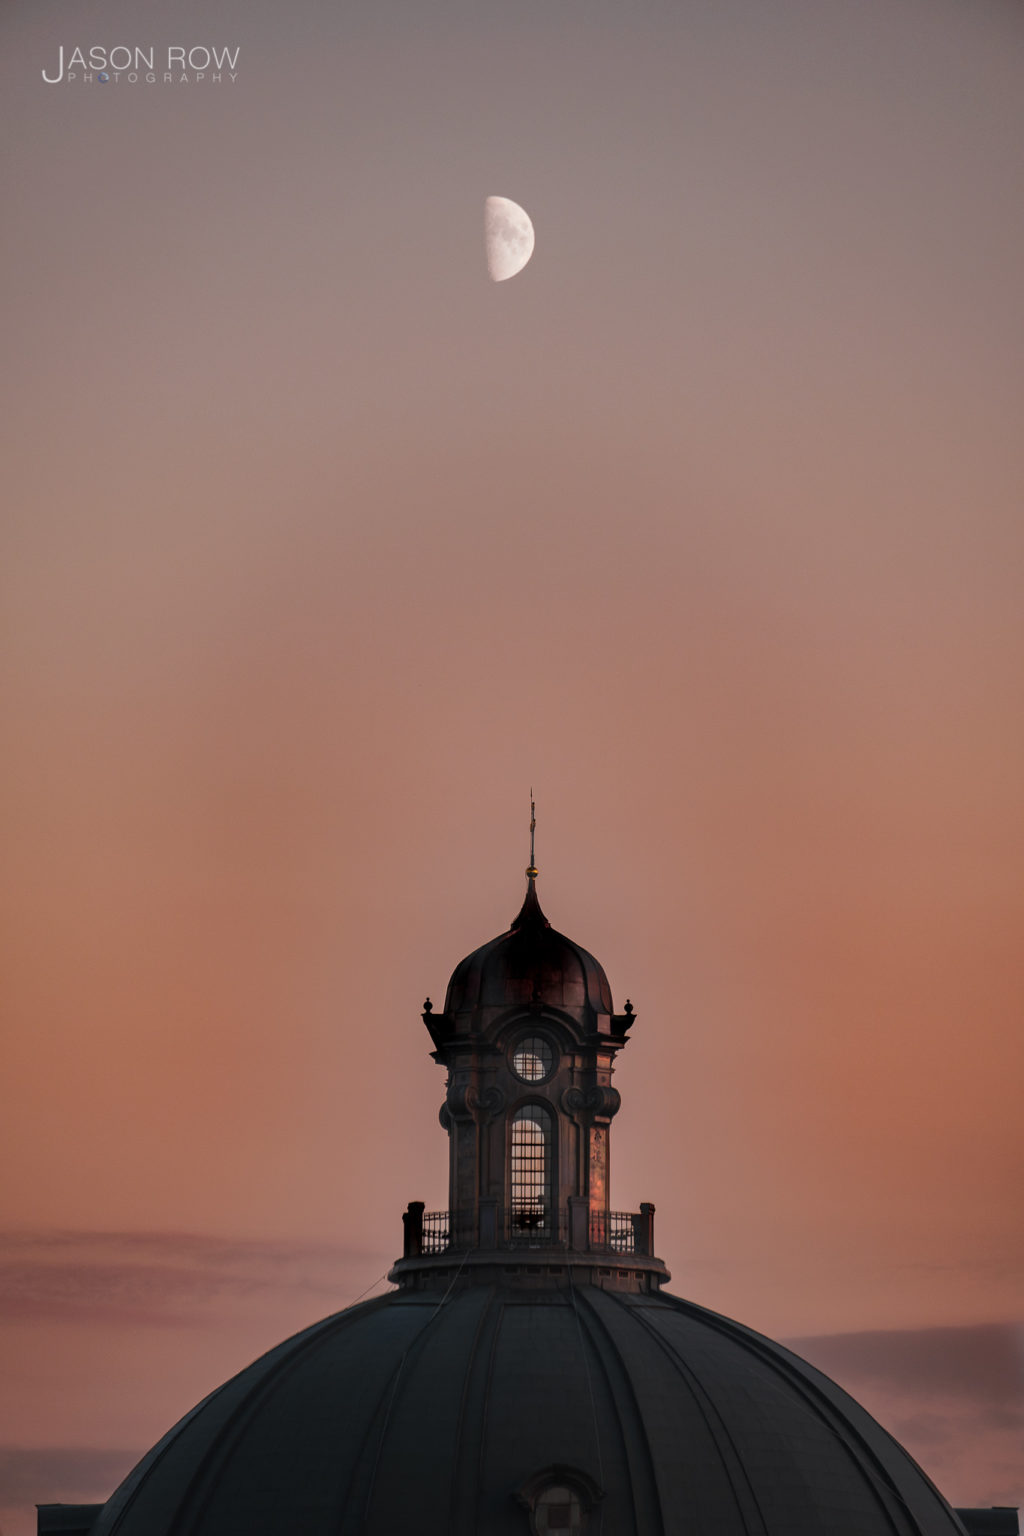
To make my sky and moon punch out much more, I have made a number of adjustments including blacks, whites, color temperature, and clarity. As I made those adjustments, I could see subtle areas where the brush had not fully covered the sky. However, by making sure the brush tool was selected in the pop-up window, I could easily paint in any parts of the scene that had not been masked. The power of this mask in Lightroom is that you can make the sky look any way you want. In my shot, I have given it a much more sunset/dusk feel. Once happy with the result, click Done at the bottom.
The Select Subject Tool
The Select Subject tool works in pretty much the same way. To demonstrate this, I am using the image of the statue of Volodymyr in Kyiv. As you can see, the image is quite complex so it is a challenge for Lightroom to determine the subject.

To create the mask I simply click on the Select Subject icon on the tools panel. As you can see, it’s done a pretty decent job overall. However, it has missed the cross and also masked areas of foliage at the bottom.
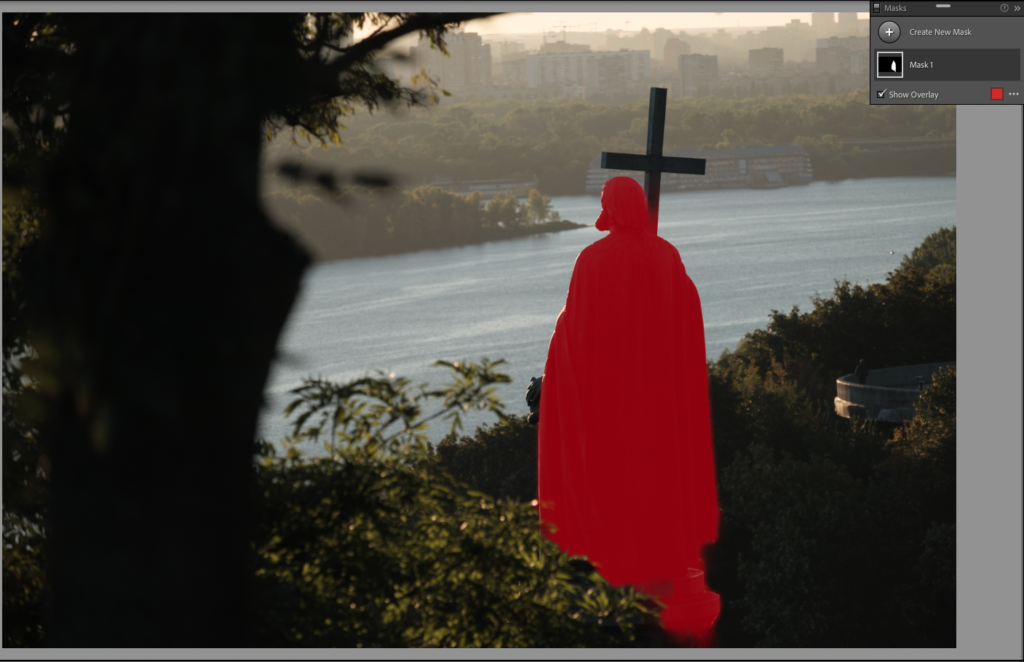
To add in the cross, we once again use the Add button and use the Brush tool to apply to the cross area. Again make sure Auto Mask is selected. Simply paint in the areas that we wish to cover.
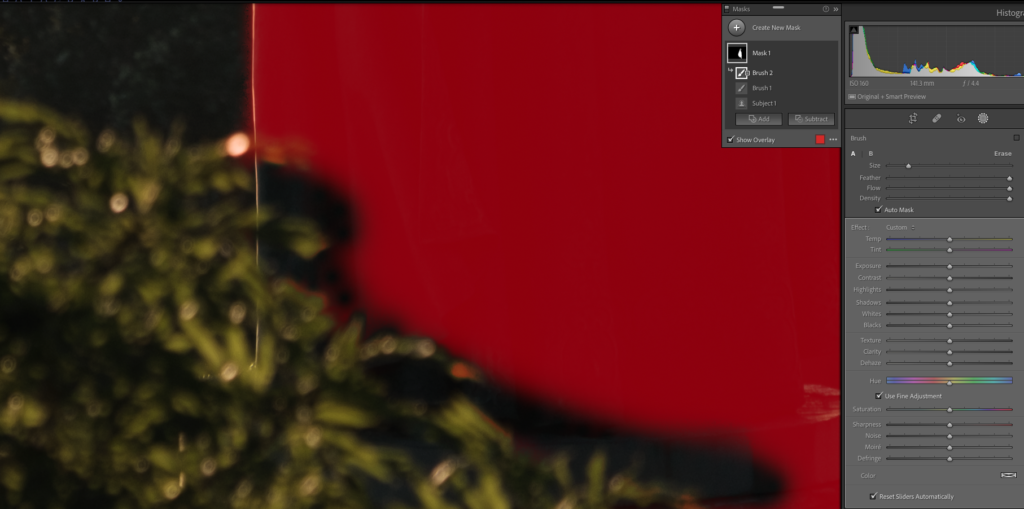
To remove the mask from the foliage at the bottom, we use the Subtract button and brush tool. In this case, as the line between the foliage and statue is not well defined, we turn off the Auto Mask, zoom in, and paint out the excess mask manually. We can adjust the feather, flow, and density of the brush from the main Develop tool panel.
With our subject selected, we can again make adjustments. In this case, I deselected the mask then made the overall image darker and more vibrant. I then reselected the mask and used the exposure and tone sliders to return the definition to the statue.

Other Features Of New Masking Tools
We have only touched upon, perhaps the two most important aspects of the new masking tools in this article. There are however additional features, some of which we briefly introduce you to here.
If you hover your mouse over any of the masks in the pop-up window, you will see three dots to the right. Clicking on this reveals further options.
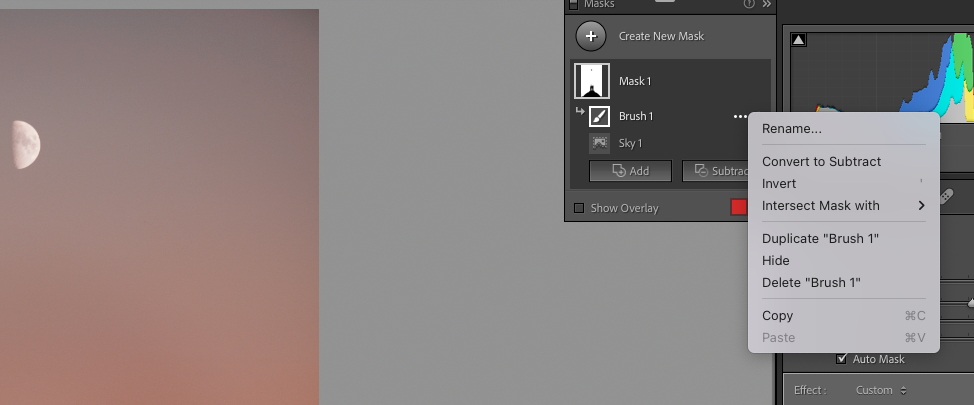
- You can convert an additive brush to subtractive. Invert the mask, in other words completely reverse the mask. There is a powerful Intersect Mask With. This allows you to add a further mask on top of the one you have already created. For example in a sky mask, you could add a linear graduated mask in order to make the sky darker at the top. You can also duplicate, hide or delete any mask from this section.
- The masking tool has also retained the recent additions of Color and Luminance Range. You can further refine your mask using these via the Add and Subtract buttons. For example, if you wished to remove a certain area of color from your mask, you would select Subtract, then Color Range, then click on the area of color that you wish to remove.
The new masking tools in Lightroom Classic have made it much more powerful than previous iterations. It is now getting closer to Photoshop, particularly in the masking elements. This in turn means there is less need to roundtrip images to Photoshop and back.
Further Reading:
- Why Lightroom’s Enhance Super Resolution Rocks
- 15 Best Lightroom Tutorials For Beginners
- How To Use Lightroom’s Color Wheels To Grade Your Photos Beautifully
- Adobe Adds AI-Powered Masking Tools To Lightroom
- How To Mask In Lightroom – A Guide To Selective Adjustments
- Lightroom Classic v11 — Local Adjustment Tools, Masking, Premium Presets, Metadata Updates and More!

