A few weeks ago, Sandmarc reached out to us to review their new Anamorphic Lens for iPhones. You can read that review here. The review highlighted the uses of the lens, it’s advantages and also some of the negatives. Sandmarc thanked us for our honesty and asked if we would be prepared to review another product, their Hybrid Filters for iPhone.
As with our other review, we have not been paid nor have Sandmarc advised us on what to say. Our review is entirely our own thoughts on the product having tested it extensively in the field. Before we go any further, let’s look at what the Hybrid Filter is and why you might need it.
What Is A Hybrid Filter?
As photographers we are familiar with filters and their use. Two of the most common types of filters are the polariser and the neutral density filter. The Hybrid Filter, as it’s name suggests is a combination of the two in one filter.
This ND/Polariser combo is most commonly found in the drone market. Drones cannot take heavy, bulky filters on their lenses but drone fliers often need to use ND filters for video and polarisers of video and photography.

Given the relatively short flight time of most drone batteries, drone photographers do not want to return and land their drones to change filters. Hence the advent of the hybrid filter.
In some respects, iPhone photographers/videographers also need a simple multi-use filter to add to their phones. Many video creators mount their iPhones on gimbals and shoot in a run and gun style. A simple one-stop filter is a valuable asset to their film making. But why do you need a filter at all when shooting on a smartphone? Let’s start with why you need a neutral density filter.
Neutral Density and Film Making.
Anyone with any experience of film making will know about the 180-degree rule. It is this rule that helps make our footage look “cinematic”. The word cinematic is really just another term for smooth. Motion pictures look smooth because each individual frame that goes up to make the film or video has a small amount of motion blur. In the same way that photographers use motion blur to convey movement, video and filmmakers use it to make that motion look smooth.
To achieve this we need to use a slow shutter speed. For the smoothest looking footage we need to use a shutter speed that is double our frame rate. So, if your frame rate is 25 frames per second, we need to use a shutter speed of 1/50th of a second.
As photographers, you will probably see where this is going. In bright light, achieving a shutter speed of 1/50th is virtually impossible even at the smallest apertures. Given that diffraction also kicks in very early on the small sensors found on smartphones, we can see there are multiple issues to getting smooth video footage.
Adding a neutral density over the lens of our smartphone will allow us to drop that shutter speed to a point where we can get the smooth footage we desire.


That’s not the only reason though. The advent of third-party apps gives us a lot of manual control over our still image taking. It's now possible to do ultra-slow shutter speed photography with our smartphones and shoot those images in RAW. With an ND filter, we can get our shutter speed down to suitable levels for this type of shot.
Polarising Filters and Image Taking
We won’t go into a long explanation of what a polariser does for your images as we have done so before. Needless to say, using a polariser has many advantages especially when shooting in bright daylight. Chief amongst them is reducing light reflections in water and foliage. This, in turn, can add saturation to an image and make dull blue skies look much more intense.
The Sandmarc Hybrid Filters.
I say filters because you don’t get just one filter in the Sandmarc box, you get three. They are ND16, ND 32 and ND 64 filters each with a polariser built-in. These represent a 4, 5 and 6 stop reduction in the light. Given that a polariser also removes two stops of light, I am not sure if the ND rating is with the polariser at its maximum deflection.
You mount the filters to your iPhone using a clip. This is placed over the camera lens and the filter is screwed into it. As I mentioned with the anamorphic lens, this does take a little of the screen real estate from the display on my iPhone 8, more if you are using phones with smaller bezels such as the iPhone 11.
Speaking of the iPhone 11, I noticed that both the clip and the filters are quite large. This I suspect is to cover the dual and triple-lens set up of newer iPhones.
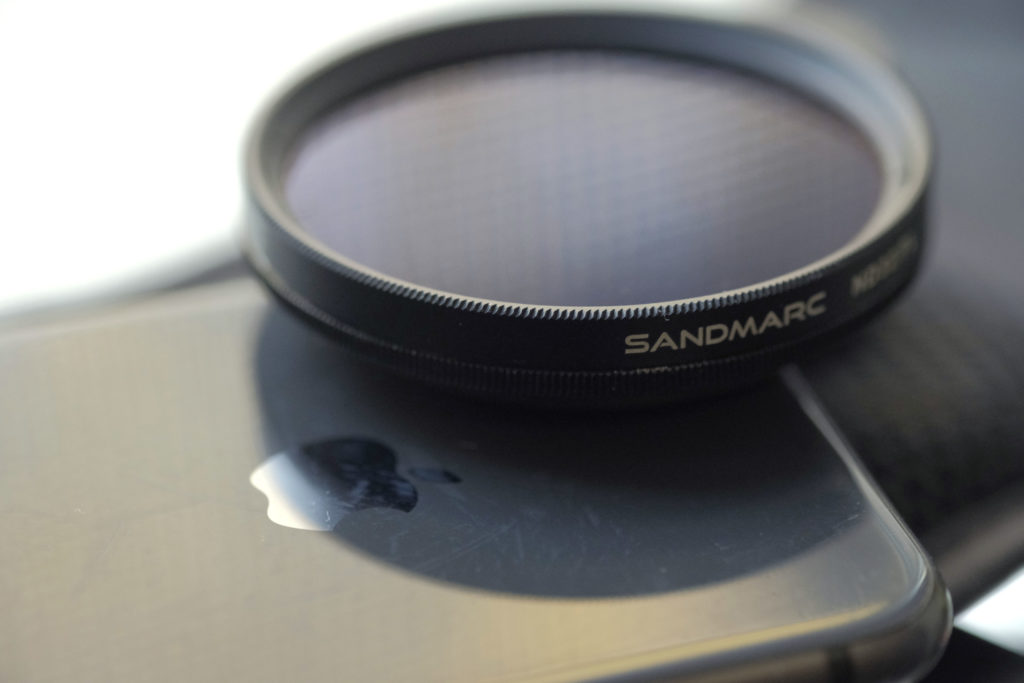
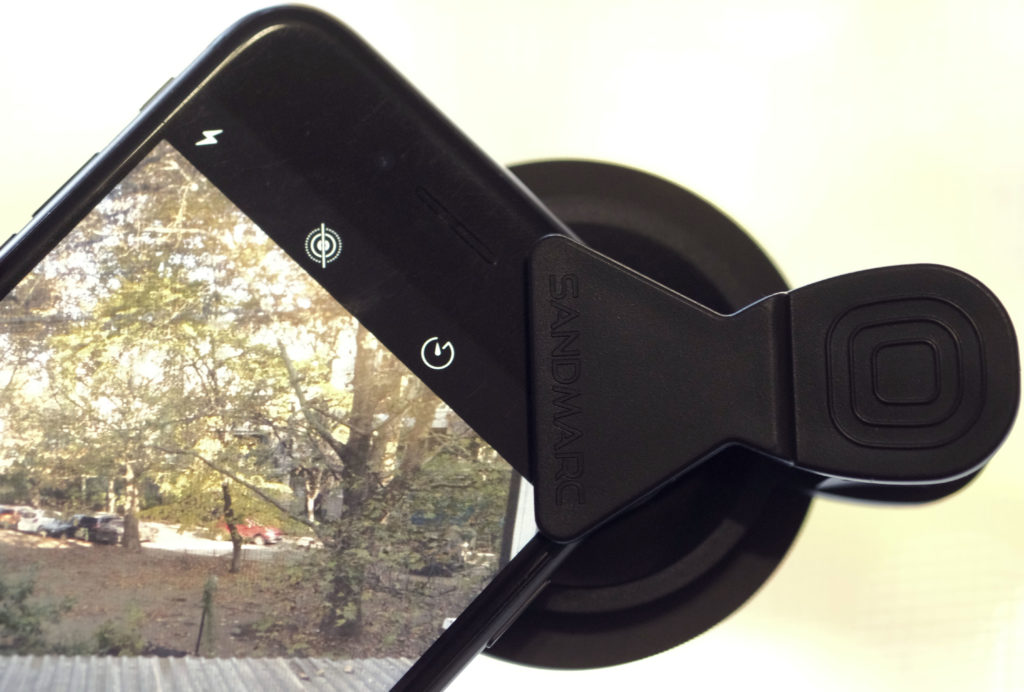
The filters come in a nice foldable filter pouch with space for each of the filters. The clip can be attached to the outside of the pouch.
The filters are well made, the outer ring is made of metal. This is mounted to the plate with a filter thread on it. The plate appears to be a sturdy plastic rather than metal. One surprising aspect is that the filters are much larger than than the plate. The filters can also be attached directly to their anamorphic lens as they share the same filter thread diameter.
The Hybrid Filters In Use.
Starting with the neutral density side, I did some test shooting a fountain. The motion in the water is a good way to demonstrate the smoothness of footage. I shot on a bright sunny day around midday and without the filters, the iPhone was giving me around 1/1000th shutter speed. Using the ND32 I was able to drop it down to 1/50th with a reasonable aperture. I used the Filmic Pro app as this give a lot more manual control over the camera.
The results were very good. The footage looked smooth and fluid yet remind sharp. Perhaps the most important thing to check with neutral density filters is colour shift. Cheaper filters can cause significant colour cast problems. I am pleased to say the all the Sandmarc filters remained close to neutral under varying conditions.
When shooting stills with the polariser you need to consider the effect of the neutral density to your shutter speeds. For most daytime shots, the ND16 will be the best as you will not reduce your shutter speed too low and introduce camera shake. This can be a real problem because even the ND16 is losing you 4 stops of light. A simple glance of your iPhone screen may not reveal camera shake so you should zoom in to check closer. It's also best to use a photography app that will show you the shutter speed such as Lightroom Mobile.


The polariser works as it should reducing in foliage and punching the blueness of the sky. I feel that the polariser does not work as well as a stand-alone version. Shooting through Lightroom Mobile in DNG RAW the files look a touch muddy compared to no filter at all. This may be due to the general flatness of the RAW file and indeed the images do punch up better in post-production. It may also be that the camera's exposure meter is underexposing slightly with the ND/Polariser on.
One thing to be aware of, especially when attaching the filters to single-lens iPhones is to make sure the filter clip and filter are covering and sealing the iPhone lens. It's quite easy to position the clip so that light leaks through the back of it and onto the rear of the filter. This manifests itself in internal lens flare. This might be very obvious if the filter is very offset, however it can be quite subtle if the filter is only slightly missing the side of the camera. It’s something to look out for when setting the filter up.

Overall the Hybrid Filters are a useful tool for both iPhone photographers and videographers. Like any compromise there are issues. You need to be careful of your shutter speed even in bright light using the lowest density filter. If shooting manually I would tend to shoot to the right a touch to avoid any muddiness.
When shooting as a ND filter, I would also tend to dial out any polarising effect and concentrate purely on lower the shutter speed. In this respect the filters give a very neutral tone, especially to your video footage.
Despite this, the issues are minor and if you are aware of them and are looking to get more cinematic footage or better-looking stills from your iPhone, they would be a good investment.


1 Comment
Nice review…polarizers shouldn’t introduce noise the way it did in the blue sky in one of the shots…why do you think that happened?