Is there anything that can’t be fixed in post? Thanks to the brilliance of Lightroom, Photoshop, and other similar applications, one could easily surmise that the answer to that question is a resounding no. Crooked horizons, over/under-exposure, excessive noise — all relatively easy to remedy. You can even remove the people cluttering up your shot of a famous landmark or swap out one sky for another. The list of manipulations than can be made with software is extensive, but there are certain things that simply can’t be compensated for in post-processing. Among those things are blurry images. I don’t mean shots that require a bit of sharping, I mean shots where it’s painfully obvious that you missed focus.
Out of focus shots are frustrating. Even worse, there’s no software out there that can take an unfocused image and put it in focus. When you miss, you miss. So it’s better not to miss. Here are some things you can do to help ensure you get sharp, in-focus shots every time.
Motion vs. No Motion
Is your subject stationary or is it moving? The answer to this will greatly affect how you go about capturing the image.
If your subject is stationary you’re not likely to run into too much trouble. Perhaps the simplest way to deal with things is to set your camera to single AF mode and, if necessary, move the focus point to the place on your subject where sharpness is most important. There are times, however, when your camera’s AF system isn’t up to the task, such as when shooting in very low light conditions or when the subject exhibits a lack of contrast (a cloudless blue sky or a solid color wall, for instance). In such cases, if you were to leave it up to the camera, it would just continue to hunt for focus. Should the camera ever lock on to something, it almost certainly won’t be in focus.
Situations like this call for you to take things into your own hands and switch to manual focus. By focusing manually, you are not at the mercy of the limitations of your camera’s AF system. Just know that if your manually focused shots are out of focus, you can’t blame camera.
If your subject is in motion — a bird in flight, your child running in the park, cars racing along the highway — you will want to set your camera to continuous focus mode (different camera makers may use different terminology: AI Servo for Canon, AF-C for Nikon and Sony, C-AF for Olympus — consult your manual if you need to). This focusing mode keeps a subject in sharp focus as you track it with your camera. Once you depress the shutter button half way, the camera will lock on to the subject and continue to adjust focus as they the subject moves so that once you fully press the shutter button to take the shot, odds are you will have a sharp blur-free image.
Check Your Shutter Speed
One culprit of out of focus/blurry images is camera shake. And the main culprit of camera shake is inadequate shutter speed. By using a fast enough shutter speed, you mitigate the effects of camera shake, thus dramatically increasing the probability of a properly focused shot. So how fast is fast enough? That depends. A good rule of thumb to keep in mind is the “reciprocal rule.”
For example, if you are using a 100mm lens, your shutter speed should be at least 1/100th of a second. If you’re using a zoom lens set to 250mm, set your shutter speed to 1/250th of second or faster. There is an important caveat to consider, though. This specific implementation of the reciprocal rule applies only to full frame cameras.
In order to adapt the reciprocal rule to crop sensor cameras (APS-C, micro 4/3rds, APS-H, etc.), you have to account for the camera’s crop factor by multiplying the crop factor by the lens focal length. If, for instance, you are using a focal length of 100mm on a camera with a crop factor of 1.5x (commonly used by Nikon, Sony, Samsung, and Fujifilm APS-C cameras) you will need to set a minimum shutter speed of 1/160th of a second (100 x 1.5 = 150, but you won’t find 1/150th on your camera, so go up to 1/160th). The rule isn’t totally fool-proof, and it’s a good idea to err on the side of speed; if, by applying the reciprocal rule, you determine you need a shutter speed of 1/80th of a second, go ahead and shoot at 1/100th of a second unless, of course, that means you will underexpose the shot.
Image stabilization, whether in-lens or in-camera, is an increasingly common feature and can work wonders in terms of allowing you to achieve sharp images while hand holding your camera at relatively low shutter speeds. Image stabilization, however, does not freeze moving subjects and should typically be disabled when using a tripod.
Increase ISO
Don’t fear high ISO levels. I can almost guarantee that you will one day find yourself in a situation where the only way to get a substantially fast shutter speed is to bump up ISO. Just do it. Many cameras will perform just fine up to ISO 3200. You will be happy you got the shot and you can always apply noise reduction on the image during post-processing.
Use a Tripod
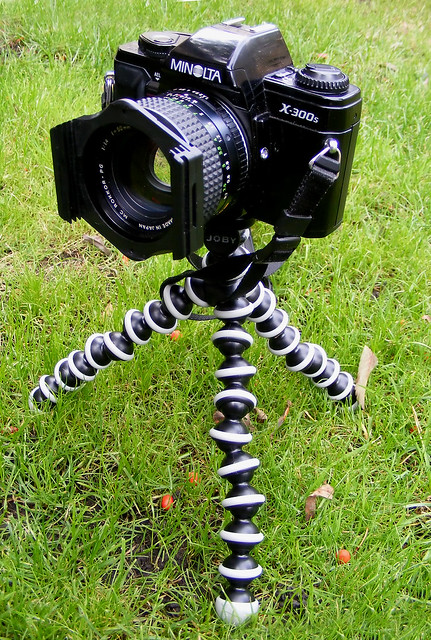
Some photographers don’t want to even think about having to carry around a tripod (I know because I’m one of them), but the fact remains that a tripod is your most effective source of stabilizing your camera. With a good tripod, you don’t worry about camera shake, which means you can safely shoot at slower shutter speeds, which means you can keep your ISO lower, all the while getting crisp, properly focused shots. And not only are there sturdy, lightweight tripods available, there are numerous tripod “alternatives” out there such as monopods and mini/flexible tripods.


3 Comments
Excellent suggestions! I usually forget about continuous focus until after I’ve ruined a few shots, but I have started using a monopod more often than not, and it has helped a great deal.
I’m struggling to focus reliably in low light situations.
Any tips?
Depending on what your subject is and whether it’s in motion you try the following:
-Tripod, beanbag, etc.
-Up your ISO
-If you are shooting stars, the 500 rule (divide 500 by your focal length. Example: 24 mm lens 500/24= 20 second exposure at f/8. Adjust accordingly).
-Set your hyperfocal. Or use a distant light source (moon, a lit up horizon, etc). Once you set your focus, turn off the autofocus.
-Use an external light source (flashlight, phone, etc) to light your subject. Once you set your focus, turn off the autofocus.
– If you using a tripod, turn off IS (Image Stabilization)
– Watch for wind or other vibration if using a tripod.
– Keep your shutter speed at least that of a you FF focal length. Faster is better. Much more if your subject moves (wind, animals, people, handholding in low light, etc.)
– Use a wider lens. A 24-70 is much more forgiving than 70-200.
– Use fast glass or a prime lens. 50mm f1.8 is a very affordable lens (around $100-$150) for most manufacturers.
-Up your aperture at least 1-2 full stops from the bottom. If your lens is a f4-5.6, try shooting at f8.
– Use Live View to set manually set your focus. Many cameras have this and it is a nice way to nail your focus.
I hope these help.