Modern cameras are immensely complex pieces of electronic and mechanical engineering, however the basic controls that we, as photographers require, are few. For this reason, today’s cameras are designed in much the same way as they have been for decades, with access to shutter speed, aperture, ISO, focus and exposure modes readily accessible via dials, and buttons on the camera’s body with the more complex and less often required controls managed via a menu system. Today we are going to take a look at some typical settings you might find in the menu system and how to navigate it.
Menu systems vary by camera but the basic navigation and options are similar. This article is a core component of improving your camera craft. If you would like a quick, downloadable guide then you should take a look at this:
How to Access and Navigate the Menu
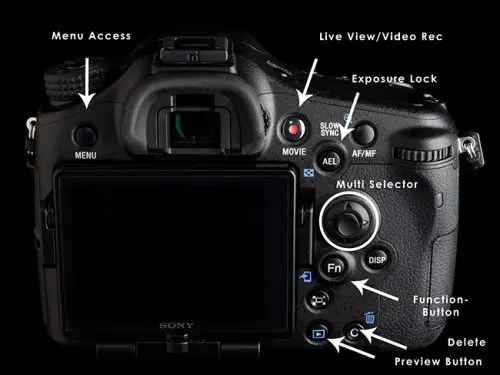
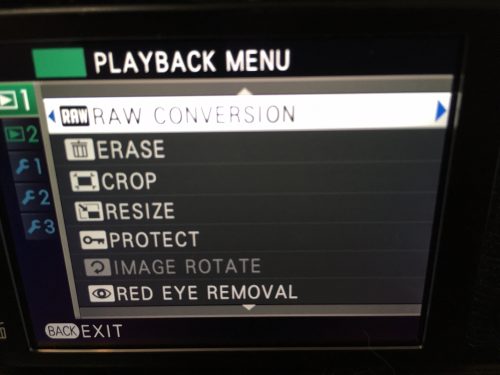
Accessing is usually pretty obvious – it’s done via the menu button. However, there are usually two different menus you can access – the shooting menu and the playback menu. The former is accessed when in shooting or normal mode, the latter when you press the menu button in playback mode, typically when reviewing a photo on the LCD screen.

Navigation is done via the joypad or multi-selector on your camera’s back. Think of the menu system as a vertical version of the one you use on your computer. Whereas on your computer your main menu selections run across the top of the screen, on most cameras they are in the form of icon tabs down the left side of the LCD.
To select a menu tab you use the up or down pads on the multi-selector. To access the options within that tab you press the right button and to go back the left button. Some menu options will have further hierarchical options accessed by pressing the right button again. To confirm a selection you press the the middle button inside the joypad. To enter that selection you press the OK button. Some cameras provide a ? button on the back, pressing this will give further information about the selection option.
Mastering the Shooting Menu
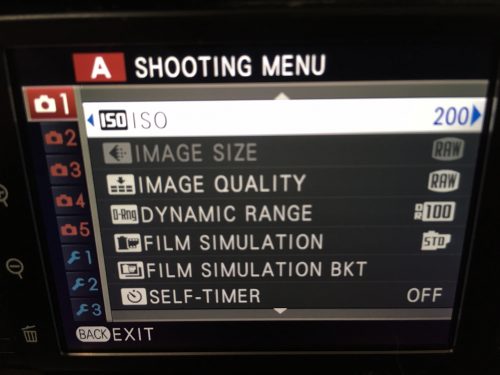
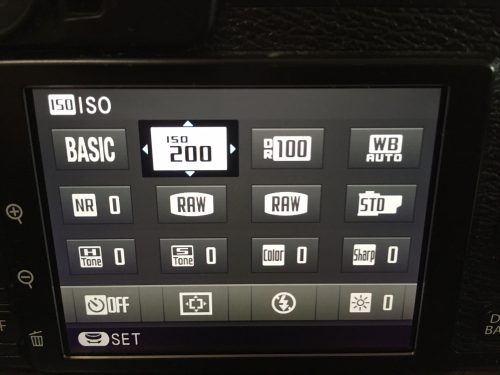
Typically the first of the menu tabs, this will give you access important options such as image file types, image size and resolution, white balance, ISO and auto ISO settings, video settings and HDR modes such as Nikons’ Active-D. Also found in the Shooting menu are the quick access modes or templates such as Nikon’s Shooting Banks.

Because there are a lot of options contained in the shooting menu, you will find that you will need to scroll down the screen using the down button to reveal further options. You will usually see that to the left of the screen the shooting menu options will labelled A, B, C or 1,2, 3 denoting which screen of the set up menu you are on. Each screen will generally group together common functions, for example the first screen, A or 1 might cover the files and resolution options, screen B or 2 may be how the image is output such as colour balance, ISO and sharpness/contrast controls. Screen C or 3 may cover the autofocus and autoexposure modes. The more important functions will be in the upper part of the menu and the less used functions such as multiple exposure and framing outlines will be towards the bottom.
On many cameras you will also be able to set up custom shooting modes here. For example on recent Nikons these are called Shooting Banks and allow you to preselect many of the options in the shooting menu and store them as a quick access option. You will be able to store several of these templates.

Don't Forget the Setup Menu!
Like the shooting menu, the setup menu will cover several screens with the most accessed options found in the upper screens. The setup menu is found beneath the settings menu. Once you have reached the last of the settings screen press the down button once more to access the first of the setup menus. Typical settings here include Date/Time, Time Zone, Language, LCD Brightness and Power Saving. All the settings in this menu are to do with the setting the camera up rather than shooting.
On more advanced cameras you can also define secondary functions to some of the camera’s buttons.
At the very bottom of the Setup menu you will find the Format option. It is placed here to make it both difficult to access accidentally but also to find quickly. You can typically access it quickly by pressing the menu button and then pressing the up button once. This will bring you to the bottom of the Setup menu and negates the need to scroll all the way through the other menu screens.
Playback Menu Can Be Very Useful
Although you can access the playback menu directly when in playback mode, on some cameras it is also found in the main menu system. Typical settings found here allow you define what you see on the playback screen such as a histogram, focus points exposure information and highlight clipping. One useful option is the Rotate Tall setting. This setting allows you to change from displaying portrait format images upright on the LCD screen to rotating them 90 degrees and hence displaying full screen.

Your camera’s menu system is a deep and powerful operating system in its own right. By learning to navigate your way through the complexities, you can set your camera up to perfectly suit your shooting style. By mastering it, your camera craft improves dramatically and your shooting options expand greatly.


