Black and white image, we all love a beautifully created one, irrespective of the genre? Black and white photographs evoke our emotions, be it the stunning landscapes captured by Ansel Adams or the intensely emotional photographs of Don McCullin.
These days of course, outside of overpriced monochromatic sensors, all our cameras shoot in color. That means, that any conversion to black and white has to be done in post-production. The exception of course is using a black and white film profile, in camera, such as Fuji’s Acros on their X series cameras. However, that’s often not the best way to produce the best black and whites.
A black and white shot should be conceived before you press the shutter button. It’s actually the best shot in RAW, giving you ultimate control on how you convert that image to black and white. So what do we need to do in post-production to get stunning monochrome images? Today we are going to look at the best monochrome practices in both Lightroom and Photoshop. These practices will also be pretty similar in other apps.
Lightroom: Basic Conversion
The first thing to note is that you should not simply desaturate the image. This applies to both Lightroom and Photoshop. In Lightroom, the best way to start is to apply one of the default black and white presets.
This is done by taking your chosen image into the Develop Module. Then from the Presets panel on the left side, open the black and white list and you will see a number of different presets such as Landscape, High Contrast, and Flat. By simply rolling your mouse over each preset you will see a preview of that particular look. To apply the preset, just left-click on it. The alternative is to use the Black and White button in the basic section of the Develop Module. This will simply convert to black and white but with no adjustments.
Once you have applied the preset, in this case, High Contrast, you can make the basic adjustments. Start off with your histogram. In this example, we are clipping the blacks:


I correct this by lifting the black slider to bring the left of the histogram inside the graph. I can also lift the whites to the right a little, which will further punch the contrast. Dehaze is a great tool for black and white images and in my shot, I have added just a little. This boosts the mid-tone contrast, particularly in the sky. I have also slightly raised the shadows to bring a little detail to the darker buildings. Lastly adding a little texture can enhance a black and white nicely. The texture is more subtle than Clarity and to my eye works better.

Lightroom: Advanced Tweaks
The best tool for advanced tweaking of your black and whites is the HSL or Hue Saturation and Luminance panel. As you can see because we have converted to black and white, the panel is now simply called the black and white mixer, not HSL.

For our image, we are going to make the sky punch more by moving the blue slider to the left. This also adds contrast with the white clouds. We can further raise the shadow areas of the dark apartments as well. To do this, I select the color picker tool top left of the Black and White Mix panel. I place that over the apartment buildings and click and drag upwards to lighten.
One further advanced tweak we can do is to add some grain. This can be done using the Grain sliders in the Effects panel. Here I have added a subtle but noticeable grain effect, giving the image a more film-like black and white look.


Photoshop: Basic Conversion
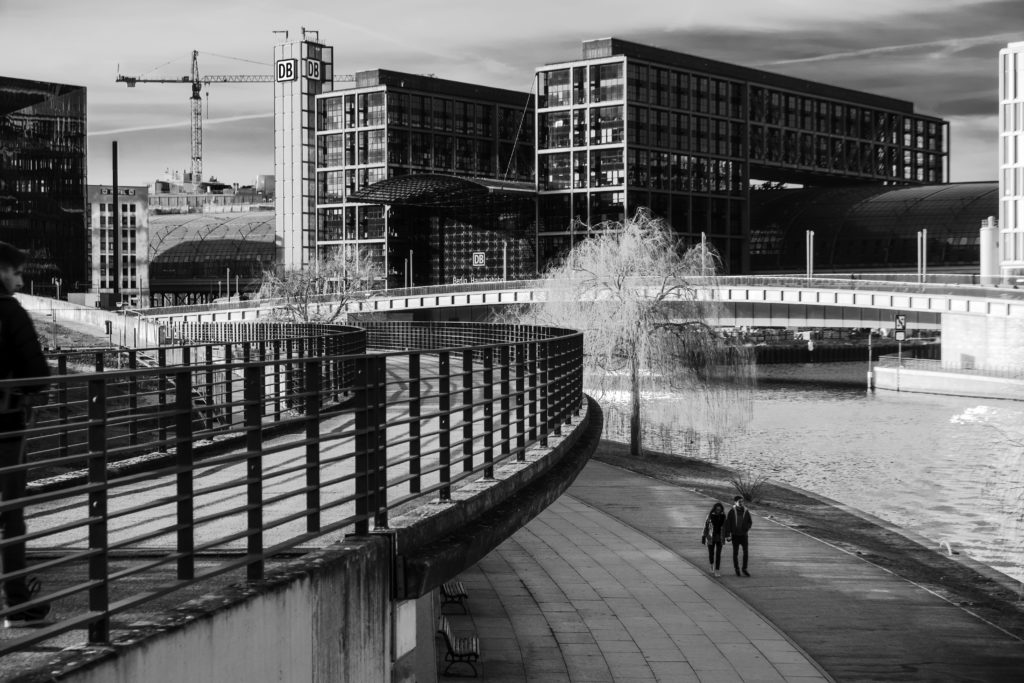
Heading over to Photoshop, we do our initial conversion in Adobe Raw. Again we can use the black and white preset, found towards the bottom of the toolbar on the right side of the Adobe Raw App. In this sample image, I have chosen B&W Landscape.
The basic adjustments are pretty much the same as you would do in Lightroom. Adobe Raw has become a powerful and similar alternative to Lightroom with similar tools.


In our image we expanded the contrast by moving the Whites and Blacks sliders to the edge of the histogram.
I have used Dehaze again but in this case, I have lowered it. This is to reduce the mid-tone contrast in what is a pretty contrasty image. This has helped lift the shaded areas and highlight the people walking by the river. Because there is already a lot of detail in the image I have not used Clarity or Texture to enhance that detail.
Photoshop: Advanced Tweaks
We can stay in Adobe Raw to apply some more advanced tweaks, again in a very similar manner to Lightroom. I again used the Black and White mixer to enhance the sky. I reduced the blue slider to darken the sky and the green slider to lighten some of the foliage in the shot. Once happy I clicked open to bring the image into Photoshop.
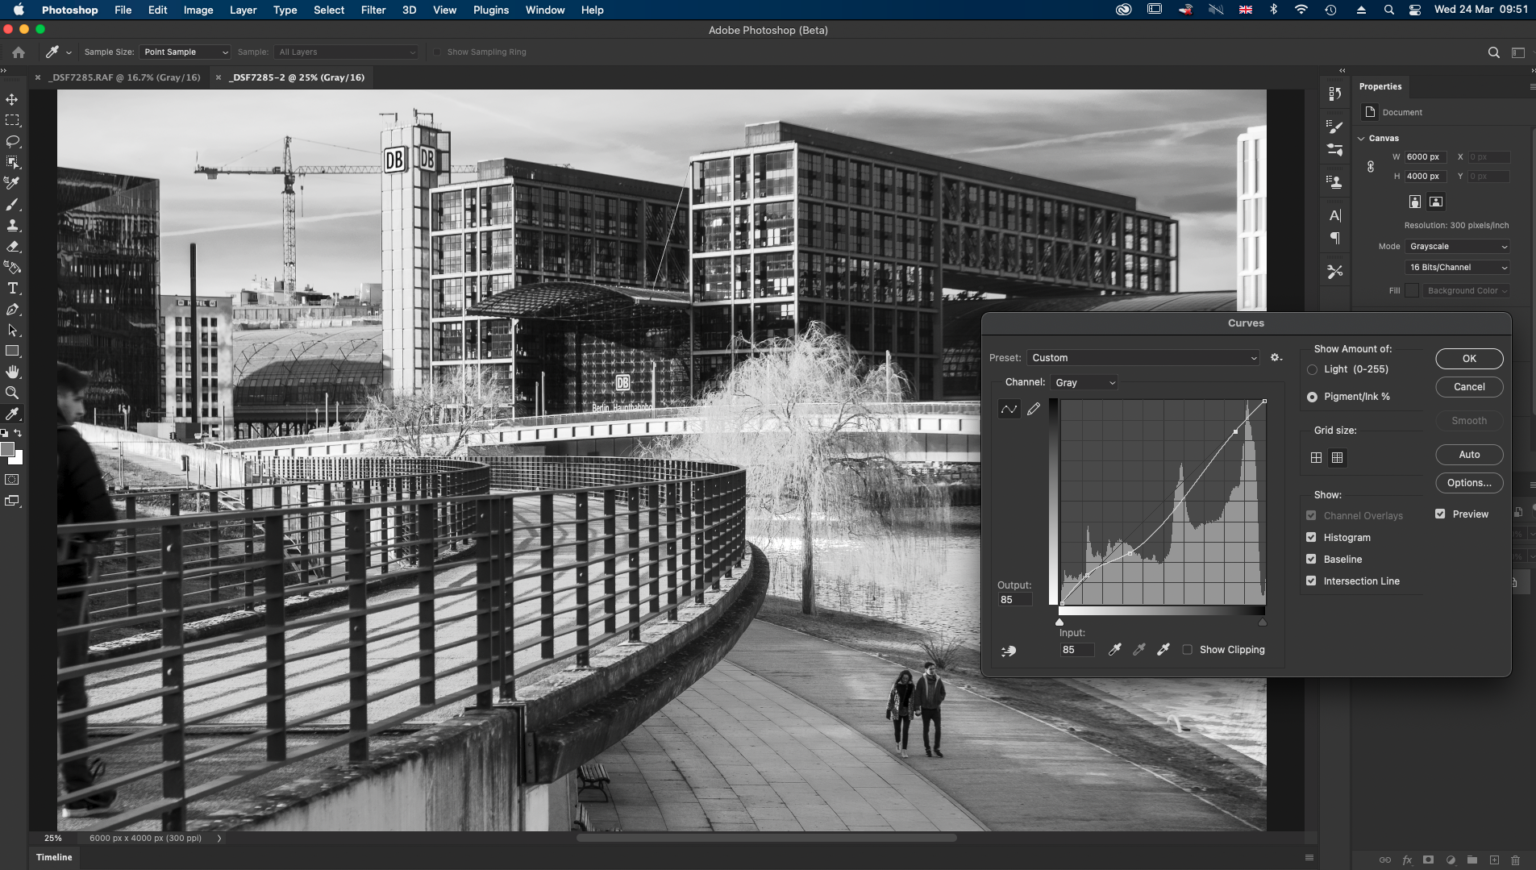
My main tweak in Photoshop is to use the Curves tool to enhance the contrast. Here I have created an S curve that has boosted the shadow regions, further highlighting the walker. I have also lifted some of the shadow areas of the modern buildings to bring in more detail.
I have also used the Noise filter to add a small amount of Gaussian Noise to the image. Again this gives us the black and white print feel.
As with most things photographic, there are many ways to achieve a look using Lightroom or Photoshop. For black and white images the presets are a very good starting point. They allow you to visualize how the image will look without committing to the changes.
From there, use the basic tools to fine-tune the look of the image and the mixer tools to increase or decrease the tone of specific colors. You can then add grain, or reduce noise and sharpen as you require.
The post-production of black and white is an infinitely diverse art form. Choose your images carefully and you will soon find yourself engrossed in the subtle art of black and white post-production.


