
Understand The Significance Of Black And White Street Photography
In these digital times, black and white photography (or monochrome) happens later, during post-production, and not directly in the camera (unless you have a tweaked sensor or the Leica Monochrom camera).
We shoot in the way the camera has been engineered to work, and it has been built to see color and render it the best way possible. Today I'm going to share nine tips that will positively impact in your final black-and-white image conversions and how to show off your black and white street photography.
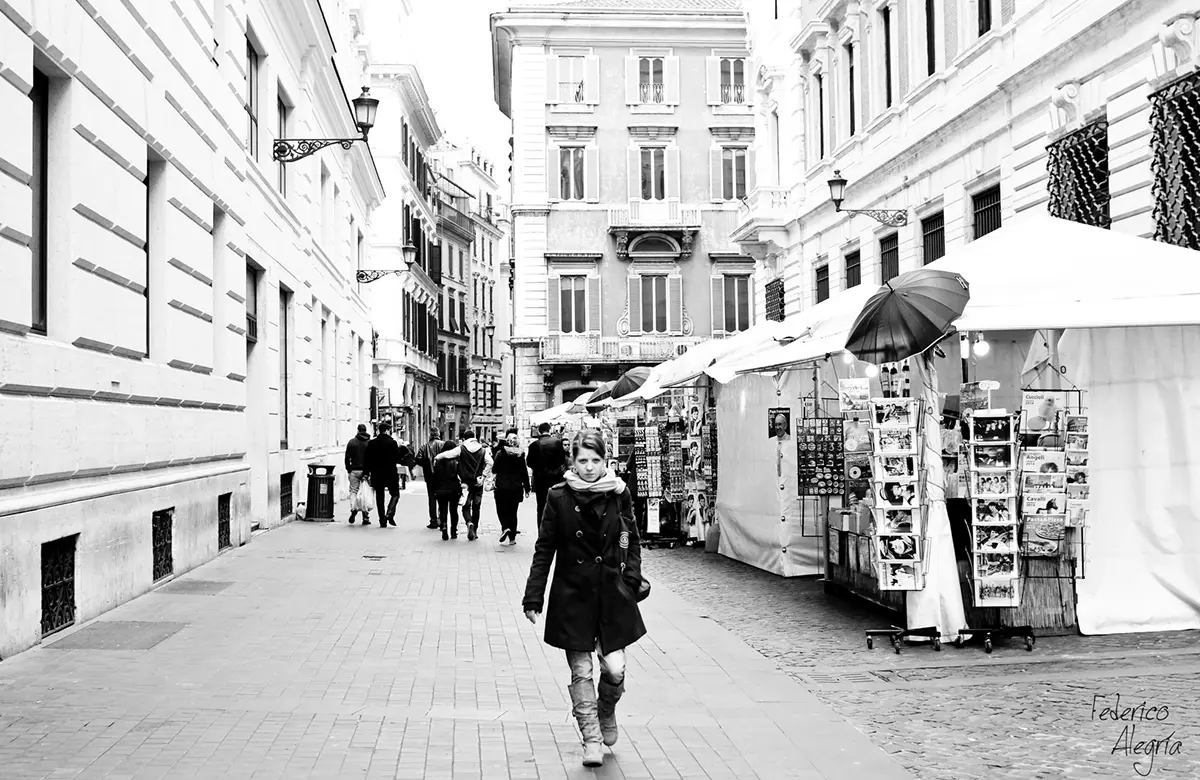
Street photography has a great relationship with monochrome, and personally, I think this because of black-and-white’s ability to convey a message without the distraction that color may introduce into a scene. Thus, often making black and white street photography an excellent outcome.
We have to remember as photographers and viewers that street photography happens in situations where we have little control, and sometimes the colors in the scene may not be the best palette.
Therefore, everyday colors can detract from the impact of the message and the viewer’s response to it.
Let’s say we are using Adobe Lightroom. We just press the letter “V” in Develop mode – and let the fun begin.

One of the biggest mistakes in black and white photography is thinking that we can render a decent monochrome image inside the camera. Unfortunately, this is not yet possible. Again, you'll need to shoot in RAW format to retain all the information that your powerful sensor can capture and create.
Many cameras have creative filters or modes that allow you to “see a monochrome or sepia image” on the screen on the back of your camera, but this has little use in serious photography unless you want to see how the scene will look when you desaturate the image.
Before we get stuck into point #1, have a quick look here…
Get the most awesome guide for Black and White photography with this eBook from pro photographer and author, Kent DuFault: “Better Black & White”.
“This is what all photographers ought to know about black and white photography…”
1. Always Shoot RAW.
Your image is captured in color, and you can later convert the image into a monochrome representation of the eight color channels you can enhance in RAW editing software.
Street photography doesn’t allow you to waste time. You have to act swiftly. So even trying to preview your black and white image inside the camera will make you lose precious time.
2. Enhance Contrast With Color Treatment

Black and white photography gives you the advantage of being able to increase or decrease contrast with a much broader scope than what you can get with color photography, without obtaining eerie results.
One of the best ways to deal with contrast in black and white pictures is to use the color mixer, or the color channels, in order to make certain colors darker or brighter.
Black And White Street Photography Key Observation
It is very common to have adjacent colors in the streets, so is important that you always adjust each image's white balance so you’ll have less trouble getting accurate color control.
- The logic is pretty simple: Imagine you have an image with bright red colors and bright blue colors. Increase the red slider, and decrease the blue slider, and you'll start to see contrast between two colors that apparently had the same vibrancy and presence in the image.
The best way to grasp this is to practice and practice – but trust me, it’s the best way to start giving your pictures more contrast.
3. Use Clarity In Your Processing
There is a poor understanding on the web about the “clarity” control in Lightroom. Many people say that it is the solution for getting sharper images, and some even dare to say that it is the solution to poorly focused images. Unfortunately, poor focus has no corrections (yet).
Clarity is a control that allows us to tweak micro-contrast. What is that, you might ask? Well, it is very simple. It is the contrast of the light in zones where dark tones clash with light tones. It can create an illusion of sharpness, but is not a sharpening tool.
4. Capture Scenes With Complementary Colors
Complementary colors are easy to deal with because they can be contrasted with less trouble than adjacent colors. It is hard to control colors on the streets, but challenge yourself by capturing scenes with aesthetically composed colors.
You'll be able to contrast them more easily in post-production.
5. Define A Workflow
Post-production is about workflow at its best. Try to define a well-structured and standardized workflow so you can do things according to a structured logic that will help you get the best results.
Always start with the white balance, and continue your journey in the best way you can find until you get to the final deployment of the digital image.
6. Learn About Cropping

Cropping in post-production is a fantastic tool when done properly. Learn to crop with aesthetics in mind. Whenever you crop, maintain standard proportions (4:3, 3:2, 16:9, etc.) so you'll have less trouble when showcasing your work through the web and in prints.
Every time you decide to crop, try to justify the decision to yourself. Don’t just crop because you can. Put some thought into deciding why you should leave that portion of the image unseen.
7. Learn About Using Perspective Tools
Perspective tools are a great help when you need to correct vertical or horizontal perspectives or the point of view of an image.
Since streets are hard to perfect, we can tend to capture images with perspectives that will negatively affect our images. Learning about these tools will make your images more appealing to the eyes.
8. Compose With Aesthetics In Mind
Every time you aim your camera at a scene put an extra effort into the composition. This might not be strictly about post-production, but when you compose correctly, you’ll be able to spend less time in front of the computer screen – and more time shooting at the streets.
9. Use The Brush Tool & Gradient Filters
Much has been said about the similarity of Adobe Lightroom with traditional darkrooms. To me, the brush tool is the most representative aspect of this comparison.
The brush tool allows you to make powerful corrections in your black and white street photography of:
- Tone,
- Contrast,
- Saturation,
- Sharpness,
- Clarity, and many others elements.
The brush tool is like a mirror of the exact workflow you've been applying to the image.
One master from whom I learned much about DNG files told us that the brush tool in RAW developing software is like having acupuncture lighting in our images. It’s like having precise sources of light helping you achieve your desired results.
These filters are like the brush but applied to whole sections of the image. Therefore, they can give much more organic results to the final development of the image.
Get the most awesome guide for Black and White photography with this eBook from pro photographer and author, Kent DuFault: “Better Black & White”.
“This is what all photographers ought to know about black and white photography…”
Further Resources
- Have You Got Your Monochrome Techniques Nailed In Lightroom? by Jason Row
- 5 Things Not To Forget When Planning For Black And White Photographs by Federico Alegria
- Here’s How to Decide When a Photo Should be Black and White by Jason D. Little
- How to Use Channel Mixer in Photoshop to Create Amazing Black and White Images by Jason Row


3 Comments
I disagree about an image taken inside a camera being unusable. When I started photography a few years ago,I had a Canon T3I and the “nifty fifty”. I had a lot to learn,being self taught. I took a photo of my wife’s make up brushes in there container and I used the white toilet lid for a stand. I never expected anything special but what I got ,I thought,was really good! However, I still thought it was just because I didn’t know what “looked” professional or great but I posted it to a few sites anyway. I received 3 orders for a print and canvas. I also had a couple guys that are published and one was sort of mentoring me tell me what a great job I did in post. I told him that I did nothing at all to the photo and he just said ” huh. Didn’t know Canon had the capability to render a photo that good”. I had to look up the word render ,that’s how new I was. I read your article twice thinking I had read it wrong.
That is great Mate, but for me, development is almost always necessary, and I enjoy it a lot.
The thing is that Monochrome mode inside the camera, renders a desaturated JPEG, not a true channel conversion of the colors into monochrome.
It works almost like the mini-labs of those express film development services back in the days of film. Those machines did a quick development with very small amounts of care in order to get film developed. JPEG inside a camera works the same way, and creative modes take this premise even further.
Except for Fuji film simulation.