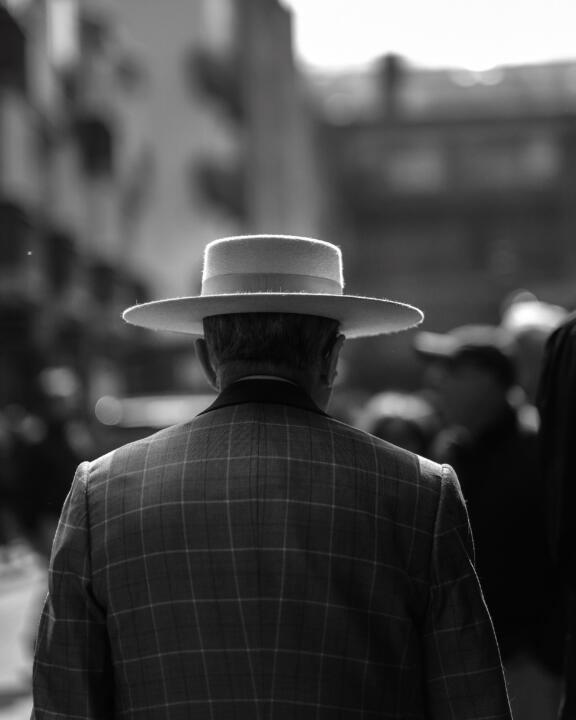
There's something about a black and white image isn’t there? A good conversion to black and white can turn a mundane color image into something with impact.
But what are our options for turning a full-color digital image into a great black and white one? Many of us use Adobe’s excellent Lightroom and today we are going to look at how to convert to monochrome using this program. Like with Photoshop, there are a number of ways to turn your image monochromatic and also there are a number of techniques you can employ to give that image further impact.
Let’s start with how to remove the color from your image. As with all black and white conversions, start with an image that will look good in monochrome and make some simple tone and exposure corrections before conversion. A quick tip here is to press the V key. This will show the image as a black and white preview.
The Most Basic Conversion – This is Technically Considered a Starting Point:
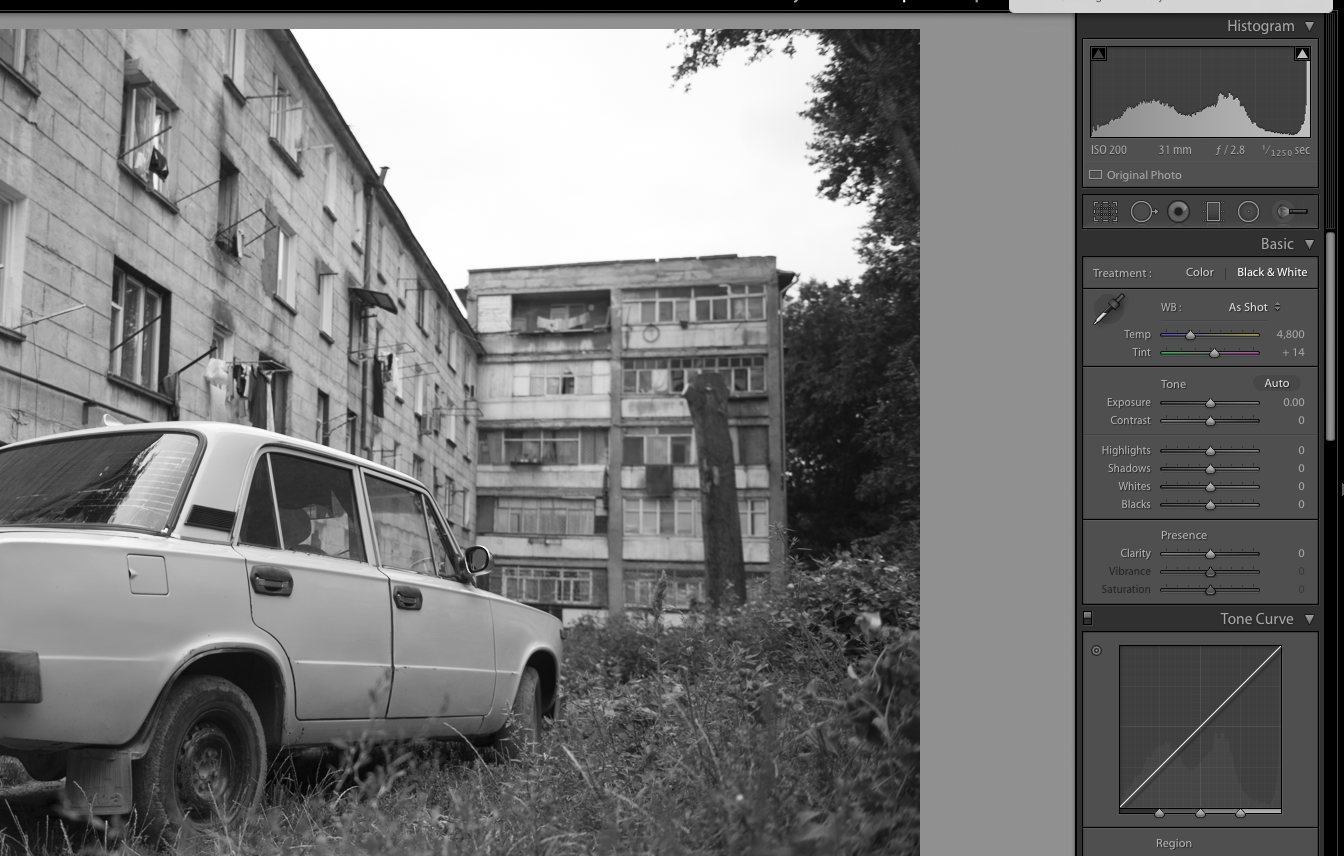
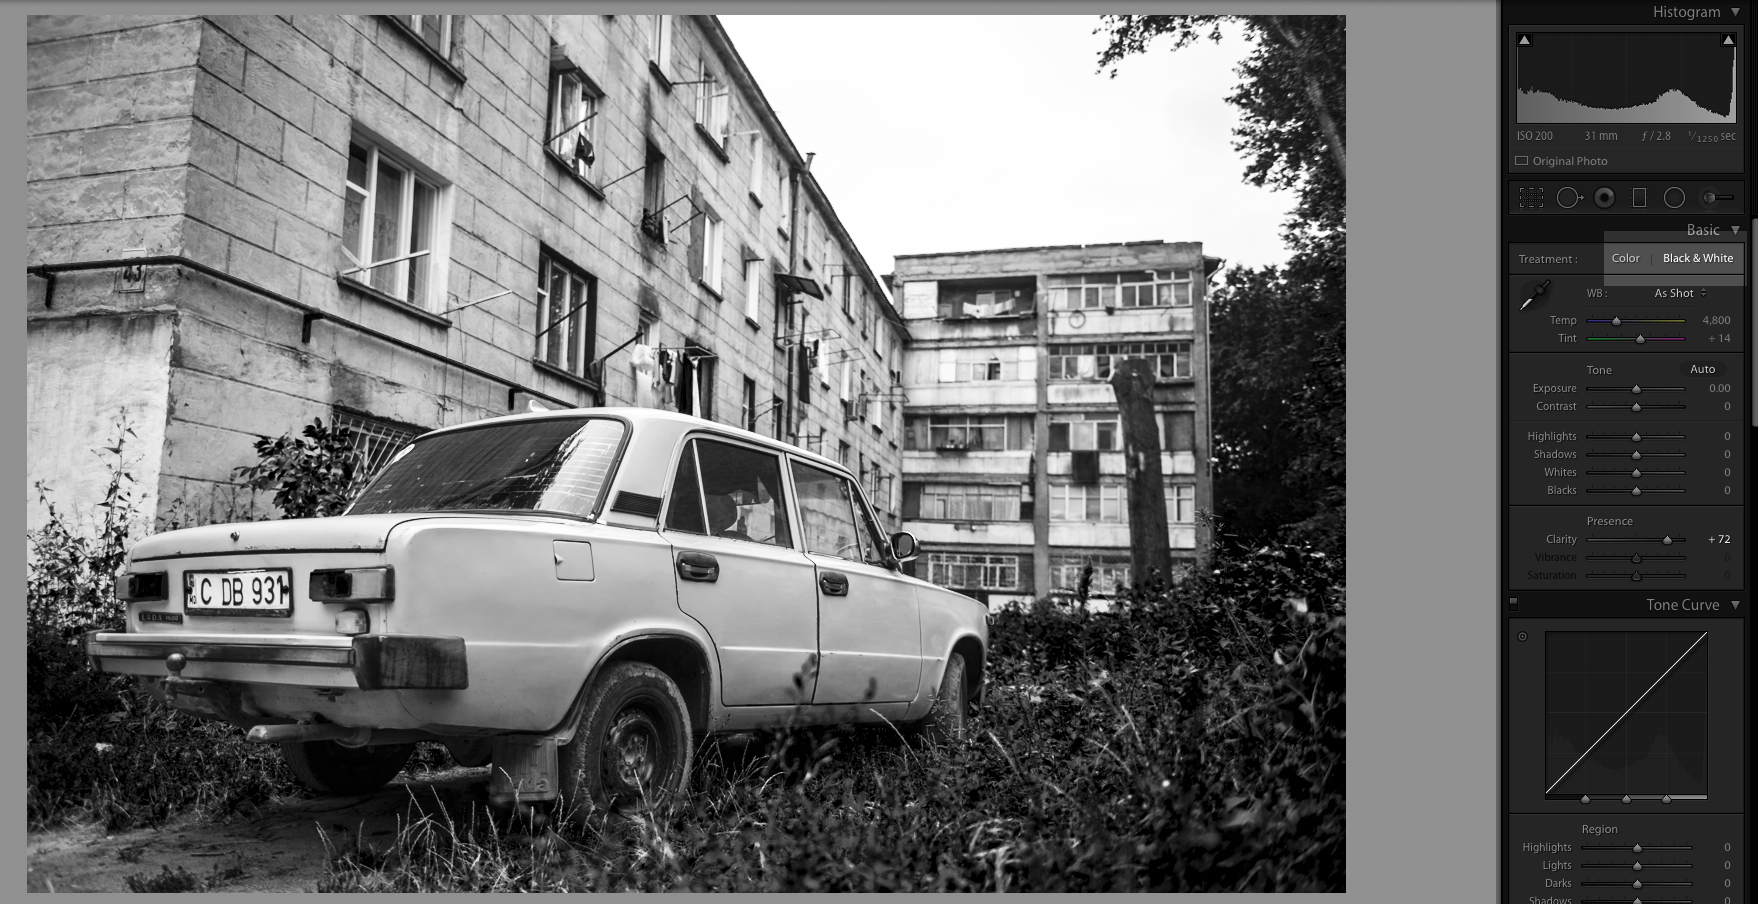
The simplest way to convert to a black and white image is to use the Black and White tab in the Basic section of the Develop Module. This simply removes all the color information and you will notice that the Vibrance and Saturation sliders become greyed out.
Tools To Get Started With – HSL/Color/B&W:
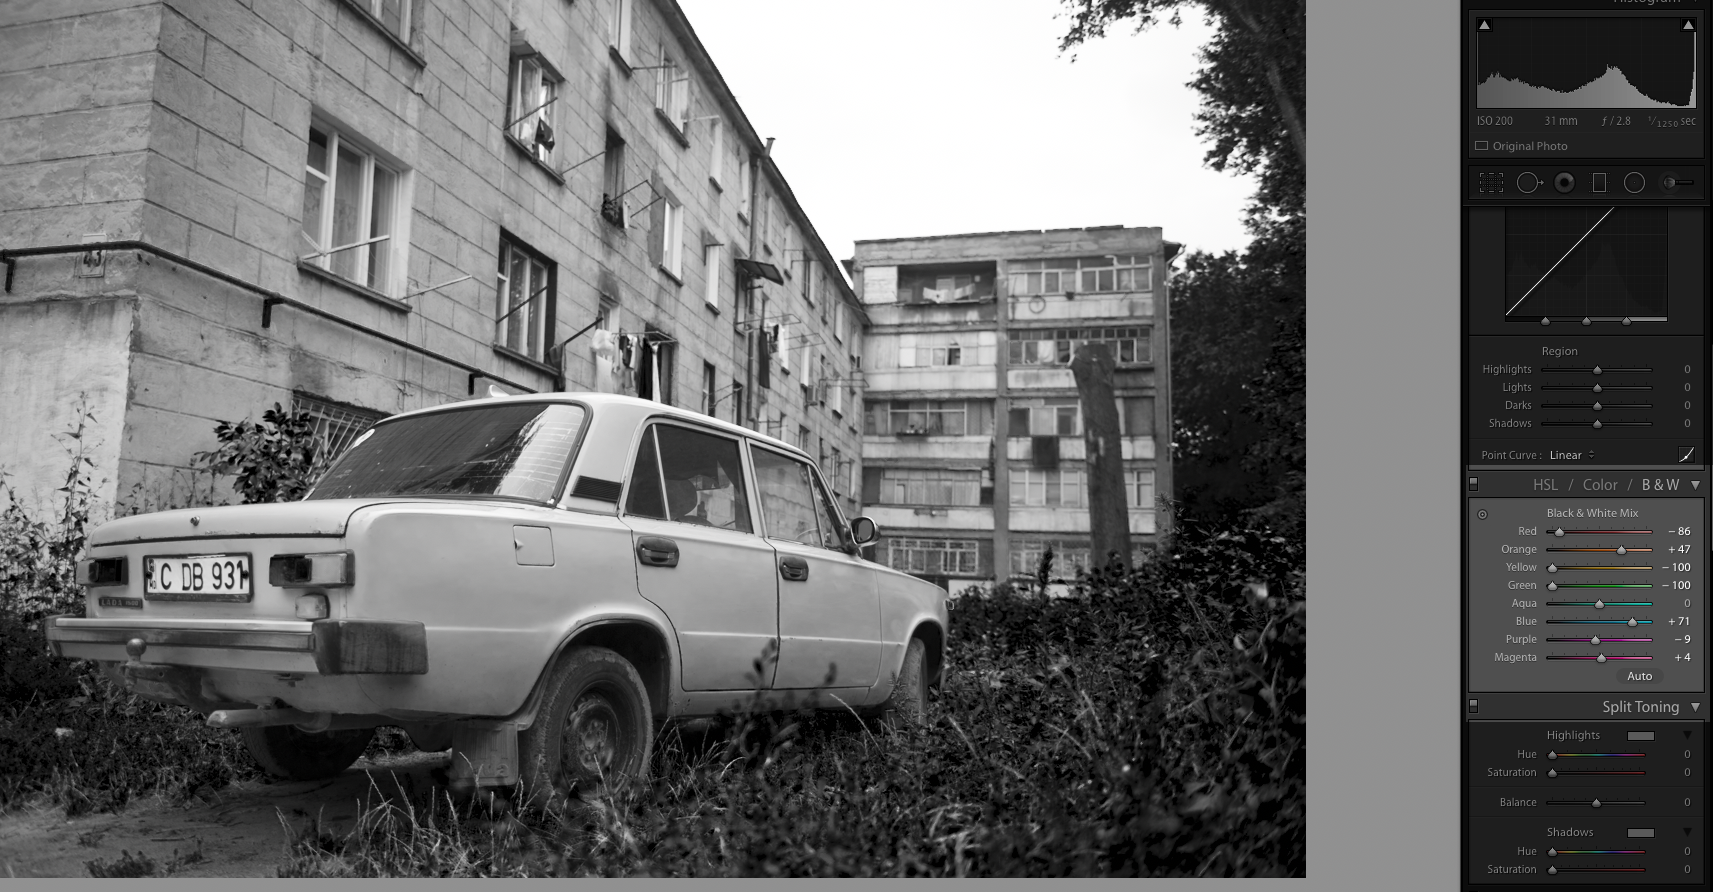
There are two tools here that you can use to convert to black and white. Under the HSL tab you can select Saturation and desaturate all of the primary and secondary colors. This can give you more control if you would like to create a monochromatic image that has, for example a hint of color or to isolate a single colour on a monochromatic background.
Better still, for pure monochromatic images we present the dedicated B&W tab the HSL/Color/B&W section. This will convert your image to monochrome but keep the colour channels intact. The advantage of this is that it allows you to control the tone of each individual color by lightening or darkening it.
Use Presets To Convert Your Images To Monochrome:
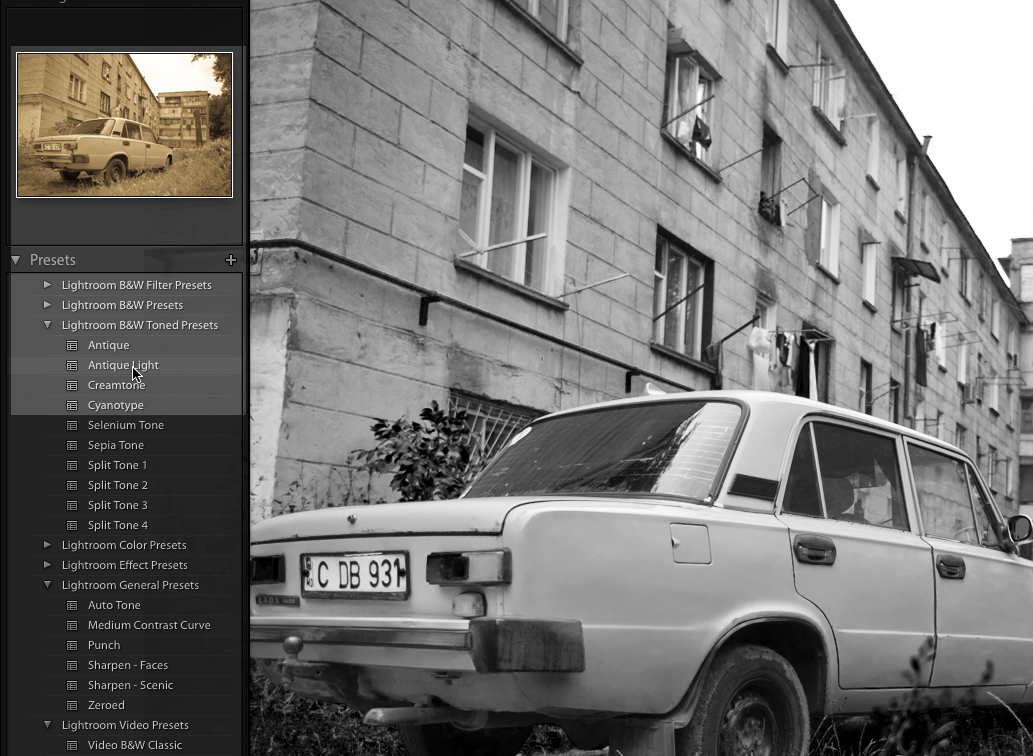
Another option you can use to get a quick black and white image is to use one of Lightroom’s several preset options. These are found, in the Develop module, on the left side of the screen under the Presets Tab.
There is a good range of different default presets provided by Adobe, neatly arranged into different sections:
- The B&W Filter Presets simulate the different types of “traditional” black and white filters that you might use at the shooting stage.
- B&W Presets give a range of different contrast options, similar to what you might have if printing a black and white image.
- B&W Toned Presets allow you to add a color tone to the overall black and white image such as sepia or cyanotype.
Of course, if you create a look that you really like using the dedicated Develop Module tools, you can also save that as a preset for future use. Let's have a look at some of the things you can do to add impact to your monochrome images.
If you're after some training to really boost your Lightroom skills, how about considering this fantastic Course Guide “Lightroom Made Easy” – Here you can master the Lightroom skills and secret pro tricks to transform your photos.
Simulate Traditional Filters For Your Monochrome Conversions:
The biggest advantage of using the B&W tab of the HSL section is that we can simulate traditional monochromatic filters. For example, if we have a blue sky in the image, we can make that sky go much darker by sliding the blue slider to the left and lighter by moving it to the right.
Using the color sliders we can finely control how our black and white image will look.
Change Contrast In The Image:
Just as with color images, we can change the contrast to give a different feel. The best way to do this is to use the Tone Curve tool. We can either change the curve itself by dragging different parts of the line up or down, or by using the four sliders underneath which change the curve in predefined sections of the histogram
Boost Your Image's Clarity Or Dehaze:
Both these tools work as well in monochrome as they do in color. Clarity is found in the Basic section at the top of the Develop module and works by boosting contrast in the midtones of the image.
Dehaze is found in the Effects section near the bottom and stretches the contrast overall.
Embrace The Grain:
One of the characteristics of black and white film is grain, particularly in high ISO. We can simulate that by adding grain in Lightroom. The Grain slider is found in Effects section near the bottom of the Develop module, and works by introducing a form of luminance noise to the image that looks very similar to film grain.
Vignetting Your Image:
Used sparingly and with subtlety, vignette can add further impact to a black and white image. This tool is also found in the Effects panel and has a number of controls to allow you to fine tune how it looks.
Now you've just read through a load of useful tips to help you along your way, why not check out this fantastic Course Guide “Lightroom Made Easy” to really take your skills further and up there with the pros!
To Summarize:
Black and white images can be wonderfully evocative and with Lightroom’s abundance of tools, we can create great looking monochromatic photos with ease.
Further Resources
- 9 Useful Tutorials on Powerful Black and White Portrait Photography by Light Stalking
- 5 Free Lightroom Resources all Photographers Should Know About by Jason D. Little
- How Understanding Lightroom’s Search Filters Can Save You Hours! by Jason Row Lightroomloads/craig-whitehead-otXBm-v6qnM-unsplash-scaled.jpg” alt=”” width=”1638″ height=”2048″ /> Craig Whitehead[/caption]
- The B&W Filter Presets simulate the different types of “traditional” black and white filters that you might use at the shooting stage.
- B&W Presets give a range of different contrast options, similar to what you might have if printing a black and white image.
- B&W Toned Presets allow you to add a color tone to the overall black and white image such as sepia or cyanotype.
- 9 Useful Tutorials on Powerful Black and White Portrait Photography by Light Stalking
- 5 Free Lightroom Resources all Photographers Should Know About by Jason D. Little
- How Understanding Lightroom’s Search Filters Can Save You Hours! by Jason Row
There's something about a black and white image isn’t there? A good conversion to black and white can turn a mundane color image into something with impact.
But what are our options for turning a full-color digital image into a great black and white one? Many of us use Adobe’s excellent Lightroom and today we are going to look at how to convert to monochrome using this program. Like with Photoshop, there are a number of ways to turn your image monochromatic and also there are a number of techniques you can employ to give that image further impact.
Let’s start with how to remove the color from your image. As with all black and white conversions, start with an image that will look good in monochrome and make some simple tone and exposure corrections before conversion. A quick tip here is to press the V key. This will show the image as a black and white preview.
The Most Basic Conversion – This is Technically Considered a Starting Point:
The simplest way to convert to a black and white image is to use the Black and White tab in the Basic section of the Develop Module. This simply removes all the color information and you will notice that the Vibrance and Saturation sliders become greyed out.

Tools To Get Started With – HSL/Color/B&W:
There are two tools here that you can use to convert to black and white. Under the HSL tab you can select Saturation and desaturate all of the primary and secondary colors. This can give you more control if you would like to create a monochromatic image that has, for example a hint of color or to isolate a single colour on a monochromatic background.
Better still, for pure monochromatic images we present the dedicated B&W tab the HSL/Color/B&W section. This will convert your image to monochrome but keep the colour channels intact. The advantage of this is that it allows you to control the tone of each individual color by lightening or darkening it.

Use Presets To Convert Your Images To Monochrome:
Another option you can use to get a quick black and white image is to use one of Lightroom’s several preset options. These are found, in the Develop module, on the left side of the screen under the Presets Tab.
There is a good range of different default presets provided by Adobe, neatly arranged into different sections:

Of course, if you create a look that you really like using the dedicated Develop Module tools, you can also save that as a preset for future use. Let's have a look at some of the things you can do to add impact to your monochrome images.
If you're after some training to really boost your Lightroom skills, how about considering this fantastic Course Guide “Lightroom Made Easy” – Here you can master the Lightroom skills and secret pro tricks to transform your photos.
Simulate Traditional Filters For Your Monochrome Conversions:
The biggest advantage of using the B&W tab of the HSL section is that we can simulate traditional monochromatic filters. For example, if we have a blue sky in the image, we can make that sky go much darker by sliding the blue slider to the left and lighter by moving it to the right.
Using the color sliders we can finely control how our black and white image will look.
Change Contrast In The Image:
Just as with color images, we can change the contrast to give a different feel. The best way to do this is to use the Tone Curve tool. We can either change the curve itself by dragging different parts of the line up or down, or by using the four sliders underneath which change the curve in predefined sections of the histogram
Boost Your Image's Clarity Or Dehaze:
Both these tools work as well in monochrome as they do in color. Clarity is found in the Basic section at the top of the Develop module and works by boosting contrast in the midtones of the image.
Dehaze is found in the Effects section near the bottom and stretches the contrast overall.

Embrace The Grain:
One of the characteristics of black and white film is grain, particularly in high ISO. We can simulate that by adding grain in Lightroom. The Grain slider is found in Effects section near the bottom of the Develop module, and works by introducing a form of luminance noise to the image that looks very similar to film grain.
Vignetting Your Image:
Used sparingly and with subtlety, vignette can add further impact to a black and white image. This tool is also found in the Effects panel and has a number of controls to allow you to fine tune how it looks.
Now you've just read through a load of useful tips to help you along your way, why not check out this fantastic Course Guide “Lightroom Made Easy” to really take your skills further and up there with the pros!
To Summarize:
Black and white images can be wonderfully evocative and with Lightroom’s abundance of tools, we can create great looking monochromatic photos with ease.


