Learning how to photograph flowers is one of those skills that will give you a lifetime of wonderful images, both of that subject and of other subjects that require a similar approach. In this article will go deep into the lighting and composition of photographic flowers and how you can join this magical club.

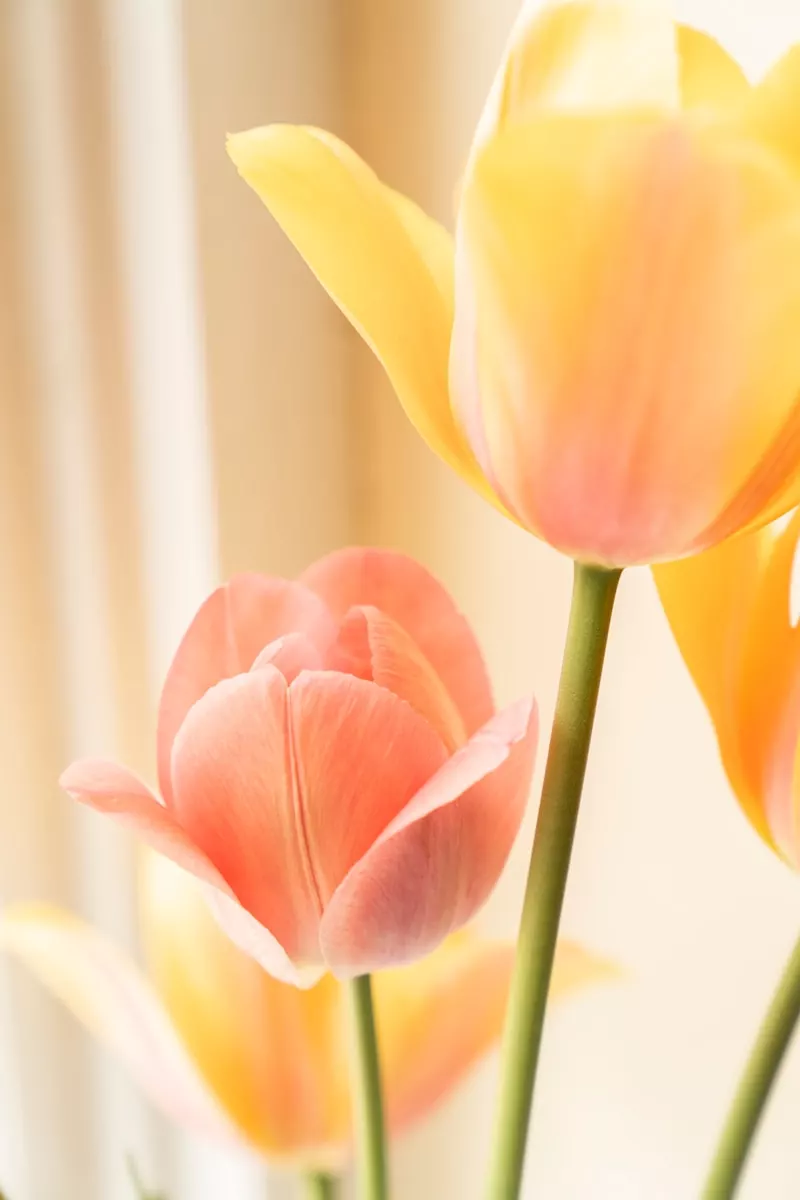
Quickstart: For a beautiful flower with a lovely bokeh background, focus on the flower while keeping the background at a distance. Use a wide aperture around f/2.8-5.6, a low ISO around 100 to 400, and a relatively fast shutter speed (1/100s or faster) to avoid any unwanted motion blur. Try to use soft, dispersed lighting.
Flowers are just about the most cooperative model that you'll ever find in photography. And for that reason, they're also a great place to both get amazing images and learn the tricks of the trade. You can go to a local park or find a flower bed downtown or at the mall. You can visit a botanical garden; there is one in every major city. You can ask the neighbors if you can photograph in their garden. You can also just go to the flower shop and buy potted or cut flowers, and set them up in your living room.

In this flower photography article, we're going to cover everything from choosing the right gear through to understanding lighting as well as camera settings and technique, and all the way through the creative composition and tips you may not have realised are great to photograph flowers.
Hint: The easiest way to get wonderful subjects is to plant a small flower garden in front of your house. Even for the sole purpose of having a photographic subject handy, they do not require that much work, especially if you choose the local wild flowers. The diversity in types and colors will help keep you interested and returning often to add to the collection of images. Each day, the flowers will look different; some will already be dying, and some will just start to bloom. There are new and different photos to be taken each and every day.
What Gear Do You Need for Flower Photography?
Photography of flowers is often at the borderline of close-up and macro work.
If you have a point-and-shoot camera, many have excellent macro mode, which will allow you to get close. Turn it on if that is what you have to shoot with.
To really get good control over your flower photography though, you're going to need a DSLR or a mirrorless camera. You can get good images with other cameras or even with a phone camera, but when you start to get serious, you want to grab as much control of the final image as possible, and that is the realm of manual cameras.

The Best Lens for Flower Photography
To shoot flowers, you will get the best results from a dedicated macro lens – that is, a lens that has a one-to-one magnification. Among the most common macro lens focal lengths for flower photography of the 60 mm, 90 mm and 105 mm lenses. I found the Nikkor 85 mm works well for me and my shooting style.
Also consider that many all-in-one zoom lenses, like the Nikkor 18-200 mm or Sigma 18-300 mm I use, will allow you to focus from just a few inches away. Other options include extension tubes and macro filters. This last option is the least recommended, but the least expensive at the same time, and extension tubes, or even bellows can be a heap of fun.
Stabilising Your Camera
Depending on how you're shooting, you may want to consider getting a decent tripod. If nothing else, it can help when you're shooting from uncomfortable angles, and of course, it can help with camera shake. A stabilising beanbag can also be a useful accessory for a macro flower photographer, especially for those unusual and uncomfortable angles.
Lighting Accessories
One of the keys to beautiful flower photography is usually even lighting. There are a couple of accessories you might want to consider to help you achieve this.
- A reflector that can help you find and direct both natural and artificial light onto your subject, and is incredibly helpful in giving you some lighting options when photographing macro flowers.
- A diffuser is also very useful when you have only harsh light, as you can diffuse either harsh midday sun or even artificial flash light. This is one of the big tricks for capturing the beauty of flowers.
- A ring light or LED light also provides a few extra opportunities for good lighting when you're taking photographs of flowers. If they are within your budget, then they can be very worthwhile.
- An off-camera flash is essential if you want to use artificial light. It certainly a skill you should learn to do if you want to take stunning photos of flowers.
Using an iPhone or Mobile Camera?
A few things to remember about mobile cameras is that they work beautifully in soft light like shadows or overcast days. With flowers, you should remember to use the Portrait setting and keep the background at a distance. And you should keep your subject simple – for example, a single flower because the portrait mode has trouble with complex subjects and separating them from the background.
The Best Settings for Flower Photography
The camera settings you choose will obviously have a strong effect on the final image. Play with them, if your camera allows it.
ISO and Noise
On most cameras, 100 to 400 is the best choice for your iso when shooting images of flowers. This will keep your image free from unwanted noise.
The higher the ISO, the shorter your shutter speed will be (which can help you to avoid motion blur on a moving or swaying flower), but the more noise you will get. In low light, this becomes a judgment call.
Aperture and Depth-of-Field
The typical flower shot requires an in-focus flower with a lovely, blurry bokeh background. To achieve that, take a look at the following camera settings.
Mode: Aperture priority or Manual mode will give you the most control over your settings. But be aware that when you shoot with a really wide open apertures like f/1.8 you may run into problems with your depth of field being too narrow and not being able to get the entire flower in focus.
Aperture Settings: You can start up by trying a very wide aperture like f/1 .8 to f/2 .8 as this should help you get that blurry background, but you may find that you are having trouble getting the whole flower in focus. Don't be afraid to close the aperture to between f/2.8 and f/8, and even as narrow as f/16, so that you can get that whole flower into focus. Remember that the distance from your camera sensor to the flower also has an effect on how much of the flower is in focus when dealing with depth of field. If you are set on using a particular aperture, then you can back away from the flower to get more of it in focus.
If you are photographing a single flower, then you might get away with a more open aperture, but remember if you are photographing a bunch of flowers and you might need to narrow the aperture somewhat. This is simply to keep the subject in focus.

Note: Many beginners enjoy a shallow depth of field from using a wide aperture, but come to realise that it can often lead you to focus problems in flower photography, with the resultant narrow depth of field focusing on only part of the flower. You will quickly realize that anything starting from f/8 through to about f/14 gives enough depth of field to avoid the feeling of an out-of-focus, blurry image, while still giving you access to those beautiful blurry backgrounds if you keep the background at some distance.
Don't be afraid to experiment with those more open apertures but realise that coming back towards the centre of the range from F/8 to F/14 will probably help you get more images in focus.
Focus Stacking
One huge post-production secret of many macro photographers is something called focus stacking. This is where you take multiple images of the same object, each with a different area of focus, and then, in post-production, you stack them together with the areas that are in focus. This gives you an overall deeper depth of field. It is certainly not necessary to do this, but it is a trick you might want to keep up your sleeve. You can read more about focus stacking here.
Shutter Speed
Obviously, your shutter speed setting is going to rely on how you set your aperture and ISO, but in general, you're probably going to want to shoot relatively fast in order to freeze any potential motion in your flower photographs from the wind (at least for outdoor flower photography). That means summer in the Romy of 1/200 of a second or faster.
Other Settings
The more parallel the sensor and the part of the flower you want in sharp focus are, the easier it will be to achieve a crisp look.
The other parameter you probably don't need to worry much is the white balance. First, most modern cameras are quite good in Automatic mode. Secondly, if you shoot RAW, you will have the most flexibility to change it afterwards. Third, the flower images are usually fine art, not documentary, and as such are subject to artistic freedom. You might even try changing the white balance to warmer or colder for some artistic reason.
A Fun Experiment
At the same time, the stepped-down aperture might cause your background to come in focus and make the image too cluttered. To avoid it and have more control over the aesthetic of your background, replace it with your own. Take several different out-of-focus photographs- of cloudy sky, trees in several shades of green, etc. If it is not single, solid color, it will look more natural. Print them as 11×14, and glue them onto foam core for more sturdiness and use as an on-demand background. The more color choices, the more flexibility.

Composition & Creative Flower Photography Tips
A lot of the rules of composition are a godsend when you're photographing flowers. Incorporating traditional guidelines such as the rule of thirds, the rule of odds, the Golden section, etc., will ensure you have a strong composition. But by no means be restricted by these guidelines. They are not set in stone, and rules are made to be broken.
One very strong tip for photographs of flowers is to experiment with the angles you shoot from. Shooting top down, low angle, or even shooting through pedals as an abstraction are all composition techniques that you should try with your flower photography, as they often result in amazing images.
Another huge tip is to pay strong attention to your background in flower photography. While you will probably want to throw them out of focus, the colour of your background will have a huge impact on the strength of your composition – try lining up your flower with colours that are complementary for example.. Try to avoid busy backgrounds in general, too.
Hint: Many flower photographers carry in their backpacks a set of variously coloured cardboard backgrounds that they can use for their photographs. This can result in much stronger images.
Another trick that some photographers use is to carry a spray bottle with them of water so that they can spray the Missed over the flowers and create beautiful water droplets. The droplets can be photographed through as they will refract what is behind them or they can simply be interesting elements of the flower itself.
Don't forget to clean up the scene if you want a clean photograph when you are taking pictures of flowers. It's okay to include other elements, but if you want one of those clean photographs, you are going to have to make sure there are no dead leaves, sticks, branches, or other rubbish around your subject.

How to Photograph Flowers With Precision
First, put the camera on a tripod. Really. It does not need to be a fancy setup with a ball head and removable center column, although it helps. What it has to be, however, is sturdy enough to keep the weight of your camera. In the past, I have used the sturdy Manfrotto 055XPROB with the 488RC2 ball head. I went through several cheap, plastic tripods before giving up and finally investing in one. Avoid my mistake.
Secondly, use manual focus. Even with a stepped-down aperture, the depth of field will still be narrow. With the stabilized tripod, now you can make the decision if the middle of the flower or the petals are where you want viewers to look first.
One of the banes of my existence, when photographing flowers, is always that they will blow randomly with the smallest amount of wind. Now it might be cheating a little bit but if this is bugging you as it does me, then sometimes I put a small rock or stick towards the base of the flower stem to make the movement less violent. It is just one of those small personal cheats that you come up with when faced with the practicalities of photographing subjects that move a lot like flowers in the outdoors.
Don't Forget to Check The Weather!
Weather is going to be your worst enemy. Sun and wind are two ingredients you need to be aware of at any moment.
They say that macro photography of flowers (and other plants) is the one type of photography allowed in the midday harsh light. Don't believe it. It will at times create as much contrast between your highlights and shadows as for any other subject. Unless of course, your flower subjects are in the shade or under a scrim. Pay attention to the light, and either photograph during “golden hour” or at times when the sun is on the opposite side of the house. It will create far more beautiful images.
It is going to be quite difficult to avoid the wind. Even a small breeze can shake high-stemmed flowers enough to result in blurry images. Especially if you photograph in the shade, with stepped down aperture (large f/ stops) for increased depth of field, the shutter speeds will be slow, and the slightest movement of the flower will be magnified in your photograph. There is not much you can do about it. Check the weather and pick the day of the week and the time of the day with the calmest conditions. Pick the side of the house for your garden opposite to the prevailing wind direction in your area. But also, you can just incorporate the movement into your photographs for a fresh, creative look.
Post-Production for Flower Photos
As always, our advice is to try to get as close to your final image straight out of the camera, but in reality, every photograph is edited, either by yourself or by whoever set up your camera's optics and software. So we prefer to do it ourselves.
Let's look at a few tips for editing flower photographs in Lightroom. It doesn't matter if you are using another piece of software for your post-production, as these tips will be easy enough to follow in almost any piece of photography software.
Most flower photographs can benefit from subtle changes to the clarity and vibrant sliders. Be sure to experiment with those two when you get your images into your software. Also, be sure not to overdo this, as it is very obvious when your hand is too heavy.
While you should be trying to frame your photographs as best you can while you're in the field, you also should not be afraid to crop images if it helps you get to the beautiful flower photograph in your mind's eye. A quick crop or straightening is almost always something to look at. And of course, you might want to take advantage of the often-repeated advice to fill the frame – and very general terms, this will improve the composition of almost any photograph of a flower.
The masking tool in Lightroom is also a godsend for photographers who want to do a bit of dodging and burning. Masking the flower itself will allow you to independently edit the flower or the background as you see fit. Often, a little exposure on the flower can make it pop, but again, don't overdo this.

One of the things that I have found very difficult about post-production with flower photography is that sliders in Lightroom tend to really affect the naturally bright colours that you can find in flowers. The flower might be red but the white slider can easily blow out the reds for example. A couple of fixes I have found is to either go a lot lighter on any of the sliders at all, or alternatively to mask around those more naturally colourful areas and avoid for those specific points of the image. This holds true from most brightly coloured subjects but with flowers it is especially noticeable so be careful.
Flower Photography Troubleshooting
Here are a few couple of things when you are out shooting flowers that sometimes go wrong. We've included the cause and a specific solution so that you have a way to fix these problems easily.
| Problem | Likely Cause | Solution |
| Blurry flower | Shutter is too slow, too windy, missed focus or there is not enough depth of field | Use a faster shutter speed a smaller aperture manual focus or burst mode. Test each solution. |
| Only small part is sharp | Your aperture is too wide or you're too close | Try f/8 to f/11 and back away slightly from the flower. |
| Distracting background | Too much clutter | Change your angle, get lower and move around to get a clear background and make sure the background is as far away as possible. |
| Colour are wrong | Midday sun or bad editing | Try to shoot in the shade or overcast light and reduce the highlights in post. Don't go too hard on the sliders. |
| Looks like a snapshot | Camera position and/or subject selection | Get low with the flower, remove elements from the composition, and try filling the fly frame with a single flower. |
Final Thoughts
I hope those few basic tips will get you interested in finding some flowers now and photographing them. Be creative. Have fun and certainly do not be afraid to experiment. Flowers are such a great subject to learn photography and then extend your skills as you get better and better. And if you feel there is anything important I forgot, please ask a question or add your tips in the comments section.


5 Comments
Thank u very much! Its rearrly helpful for the new comer like me. The explanation is so easy to follow and not make me headache with many theory of photography. U r a good teacher! 🙂
Awesome article, Iza, thanks for this sensible advice.
I got eos 350D slr and and the 85-15mm lens. I use the macro mode to shoot flowers in close up. But some time my spirit urges me to use the manual mode and try out different aperture and exposure settings to perform similar to the macro mode. But I am never satisfied with the result. Reading this article, I feel I must go for a better lens with a smaller f-stop and there after taking photos without a hurry!!https://www.gardenstew.com/plantstew/img/ps-garden-20130211/45454.jpg
Thank u. Very helpful article and tips. Lia.
Hi, these are basic, valid recommendations but flower photography lends itself to more creativity than this. I have been doing it for MANY years also at pro level and have learnt a few interesting things about it (which I teach at photo and garden clubs). No matter how good you are in lighting your flowers indoors, diffused sunlight is always the most compelling. A thinly overcast sky will do that for you but you can recreate it with a portable diffusion tent (google photo diffusion tents and you’ll see how many there are at reasonable prices). I use a small self standing greenhouse in my garden while in the field I make one with a shower liner, a small tripod and a few clothespins (both to diffuse the sunlight and block the wind. With calm wind, even an inexpensive translucent photo umbrella helps a lot. Direct sunlight is challenging but I have a number of jaw-dropping pics of large back-lit flowers. Don’t use a flash, it’s convenient but horrible. Close-up lenses are great but telephotos can do an excellent job too. Many interchangeable lenses focus up close (check the specs). You can make a composition with flowers on a computer scanner (the thinner the flowers the better). I constructed a shooting table with a light box at the bottom and light all around to photograph thin flowers in transparency. Printed on watercolor paper the pics look like real watercolors.