What You Need to Know About Adobe Lightroom
We're a pretty diverse bunch here at Lightstalking. Some are experienced photographers, some are just setting out on their image-creating journey. To those newcomers, post production can be a daunting prospect.

They read about powerful tools such as Lightroom and Photoshop. Beginners often see articles explaining complex editing techniques but might fear dipping their toes in the water because of such perceived complexity.
As such, and with apologies to more experienced photographers we are going to bring you two guides, one to help you understand what Lightroom is and one to guide you through what Photoshop is.
We kick off today with an introduction to Lightroom.
The Basics – What is Lightroom?
At it’s core, Lightroom is an image management system. It's a powerful yet simple way to catalog all of your images. Over the years it has increased in complexity and diversity, allowing you to carry out ever increasingly complex edits to your photos as well as cataloging video.
It comes in two forms,
- Lightroom 6 which is a standalone one-time license purchase and
- Lightroom CC – Lightroom CC is part of Adobe’s Photographers package. This package includes both Photoshop and Lightroom and is licensed on a pay monthly basis (under $10 p/month for both pieces of software).
Lightroom allows you to import your images into managed catalogs. There are several features that make this advantageous to photographers. Firstly you can choose to keep your images in their current location and for Lightroom to catalog them there.
Alternatively, you can get Lightroom to create a new location for storing your images and either copy them or move them to that location. The latter is a particularly useful for those of you with a slightly disorganized approach to uploading your images.
When first opening Lightroom it can be pretty daunting. However, Adobe have broken the program down into seven distinct functions called Modules. They are found at the top right of the screen. Let's have a look at what they do.
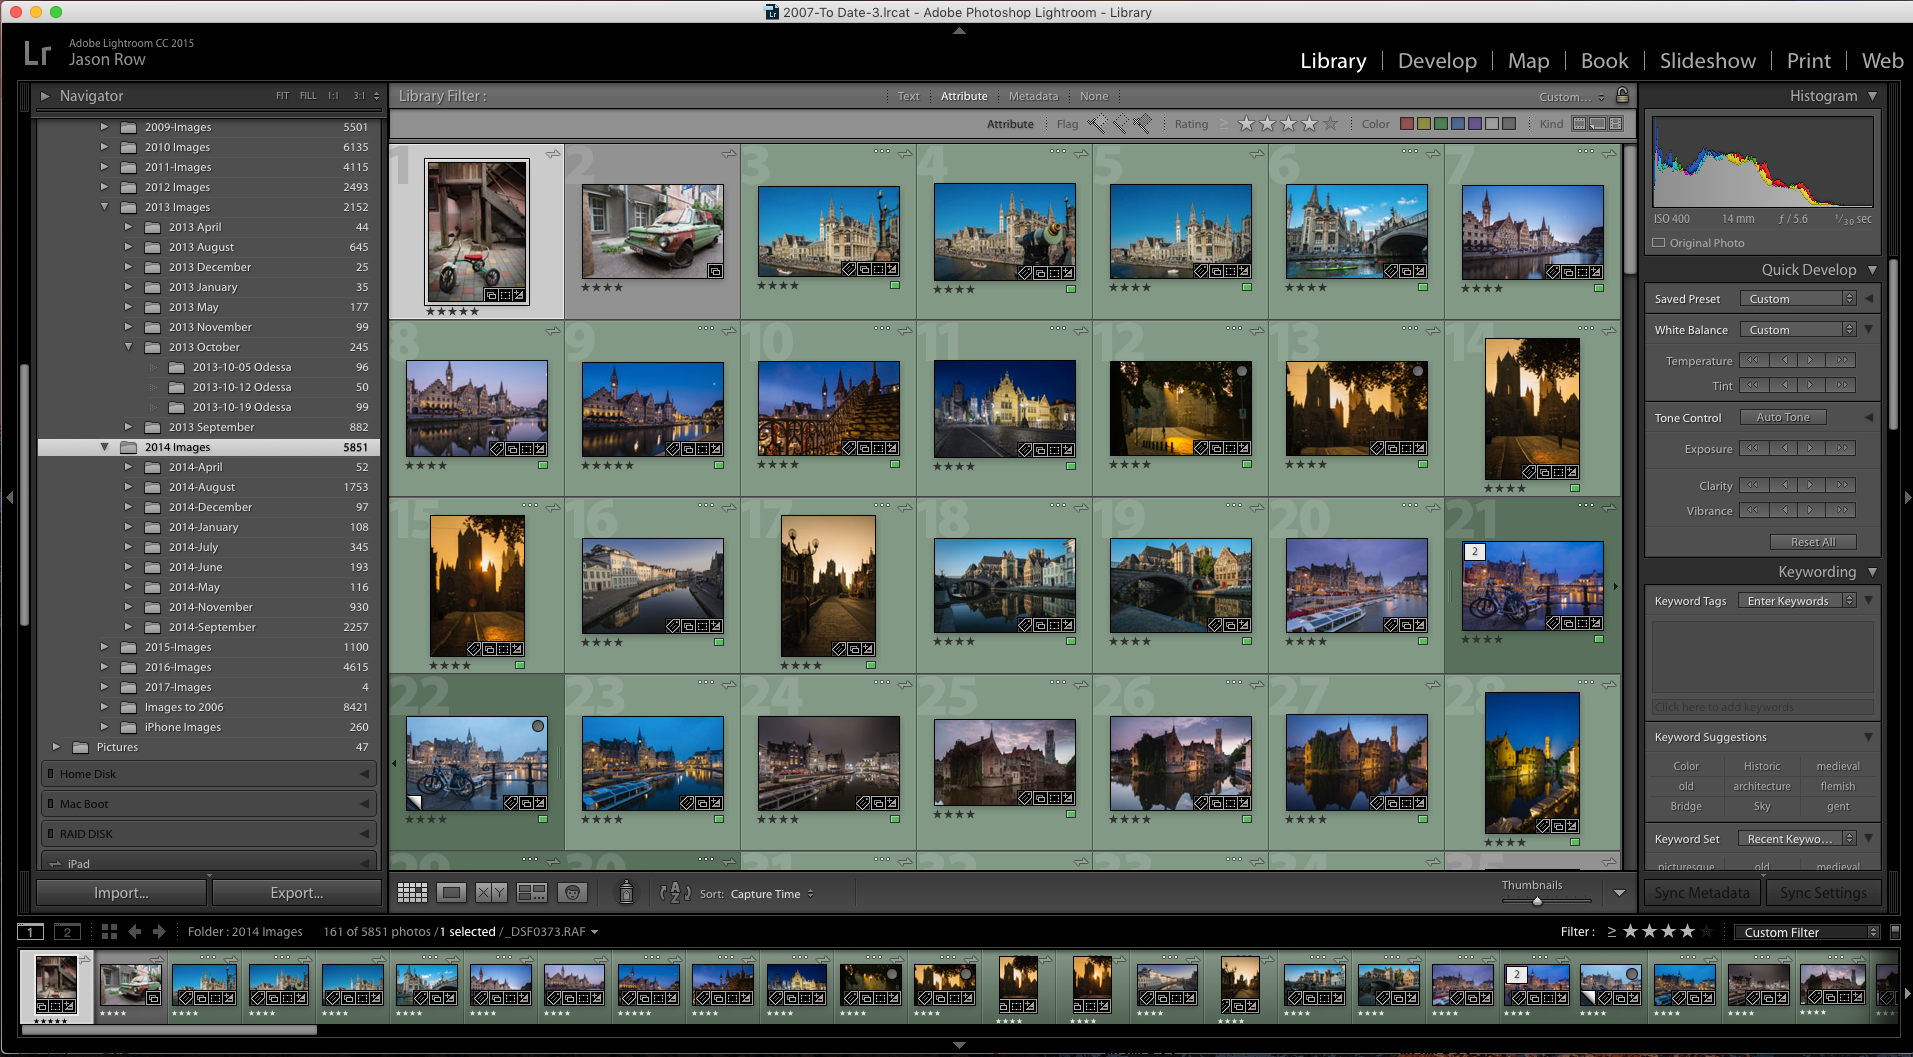
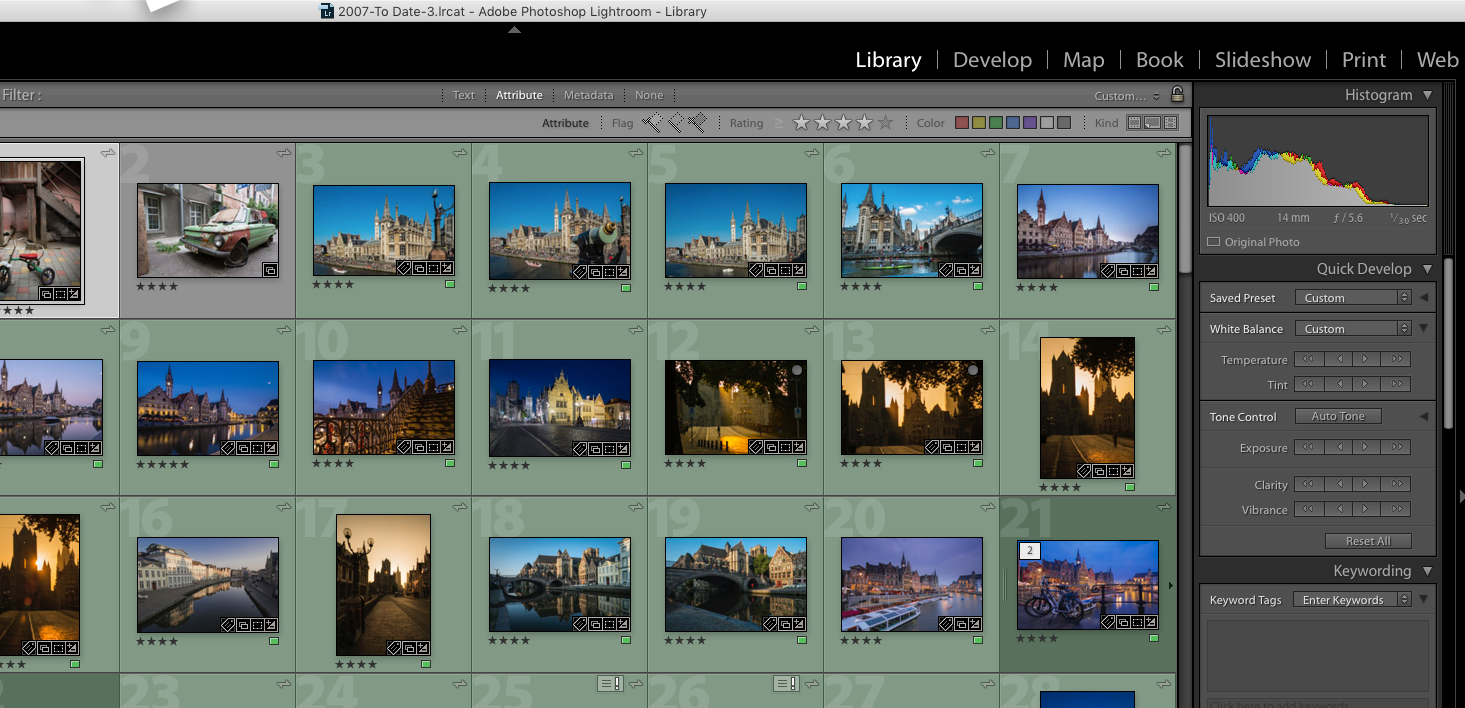
Lightroom's Awesome Library Module
This is the default cataloging module. It is here that you import and export your images and move or copy them to different folders within the catalog. You can add ratings in the form of stars, flags or color labels as well as adding captions, descriptions and keywords.
To the left of the screen, you see the Catalog. Here you can see the locations and folder hierarchy of all the images in your catalog. The main screen can display a grid of photos in any or all folders or individual images with a filmstrip below that you can scroll through.
The right of the screen contains windows for applying metadata such as keywords and for applying quick editing fixes.
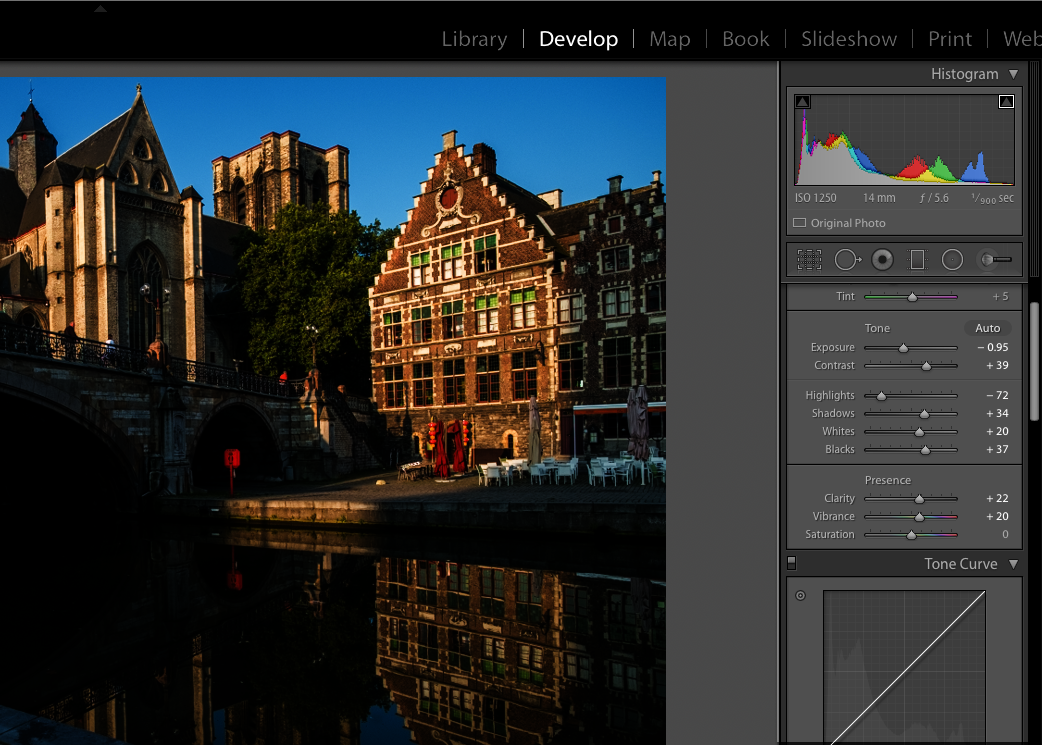
Next, the Develop Module – What's it For?
This is the main post production editing module. It's here you can carry out anything from basic edits to complex filtering and brushing. The more common editing tools are at the top. Scrolling down the right side window reveals deeper editing facilities.
To the left of the main screen, we have Presets. These, as their name suggest allow you to carry out a preset action of one or several of your images. These can range from a simple contrast boost to creating a split tone image.
There are a number of presets that come with Lightroom but you can also create your own or buy pre-made ones.
One important thing to note about editing in Lightroom is that the process is called non-destructive. Your original files are never touched. Instead, the adjustments and edits are shown on screen as a preview file and stored in a separate file linked to the original.
When you export an image, Lightroom creates a new version of it and applies the edits to it.
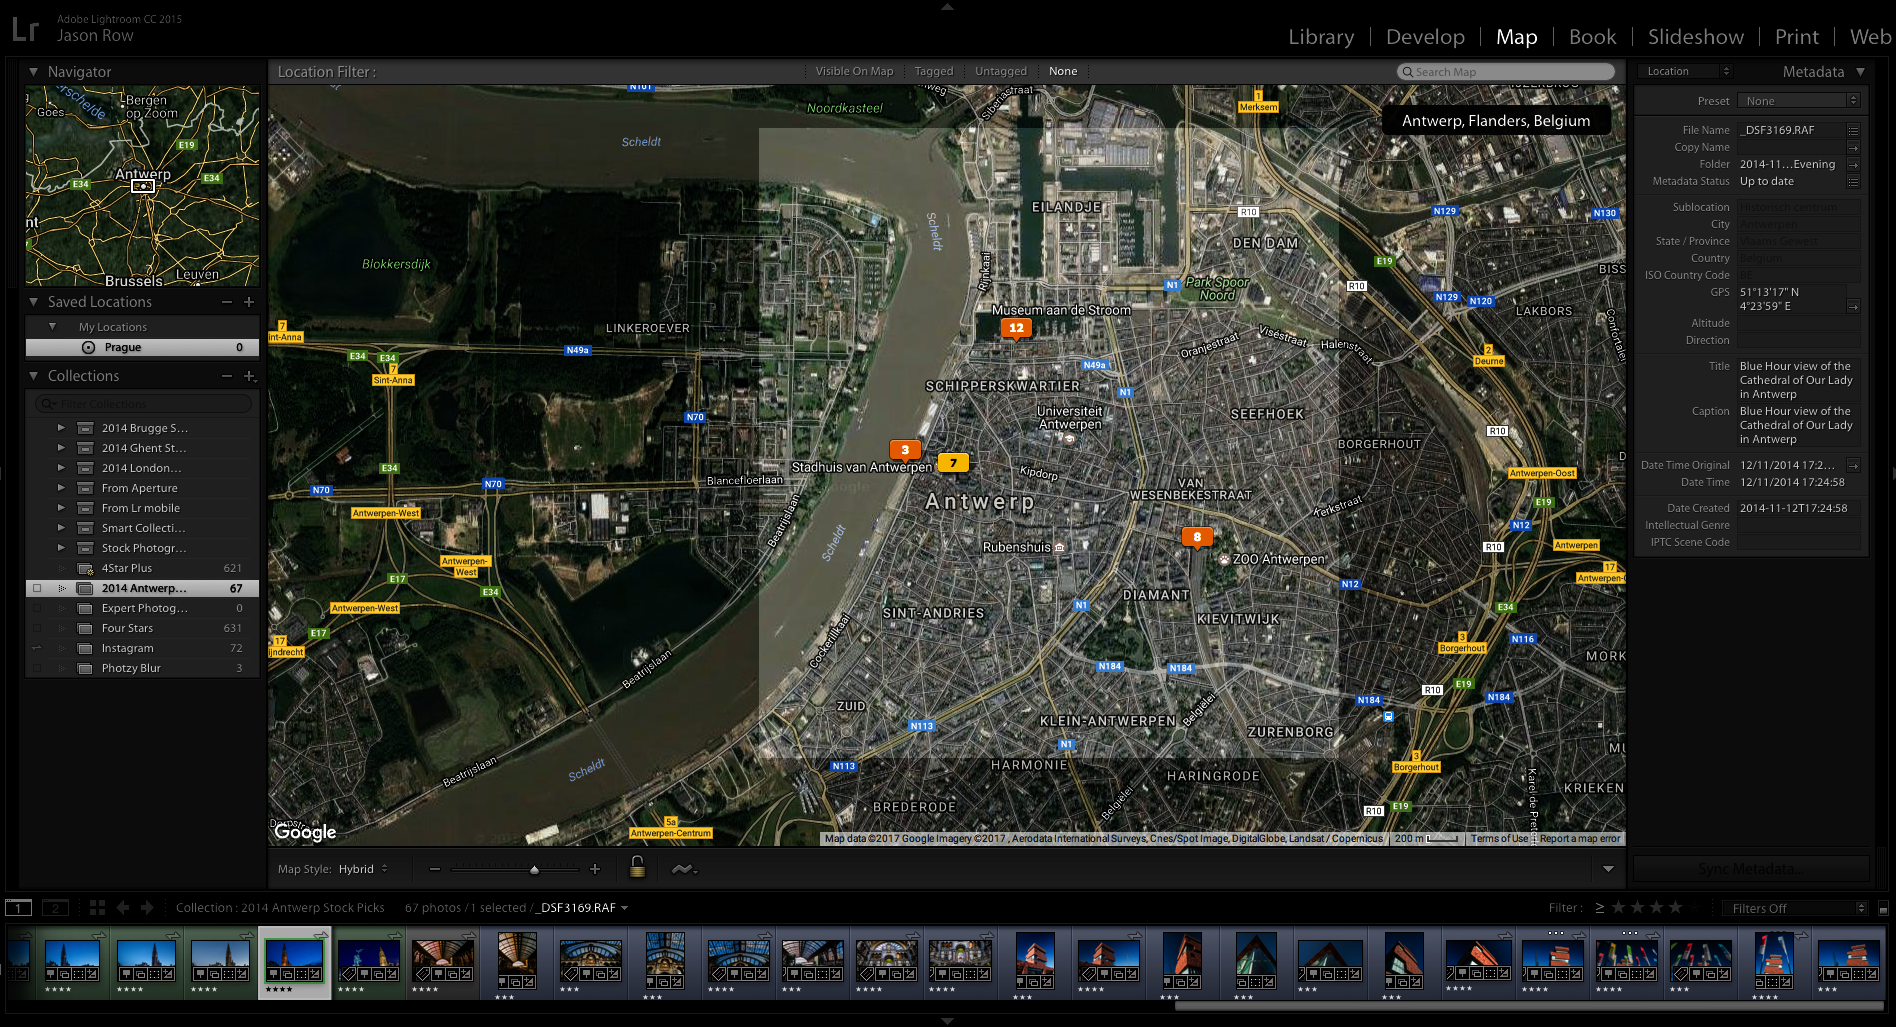
Map Module – Embed Your Location in Your Photos
Increasing numbers of cameras now have GPS built in. For those that don’t, there are smartphone apps that allow you to link your camera to your phone’s GPS. The Maps module shows you where geotagged images were taken.
For images with GPS data embedded already, this is done automatically but you can also add any non-geotagged image to the map also. To the right of the screen, you can add further location metadata.
Book Module – Create a Book in Lightroom!
It's increasingly popular for people to create photo books from their own images. The book module simplifies this process allowing you to select images from your catalog, arrange them in a suitable layout, add text and send them to be printed via Blurb or to export it as a PDF file.
Slideshow Module – Showcase Your Creative Work
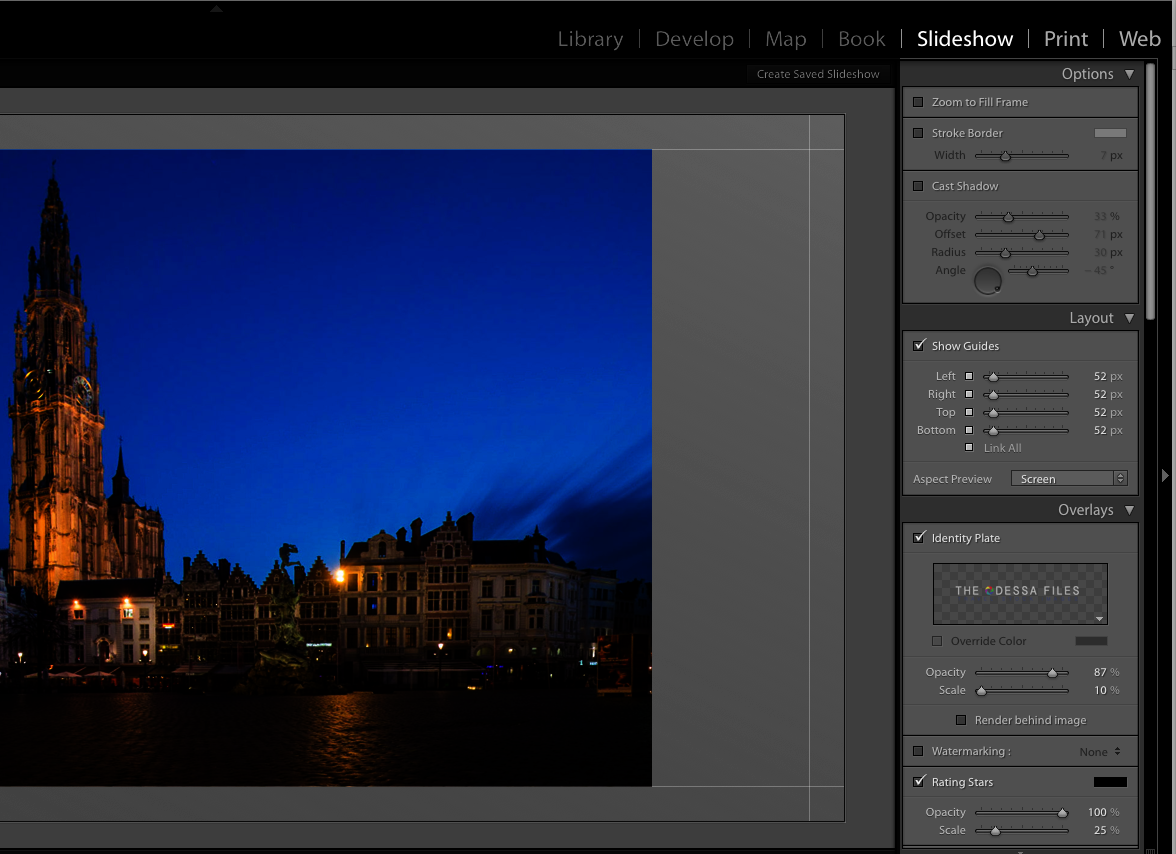
This module allows you to create custom slide shows from images selected in your catalog. You can create different dissolve effects, add text, borders and add music. You can then display the slideshow in Lightroom or export it as an MP4 movie file.
The Final 2 Modules – Print & Web
These two modules allow you to export images to a printer or to create web galleries. In the print module, you can create single images with or without borders, contact sheets or create custom picture packages.
You have control over print resolution and image sharpening and can export direct to a printer or save as a PDF file.
Summary
Despite its many layers and complexity, Adobe have created a user-friendly interface that is definitely suitable for newcomers to photography. Don't be afraid.
The Modules tab allows you to know where you are at all times and separates the major functions into distinct easy to use section.
If you still feel a little daunted, create a small catalog of a few images. Copy, as opposed to moving them into a new location and have a play around until you feel comfortable. Lightroom is well worth spending some time with, once mastered you can organize and edit your shots all in one program
Introduction to Lightroom – Top Takeaways
- Firstly, decide whether you'd like to invest in a stand-alone version (i.e. Lightroom 6) or Adobe's Creative Cloud subscription-based service (which includes Photoshop).
- One of the major benefits of using Adobe Lightroom is it's non-destructive workflow, meaning whether you're importing Jpeg's or RAW files, LR won't edit the “original” image, but display an exact copy.
Further Resources
- How to Easily Improve Your Skies in Adobe Lightroom by Jason Row
- Why Adobe’s Creative Cloud for Photographers is a Good Deal by Jason Row
- 10 Very Useful Tutorials on Lightroom for Landscape Photographers by Lightstalking
Further Learning
Learn the fundamentals of Lightroom editing and make your images really work for YOU by getting the best out of them.
We recommend this fantastic course by the guys at Photography Concentrate – Super Photo Editing Skills.




1 Comment
Lightroom is really an awesome software to retouch images, But I am not that expert in Lightroom. I have working with Photoshop since 2007, Now I am planning to start learning lightroom.
Thank you for this beautiful post.