It's a fact that even the most beautifully composed image will fall apart if it includes a dull, lifeless sky. A great sky, on the other hand, can boost the impact of an image immensely. The problem is that we are at the mercy of Mother Nature and she is not always forthcoming about giving us the sky we need. Of course this being the digital age, there are things that we can do about it and today we are going to look at some ways to improve your skies using Lightroom.
Here are some ways to improve skies within Adobe Lightroom:
- Using the Graduated Filter
- Using the Brush Tool
- Using HSL adjustment
1. The Graduated Filter:
Lightroom’s Grad Filter is perhaps the easiest way to boost a dull looking sky. It is found in the Develop Module underneath the histogram. Work on your image first, getting the exposure, contrast and color right then, when you are happy we can add the grad to the sky. Click on the Graduated Filter Tool.
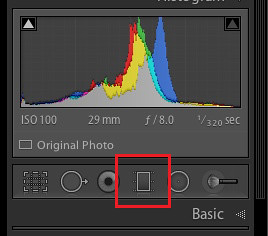
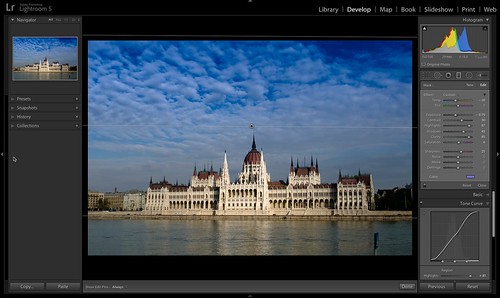
Now move your cursor over the main image, you will see that your cursor turns to a crosshair. From the very top of the image, click and drag this crosshair down. You will see three lines expand across the image. These are the extents of the effect of your filter. Drag so the lowermost point is just below the horizon.
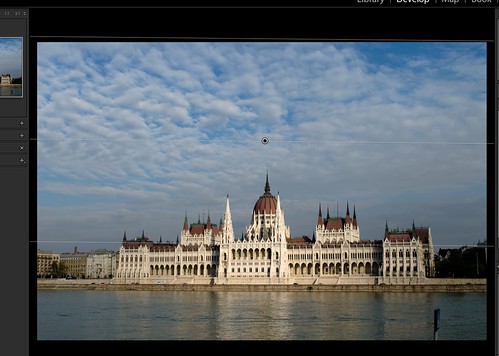
Making Fine Adjustments To The Filter
Underneath the histogram in the Develop module, you will now see a range of adjustment tools. These tools will work only within the confines of the graduated filter, leaving the rest of the image as is.
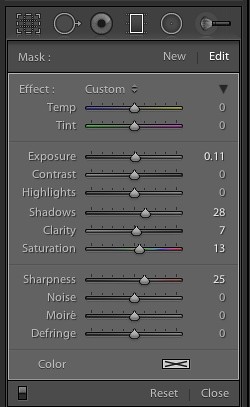
In our particular example, we want to
- Darken the sky a little
- Make it more blue and
- Make those puffy white clouds stand out more.
To darken the sky, we simply move the exposure slider to the left. We don’t want to go too far otherwise we will just end up with a very dark, unnatural looking sky.
To make the sky more blue, we click on the Color swatch at the bottom of the grad adjustments and then select a more suitable blue.
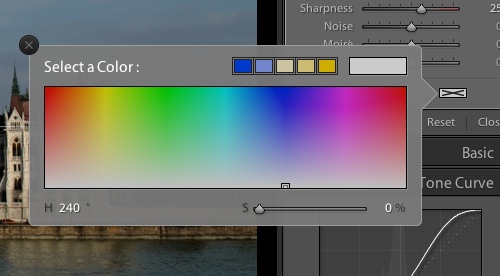
To make the clouds stand out, we can do several things.
- First we can boost the contrast a little
- Then increase the highlights by moving the slider to the right
- Finally we can increase clarity, again by moving the slider to the right.
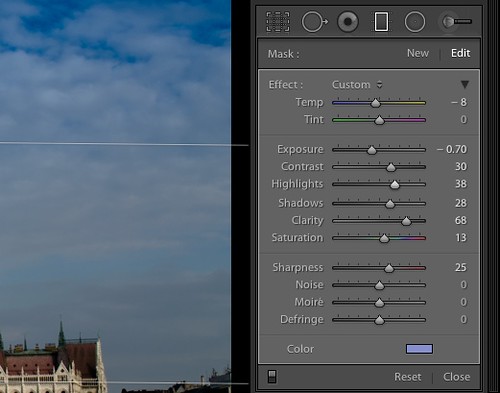
Lastly, we can adjust the position of the graduated filter by, clicking on the center line and moving the grad up or down. You can also rotate the grad to fit the image.
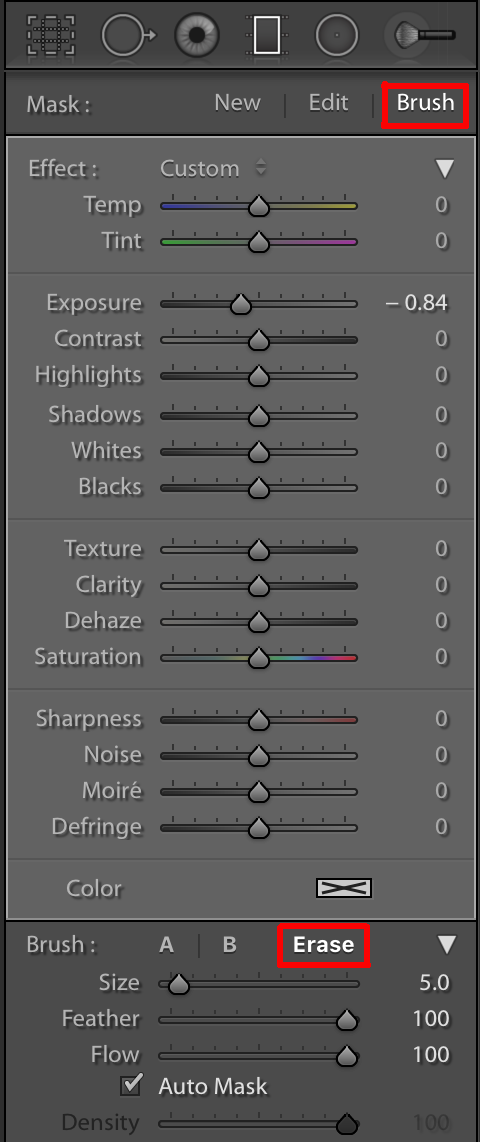
Note: Sometimes the graduated filter may overlap your subject and adding the blue colour to the filter can affect the colours on your subject. In order to avoid that, use the “Brush” tool within the graduated filter, then click “Erase” at the bottom of the panel and you can see that the brush has a “-” in the centre. You can now erase the brush effect from unwanted areas, especially your subject.
2. The Adjustment Brush
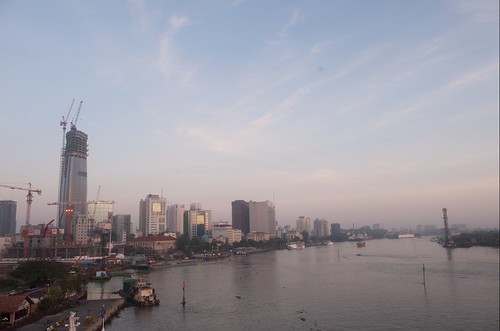
The second technique involves using the Adjustment Brush. This is a little harder to use than the Graduated Filter but allows for much greater control and flexibility of the areas that you wish to work on. In our example we want to take this dawn shot of Saigon and make the sky look more golden yellow.
As before get the image looking the way you want and then click on the Adjustment Brush tool below the histogram.
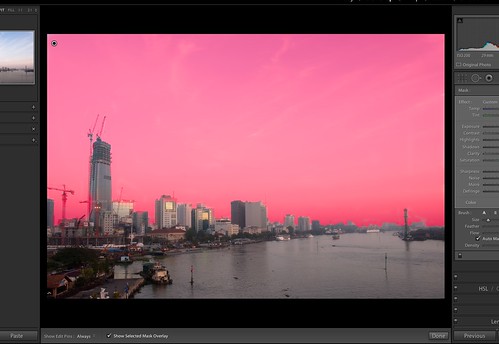
Making Fine Adjustments To The Brush
When the area is completely covered we can make our adjustments in the same way that we did with the Graduated Filter tool. In the case of this image, we want to
- Darken the sky a little
- Make it more, dawn-like and
- Add some contrast.
To see the adjustments we make, we need to uncheck the “Show Selected Mask Overlay” from the bottom.
To make the sky more like dawn, we can move the white balance more to the right, adding yellow.
We can then decrease the exposure a little to darken the sky, again not too far or the image will become unrealistic.
To boost the color a touch more we can add some saturation and to make the clouds stand out a little, add some clarity and contrast.
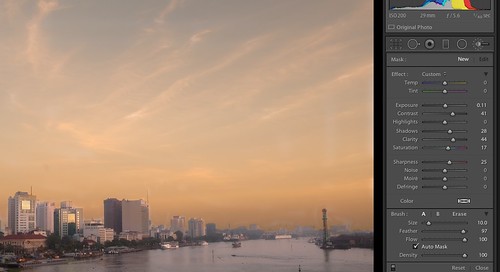
Lastly, we want the rest of the image to match the color of the sky so we click on Done, at the bottom right of the image screen. This returns us to the normal Develop module. Now we can simply change the white balance of the image to match the overall color to that of the sky. If you want the image to match more accurately, you can use the Adjustment Brush tool to change specific areas, in this example the water needs to match the sky more.
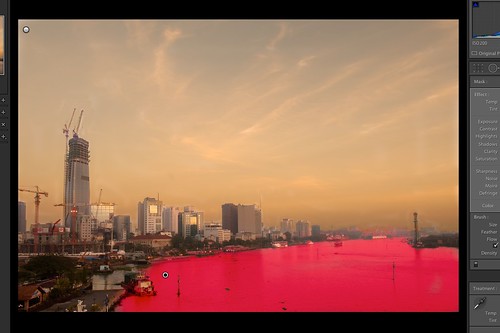
You can also make corrections and further adjustments to brushes by clicking on the Adjustment Brush tool then selecting the small circle on screen. A useful tip to make sure your adjustment looks seamless is to use the Feather tool at the bottom of the Adjustment Tool screen.
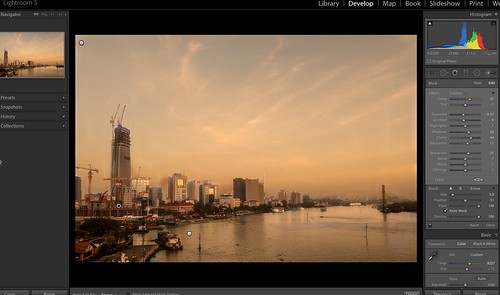
3. The HSL Panel Adjustment
This is a quick method to bring out some colours in the skies as you can see, the HSL panel helps with controlling the hue, saturation and luminance of individual colours.
If you want to make the blue colour of the skies look richer and slightly darker, just increase the saturation according to your likeness for the blue colour and then drag the luminance slider for blue towards the negative side, so the blue gets a bit darker. Do not over do this process as it can cause banding, unwanted colour casts in the skies, image degrading and the values required for saturation and luminance will vary for each image. This way you can boost the colour and create some contrast in the clouds as well.
If you find that the blue colour of the sky is a bit not of the right colour, you can use the Hue slider for blue to fine tune the blue colour. Same applies to sunset colours if you want to fine tune them if the colour looks off even after adjusting the white balance.
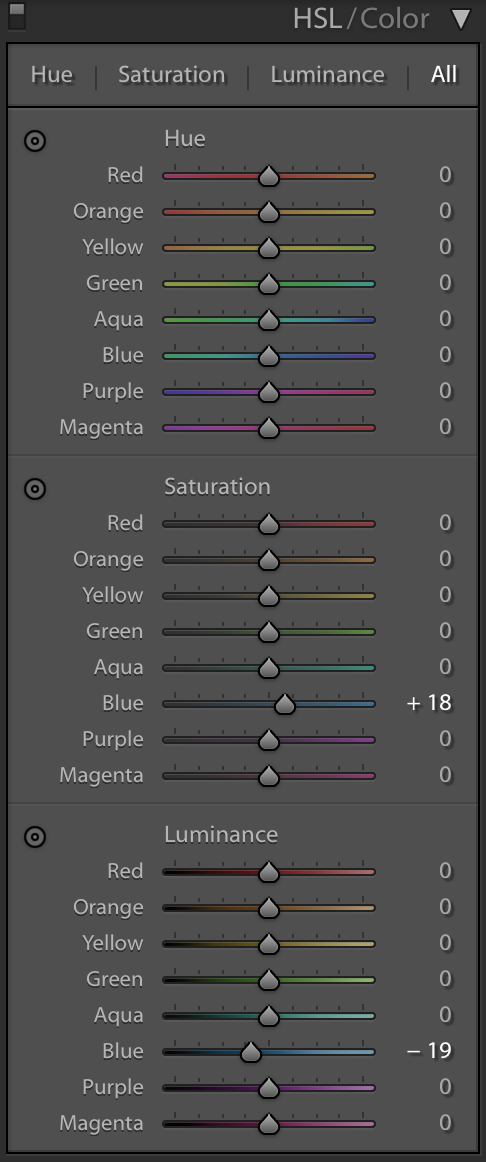
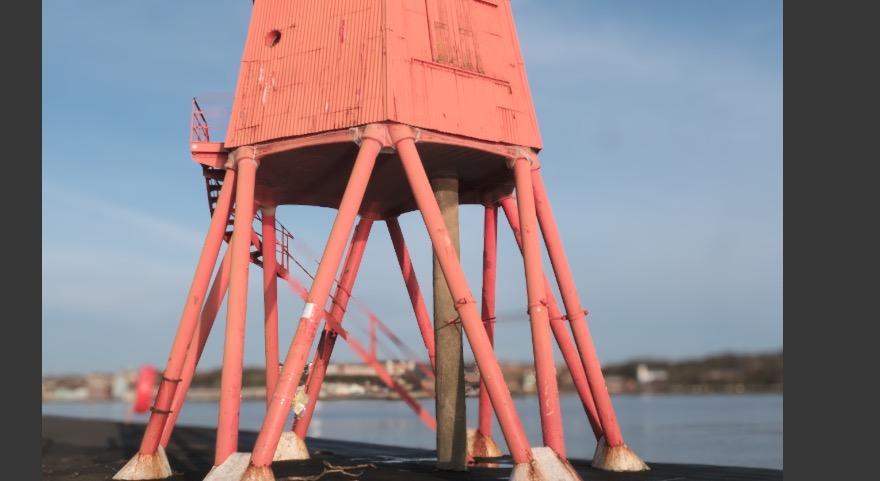
Note: Dragging the hue, saturation and luminance slider for the blue colour will also affect any other element that is blue within the frame.
These two techniques are very useful for making quick and easy adjustments to dull looking skies. As with all digital images, you will degrade the image slightly by carrying out these adjustments but if you are careful you can get better looking skies on days when Mother Nature does not play ball.



1 Comment
Thanks Jason! Great explanation as always!