Some of the most visually striking images in photography are those shot in infrared. There is an ethereal look to infrared images that is distinctive and visually appealing. They are however, not the easiest things to take, you need to shoot either on infrared film or on a digital camera suitable for infrared. In most cases this means a specially adapted camera where the infrared filter on the camera has been removed. All in all, it requires the right equipment and a certain amount of pre-planning. There is, however, as with many things in photography, a way to simulate infrared using Photoshop and today we will walk you through that technique.
As with any Photoshop simulation, the end result will not be perfect, and will depend on choosing a suitable image to convert. Images with reasonable areas of blue in them are often the most successful to convert. To convert our image we will use Photoshop’s Channels Palette and Channels Mixer.
1. Open the Image and Duplicate Layer
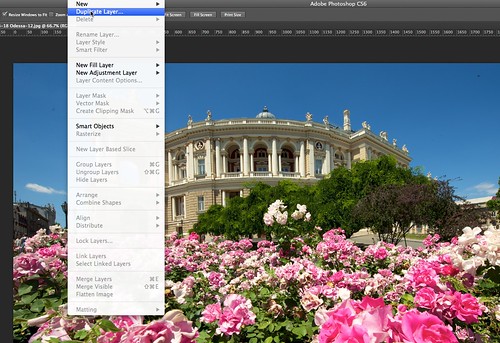
To get the color style Infrared image open the image in Photoshop. We now need to duplicate the layer. From the Photoshop top menu select Layer – Duplicate Layer. Give it a suitable name, in our case Infrared.
2. Invert the Image
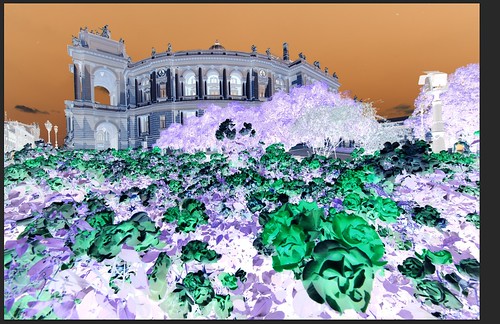
We now need to invert our image, in other ways make it a negative. To do this we go to Image – Adjustments – Invert. Those of you from the film days will recognize the resemblance to a color negative. In the Layers palette, change the blend mode of our duplicated layer to Color. This can be found near the bottom of the Blend Mode drop down.
3. Make Channel Mixer Adjustments
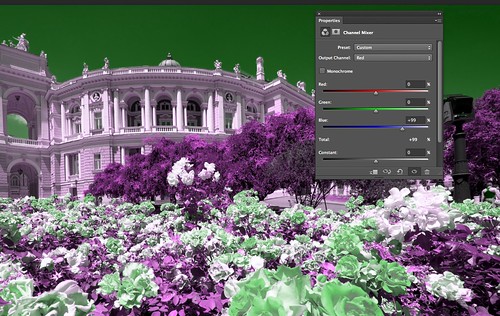
We will now add a new adjustment layer. From the menu, select Layer – New Adjustment Layer – Channel Mixer. Make sure that at the top, the output channel is set to red. Then move the red slider all the way to 0 and the blue slider all the way to +100.
Now change the output channel to blue and move the red slider to +100 and the blue slider to 0.
4. Adjust the Hue and Saturation
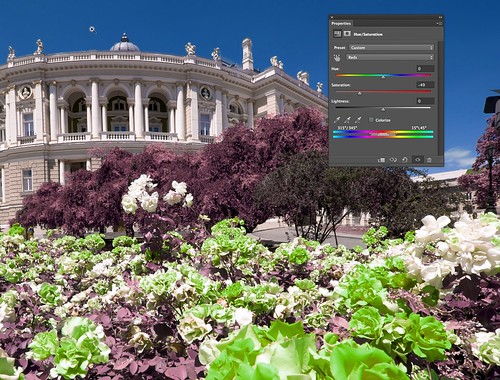
Now we can adjust the Hue and Saturation. From the Layers menu select New Adjustment Layer – Hue/Saturation. Select the red channel and reduce the saturation so that the reds appear almost grey. You can also slide the lightness slider up to add that ethereal look to any foliage in the image.
5. Adjust the Contrast Using Curves
Next we can adjust the overall contrast of the image using either the levels or curves. In this example we will use curves as it gives much greater overall control. From the Layers menu select New Adjustment Layer – Curves. We can now use the curve tool to boost the contrast of our image by using an S curve.
6. Create the Ethereal Look
To fully recreate that infrared ethereal look we need to firstly flatten the image. From the Layers menu select Flatten Image. Then duplicate the new single layered image using Layers – Duplicate Layer. With the duplicate layer selected from the menu go Select – Select All. Now go to Edit – Free Transform. Expand your duplicate layer outwards a few pixels.
From the Layer palette, select Screen as the Blend Mode.
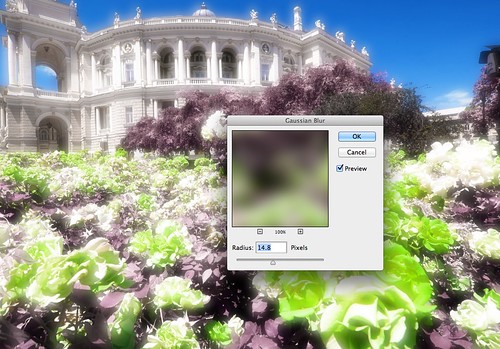
Now from the filters menu select Blur – Gaussian Blur. Adjust the blur amount until you are happy with the effect of the image.
7. Add Some Noise
Lastly to give the image that typical grainy look of infrared film, go to the Filter – Noise – Add Noise. Select Gaussian and check the monochromatic check box. Adjust the noise to suit.
For the Black and White Infrared Effect
1. If you would prefer a black and white look after opening and duplicating your image, go to Layer – New Adjustment Layer – Channel Mixer. Select the Black and White Infrared Preset.
2. Now we can move the green slider all the way to the right and the blue, all the way to the left. You can also play a little with the red slider to suit.
Now follow the instructions from point 6 on the color infrared section to obtain the grain and ethereal look.
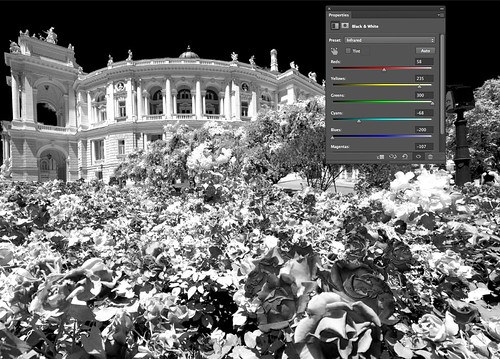
Creating a black and white version
As we said at the top, simulating infrared is very much dependent on the image used. It can be very hit and miss but given the right image, you can recreate a convincing infrared image.


2 Comments
I just tried the effect in a old Photoshop 7. It kind of worked but I only use Lightroom 6, TopazLabs and the new OnOne RAW. Looking at your related graphics, it should beat the heck out of expensive Infrared filter or converting a camera. Anyhow, keep up the great work.
There are a lot of different way’s to use this effect.
I played around with it quite some time, and I really like how you change the whole look and feel of a scenery, especially with the hue and saturation.
When you adjust the red spectrum and reduce saturation to -100 and bring lightness a bit up, you can simulate the white trees you often see in real infrared images. Here some examples:
https://www.xresch.com/gallery/infrared-artificial/