I had never once set foot in a light aircraft on the day that I shot my first aerial photo. I think I’d only been on half a dozen commercial flights by that point too, so how I blundered into it, I’ve no idea. That was 10 years ago now and since then I’ve racked up around 4000 flying hours, shot countless thousands of images and gained my pilot’s licence along the way.

Photo by Andy Callan
Photographing the world from up there is a real privilege, one that only a handful of people are lucky enough to experience, which is a shame. If you’re ever given the opportunity to take a sightseeing flight in a plane or helicopter, grab it with both hands and don’t let go. You could have lived in the same place your whole life, and the moment you look down on it from above, it’ll be like seeing it for the first time.
I’m going to share some tips I’ve learnt for getting the most out of your time in the air and coming home with some images you can be proud of.
Plane or ‘copter?
The first thing to decide on is which platform to use. They each have their merits and downsides – the biggest one being price. Keeping a helicopter in the air takes a lot of fuel, and as we all know, fuel is expensive. There are some helicopters, such as the 2-seater Robinson R22, that are so small that they’re relatively fuel-efficient but, because they’re so small, they tend to vibrate a lot – not great for us. If your budget can stretch to it, try and use at least a 4-seater. The R44 is the bigger brother of the R22 and much more stable.
As for planes, you’re obviously going to need a high wing design, such as the Cessna 172. You can hire these for less than half the price of even a small helicopter, they’re big enough to be comfortable and they will get you to your destination quicker.
Of course, the biggest downside to fixed wing aircraft is you can’t stop! Even the most skilful pilot won’t be able to fly a plane slower than about 60mph. Factor in the wind conditions on the day and you could be going even faster than that. Therefore, you’ll need to think ahead to get your pilot to manoeuvre the plane exactly where you want it and have some quick reactions to get your ideal shot.
With a helicopter, you have pinpoint accuracy and can hover exactly where you need to be for as long (within reason) as you need.
Airspace
Depending on where you want to shoot, you’ll need to know that you’re not going to infringe on anybody’s airspace. In the southeast of England, where I’ve shot a lot of my work, we have three major international airports to contend with, not one of them with any sense of humour about busting into their zones.
When I took some aerial shots of a friend’s wedding, it took about 6 weeks to get permission from Gatwick airport to let us in to the very edge of their area for all of 10 minutes. Your pilot will be able to advise you on any difficulties.
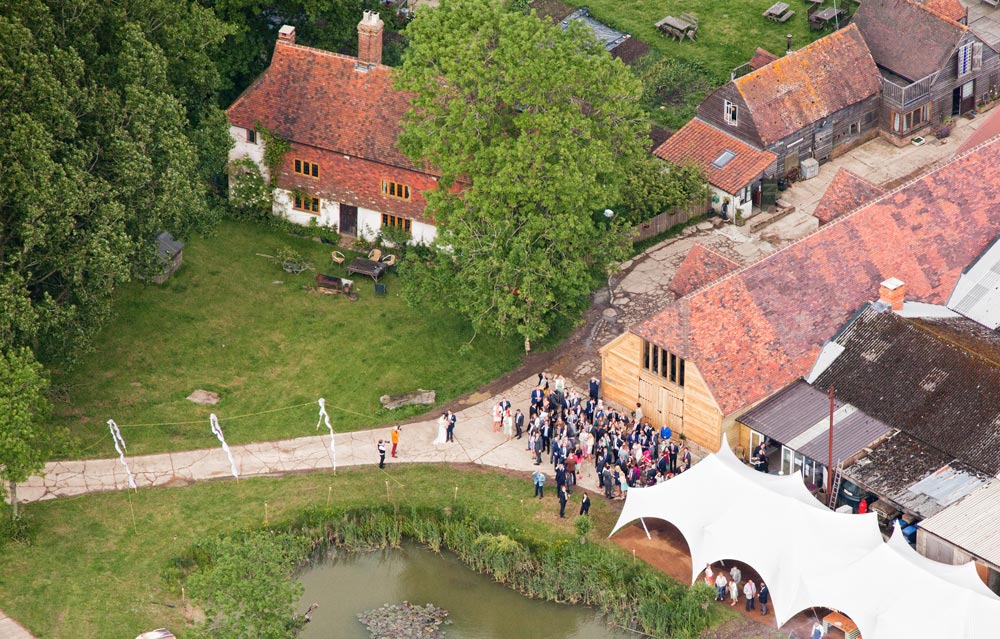
Photo by Andy Callan
Equipment for Aerial Photography
Space is usually at a premium in light aircraft, as is the amount of weight they can legally lift, so this isn’t the day to bring along every piece of kit you own.
One DSLR body and a zoom lens that covers all possibilities is ideal, because trying to change lens in the confined quarters of a moving aircraft is just asking for trouble. Even with the windows closed, it’s always a little breezy up there and you won’t be able to stop dust blowing into the camera sensor.
I’ve always used Canon bodies (a 1D IV currently) with a 5D MKIII as a back up. Because I could be shooting anything from individual houses to wide landscapes in the same flight, I have Canon’s EF 28-300mm. It’s a wonderful lens for the job, but gets a bit heavy after a few hours!
As for memory cards, if possible, you’ll want to bring along one that’s big enough to not need changing mid-flight. They can be slippery little suckers and if you drop it inside the aircraft, you probably won’t be able to retrieve it until you land.
Always keep your kit securely tidied away in the bag for take off and landing. If it’s a bumpy one, loose equipment could fall and get damaged.
And bear in mind that it could get chilly up there as well, so make sure you wrap up. My hunt for the perfect pair of aerial photographer's gloves is now in its tenth year. The best I’ve found are builder’s gloves with removable thumb and index finger bits so I can still work the camera controls. If it’s a cold day, you WILL need to protect your hands!
Photo by Andy Callan
Safety
The first pilot I worked with was fairly cranky and he said he was going to give me the only two pieces of safety advice I’d ever need in a plane:
- “Do what I tell you.”
- “Don’t touch anything.”
To be honest, they’ve served me pretty well. I’m going to add a couple more of my own which are more specific to aerial photographers rather than grumpy pilots.
Firstly – to strap or not to strap? Whether or not I use a camera strap depends on whether I’m shooting from a plane (with just an open window to shoot through) or a helicopter (with the whole door off).
Camera straps are a bit of a pain, mainly because they always seem to get tangled up with the headset cable. Also, I could be shooting for hours on end and that camera gets pretty damn heavy after a while! So I want to be able to just drop it into my lap occasionally to give my arms a rest. If I’m shooting through the little open window of a plane, I know I can sit well back out of the airflow and there’s no chance of me losing the camera out the side. Not with the death-like grip I’ve developed over the years.
Helicopters are a different story. Inconvenient or not, the camera has to be on a strap. With the whole door off it’s just too risky. Anything that falls out could hit and damage the tail rotor or do some real harm to someone on the ground. Either way, not cool.
It’s the same story with a seatbelt. I’ll always wear it for take off and landing, but in a plane I’ll loosen it as much as possible when I’m shooting, or maybe take it off altogether if the weather’s calm. Helicopters? I’m buckled in like a toddler in a car seat all day!
Photo by Andy Callan
Camera Settings for Aerial Photography
Shutter Speeds and Aperture
As we said before, little aircraft are generally a bit shaky, and shaky is not good for photography. To overcome the natural vibrations and your speed across the ground, you’re going to need to use a fast shutter speed. I always shoot in shutter priority mode and, depending on the amount of zoom I’m using, my speeds range from 1/640 sec for landscapes to 1/1000 sec for close up shots. Any slower than that and the risk of camera shake is too much. This obviously means that your aperture will need to be pretty wide to get enough light in, but as you won’t be shooting with too much close up in the foreground (I hope!), depth of field isn’t an issue. You can open up to an aperture of f5.6 with no problems.
Metering
As for metering, that’s a little trickier. One of the biggest problems that aerial photographers have to contend with is the weather. Because you’re shooting over such a huge area, you can have massive changes in light over the whole scene caused by different weather conditions. Stray clouds can plunge part of your shot into darkness while the rest of it stays bright and sunny. Your best bet for a good exposure is the centre-weighted metering option. It’ll measure the whole scene but bias slightly to what’s in the middle of the frame.
Photo by Andy Callan
Image Stabilisation
If you have a fancy-shmancy lens equipped with image stabilisation, turn it off. At the speeds you’ll be shooting, it won’t have any effect on the sharpness of the image and will, in fact, only do one thing; make you want to throw up! The stabilising giros inside the lens produce an opposing movement that keeps the image static inside the camera. So while your eye is telling your brain you’re sitting still, your body is jiggling around all over the place and your inner ear and balance go haywire–leading to a breakfast evacuation.
That brings me, indelicately, onto a top insider tip for all new aerial photographers, which I learned the hard way. Keep both eyes open when you’re shooting. It helps a lot with your own internal giros and keeps you feeling balanced.
Of course, it’s possible you might get sick anyway. If that happens, here’s another tip: aim out the window and make sure the headset microphone isn’t in front of your mouth! (Another hard earned lesson. Don’t ask.)
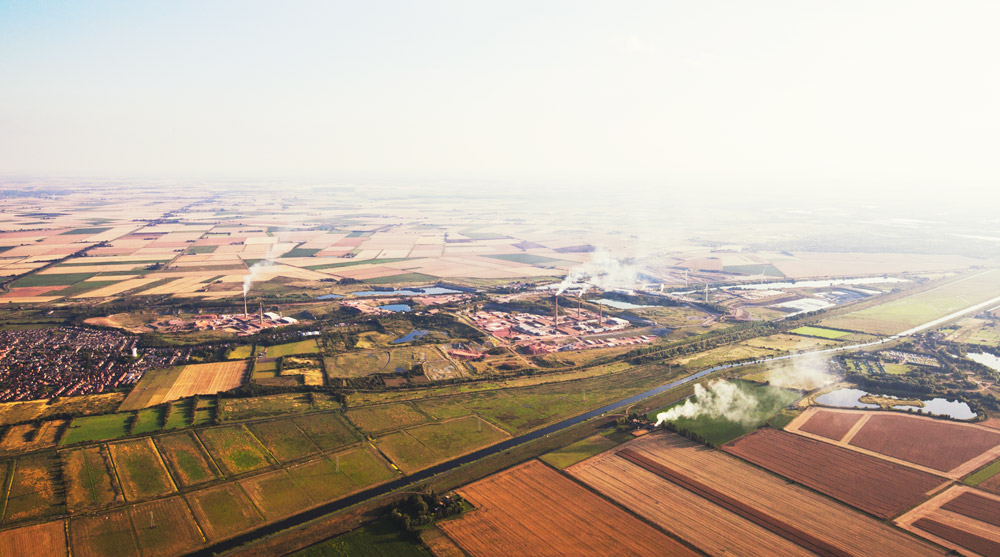
Photo by Andy Callan
Shooting
Aerial photography really isn’t easy, especially at the beginning. There’s no other type of photography like it and it can be overwhelming to start off with. If you’re in a plane, it’ll probably be your first time shooting while you’re moving, and you’ll be moving quickly. Everything looks strange and new, it’s a little cramped and very noisy. All of these conditions are perfect for producing bad photos.
However, the same basic rules still apply. Things like composition, light and lens choice are just as important whether you’re standing on the ground or hovering 1000ft in the air. So let’s look at some of the ways you can land with a card full of stunning images.
Light
The golden hour will always produce the best light for photography. That short period at the beginning and end of the day when the sun is at its lowest and the light is at its softest. Strangely, your chances of being able to shoot at this time will depend on how far you are from your shooting location. Very few airfields are licenced to have aircraft land or take off in the dark, so you have to wait until sunrise to take off and you have to be back down again before sunset. Even so, you’ll have more chance of getting some great shots if you can arrange your flight for the earliest or latest times available.
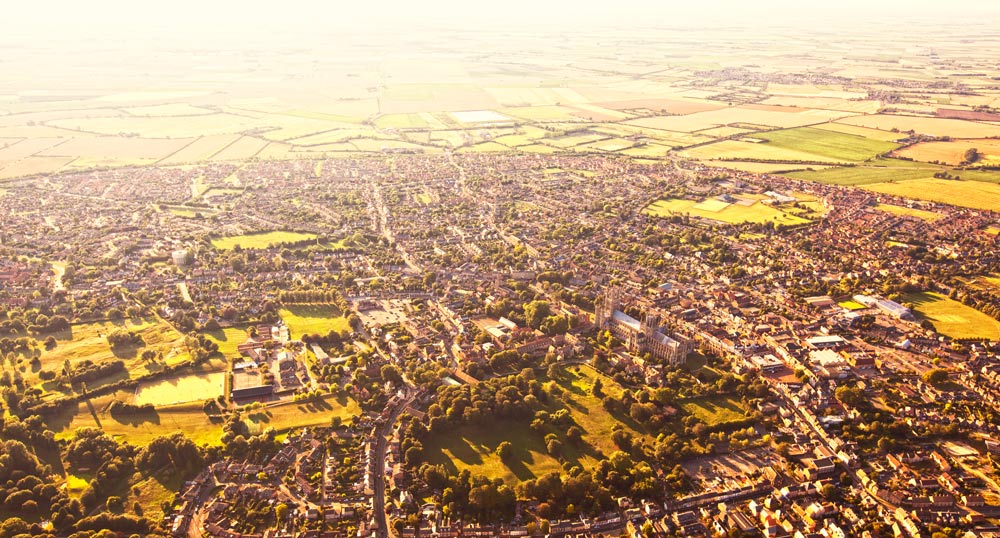
Photo by Andy Callan
Composition
Good composition can make or break a photograph. Being in the air for the first time can cause you to lose your eye for a good image and you might be surprised at just how quickly things move past your viewfinder. The gap between a winning composition and a so-so one can be measured in milliseconds.
Always keep your wits about you and try and remember the same guidelines you would use if you were shooting on the ground.
Leading Lines
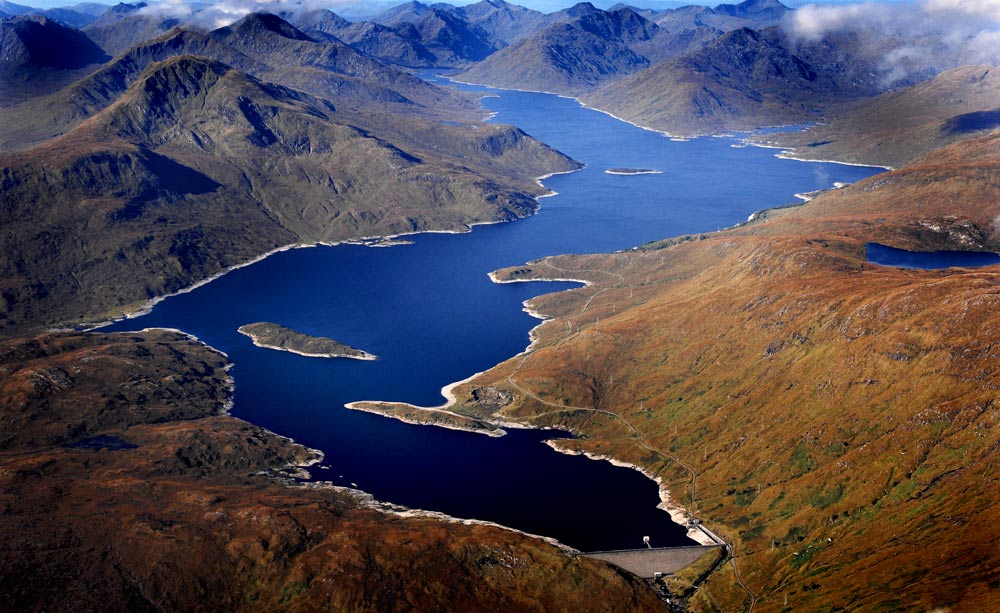
Photo by Andy Callan
You can use natural features like rivers or man-made ones such as roads to draw the viewer’s eye through your shot.
Rule of Thirds
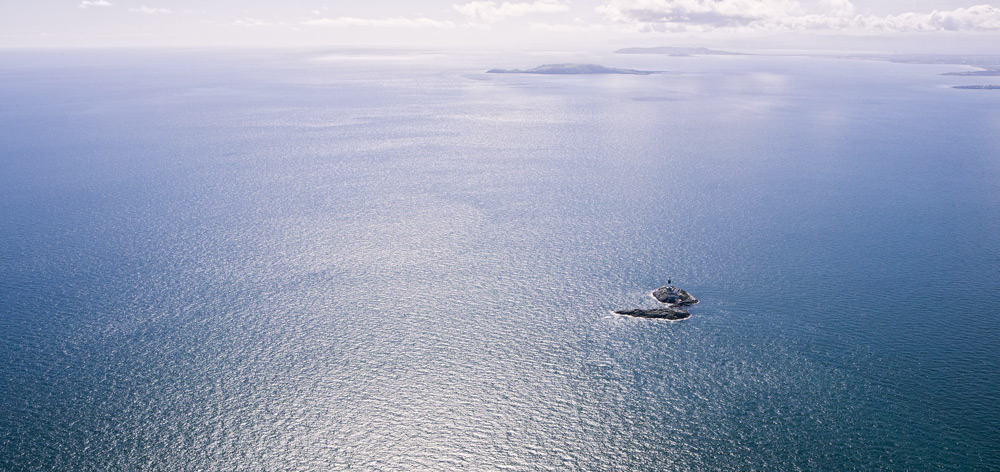
Photo by Andy Callan
Imagining a grid dividing the image into 9 squares and putting an important element from your scene along one of those lines or where they intersect, gives a balance to your shot that works well, wherever you are.
Viewpoint
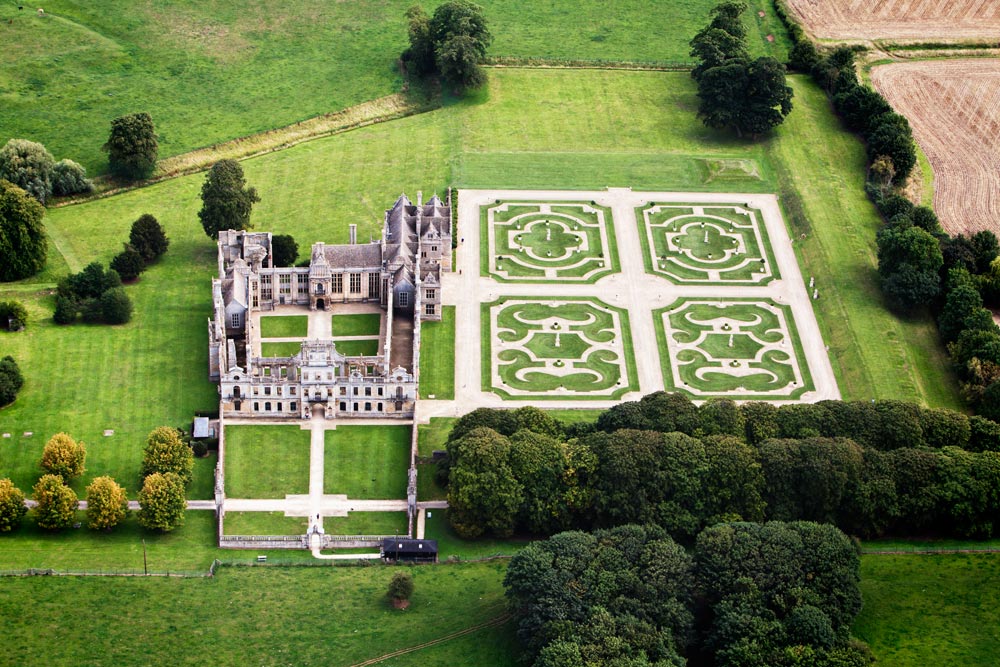
Photo by Andy Callan
Your viewpoint makes a huge difference to the success of any shot, and you now have almost limitless scope for exploring your subject from every angle
Patterns
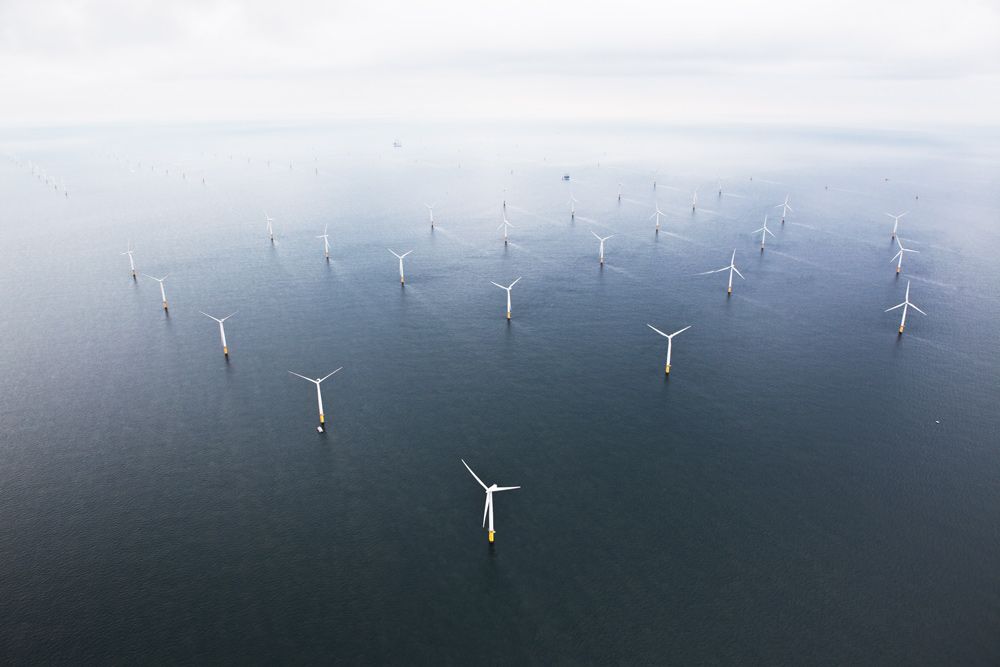
Photo by Andy Callan
Patterns and symmetry occur everywhere around us, and from the air they’re even easier to spot and can make for compelling images.
Fill The Frame
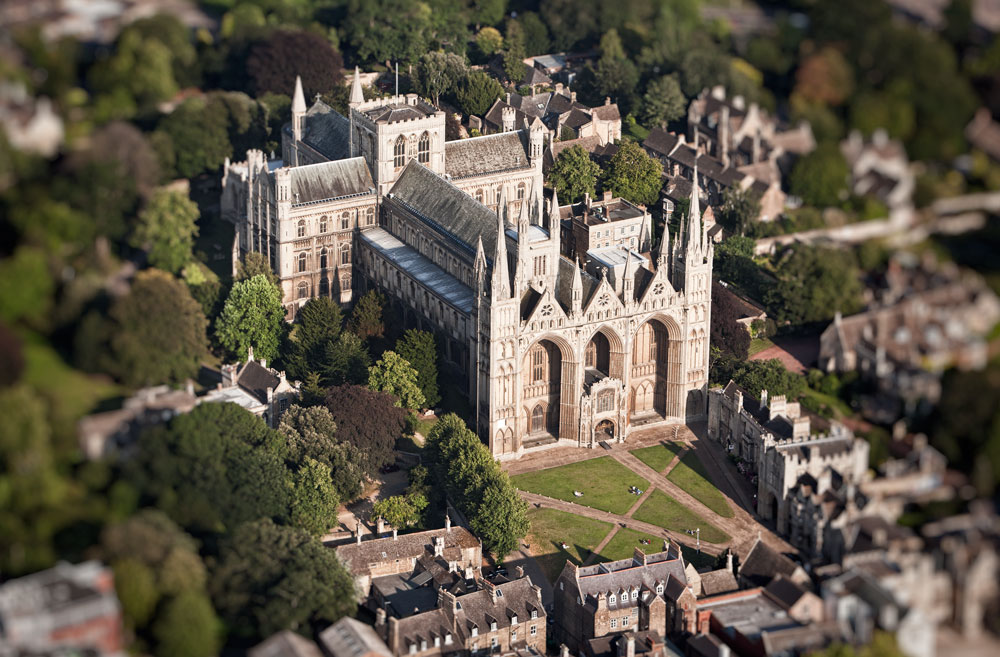
Photo by Andy Callan
There are very strict rules governing how low you can fly, so filling your frame can be tricky. But using a long zoom and some post-production cropping can bring strong results.
Straight Horizons
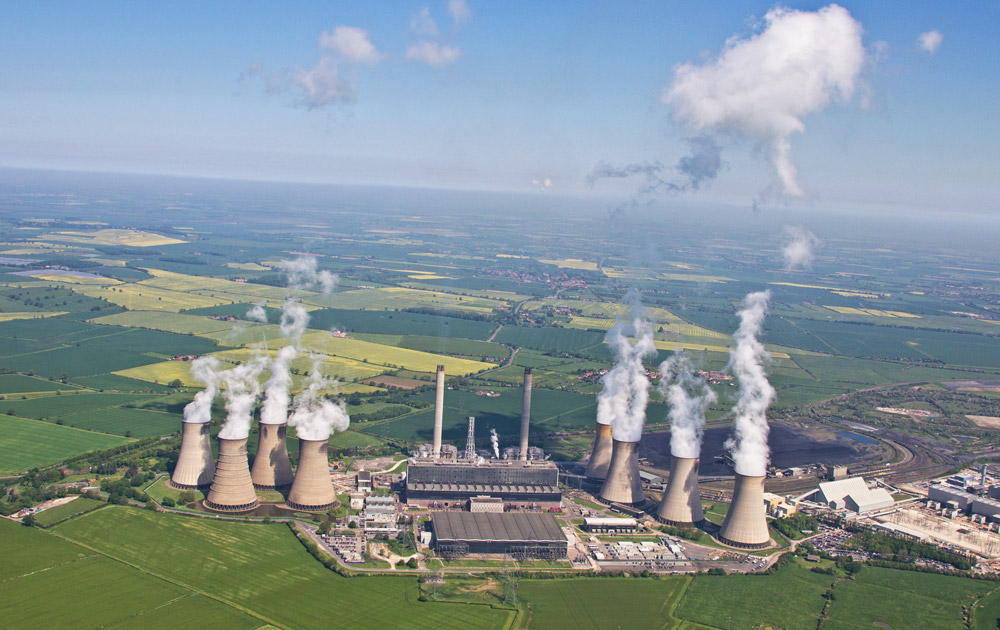
Photo by Andy Callan
It’s not a hard and fast rule, but a level horizon in an aerial shot generally looks better.
Lens Choice
One thing you’ll notice straight away when you start taking aerial shots is just how small a gap you have to shoot through from an aircraft. Above you is either a wing tip or a spinning rotor to creep into the top of your frame, and at the bottom is the wheel or landing skid. If you’re in a high wing plane, you have the strut to contend with too.
It can be frustrating when you want to take a wide-angle shot, and portrait aerial shots are rare. Think carefully about your lens choice and don’t go super-wide, fisheye crazy. A 28mm wide-angle on a full frame camera is about as wide as you can go safely, but don’t forget to check the edges of your frame as you shoot.
Photo by Andy Callan
Being There
Successful aerial photography is a two-person job. You have to be able to communicate exactly what you want to achieve with your pilot. Make a careful plan in advance, brief the pilot before you take off and keep up a running commentary as you’re shooting. Light aircraft are extremely manoeuvrable and can be positioned pretty much wherever you need them to be, but only if the person flying it knows where that is.

Photo by Andy Callan
Conclusion
I hope that you’ve found this little guide useful. The chance to jump into a plane or helicopter and take some aerial shots doesn’t come along every day–even for the pros–so grab it while you can.
Have fun and happy landings.


9 Comments
Wonderful pictures are posted at this page.
At the moment I’m inspired to take my own pilots license 😀
I’m waiting for the next “flying pictures”.
Kind regards
Thomas
Thanks Thomas! Hope you manage to get airborne soon!
Great article.
Once upon a time I was associate editor for a boating and fishing magazine in Ft. Lauderdale Florida. Fishing tournaments were a prominent component of the news so the publication hired pilots to fly me around in high wing aircraft to shoot various boats and hopefully fishing activity. Only in the Bahamas did I shoot from a helicopter which never was fun!!!!
Out over the Gulf Stream, there were no limitations to how low the pilot could fly the plane. Sometimes I’m sure that the landing gear skipped the top of the waves while I was shooting. Fortunately, I was too busy to think about worrying. Besides, if we ditched, there were plenty of fishing boats to come to the rescue.
And remember, they were the film days… no chimping. Never knew how many images would be usable by the art director back at the office. Most were not! Thank goodness for good luck… which enabled enough images with sufficient quality to publish.
In the beginning, I also experienced some of the bodily components that you described but never revisited my breakfast. By the third flight buzzing fishing boats became normal thrills. But as you so aptly said… considering the challenges… it’s never easy!
Cheers!
Thanks for the great comment Bob! I actually trained for my my pilot’s licence in Florida, so I know how beautiful it must’ve been flying round there. Sounds like a fun gig you had. Do you miss it?
Very interesting to read your article. I have spent some time photographing out of small planes in Alaska and fully agree with a lot of your tips. Lately I have been using a drone for aerials and think this could be the next big thing…check out my best of 2015 Gallery in the website link.
Have you thought about going that way yourself?
cheers Andrew
Wow! Andrew, those are some truly incredible images! Were they all taken from drones? I think you’re right about them being the next big thing. The problem in England is airspace–it’s such a small country that there’s very few places where you can fly them safely, especially in the south, and there doesn’t seem to be much regulation at the moment. There was a near miss between a drone and a landing commercial airliner at Heathrow last year. The thought of a collision between the two is terrifying.
However, I’ve recently moved to Northern Ireland which has very little in the way of restricted airspace, so it’s something that I’m definitely going to look into. What equipment do you use, if you don’t mind sharing?
Great post
Thanks very much Erica! Really glad you enjoyed it.
Great article, just a couple of thoughts to add (I’ve done a fair bit of flying and shooting, sometimes at the same time (!)), and I’ve picked up a couple of tips along the way:
– Good call on the 28-300 lens (Canon EF 28-300 L FTW) – it’s a real bugger if not downright dangerous trying to change lenses in flight.
– Regarding the camera strap, I’ve found using a carabiner to secure the strap to my harness, rather than putting the strap round my neck works very well. Just make sure it’s a good carabiner (one with a screw gate might be a good idea although I don’t use one), and also make doubly sure the strap is secure on the camera!
– Ever since I heard about a game darter falling out of a chopper after inadvertently unbuckling his harness, and then leaning out to take a shot, I’ve become a bit paranoid about that so I try to tape up the buckle with gaffer tape if I remember to bring some. Not too heavily though, as I still might need to rip it open it in a hurry in case of the unthinkable… If it’s not taped then I make sure to check it often.
– Lens hoods will blow off in the slipstream, so they’re best left on the ground. It’s also a good idea to try to avoid sticking the lens out into the slipstream as the airflow round the lens/camera will cause quite a lot of vibration.
– Double-tapping when shooting out of a helicopter helps if you’re worried about a rotor blade in the frame – usually more of a problem when banking towards your subject.
– On using a helicopter because it can hover, I prefer not to hover or fly at very low airspeeds as the vibration gets pretty bad and makes shooting pretty awkward (I’ve only ever flown in twin-blade choppers like R-22s, -44s and Jet Rangers, but I understand that it’s not such an issue in machines with three or more blades). I’ll only ask the pilot to fly slowly or hover if I absolutely have have to, for example tracking with a slow-moving boat. Also, if you are considering using a helicopter for this reason, make sure you have a pilot who has plenty of experience in photo ops, as hovering (or under certain conditions flying very slowly) at an altitude that takes you out of ground effect exposes you to the risk of something known as Vortex Ring State, or Settling With Power. VERY simply put, this is when the helicopter descends into the downwash generated by its rotors, and no matter how much power is applied the descent cannot be arrested. An inexperienced pilot might not be able to control the hover precisely enough to avoid it, and also not realise soon enough what is happening and use the appropriate recovery technique. There was a crash here (in Cape Town) a few years ago which was caused by this very thing (inexperienced pilot flying a photo sortie entered vortex ring state at low altitude and couldn’t recover) – luckily everyone walked away – including two execs from the commissioning company who were along for the ride – which opens up another can of worms…
– Damn right about the chance not popping up often. Definitely not often enough for me these days!