How to Jazz-Up Flat Photographs
Ever get that feeling sometimes your images look a bit…washed out, lacking some color or contrast?
It doesn’t happen all the time, but under certain lighting conditions, cameras have a tendency to get the exposure wrong. Recognizing this is happening is half the battle, the other half is doing something about it.

Today we are going to have a look at both halves of the equation and help you put some punch back in your shots.
See the Problem
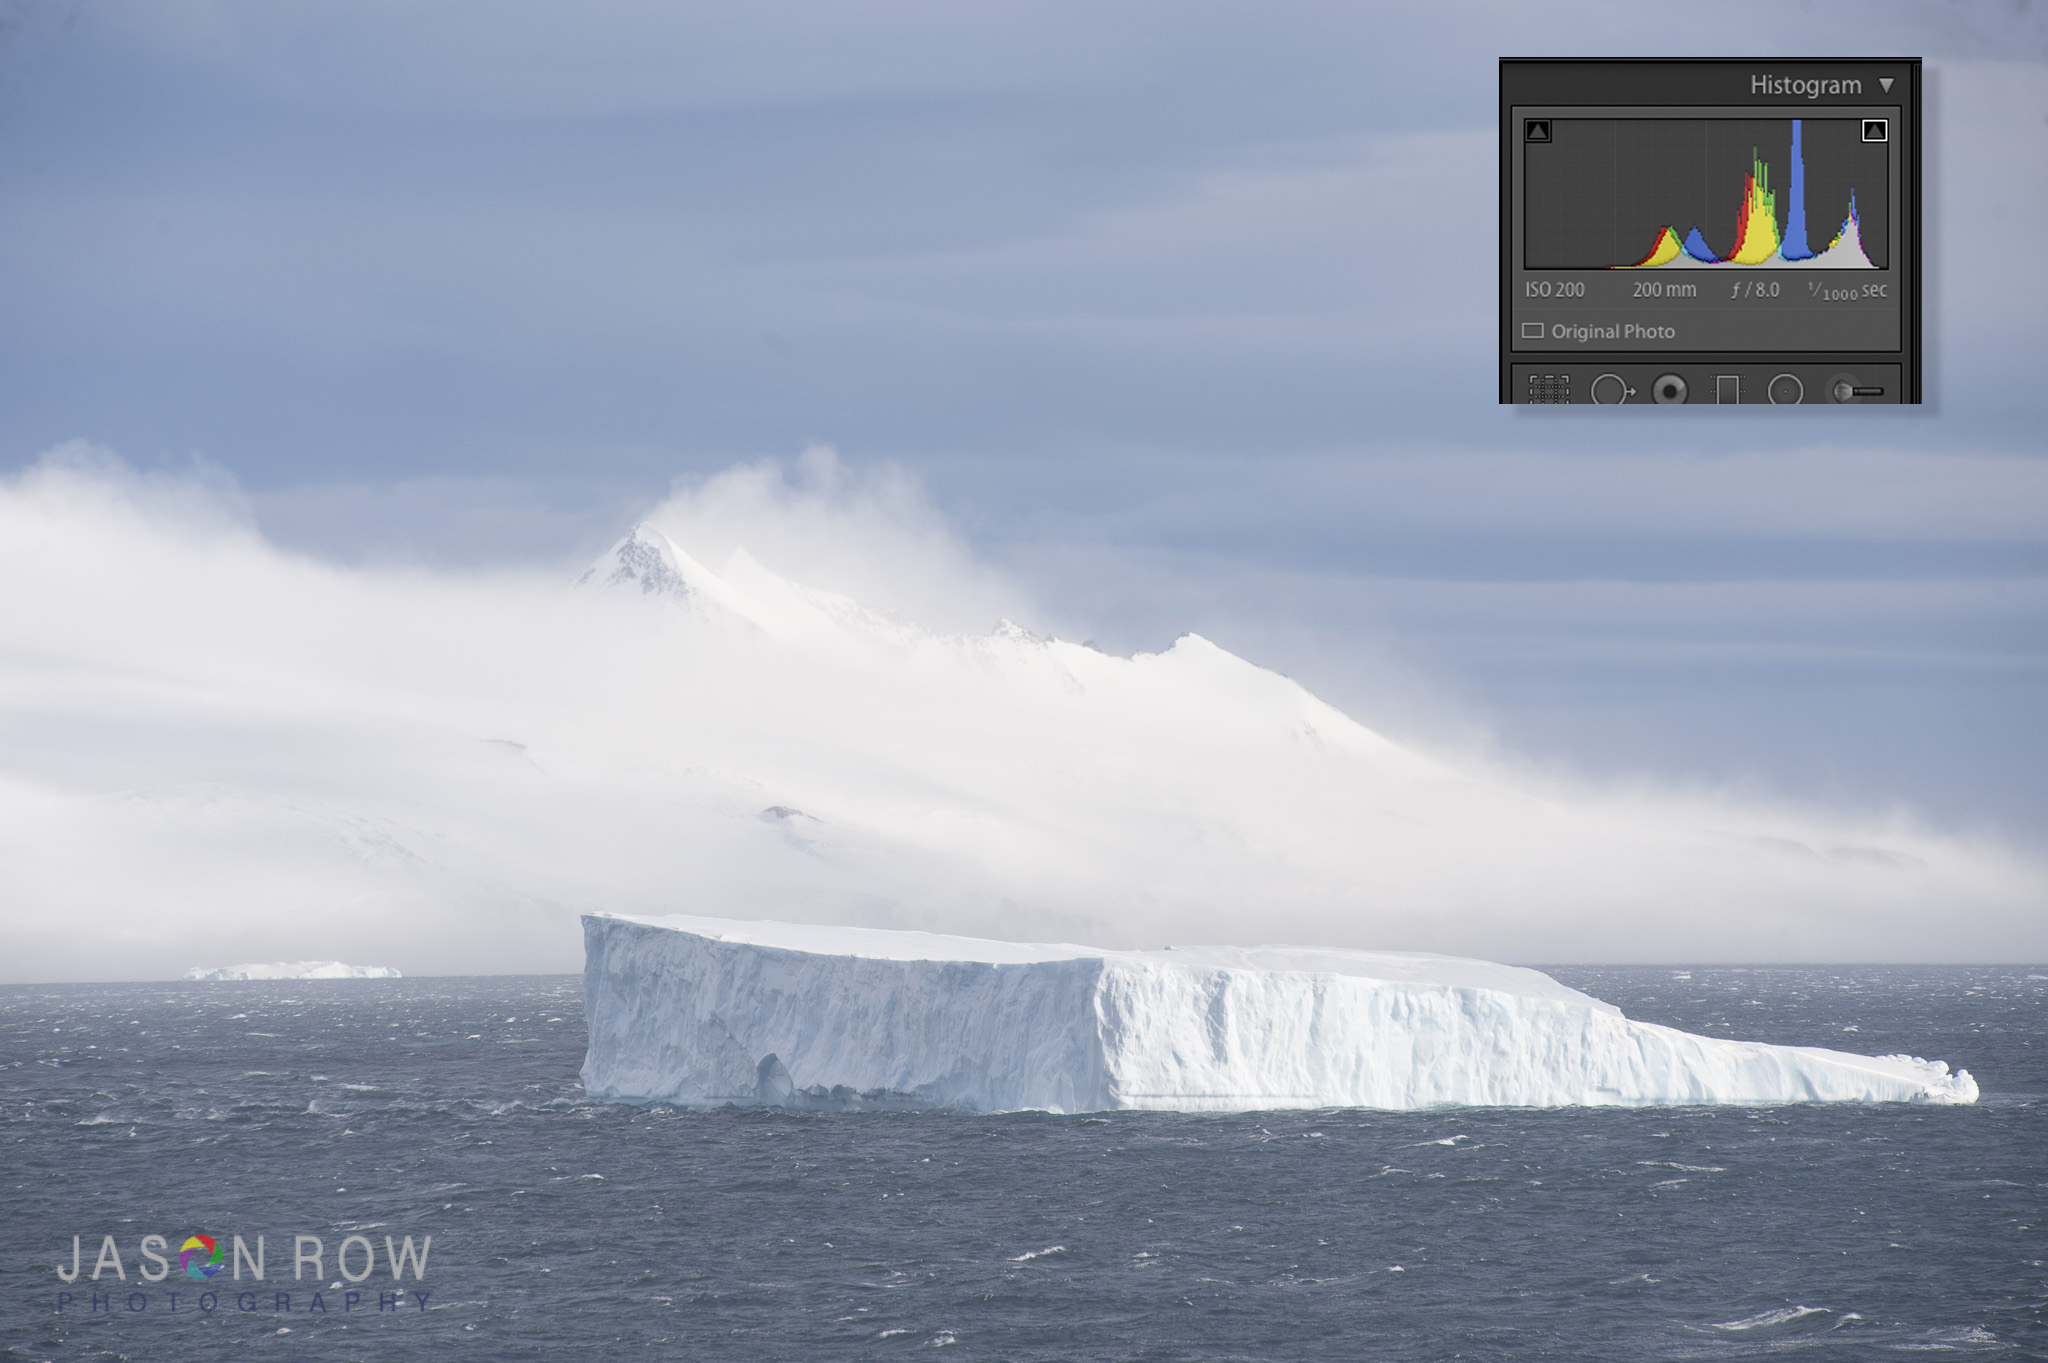
Recognizing a washed out photo can be tricky if all you use is the preview on the LCD. A better option in the field is to use the histogram. If the majority of your histogram if bunching up to the right then you are close to over exposure. This gives the potential for washed out images.
If the histogram has a very narrow band with a very steep and narrow mountain peak then you might be looking at low contrast. This can be another factor in washed out images. There are two ways we can deal with washed out images:
- In the camera, and
- In post production.
Get it Right in Camera
In this scenario (above) we've recognized some potential issues using the histogram. So, what can we do?
Firstly, we can try to reduce exposure a little. Close down half to one stop or increase the shutter speed and monitor the histogram. If it moves back to the left or expands a little, you should reduce the washed out look.
Secondly, we can try to bracket our images. This involves taking a series of shots at varying exposure both over and under the metered exposure. This gives us two advantages.
One we can choose the punchiest least washed out shot and two, we can create an HDR image in post production.
Another way to avoid washed out images in camera is to use filters. Polarizers, in particular, are great when you have strong bright sunlight that's giving an overly bright look to your images. The polarizer will return some contrast to the image, reduce glare and increase saturation.

If you have a bright foreground and washed out skies, a graduated neutral density filter is a good option. This will allow you to reduce the exposure on the foreground without washing out the sky completely.
If you are not comfortable with using RAW files or post production, you can use some of your camera’s in-built presets to boost contrast and saturation. These are sometimes called film modes, scene modes or similar depending on manufacturer.


Fixing it in Post
We can fix a lot of washed out images quite easily in post production. It might be that we did not realize the image would be washed out or we might have deliberately washed the image out to improve it in post production. Shooting to the right is an example of this.
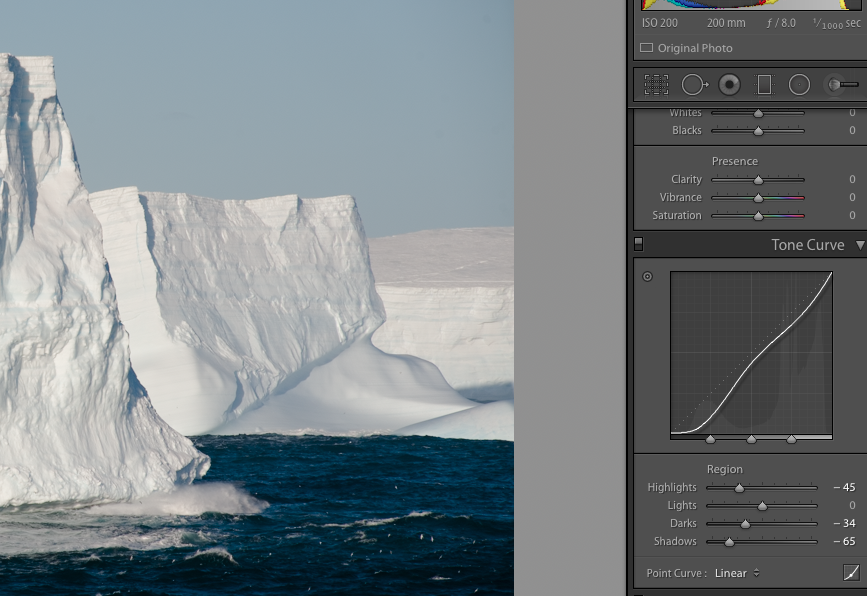
Your best friends in post production are either levels or curves. Levels are less intimidating to the newer photographers whilst curves give you more control.
To get some more punch in your images start by pushing the blacks a little. You can do this by sliding the black or shadow slider to the right with levels or by creating a curve to boost contrast. There are tutorials here on Lightstalking on how to do that.
Lightroom users who might be new to photography might find it easier in the beginning to use either the contrast slider or the clarity slider. Both in combination with the exposure slider.
Make small adjustments with these until you are happy with the image. However, in post production terms they are a little like cracking a walnut with a sledgehammer.

We also talked earlier about HDR. This is another way we can combat a washed out image. By combining multiple exposures we can increase the dynamic range and contrast of an image to give it much more punch.
Take care not to overdo it though, it is very easy to create a garish image from a washed out image – basically, the total opposite!
A big advantage in post production is if you shoot RAW. This will give you naturally flat looking images in camera. However, the image retains much more of the information from the sensor.
In short, this gives you much more control and latitude in post-production before you start to get noise or blow highlights. If you are nervous about shooting RAW alone, you can always set your camera to record both a RAW and Jpeg file giving you more options.
Summary
Washed out images are easy to control. The key is recognizing them in the first place, ideally in camera. Then you can use camera settings or post-production techniques to bring back the exposure and contrast.
Practice over exposing some of your images, without pushing the histogram beyond the right side limit and use post production to recover them.
Improve Your Photos in Lightroom – Top Takeaways
- When out shooting, always aim to get things right in camera by studying your histogram rather than the LCD image being displayed.
- Lens Filters can help out with extremes of light – particularly the harsh bright light when trying to photograph a landscape for example.
- Use Curves and Tones for greater control of managing the depth and controlling contrast.
Further Resources
- A Beginner’s Guide to Dynamic Range (Plus Useful HDR Photography Tips) by Dzvonko Petrovski
- How I Edited This Portrait Photo in Lightroom by Lightstalking
- Use The Details Tab in Lightroom Like The Pros Do by Jason Row
Further Learning
Making the most of Lightroom’s editing tools?
We have the Course for you, Steele Training Lightroom Made Easy.
This will enable you to learn the tricks from the pros, create stunning images plus a whole load more and quite simply, make you a more efficient and confident editor.


