Add some Dynamics to Your Photos Using Fill In Flash
Camera flash can be an immensely useful tool. It can also be an immensely frustrating tool.
The tiny light that adorns the top of your camera is capable of some hideous results if not used carefully and with some thought. You could experience one of the following without fill in flash: Red eye, harsh shadows, bright, unflattering and cold light.
These are all things that can happen either with your built-in (pop-up) flash or with a dedicated flashgun on top of the camera.
Used well, however, they can create striking and beautiful images. One of the best uses of camera flash is called fill in flash and today we are going to give you a short guide to it – what it is and how to use it.

Stefan Stefancik
What is Fill In Flash?
A simple question. The best way to think of fill in as a supplementary light source, not a primary one. It is best used to reduce the harshness of other light sources.
This might be the sun, or it might be other studio flashes. It is used as the name suggests, to “fill in” shadows cast by a harsh light. On a model, this might be shadows under their nose, chin or eyes. It can also add a little sparkle to the eyes.
It’s not solely restricted to people either. Any subject that has shadows that need lifting is a candidate for fill in flash. It is often used in macro photography on plant and insects. It is also
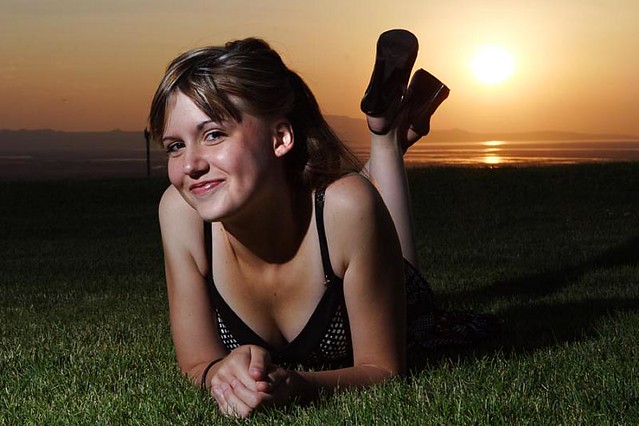
It's also a very useful technique for lighting a backlit subject. An example where it is often used is to light a person’s face when shooting on a beach, particularly with the sun behind.

Fill In Flash allows us to lift shadows and supplement ambient light.
How Do I Use it?
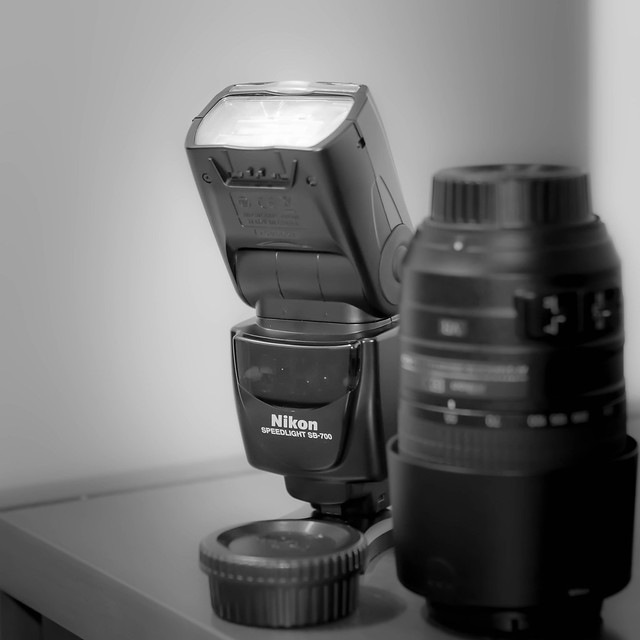
Your two primary options for using fill in flash are your camera’s built-in flash or by using an external dedicated flashgun. The latter is a more controllable option but it is still possible to get great fill in results using a pop-up flash.
If you're using your camera’s built-in flash, there will almost certainly be a flash mode called “Fill In.” Depending on the camera this will give an automatic amount of flash or will afford some control over the flash output.
The mode can be selected either from an on-camera button or dial of via the camera’s menu system.
Using an external dedicated flash, you will have two options:
1. First is to use the camera/flash’s dedication. This means that the camera’s exposure meter will send information to the flash gun on how much light to output. In dedicated mode you will usually set the fill in mode using the camera menu and shoot in one of the camera’s auto modes.
The advantage of dedicated fill in flash is that if your subject has a varying distance the camera will work out the correct flash output. The disadvantage is that any variation in the other light sources can cause a variation in the final exposure.

Fill in is not restricted to human subjects.
2. The second option is to use manual flash. With manual flash, you set a power level defined as fractions of full power. Full power would be 1/1 and the minimum flash maybe 1/64 or 1/128.
To use manual fill in flash you will need to experiment to get the right balance. If your subject moves position you may have to adjust again to maintain a consistent exposure.
The advantages are for a subject that does not move too much. You will get both a consistent exposure and a constant white balance.

A dedicated external flash will be much better than the camera's internal one.
The Flash Ratio – What is it and How to Utilize
The flash ratio is an important element with fill in flash. It tells us the ratio between the ambient light and the output of our flashgun. A ratio of 1:1 will give us equal levels of ambient and flash light.
For example.
Shooting a subject outside, the ambient light might give us an exposure of 1/250th f/8. If we then set our flash to f8 we get a 1:1 light ratio.
Understanding the ratio is the key to getting different looks when using fill in flash. If you want to have a darker background you might keep the camera aperture at f8 but set the flash to f/11. This will give a higher output of flash light rendering the background darker.
If we wanted to maintain the background and add a little light to shadows on a face we would set f8 and reduce the flash output to f/5.6. This reduces the amount of flash being emitted.
Although important, don’t get too bogged down with ratio’s, the best technique is experimenting until you get the right look for your shot.
Summary
Fill in flash has great potential to make improvements to our images. It can lift shadows, add dimension and elevate a flat image to something special. As with many aspects of digital photography, practice is key. There is no golden setting for fill in flash, but with our LCD screens we can see if we are getting the right result and act accordingly.
Further Resources
- Seven Keys to Starting with Flash Photography by Jason Row
- Flash Synchronisation Demystified by Jason Row
- How to Use Fill Light to Improve Your Portraits by Dzvonko Petrovski
Further Learning
Learn the fundamentals of Lightroom Editing and make your images really work for YOU by getting the best out of them.
We recommend this fantastic course by the guys at Photography Concentrate – Super Photo Editing Skills.


