Since Adobe quietly dropped support for its standalone version of Lightroom, many of us are now subscribing to Adobe’s Photographer’s package. As well as getting the traditional Lightroom CC Classic we also get the new Lightroom CC and more significantly, the full version of Photoshop.
While Lightroom in itself is an incredibly powerful tool, there are some things that Photoshop does better. The problem is that Photoshop is a daunting prospect, especially if you are a newcomer to photography or even to Adobe.
Today we are going to take a look at three Photoshop tools that trump their equivalents in Lightroom.
1. The Curve Tool
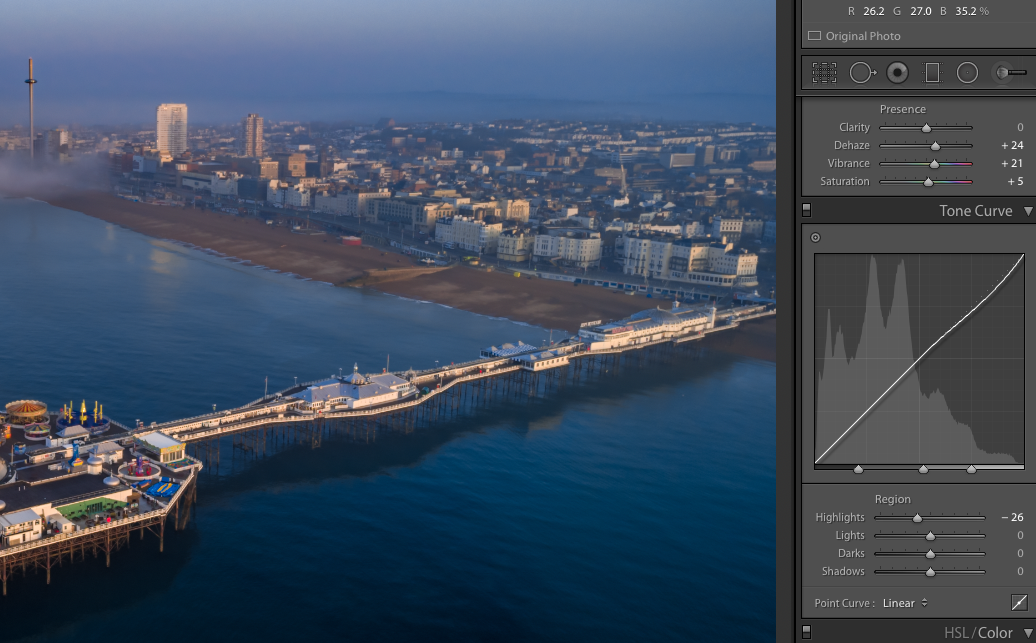
In Lightroom, this tool is called Tone Curve and in itself is a very powerful tool. It allows manipulation to the curve either manually or by using sliders in the four main tonal regions. Photoshop, however, has an even more powerful curves tool for the following reasons.
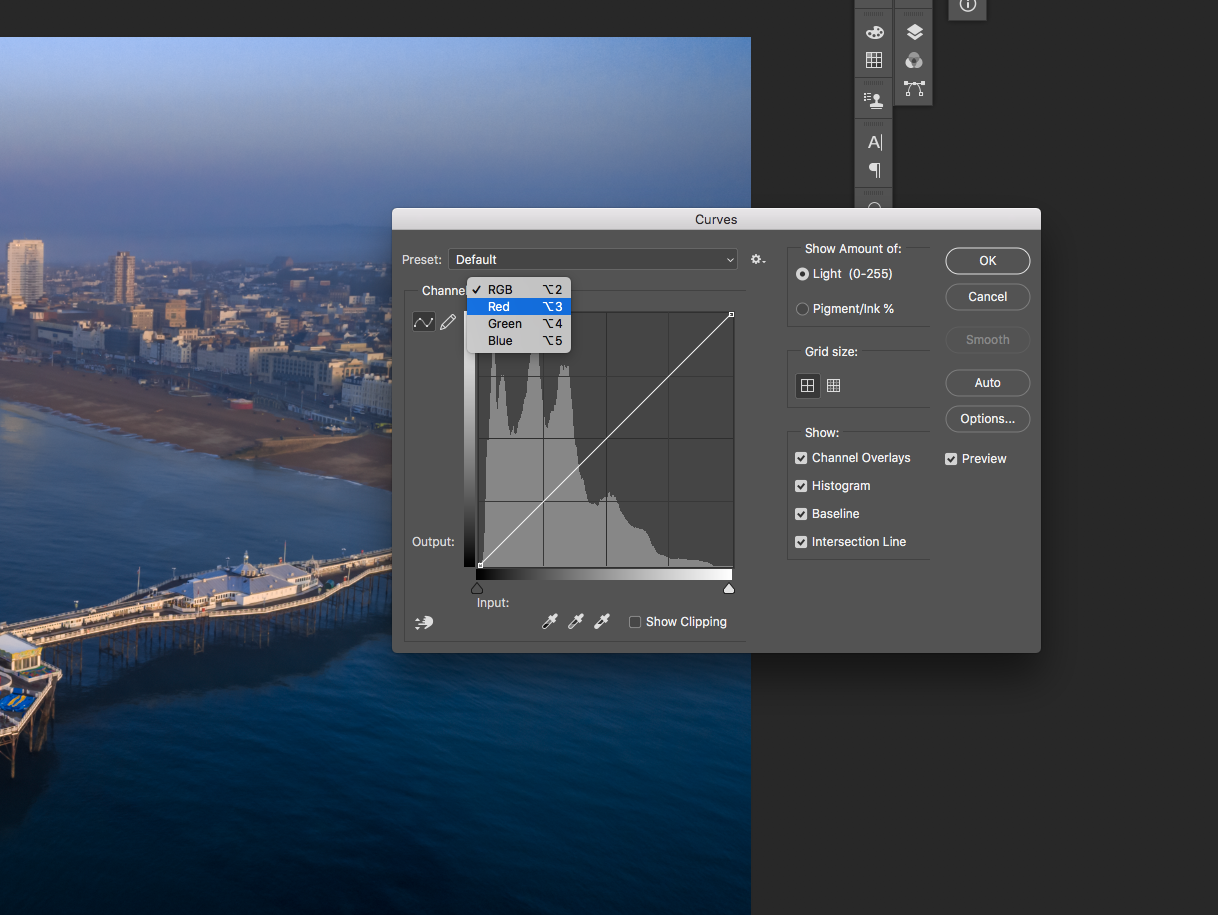
First and perhaps most importantly, it allows us to adjust the curve not only in the combined RGB channel but also the individual Red, Green and Blue Channels. This gives us a very fine degree of control over colour levels and contrast as well as luminance.
Secondly, you can draw your own custom curve using a pen tool which, with experience, can be a much quicker way to make an adjustment.
The third reason is the larger range of curve presets available. Lightroom has three simple preset while Photoshop has nine much more advanced presets.
Lastly, in Photoshop, we can save our own presets for later use.
2. Selective Colour v HSL
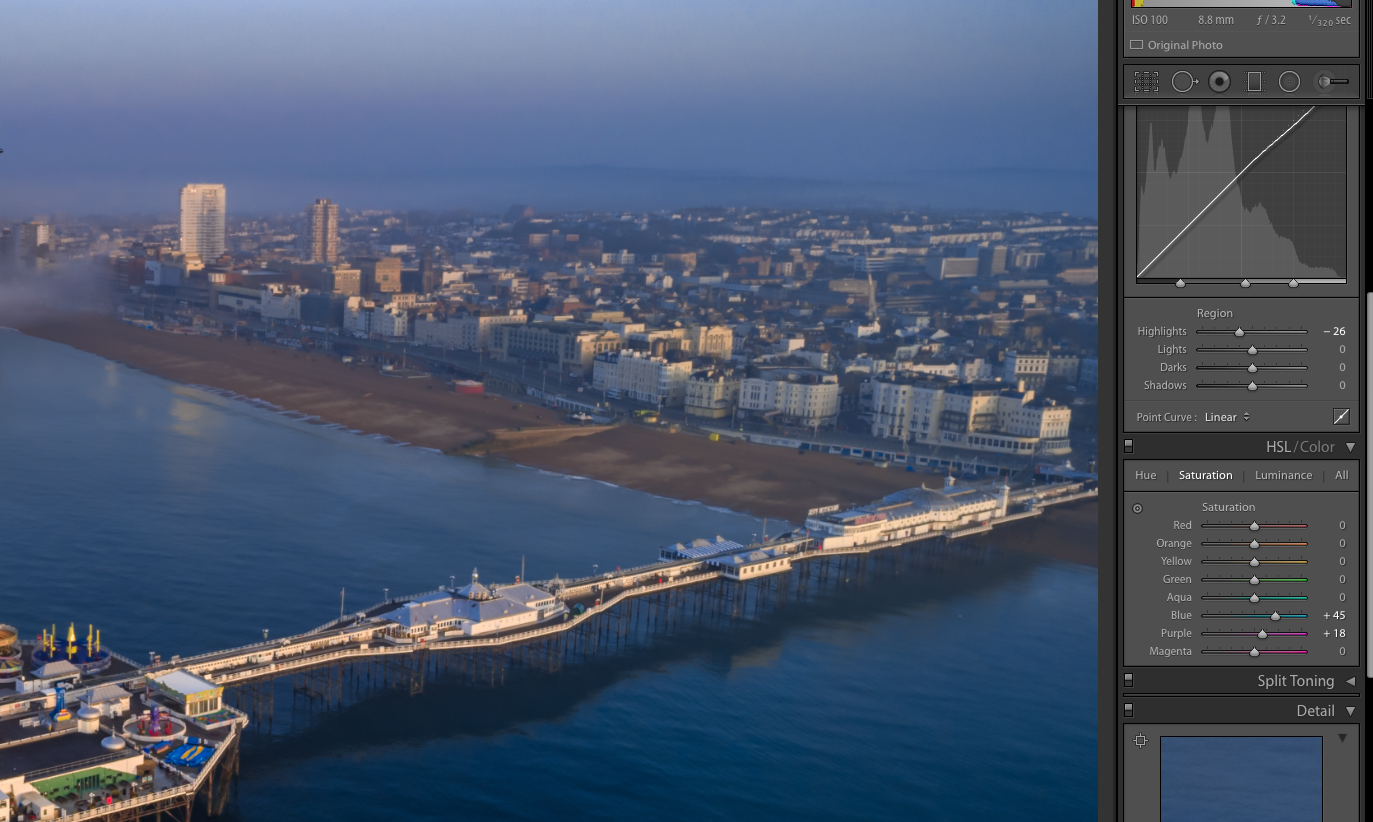
Lightroom has an excellent tool called HSL/Color. This allows us to fine control the way colour looks in our images. The HSL section allows us to change hue, saturation and luminance for each of the primary and secondary colours. The Color tab allows us to control the hue, saturation and luminance within those individual colours.
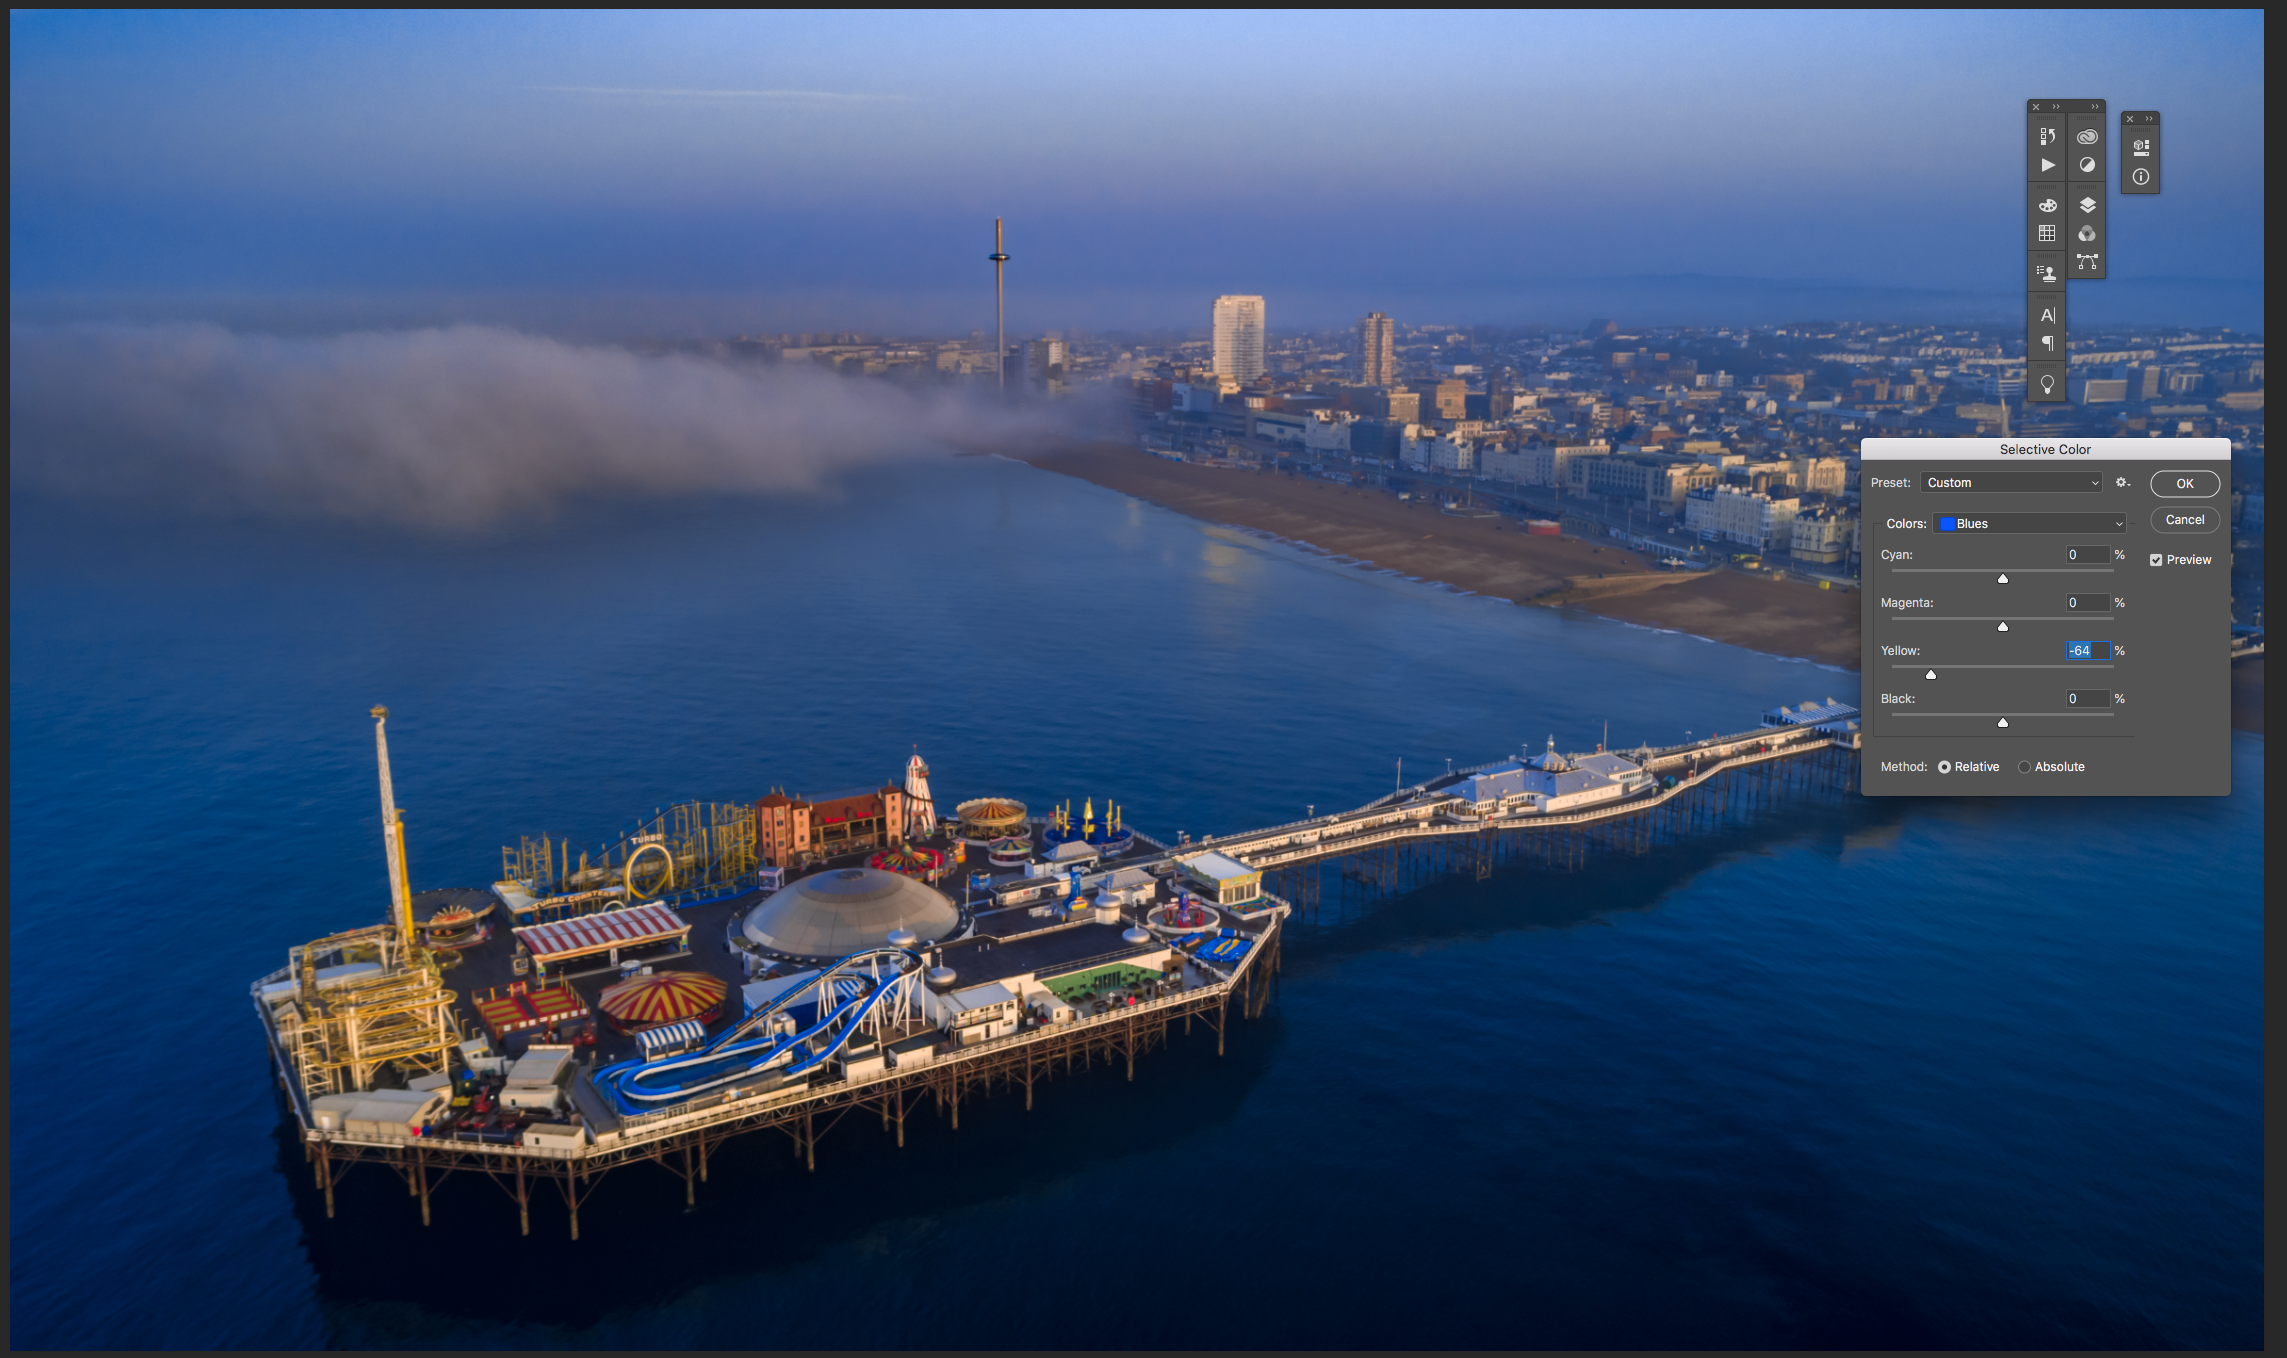
The Photoshop equivalent is called Selective Color and it goes one stage further than HSL/Color.
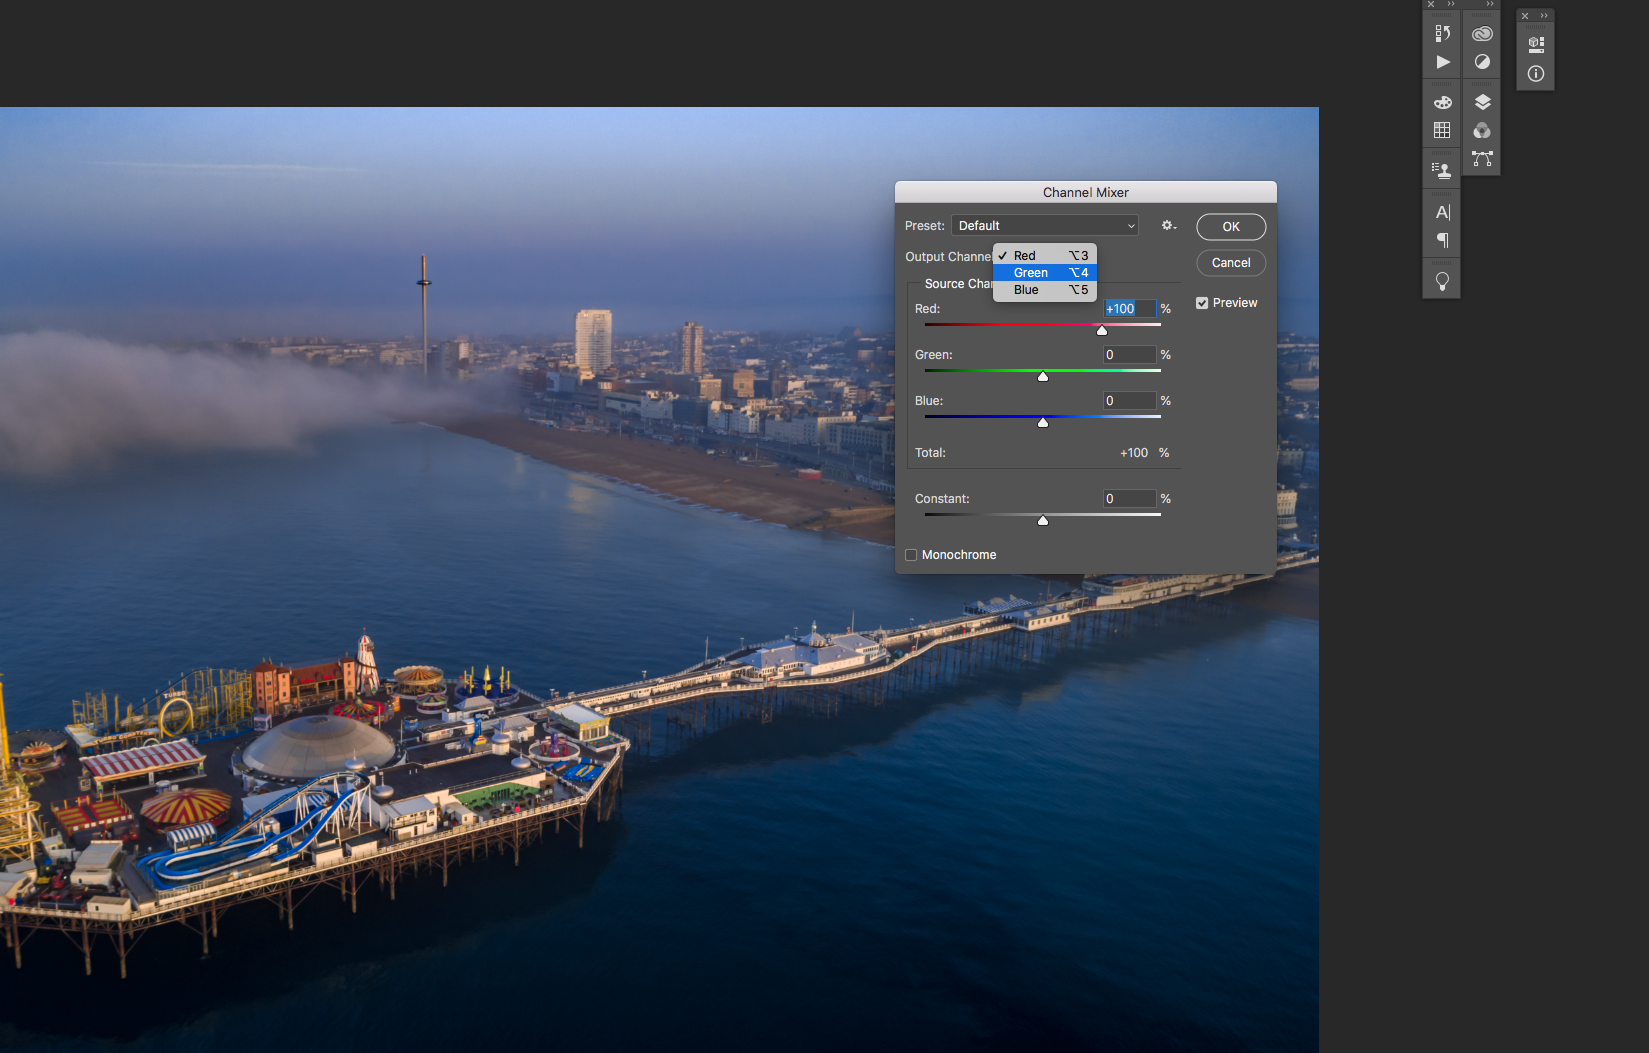
What it does is allow us the control the levels of cyan, magenta, yellow and black within each of the primary and secondary colour as well as the whites neutral and blacks. This gives us an almost infinite amount of control over not only the colour but also the brightness of those colours.
For example, if we feel that our blue sky has a slightly red tinge to it, we can select the blue channel and reduce that red by adding a little more cyan. We can control the luminance level of the blue sky by sliding the black slider left or right. Selective Color is a very powerful tool if you want fine control over the look of your image.
3. Healing Tools
The third tool where Photoshop trumps Lightroom is the healing tool. Lightroom has a Spot Removal tool. This is split into two basic options, Clone, which works in a very similar way to Photoshops venerable clone tool. You manually select a region of the image to cover over the blemish.
The second option is the Heal tab. This works in a similar way only it decides from where to draw the source to cover the blemish. Both are useful for basic spotting and cleaning but Photoshops tools are much more powerful.
The main Photoshop tools are Spot Healing Brush, Healing Brush, Patch, Clone and Content Aware Move. The beauty of these tools is that they are content aware. In other words, they calculate the area surrounding the image and attempt to replicate it when repairing an area.
The patch tool allows us to quickly correct large areas, while the Content Aware Move will allow us to move an object elsewhere and fill the background automatically.
Overall if you are wanting to make some significant improvements to your image, then the Photoshop healing tools are the way to go.
One Last Thing.
Although Lightroom and Photoshop are two separate and distinct programs, they are designed to work together. Lightroom is an image management app with some powerful editing tools while Photoshop has always been a dedicated editing program.
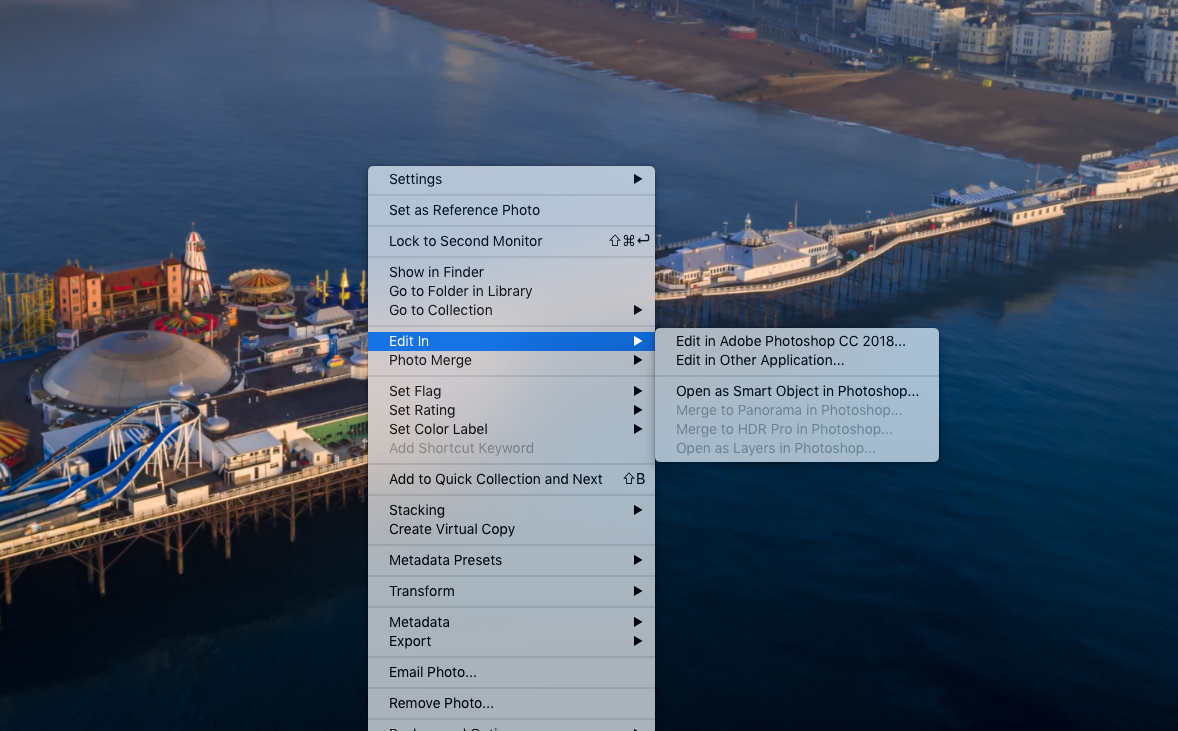
We can easily work between the two by using round-tripping. This allows us to select an image in Lightroom, work on it in Photoshop then return a saved version back to Lightroom. It does this without affecting the original. To do this, right click on the image you wish to edit. Select Edit In – Edit In Photoshop CC. Carry out your Photoshop edits and then return the image to Lightroom simply by saving it.
Lightroom has some pretty powerful editing tools for photographers but as a dedicated editing suite, Photoshop may sometimes be needed for more advanced editing.
The tools mentioned above are just some of those where Photoshop is better than Lightroom but it should also be noted that Photoshop has a lot of tools and features that simply do not appear in Lightroom.
Given the close integration of the two, it's well worth taking the time to learn some of Photoshop’s advantages. You may well find you take your editing skills to the next level if you do. Lightroomrsion of Lightroom, many of us are now subscribing to Adobe’s Photographer’s package. As well as getting the traditional Lightroom CC Classic we also get the new Lightroom CC and more significantly, the full version of Photoshop.
While Lightroom in itself is an incredibly powerful tool, there are some things that Photoshop does better. The problem is that Photoshop is a daunting prospect, especially if you are a newcomer to photography or even to Adobe.
Today we are going to take a look at three Photoshop tools that trump their equivalents in Lightroom.
1. The Curve Tool
In Lightroom, this tool is called Tone Curve and in itself is a very powerful tool. It allows manipulation to the curve either manually or by using sliders in the four main tonal regions. Photoshop, however, has an even more powerful curves tool for the following reasons.
First and perhaps most importantly, it allows us to adjust the curve not only in the combined RGB channel but also the individual Red, Green and Blue Channels. This gives us a very fine degree of control over colour levels and contrast as well as luminance.
Secondly, you can draw your own custom curve using a pen tool which, with experience, can be a much quicker way to make an adjustment.
The third reason is the larger range of curve presets available. Lightroom has three simple preset while Photoshop has nine much more advanced presets.
Lastly, in Photoshop, we can save our own presets for later use.


2. Selective Colour v HSL
Lightroom has an excellent tool called HSL/Color. This allows us to fine control the way colour looks in our images. The HSL section allows us to change hue, saturation and luminance for each of the primary and secondary colours. The Color tab allows us to control the hue, saturation and luminance within those individual colours.
The Photoshop equivalent is called Selective Color and it goes one stage further than HSL/Color.
What it does is allow us the control the levels of cyan, magenta, yellow and black within each of the primary and secondary colour as well as the whites neutral and blacks. This gives us an almost infinite amount of control over not only the colour but also the brightness of those colours.
For example, if we feel that our blue sky has a slightly red tinge to it, we can select the blue channel and reduce that red by adding a little more cyan. We can control the luminance level of the blue sky by sliding the black slider left or right. Selective Color is a very powerful tool if you want fine control over the look of your image.


3. Healing Tools
The third tool where Photoshop trumps Lightroom is the healing tool. Lightroom has a Spot Removal tool. This is split into two basic options, Clone, which works in a very similar way to Photoshops venerable clone tool. You manually select a region of the image to cover over the blemish.
The second option is the Heal tab. This works in a similar way only it decides from where to draw the source to cover the blemish. Both are useful for basic spotting and cleaning but Photoshops tools are much more powerful.
The main Photoshop tools are Spot Healing Brush, Healing Brush, Patch, Clone and Content Aware Move. The beauty of these tools is that they are content aware. In other words, they calculate the area surrounding the image and attempt to replicate it when repairing an area.
The patch tool allows us to quickly correct large areas, while the Content Aware Move will allow us to move an object elsewhere and fill the background automatically.
Overall if you are wanting to make some significant improvements to your image, then the Photoshop healing tools are the way to go.

One Last Thing.
Although Lightroom and Photoshop are two separate and distinct programs, they are designed to work together. Lightroom is an image management app with some powerful editing tools while Photoshop has always been a dedicated editing program.
We can easily work between the two by using round-tripping. This allows us to select an image in Lightroom, work on it in Photoshop then return a saved version back to Lightroom. It does this without affecting the original. To do this, right click on the image you wish to edit. Select Edit In – Edit In Photoshop CC. Carry out your Photoshop edits and then return the image to Lightroom simply by saving it.

Lightroom has some pretty powerful editing tools for photographers but as a dedicated editing suite, Photoshop may sometimes be needed for more advanced editing.
The tools mentioned above are just some of those where Photoshop is better than Lightroom but it should also be noted that Photoshop has a lot of tools and features that simply do not appear in Lightroom.
Given the close integration of the two, it's well worth taking the time to learn some of Photoshop’s advantages. You may well find you take your editing skills to the next level if you do.


5 Comments
Lightroom also has tone curve for individual RGB channel, click the lower right “stop editing point curve” icon to reveal the channels.
I posted a link to your article on several social media outlets. Someone asked me if there is an alternative to Photoshop that doesn’t take so much RAM. These same tools are in Elements? Are they not? Also how about Aurora or Affinity?
Luminar at Skylum.com
Another point where Photoshop would be my first choice over Lightroom is for Dodging and Burning. In Photoshop this can be done on a separate layer (or two layers) and completely non-destructive.
Great post! Thank you for all the details and examples.