Have you read any posts or tutorials by Scott Kelby? He is a guru in Lightroom and Photoshop and I am a big fan of him. His discoveries inspire many photographers including me making us push our boundaries in Lightroom and Photoshop. One of his recent articles was why it is better to use HDR Pro in Photoshop over Lightroom to create High Dynamic Range images.
As someone that brackets virtually everything, I was keen to try this out. I was very happy to find that HDR Pro does indeed give a much better result. The end result is much sharper as Scott Kelby had suggested but also I found that the removing ghosts also seems much more efficient and accurate.
Today I am going to talk you through the process of taking Lightroom images through Photoshop’s HDR Pro. I am using a 5 image auto exposure bracket shot taken from my Phantom 4 Pro drone in Cornwall earlier this year.
Exporting From Lightroom.
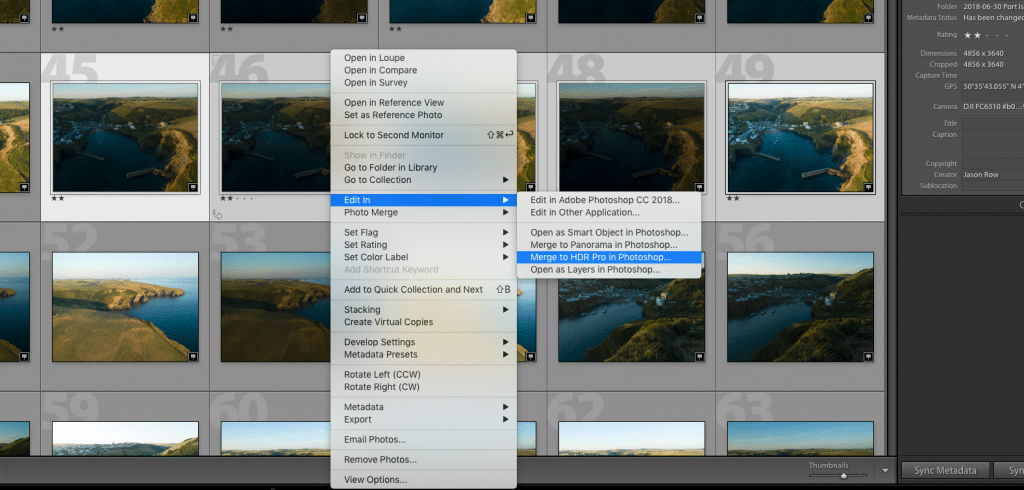
The first thing we need to do is select the images that we wish to merge in Lightroom’s Library grid view. Right click on any of the selected images and click Edit In – Merge to HDR Pro in Photoshop. This will automatically open Photoshop, load the images and open HDR Pro. Once open you will see something like this.
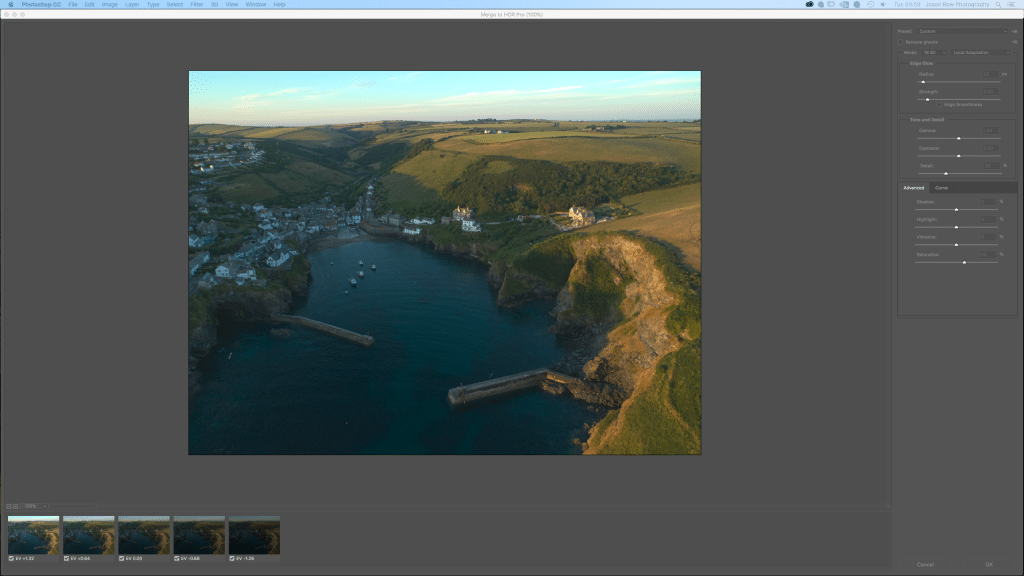
Here is the interesting thing that Scott Kelby found. As most of you know, latest editions of Lightroom will merge RAW files into an HDR RAW. This gives you more dynamic range to play with than if the HDR was merged down to a different format. In Photoshop the files are usually merged into a Photoshop PSD file. HDR Pro usually defaults to 8 or 16-bit files.
However, if you click at the top right of the HDR Pro window and change 8/16 bit to 32 bit, something interesting happens. The HDR editing controls disappear and we see an option to “Complete Toning in Adobe Raw” This is checked by default, and we leave it on. If you have not shot from a tripod, you should also check the Remove Ghost box.
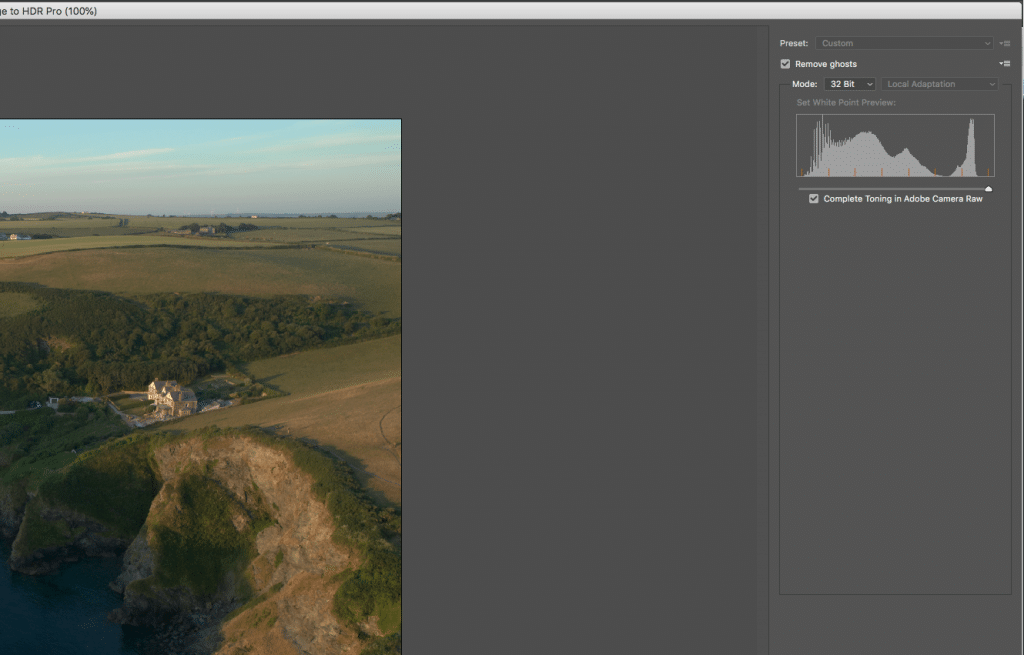
To the bottom left of the screen, you can also see thumbnails of the images you have selected. You can check or uncheck them to see how they will make a visual difference to your HDR merge.

When you are happy with the selected images, click on Tone in ACR on the bottom right. Photoshop will process and merge the files into one 32 bit RAW.
Editing in Adobe RAW.
Once in Adobe RAW you can make all the adjustments we would normally make to any RAW file. You should try to get the image as close to final as you can using ACR as when you finally click ok, the image will be output to Photoshop as a PSD.
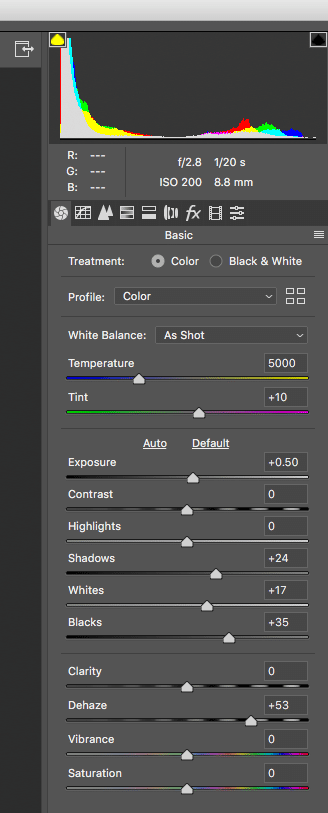
In my image, I have pulled the Exposure up a little, raised the Blacks to reduce shadow clipping, pulled up Shadows to bring some definition into the shaded parts of the town. I added some Dehaze to punch out the mid-tone contrast. I also added a narrow Graduated Filter to the top with reduced exposure and increased clarity. This adds further definition to the sky region. Using the Before/After icon bottom right of the screen, we can see the effect the RAW adjustments have made.
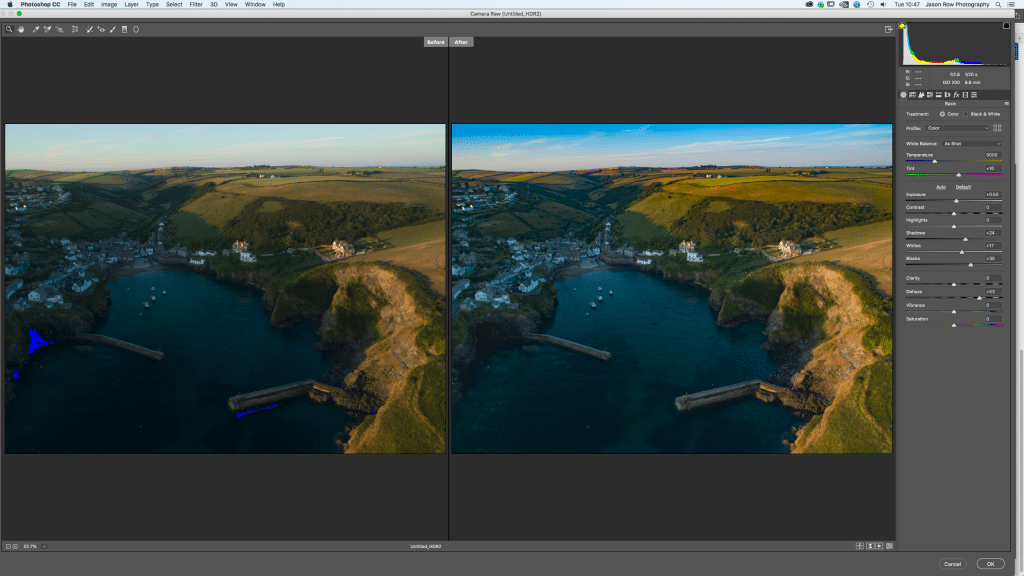
Once you are happy with the final RAW edits, click OK on the bottom right of the screen.
Final Adjustments and Return To Lightroom.
Once you click OK, the final image will be opened in Photoshop as a PSD file. You can now choose to make any final adjustments in Photoshop or in Lightroom. I will make a couple of minor adjustments in Lightroom. To return it to Lightroom simply click File – Save. You can now close the image in Photoshop if you require.
Returning to Lightroom you will see the newly merged HDR as the only selected image in the Library Module. To edit it further click on the Develop Module at the top. In my image, I am raising the shadows very slightly and making the water a slightly different hue with greater saturation.
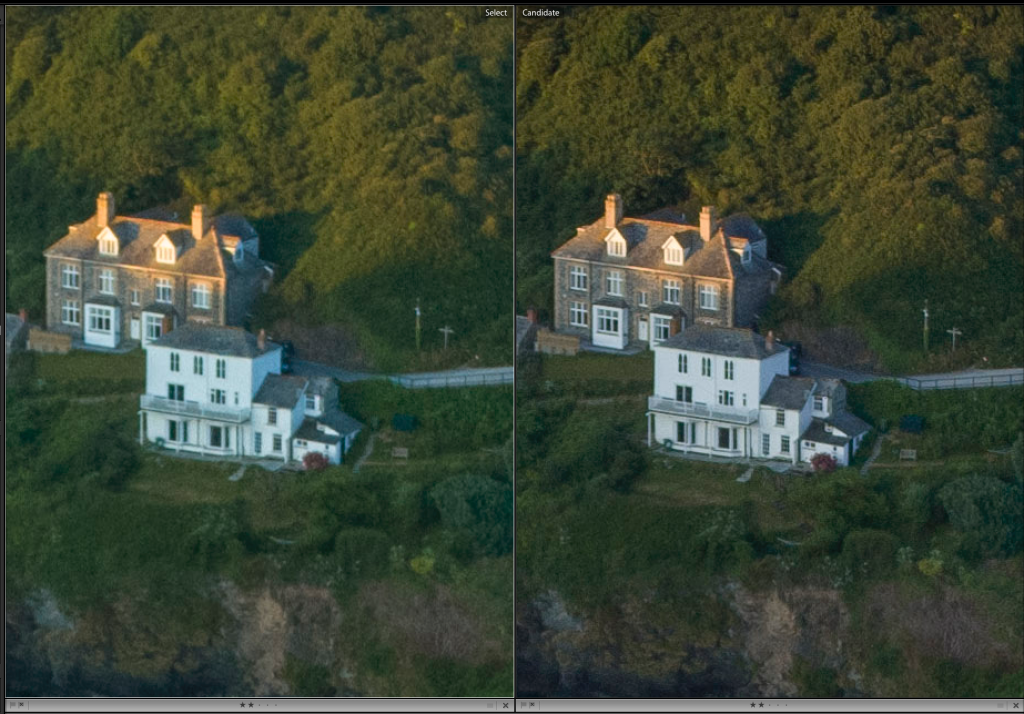
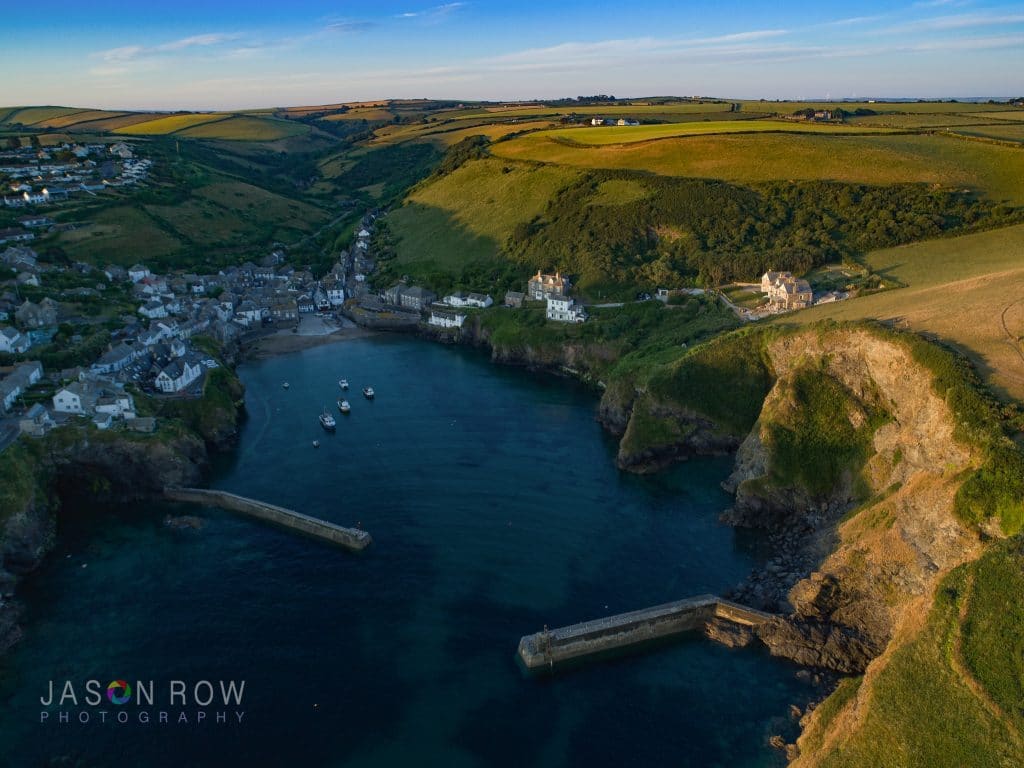
While the Merge in HDR Pro route is slightly longer, it really does seem to produce sharper final images and better control of ghosting. When viewed at 200% the Photoshop merge seems obviously sharper than the Lightroom merge. Using Photoshop’s Camera Raw also seems to give us finer control over the end image.
Thanks to Scott Kelby for this excellent tip, I for one have been using it ever since he published it.


4 Comments
Might want to check out Scott’s follow-up:
https://lightroomkillertips.com/follow-last-mondays-shocking-truth-lightrooms-hdr-post/
Effect is the result of double default sharpening in camera raw
https://lightroomkillertips.com/follow-last-mondays-shocking-truth-lightrooms-hdr-post/
Thank you so much. Somehow I missed Scott’s post. This is perfect for my workflow. All of my merged files end up going to PSCC anyway.
Photoshop Merge to HDR and CTRL opening the different exposure raw files in ACR selecting all and doing a merge yields very different results.
The latter looks much more 32 bit.
(Obviously PS is set to 16 bit and the image space is set to 32 bit)