Luminosity masks are a post-processing technique in Photoshop that is commonly used by landscape photographers on a single RAW image or to create a high dynamic range image with digital blending. It is essentially a method of making selections based on the luminosity value of the pixels.
The benefits of luminosity masks include its self-feathering nature and its ability to create a highly targeted selection. The downside of it are slightly more time-consuming editing and also the learning curve.
There has been a surge in the number of tutorials on how to use luminosity masks since it was first published in 2006 by Tony Kuyper. Most of these focus on landscape photographs and haven’t really extended its application beyond that.
Luminosity masks is not a standard tool in Photoshop. You can create it manually but the easiest way is to use a photoshop action to automate the process for you. You can download the photoshop action for luminosity masks free here or by searching it in the search engine, or watch this video and do it yourself.
Once you have created the masks, you will realise there are 18 of them. 6 masks targeting the highlights, 6 targeting the shadows and 6 for the midtones. One of the challenges of using luminosity masks is to choose a mask that has the selection you want. Every single image is unique so there is no one answer for all. Trial and error is your best bet at the beginning but experience will soon guide you as you gain competency.
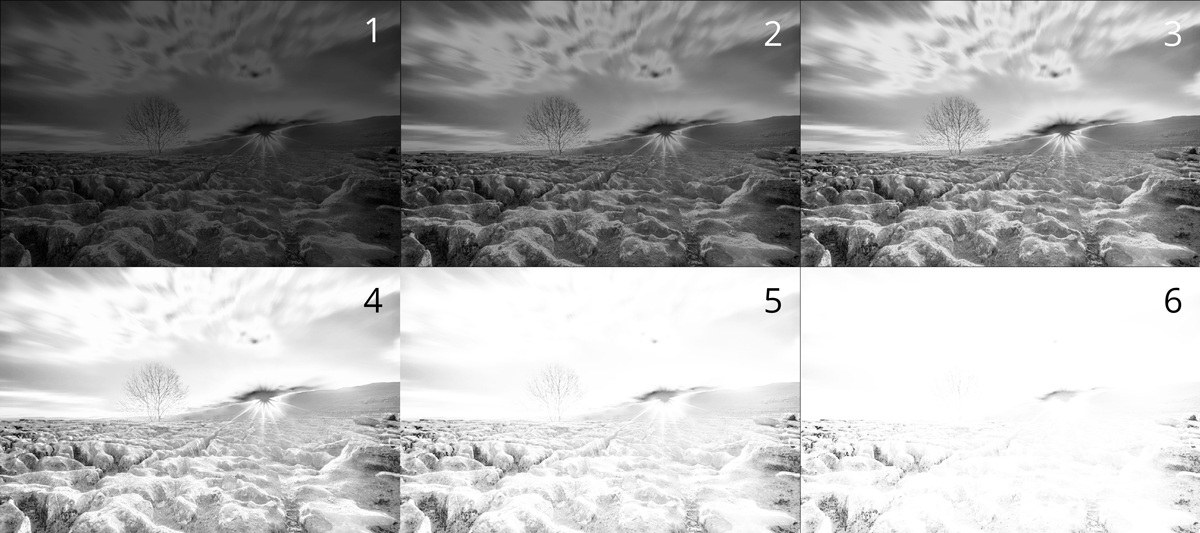
I’m going to show you 4 examples of using luminosity masks. I won’t go into the technical details but I will explain to you the reason behind my steps. I hope you can take away the principles of each method and apply it in your workflow.
It is important that you use a RAW image because of the higher colour depth to give you the flexibility of editing without causing banding (or posterization). You can read more about luminosity mask here if you are not familiar with it.
Tonal Adjustment
One of the most common ways of using luminosity mask is making targeted selection to apply for tonal adjustment. You can use luminosity masks to recover details in the highlights or the shadows in very specific part of your image without or minimally affecting other areas.
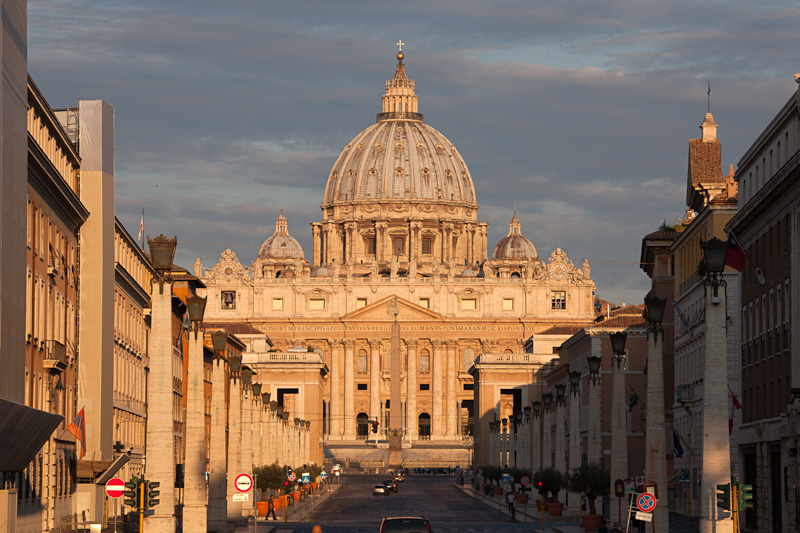
This image of the St Pauls’ Cathedral in the Vatican City was taken at sunrise. I like the composition and the warming sunlight but the row of buildings on the right-hand side is in shadows. We are going to use luminosity masks to target just that area to recover some details and to balance the overall contrast of the image.
Here is how you do it:
- Generate luminosity masks.
- Select darks 3 mask, and subtract darks 5 and 6 from it.
- Apply the mask to a levels adjustment (or a curves adjustment) to brighten up the shadows.
- Group the levels adjustment layer and apply a layer mask to mask out the highlights that is being affected by the adjustment.
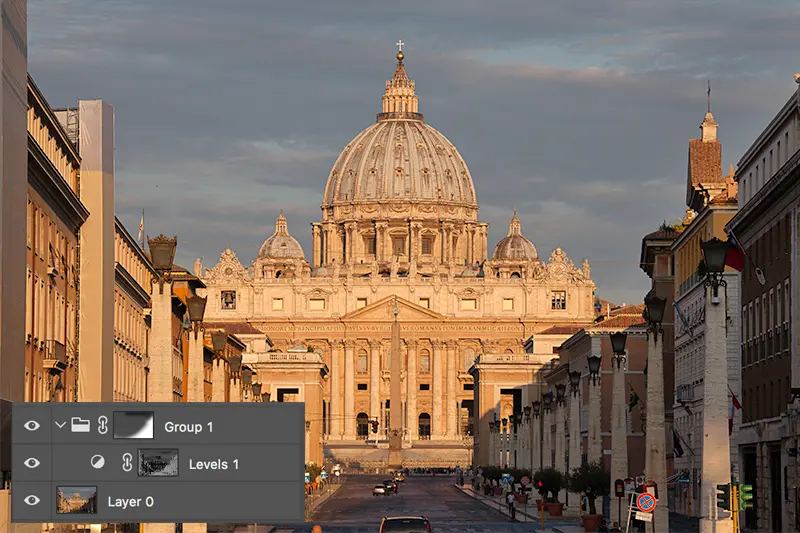
I subtracted darker masks from a dark mask to preserve the contrast. The shadows will look washed out if the shadows are brightened up with a single dark mask. Because of the nature of luminosity masks, the highlights have also been brightened up and we don't want that.
To fix that, simply group the layer and apply a layer mask to the group and mask out the highlights with a black brush. On the other hand, you don't need to use the subtracting masks technique if you are brightening or darkening the highlights.
Colour Adjustment
Another great way of using luminosity masks is to apply targeted colour adjustments to only the areas you want. Because the selection is made based on the luminance of the pixels, you should paint the adjustments in rather than applying it straight to an adjustment layer.
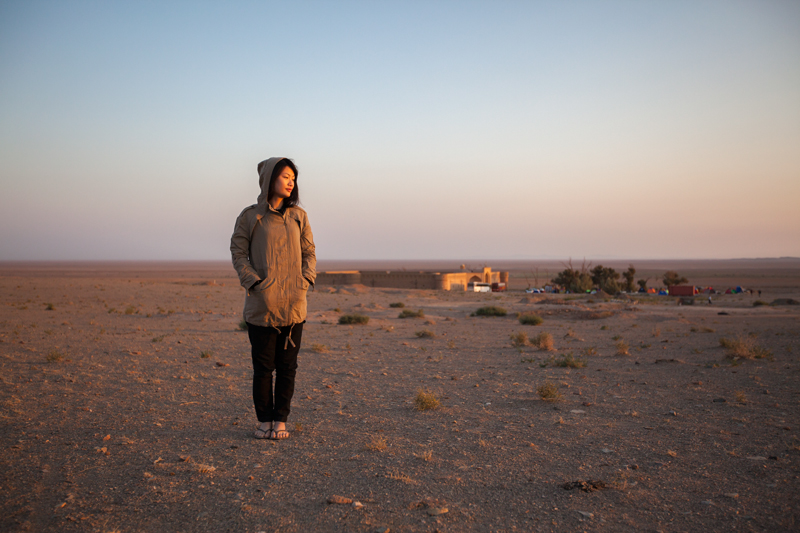
I have used a brights 2 mask in this example. But the image will look like this (below) if you apply it straight to a hue/saturation adjustment layer. All the highlights that are selected by the brights 2 mask will be affected instead of just the sky.
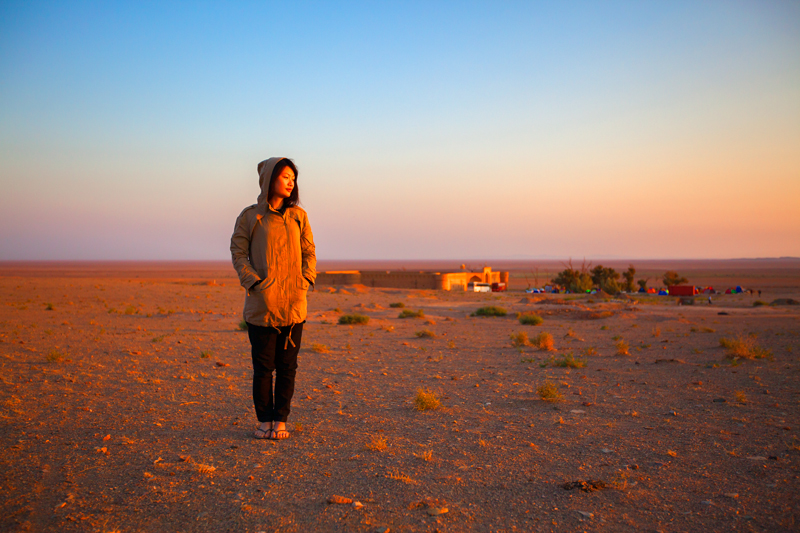
Here is what you do:
- Click to apply a hue/saturation adjustment layer without any mask first.
- Make the adjustment and pay attention to the sky only.
- Fill the layer mask of the hue/saturation adjustment layer with black to conceal everything.
- Select brights 2 luminosity mask in the channels panel, go back to the layers panel and click on the black layer mask.
- Paint the layer mask with a white brush on the sky only to reveal the adjustments.
- You can even apply a photo filter (I used magenta in this case) and clip it to the hue/saturation layer below.
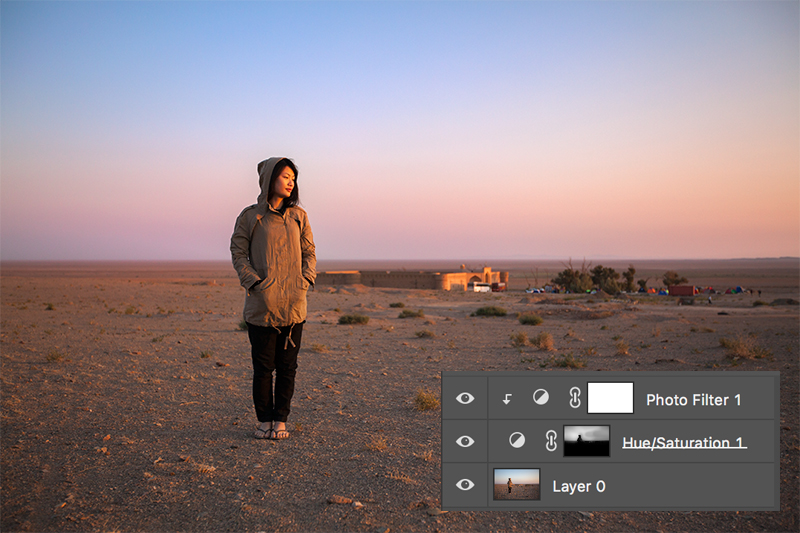
When you want to apply a hue/saturation adjustments to certain parts of your image with luminosity masks, first focus on the areas you want only because the rest will be masked. Once you are done, apply luminosity mask to the black layer mask and paint white on the areas you want to uncover the adjustments.
Dodge And Burn
This is a technique used frequently in the darkroom before but hasn’t been as popular in digital photography. Dodging and burning utilise white and black to lighten and darken parts of the image. It can be applied in both colour and black and white images.
Dodging and burning with luminosity masks is an easy and artistic way to enhance local contrast subtly to make an image pop.
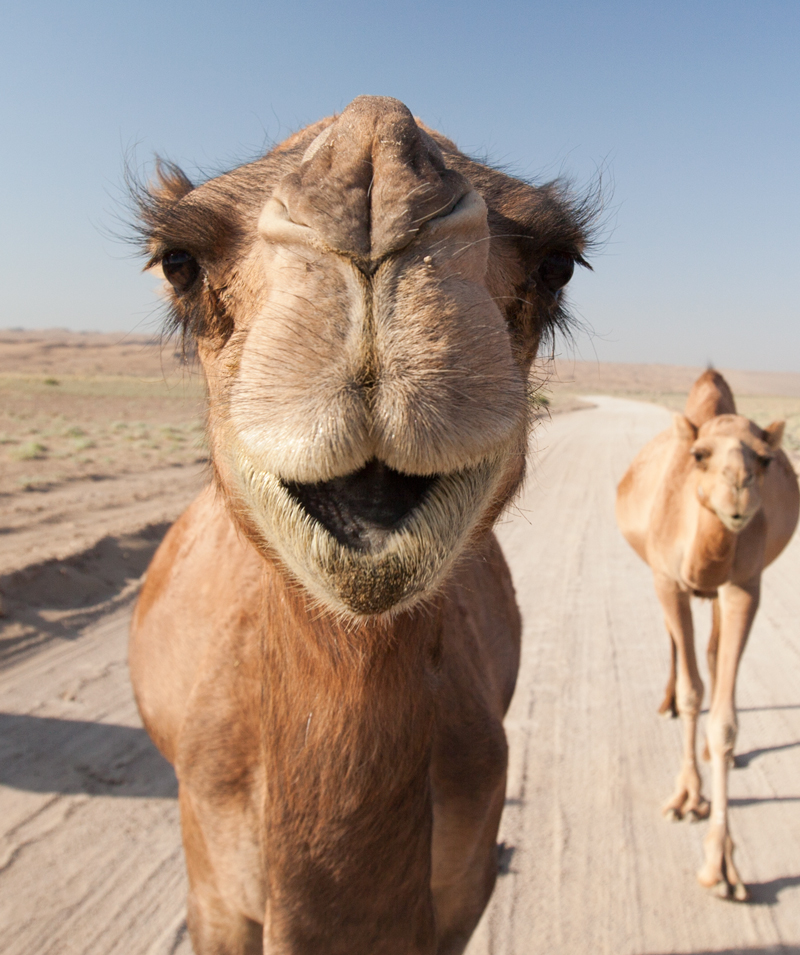
To dodge and burn, you will first need to create two new layers, renamed “dodge” for one and “burn” for the other. Fill both layers with 50% gray, change the blend mode for “dodge” to overlay and “burn” to soft light.
Now, there is no magic formula to dodging and burning an image. You need to focus on one small part at a time. Decide a part you want to dodge or burn and ignore the rest. Next, find a luminosity mask that targets that specific area you have chosen.
Select and load it onto the dodge or burn layer and apply adjustment on the part you want only. I start my brush between 25-50% opacity depending on the image. Move on to other parts once you are happy. You can always come back to the same part to apply more adjustments.
In this example, I use dodge and burn to lighten the shadows a little on the right-hand side of the image while maintaining the contrast and the details of the camel's eye. I have also darkened the shadows and lightened the highlights on the front to emphasise the 3 dimensional feel of the image.

Sharpening
Everyone has their own way of sharpening, be it unsharp mask or a high pass filter. But what many of us often do is to apply a global sharpening adjustment to our image.
You can mask out parts you don’t want to sharpen with a layer mask but the parts that are unmasked still receive 100% sharpening. This often causes the image to look unnatural.
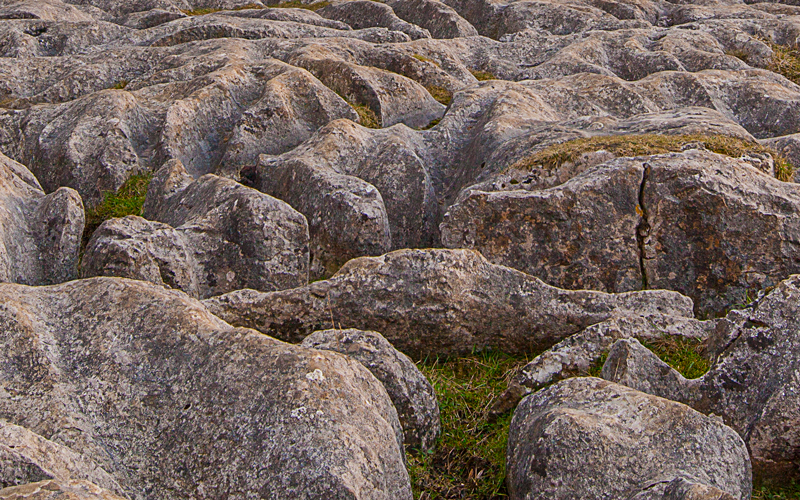
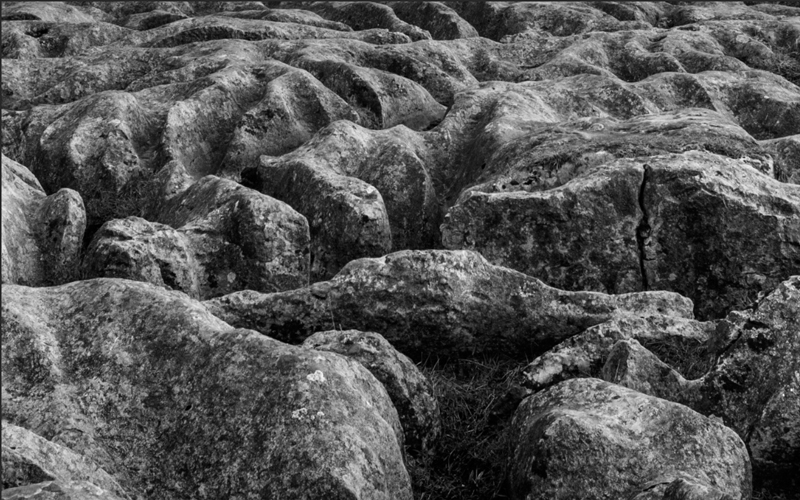
This problem can easily be solved by applying a luminosity mask to the sharpening adjustment layer. You can use the painting a mask technique for this.

- Apply a sharpening adjustment layer, add a layer mask and fill it with black.
- Choose a luminosity mask that selects the area you want to sharpen and load it onto the layer mask.
- Paint the layer mask with a white brush only on the parts you want to sharpen.
In this example, I only want to sharpen the surface of the rocks but not the gutter in between. A brights 2 mask makes just the perfect selection for this task.
Conclusion
Luminosity masks is a great way to transform your photo yet maintaining its natural look. You can apply these techniques in any types of photographs, The possibility of luminosity masks is only limited by your imagination!
Note: While this tutorial will give you what you need to get started with creating powerful imagery with Luminosity masks, you might want to take it to the next level with Jimmy McIntyre's full course on the topic where he goes into depth on the elements of creating powerful imagery with luminosity masks. Check it out here.
Further Resources
- Master Luminosity Masks by Jimmy McIntyre
- How to Create an HDR Image From a Single Raw File in Photoshop by Jason Row
- 3 Extremely Useful Photoshop Techniques you Should Know by Jason Row
- Dodging and Burning in Photoshop and How It Can Enhance Your Photos by Jason Row


2 Comments
I’m curious to hear your thoughts… In my mind… Luminosity Masks made sense back in 2006. But today, you can accomplish everything that you’ve described here (with the exception of the HDR) faster and easier using the Adjustment Brush in the Camera Raw Processing Window- and you have the ability to easily remove those edits at any time in the future. Or, within Photoshop using adjustment layers and layer masks. If I’m not attempting HDR, I don’t really see the benefit. And If I am attempting HDR- Aurora makes it faster and easier.
Hi Kent,
You’re absolutely right. I use ACR when I want a quick edit. I’m also discovering Aurora and I think it’s an amazing all-in-one software. To me, luminosity mask is one of the many ways to post-process and it certainly has its own pros and cons. But I often create HDR and edit photos that I put more weight on with luminosity masks because I feel it gives me more, if not, total control of my adjustments. Sometimes I like to take my time painting adjustments in where I want it, giving it my own personal touch 🙂