If you have ever found yourself out at night when there happens to be a beautiful moon on the rise in the night sky, you may well have tried to photograph it. The problem is that, although the moon is a wonderful subject that is beautifully bright and obvious in the nigh sky, photographing it can be quite difficult, even when using professional-level cameras. But with a few pieces of knowledge, it can become one fo the easier objects to photograph with just a little practice, even with beginner cameras or even phone cameras.
You may wish to photograph the moon, but only have a smartphone because you are a beginner in photography or you are someone who only uses a smartphone for photography. With the advancement in smartphone technology, more and more photographers are leaning towards smartphone photography and similar to other genres, they are also very enthusiastic about capturing night sky images.
One subject that most beginners in night sky photography try for the first time is the moon and it can be somewhat easier to photograph the moon compared to other night sky objects, if you get the exposure and other settings right.
Night sky photography includes photographing the moon, the milky way galaxy, the stars, the distant galaxies and nebulae, star clusters, cloud complexes and so on. With some effort, night sky photography can be done with a smartphone and if you have only that camera in hand, it can be used for some of the best night sky photos you can capture.
Can I Take a Picture Of The Moon With An iPhone Or An Android?
Although smartphone cameras are getting better each year, when it comes to photographing the night sky, they cannot replace traditional cameras like the DSLRs and mirrorless. Although the quality from a smartphone camera will not be equivalent to the DSLR or mirrorless, it doesn’t mean that they cannot be used to capture good moon images.
Even using a smartphone with a single basic lens, and not a zoom lens like a 2x, 3x or 10x, you can capture a wide angle moon image or pinch zoom and capture a slightly closer shot. With zoom lenses, you will be able to get close and capture some details of the moon. Make sure to mount the phone on a small tripod or a gorillapod for the best results.

Check Out These Top Tips For Photographing The Moon Using Your Smartphone
Photographing the moon with a smartphone can be a bit challenging at first. If you take care of certain factors, use the right settings and post process it the right way, you will be rewarded with stunning moon photographs with your smartphone.
1. Required Criteria For The Best Moon Photographs Using A Smartphone
When photographing the moon, you are capturing light (reflected light from the sun) from a very distant object and hence any atmospheric condition will have a huge effect on the resulting images.
- Find a location where there is no or very less light pollution. If you are shooting from your backyard, turn off all lights possible, so you can shoot from a dark place. If you are in a city, try to get to a place where the light pollution is low. Sometimes you may be able to capture the moon photo against a cityscape if the atmospheric conditions are good.
- Keep an eye on the weather forecast. The sky needs to be clear, but any high level clouds in the sky are fine and can add to interesting compositions and textures in the frame.
- The atmosphere needs to be clear and not hazy as haziness can deteriorate image quality and also prevent you from capturing any details of the moon.
- Photographing the moon from an open space helps to get a neat frame without much obstruction.
- Think about interesting compositions. Do you wish to photograph the moon alone or you wish to include interesting landscapes, cityscapes or elements like trees, buildings, humans, etc., or you wish to frame the moon through something, and so on

- Capture the moon from various perspectives using different compositions and focal lengths.
- Try both landscape and portrait orientations. Some orientations work best for the compositions that you choose.
2. Gear Required To Photograph The Moon Using A Phone Camera
Gear for smartphone photography is pretty straightforward and minimal. Here are some essential and optional gear for photographing the moon using a smartphone.
- A Smartphone – you need a smartphone that has a good camera and one that has a manual mode for exposure settings. If it has an optical zoom capability, that will be an advantage. Use the telephoto lens if your phone has one and as much as possible avoid using digital zoom (pinch zoom).


- Stabilising Accessory – you can handhold the phone when photographing the moon during the day, but when you are photographing at night using manual modes and wish to lengthen the exposure, a mini tripod or a gorillapod is a must for sharp and clean images. If you already have a tripod for your camera, just buy a mobile holder that can fit on to your tripod and mount your smartphone on it.
- A Telephoto Lens – if your smartphone does not have optical zoom features, using the digital zoom can most of the time deteriorate image quality, especially for moon images. If you will be using your smartphone a lot for photography, you can invest in a clip on or screw on lens for your smartphone. Companies like Moment and Apexel manufacture lenses of all types with good optical quality. Choose a telephoto lens that suits your budget, and make sure the glass quality is good for moon photography.
Note: If you have a telescope or a binocular, you can put the smartphone’s camera on the eyepiece of the telescope or binocular, adjust the focus and capture the image. Make sure you do not use any zoom features in your smartphone during this process.

- A Remote Or Cable Release – after mounting the smartphone on a tripod, you do not want to press the shutter button and cause any camera shake. Use a remote or cable release, or an in-built timer feature to release the shutter. Some smartphones come with headsets that can trigger the shutter release when pressing the volume up/down button.
- Apps For Moon Photography – If your native camera app does not have options for manual exposure settings, use an app for night sky photography or one that will allow for manual mode exposure. Also, to check the moon rise and setting times, directions, phases of the moon, have an app handy, so you do not miss any lunar events. There are a few suggestions below in the apps section of this article.
3. Camera Settings To Photograph The Moon
Here are some settings and factors to take care of, in order to get a stunning image of the moon.

- Turn off camera flash as this feature cannot be used for distant objects like the moon. Usually when you open the camera, the flash icon shows as a lightning bolt and tapping on it will come up with options to switch it on or off.
- You then need to zoom in, to get the best possible results. Zooming in using an inbuilt zoom lens or an external zoom lens attachment is the best option. Pinch and zoom can switch to digital zoom and greatly degrade image quality as you zoom in more.
- Most of the Android phones have manual settings in their native camera app that can be customised to set the required exposure.
- Use this feature to shoot raw if that is supported by your camera app. Shooting raw will help you to capture more details and get a high quality resulting image.
- Choose an aperture value that will keep the moon sharp. Widest exposure values depending on the phone camera may result in soft images. So always capture test shots to decide on the aperture values.
- Lower the iso value to get the best possible results.
- Choose a shutter speed to get the correct exposure. Usually it will be a slow shutter speed for a zoom long enough to get a photo of the moon at night. So, you need to have your camera as stable as possible. It is always recommended that you have your smartphone on a stabilising device like a mini tripod or a gorillapod. Day time moon photography will have a decent faster shutter speed to hand hold the camera.
- Set the focus sharply on the moon. Some camera apps support manual focus, or a manual camera app can be used to accomplish this. If you can tap on the moon on the screen and if you are happy with the focus and sharpness, you can use the autofocus feature.
- You will need to long press in order to lock exposure and also focus.
- Adjust the exposure, so that the highlights have good details and are not blown out. The moon should look slightly grey and not bright white. Most of the time the automatic exposure setting will capture an overexposed image that looks like a white blob with no details.

- If your phone camera has a HDR option, use it to capture a high dynamic range image of the moon as it can help with details in the highlight and shadow areas.
- Capture a photo of the moon and zoom in to see the results. Based on the resulting exposure and sharpness, you can adjust the aperture and shutter speed values.
- If you are going to zoom in to get a closer shot of the moon, make sure the other elements in the frame are far away trees and buildings, or mountains, so the moon appears bigger in the frame.
Night Mode
Most of the recent phone cameras come with a night mode that can help with capturing long exposure shots, which means, you can lengthen the exposure to the required time to get a good photo of the moon. Night mode also helps with better low light performance, thereby allowing the photographer to capture more details of the moon.
Night mode works by capturing multiple shots and then combining/stacking them to get a well-detailed image. In order for this to work successfully, you need to hold the camera still till the process is complete and hence using a stabilising accessory will provide the best results.

4. Apps For Moon Photography Using A Smartphone
Although you can capture good moon photographs using the in-camera app on your phone, not all phones come with manual settings for the camera. In those situations, in order to have creative control over your exposure, you can use one of the camera apps available that will help you with setting the exposure manually.
Manual Camera Apps
- NightCap Pro – this is an app for the iPhone and it will help you to manually adjust the iso, exposure, focus, etc.
- Slow Shutter Cam – this app for the iPhone allows for manual shutter speed and iso values. You can tap to adjust focus and exposure.
- Shutter – Manual Camera – this app for the iPhone allows manual settings for focus, ISO, White Balance and Exposure
- Halide Mark II – Pro Camera – this app is a powerful one that allows manual focus, manual exposure and also allows shooting in raw format.
- Prime – RAW Manual Camera – this app allows manual control for focus, iso, shutter speed, white balance, exposure compensation, and allows to capture images in raw format.
- Halide – Pro – this is an app for Android phones and has manual controls for slow shutter speeds.
- ProCam X – this app allows full control over exposure, focus, iso, white balance, etc
Moon Phase & Locator Apps
- Sun & Moon – this is an app for the iOS and will allow you to locate the sun and the moon, along with rise and set times.
- Lumos: Sun and Moon Tracker – this app for iOS allows you to track the positions of the Sun and the Moon along with their phases for your location.
- Moon Phase Calendar Plus – an app for iOS for moonrise, moonset times with moon locator compass, so you can plan your lunar activities.

- Sun & Moon Tracker – this is an Android app for sun and moon rise and set times along with moon phases.
- Calendar – Sun & Moon – this app for Android allows you to determine the position of the sun and the moon along with their rise and set times.
5. Post-Processing Moon Images Captured Using A Smartphone
You can use any good post-processing application from your app store that will allow you to edit raw files if your phone camera allows that feature. One of the best apps is the Adobe Lightroom for mobile.
- Import your image into your post-processing application. Here are some adjustments that you can make:
- Adjust the exposure, till you see the desired details in highlights and other areas. Ensure there is no clipping.
- Adjust contrast to get the desired look. You can also use the highlights and shadows sliders to make adjustments if needed to bright and dark areas in the image.
- You can also work with the clarity and dehaze slider in order to bring in more details and remove any haziness in the moon image.
Besides Lightroom, other apps like Snapseed, VSCO, etc., can be used to edit photos on your mobile.
FAQs
Why can't I get a good picture of the moon with my iPhone?
Focus and exposure are the most important factors to keep in mind when photographing the moon. Check to see that the focus is sharp and the exposure is just right to reveal the details of the moon’s surface.
Also, make sure that you are shooting in the right weather and atmospheric conditions with the least light pollution possible. Clouds and haze can make the image look soft and grainy with no details. Stabilize your phone camera to avoid shake, especially if you are using the zoom functionality.
How can you capture close-up images of the moon using your phone’s camera?
Use the zoom feature in the camera, for example, a 2x, 3x, 10x zoom lens
Use a lens attachment like a telephoto lens and manufacturers like “Moment” make lens attachments for smartphones with good optics.
What phases of the moon are the best for moon photography?
Most photographers love to photograph the full moon and there is a reason why. The moon is fully illuminated but will lack any shadows that usually add some depth to the moon image. Capturing the full moon can be quite tricky but gets better with practice.
So, for a start, it is good to start with shooting pictures of the moon when it has between 20% to 80% illumination. Once you get an idea of how to perfectly capture the moon using a phone, you can try photographing the full moon.
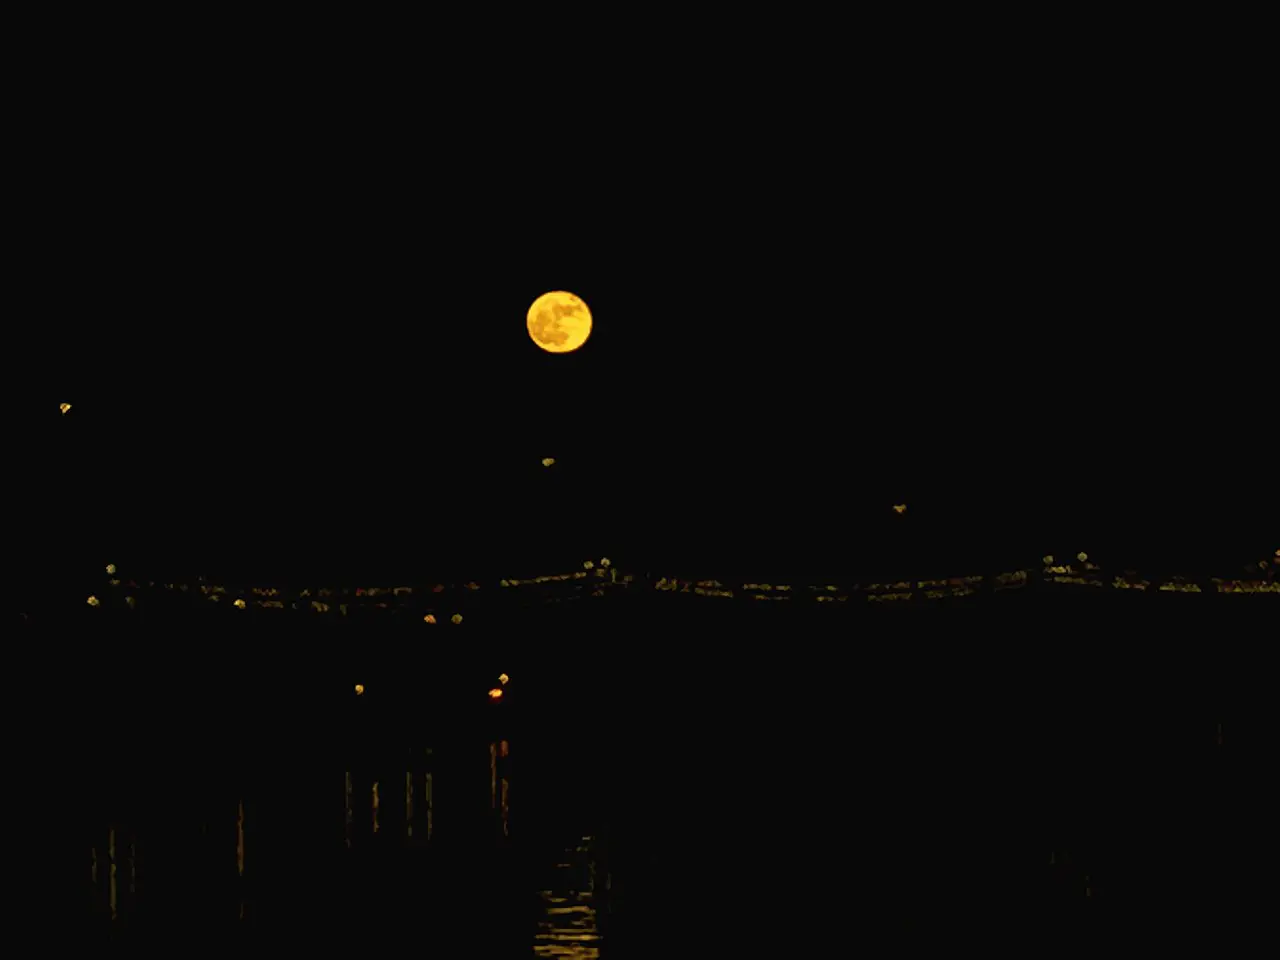
On full moon days, photograph the moon when the moon rises, so you will still have some light in the sky as it will be just as soon as the sun sets. You will also be able to include some foreground details like a landscape or a cityscape, so you can frame the moon interestingly to capture stunning images of the moon rising above the horizon.
Also, during this time, the moon will appear big, with a reddish-orange color and can be quite tricky to photograph. You will need to have the camera on a tripod, use a slower shutter speed, and use a remote shutter release to release the shutter button, so you can avoid camera shakes to get a sharp photo, especially if you will be zooming in, for taking pictures of the moon.

Can You Use A Camera App To Photograph The Moon With A Smartphone?
Yes, you can use an app that allows you to manually set the exposure, so you can capture brilliant moon photos. Check the apps section above and you can choose an app of your choice to photograph the moon.
How can I improve my moon photography skills using a smartphone?
Although the settings and techniques that photographers use to capture the moon using a smartphone may be similar, each phone captures images differently and there are various factors that affect how the resulting moon image looks. For example, day and night, up in the sky or near the horizon, sky conditions like clouds and haze, etc.
So, the more you photograph, the more you will learn to control the phone camera and get desirable results. Capture photographs of the moon whenever possible, under different conditions and this way, you will learn more about using the smartphone for moon photography.
Alternatively, you can set up a project for yourself to capture the full moon each month, or a photo of the moon every day of the month, etc., so you can master capturing photos of the moon with your smartphone.
Other Night Sky Photography With An iPhone Or An Android
The smartphone can be a great tool to capture the moon as it is a comparatively bigger object in the night sky. Capturing a celestial object is very rewarding and besides the moon, you can capture the Milky Way, constellations, conjunctions with the moon, aurora, etc., using your phone camera.
You need dark and clear skies to get clear and stunning images of the night sky. Also a stabilising accessory is a must for sharp night sky images.
Conclusion
Photographing the moon is a very exciting genre in photography. Each month, there is a full moon and sometimes two, called the blue moon and each full moon has a name. For example, the wolf moon in January, the snow moon in February, the worm moon in March and so on.
Do not look for the moon in the sky only at night, but photograph them during the day as well. Unless the moon is high up in the sky during the day, it is quite easy to capture the moon in the daytime sky and if you include interesting clouds and other elements in the frame, you can capture very beautiful moon photos during the daytime as well.
There is a chance to photograph the moon almost every day (except on the new moon and one or two days before or after when the crescent moon is too faint), which you can try to photograph using your smartphone.
As we always recommend, take time to enjoy moonrises, moonsets, and the moon when it is up in the sky, with your own eyes. No number of taking photos will give you the joy of witnessing these events in real-time.
Here are some photographs of the moon captured using a smartphone:


