When we think about landscape photography, we imagine photos shot during the beautiful golden hour or the soft blue hour. Photographers choose these specific times of the day because the light is soft and glorious, with the golden hour adding drama to landscapes. Once the sunlight is gone, landscape photographers tend to pack up, but should you? Landscapes can be beautifully photographed at night too, but how do you find the required light to illuminate the landscape?

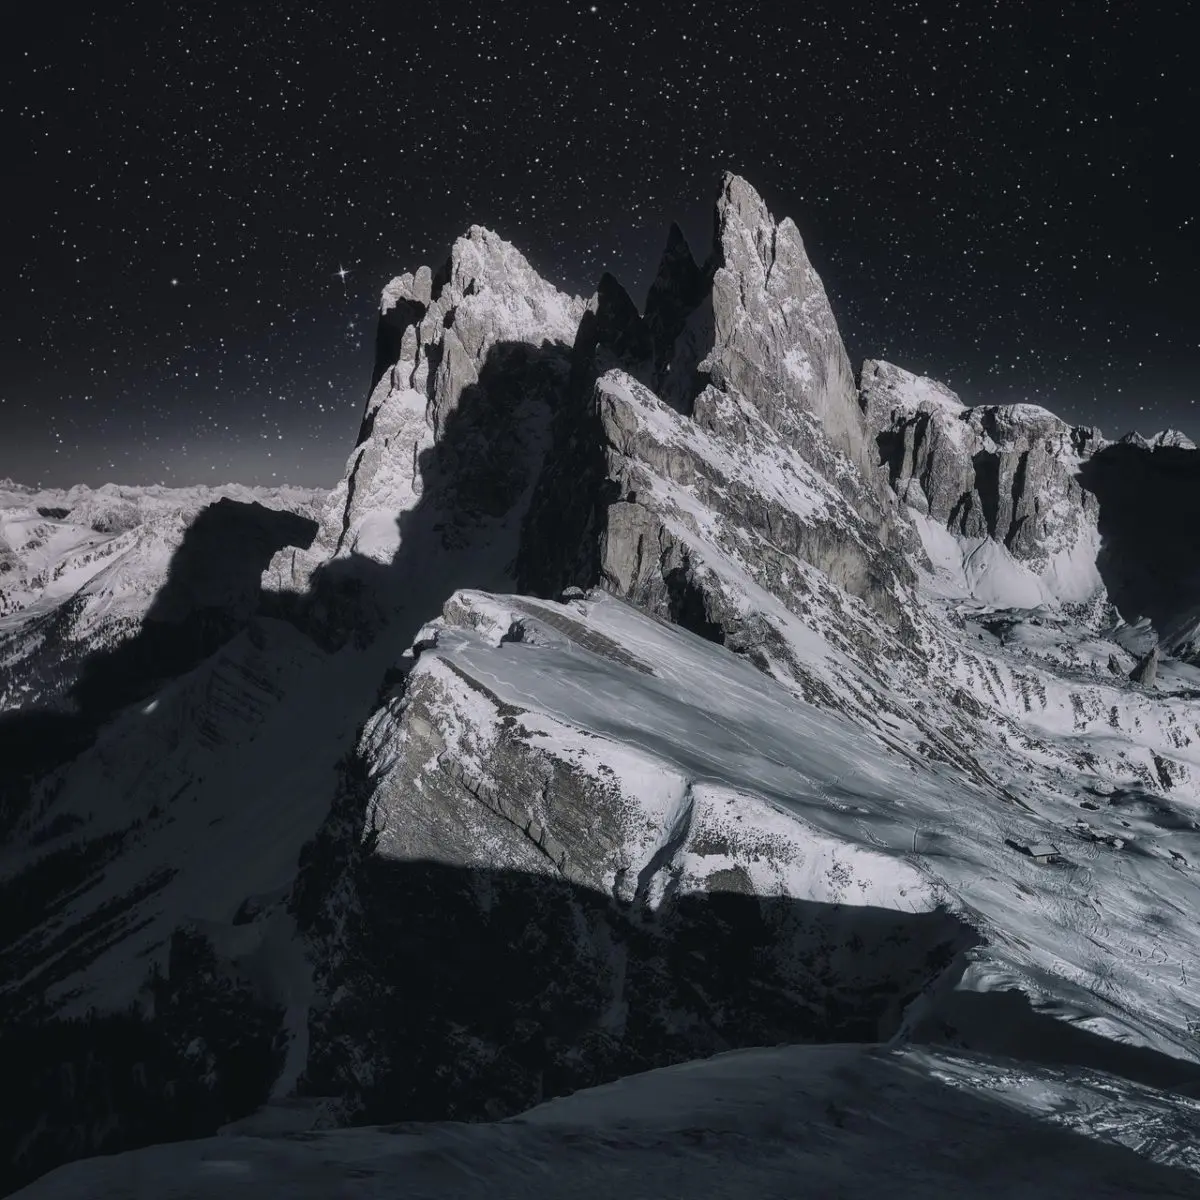
Photographing landscapes at night can be a very interesting way to present a scene quite differently from what you normally see (take a look at some other landscape photography ideas too). Have you observed landscapes at night? If not, go out on a full moon night and be in a location that is free of light pollution (light pollution can reflect off unwanted light from the clouds that can look less pleasing). You will have enough light to see the landscape and things that are around you – the landscape will be lit by a beautiful bluish glow and you can even see shadows created by the moonlight.
So how can you illuminate a landscape at night for landscape photography? The best way to light a landscape at night for soulful landscapes is using moonlight. The stillness of the night along with the light from the moon can evoke various feelings in a landscape.
Photographing landscapes under the moonlight can also be quite challenging, but the results can be very rewarding. You will need to take into account the direction and intensity of moonlight just as you would do for day time landscape photography. Let’s look into the details along with some tips on how you can photograph night time landscapes using moonlight.

Some Points To Remember For Night Time Landscapes:
There are many factors that need to be taken care of when photographing landscapes using moonlight. Here they are!
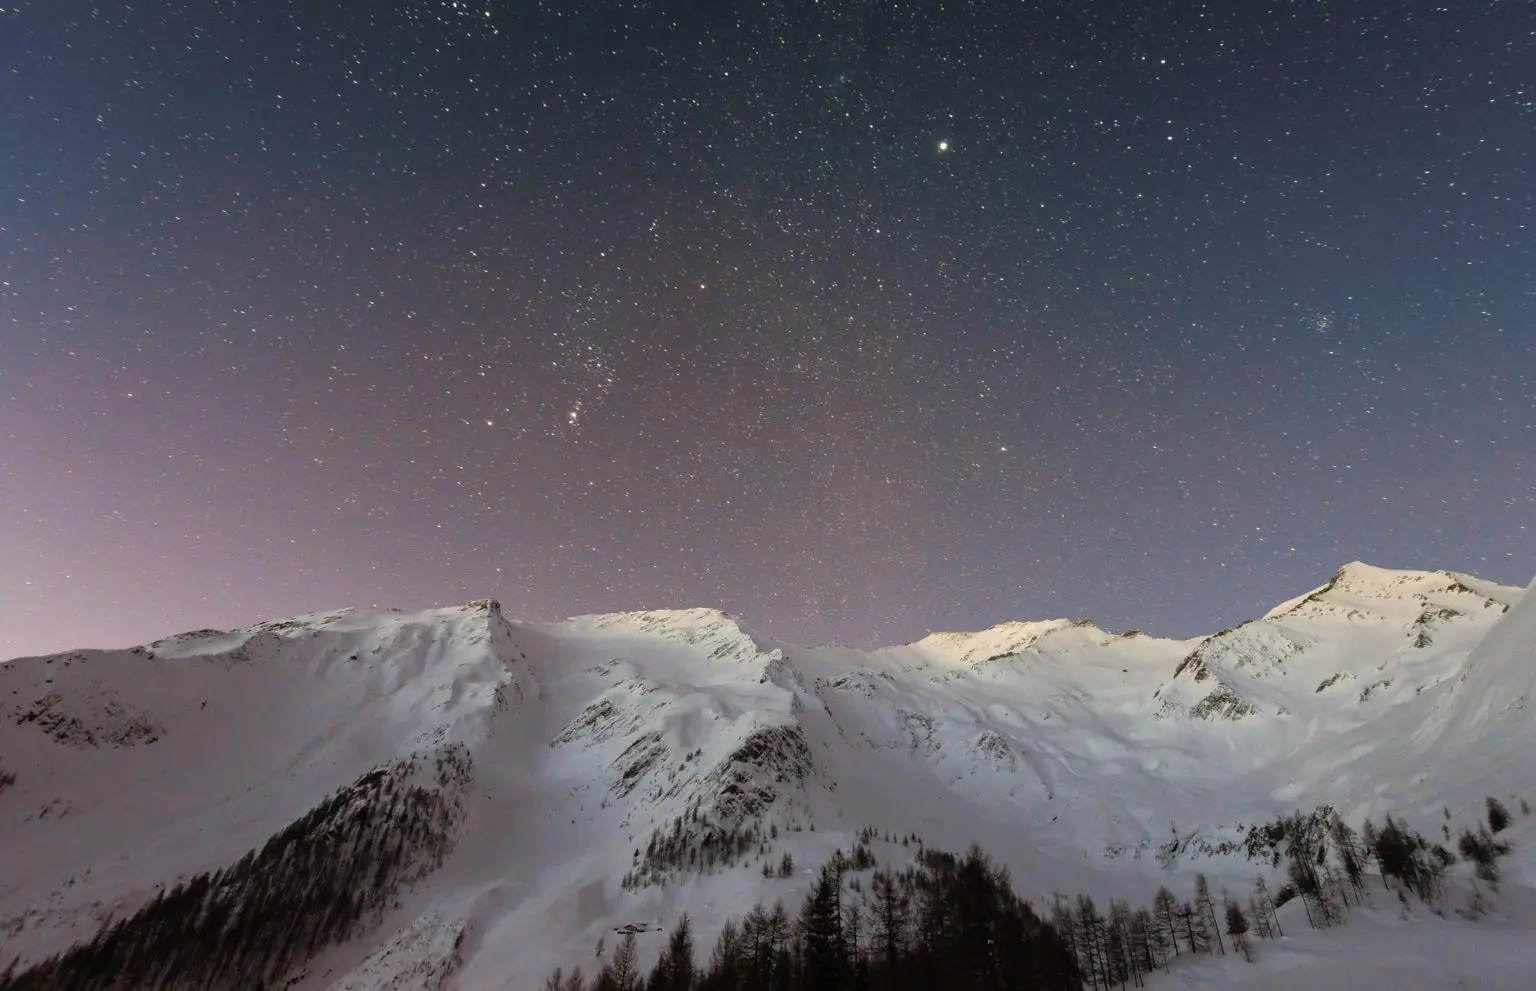
- Choose an open area where the moonlight can light up the landscape or the landscape can reflect as much light as possible so you can photograph it. This way you will be able to capture more detail. Landscapes with light coloured sand and snow can reflect more moonlight whereas a tree covered area will be difficult to photograph.

- Stay at the location for a while, for about 15 minutes to allow your eyes to adjust and see if you are able to make out the elements of the scene.
- Instead of having the moon directly in front of you when photographing a landscape, try to position it at an angle of about 45 to 60 degrees (more like side lighting). Doing so will add more depth to the landscape in the form of shadows. This will help create dramatic moonlit images.
- You can also try to include the moon in the image. In this case you may need to make two exposures (one exposed for the moon and another exposed for the landscape) and blend them in post processing.

- Try to keep the colour natural for emotive night landscapes. The moon lights up a landscape and illuminates the sky with an unusual deep blue colour, so set your white balance right to get the correct colours in your moonlit landscapes.

- When including trees or foreground plants/flowers, make sure it is not a windy night as these elements can record blur in the frame due to movement and longer shutter speeds.
- Try various focal lengths – start from wide and also zoom in to photograph interesting features and textures in the landscape.
- Location scouting is important as it will give you an idea of what you can expect from a particular location, you can pre-plan perspectives and compositions and also get familiar with a place that you will be shooting at night.
- Some remote locations may not have proper network connections and so it is better to let someone know where you are going or even better take a friend or family member along with you. Reach the location before the sun sets, so you can settle down in the new location, familiarise yourself and plan the photoshoot. It is also good to carry a map and compass handy if you’re going really remote so you do not get lost in the dark. Make a note of any landmarks.
- Wear clothes for the weather and take enough drinks and snacks with you to get you through the shoot!
When Is The Best Time To Shoot Moonlit Night Landscapes?
As with daytime landscape photography, night time landscapes also require certain favourable conditions that are most likely to help create beautiful photographs. Here are some things to consider when it comes to the best time like weather, moon phase, etc., when photographing night landscapes.
- Photograph on a clear night: The light source that we will be using for night landscapes is moonlight, so make sure to check the weather forecast and head out on a clear night with the moon in the sky. Stray clouds are not a problem, but cloud cover that can obstruct moonlight should be avoided when photographing moonlit night landscapes obviously.

- Keep an eye on the moon phases: A full moon night is the brightest night you can have to photograph night landscapes. Two or three days before and after the full moon will work well too and this is the time when the ambient light is just right to capture the best tonal range.
- During the full moon, you can use shorter exposure times to photograph the landscape with high contrast and good image quality compared to other days.
- Dim moon phases with up to 50% illumination will work fine, but the exposure times will be longer with less contrast in images.
- Position of the moon in the sky: When shooting night landscapes, we need to have the moon illuminating the landscape in specific ways to get powerful images. The brightness of the moon not only depends on the phases of the moon, but also on the position of the moon in the sky. During moonrise and moonset, the moon is dimmer and the light is softer compared to when it is high up in the sky. Positioning the moon also depends on how you want to photograph the scene in front of you.
- Backlighting the scene will make the elements in the landscape, for example, trees, buildings, etc., silhouetted. If this is the look you are going for, then you will need to position the moon in front of your camera.
- Doing this from a slight angle can add some depth to the image by slightly illuminating the sides of elements.
- When having the moon in the frame, position it in such a way that the flare caused by a very bright moon is minimised.

- Front or side lighting the scene:
- If you have the moon to your back, then it will help to bring out details of the elements in the scene. Again, positioning the moon at a slight angle will help to add contrast and depth to the landscape.
- Photographing when the moon is high up in the sky can cause harsh light and shadows especially on and near full moon nights. So on days when the moon is bright like full moon and days before and after the full moon, it is better to photograph the landscapes when the moon is at an angle just above the horizon.

- Useful Apps: There are a few apps that will help you plan and get a gorgeous night time landscape.
- PhotoPills: PhotoPills is an amazing app that will help you find the right time to shoot by showing the direction at which the moon will rise and set and the position of the moon in the sky at certain times. This way you can plan a location, date and time for the shoot.
- Darksky.org: In order to photograph night landscapes neatly, you need to find a location that has the least light pollution and darkest skies. Darksky.org is a website that will help you look up dark skies near your location.
- Cleardarksky.com: This website helps you with clear sky charts and light pollution maps.
- The Photographer's Ephemeris (TPE): TPE helps you to plan outdoor photography in natural light. This app will show how light will fall on the location you are planning to shoot both for day and night. This will help you to plan your shoot well ahead including how to compose based on the direction of moon light.

Gear Required For Night Time Landscapes:
- A camera that can shoot in manual mode
- A sturdy tripod since you will be shooting long exposures
- Cable or remote release to avoid camera shake
- Spare fully charged batteries and formatted memory cards
- A headlamp or flashlight to work your way in the dark
- A power bank in case you need to charge anything urgently
Camera Settings For Night Time Landscapes:
Since you will need to have full control over the exposure settings, it is recommended to shoot in manual mode. Let’s look at the various other settings that are required to shoot night time landscapes.
- Shooting Mode: Shoot in manual mode
- Image Stabilisation: Turn off image stabilisation on both lens and camera if they have it.
- Mirror Lock-up: If you are using a DSLR, make use of the mirror lock-up feature if it has one. This will help reduce camera shake.
- Remove Filters: Remove any filters on the lens as this can cause unwanted flares, ghosting and artefacts.
- Focus: Cameras can struggle to focus in low light. In order to get perfect focus, it is advisable to use manual focus. You can focus on a bright star in the sky or the moon or distant lights, but this may sometimes throw the closer foreground elements slightly out of focus.
- White Balance: Manually choose a white balance value or preset (tungsten or incandescent should work) but if you are not sure, you can leave it on auto and make adjustments while post processing.

- Raw: Always shoot raw for the best image quality and colours.
- Aperture: For landscapes, we need to make sure that the depth of field is larger so we have everything in the frame right from the foreground to the background in focus. You can shoot with wide open aperture if you do not have any elements in the foreground that require narrow aperture to appear perfectly sharp. You can try focus bracketing in these situations.
- Wider apertures also help to keep iso low and shutter speed fast, but if you are looking for perfectly sharp images, it is recommended to shoot at aperture values between f/8 and f/11 depending on your lens' sweet spot. You can even start with f/4 or f/5.6 depending on the lens, so you do not have to sacrifice on low iso values.
- ISO: Set the iso to the lowest possible setting. If you are shooting at the widest aperture value, iso 320 up to 1600 will work fine depending on the performance of your camera sensor, light from the moon and the aperture value of the lens. If you are narrowing down the aperture, you may have to increase the iso to 3200 and above, but this may also lead to noise showing up in the images. Either way, some experimenting with iso and shutter speed will be required to achieve perfect exposure.

- Shutter Speed: If you are photographing the landscape with the sky in the frame which we will be doing most of the time, you will also be recording some stars in the sky. You do not want the stars to trail, so you need to calculate a shutter speed that will help avoid star trails in the images. For a start, you can use the 500 rule to calculate the shutter speed. Any shutter speed faster than that will work great. According to this rule, you divide 500 by the effective focal length. For example,
- If you are using a 24mm lens on a full frame camera, then shutter speed = 500/24 = 20.8 = 21 seconds
- If you are using a 24mm lens on a crop sensor camera, then taking a crop factor of 1.5 into account, shutter speed = 500/(1.5 x 24) = 500/36 = 13.8 = 14 seconds
- The above calculations are to avoid star trails and if you want the exposure time to be lesser than the above values, it is perfectly fine.
- If you photograph on a full moon night, you will have a lot of light from the moon illuminating the landscape, so you may need short exposure times than that calculated using the 500 rule. In these cases, first reduce the iso to the lowest possible and then if required, reduce the exposure time, so you get neat noise free images.
- If you are not concerned about the star trails and are looking to stack these images for star trails, then you do not need to worry much about the 500 rule. Just use low iso values and slower shutter speeds to get the shot.

- Noise Reduction: Longer exposures can cause thermal noise in the images because of the sensor heating up. This can be reduced by turning on the “Long exposure noise reduction” feature in the camera but this can delay the time between two shots. Read here to find out whether you should turn this feature on or off for night time photography. You can also reduce any noise while post processing.
Getting The Shot:
Once you have made the settings on your camera, compose the image for an interesting frame. Keep an eye on the foreground elements and the background and use the compositional guidelines to compose the shot.
Release the shutter using a cable or remote release so you can avoid blur due to camera movements. If you do not have one, use the delay timer feature. The longer the focal length, the longer should be the delay, about 10 seconds.
Review the test shot on the screen for correct exposure on all parts of the frame and for sharpness. Take a few more test shots at different exposure settings and see which works best. Try different shutter speeds, iso and aperture values and find the one that works best.
You can also try focus stacking to get greater depth of field right from the foreground to the stars in the sky and in general for a comparably sharper landscape image. Slight clouds in the sky can be an interesting feature, adding character and surreal mood to the night time landscape.

If you think there is loss of details in the shadow areas of the image, you need to bracket a few exposures to combine them while post processing. You need to be fast as the stars will be moving across the sky and so will the moon if you have it in the frame.
Post Processing:
Post processing is an important part of photography especially when we shoot raw. We need to make some tweaks to bring out the best from the image we took the effort to photograph. Some basic and local adjustments can make a dull image pop. Here are some steps that you can follow:
- If you had bracket exposures, combine them using a post processing application like Photoshop. If you also had taken exposures for foreground and the moon, you will need to combine them.
- Adjust the temperature to get the colours right in the landscape and the sky.
- Straighten and crop the image if necessary.
- Make basic adjustments like exposure, contrast, highlights, shadows, blacks and whites.
- You can play around with the tone curve to get the colours right. You may have to work individually with the RGB channels to get the stars and the sky of right colour.
- If there are areas that are slightly in the dark and require slight exposure, you need to make use of the brush tool to make local adjustments.
- Add some vibrance, clarity and sharpness if required.
As landscape photographers, we are always looking at different ways to photograph a location. Photographing a landscape under moonlight can be a different way to show the location and it will add a completely different mood to the image. So if you are bored with photographing the same location over and over again, the next time, try photographing it under the moonlight.


6 Comments
When taking pictures evening landscapes, we have to have the moon illuminating the panorama in particular methods to get highly effective pictures. Thanks for sharing this information.
Thank you Naresh 🙂
Thanks for your article. Even though there a lot of articles online I always find some nuggets of information to help me make better photographs. So again thanks for your effort posting this article on Moonlight landscapes.
Hi Brian, thank you for reading and glad that you found some useful information here 🙂
I really enjoyed this article, Dahlia. I find the specific information needed to succeed very helpful.
Thank you very much Rose Marie. Glad it was helpful 🙂