
The first time we hear the words Dynamic Range in photography they are usually associated with HDR or High Dynamic Range. We know that HDR is a tool that we can use to expand the dynamic range of our sensor, to give us more detail in the darker and lighter parts of our image, but do we really know what dynamic range is?
Today we are going to take a basic but hopefully helpful look at dynamic range:
- What it is,
- How to see it in your camera and,
- How to extend or control it.
Dynamic Range: The Basics, Explained
Our camera sensors capture in tones. These start at pure black and end at pure white.
The tones between black and white are not infinitely variable but are actually a series of very small steps, each one imperceptible to the eye.
Many of you will have seen a greyscale. This is very similar to the tonal range of a camera sensor but in the camera, we have many more smaller increments.
It's the number of those increments between black and white that give us our dynamic range. Because as photographers we work in and understand f-Stops or EV (Exposure Value) as the scale we use to measure exposure, it makes sense to define the dynamic range in f-Stops.
Typically cameras capture between 12-15 stops of dynamic range at base ISO. That range reduces as you increase your ISO.

Dynamic range is the number of steps between pure black and pure white. By s2art
As an example, lets take a camera with 14 stops of dynamic range. That means that if you measured the darkest part of the exposure as being 1 second at f2.0 you could shoot an image where the brightest part measured the exposure would be 1/8000th of a second at f2.0 and capture the shadows and highlights correctly.
Of course, our actual exposure for this dynamic range would be somewhere in the middle of this. This might sound like a very wide range but a very bright contrast scene can easily exceed this. Hence the need for us to know and understand the dynamic range of our cameras.
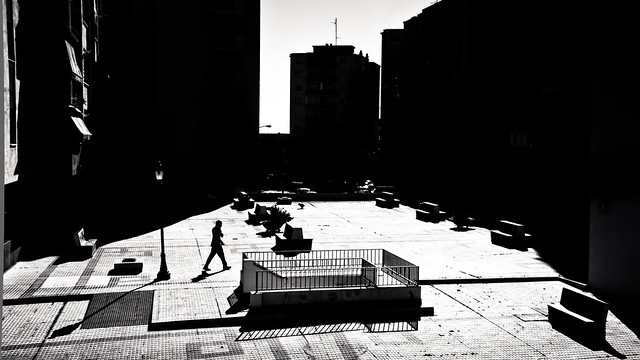
High contrast scenes can go well beyond the range of our sensors. By Hernan Pinera
Light Skills are absolutely essential components to making an image “correctly exposed” and continually improving your photography. This course guide “Fundamental Light Skills” will take you through the essentials you need for getting those images looking perfect!
How Do We Monitor Dynamic Range?
Fortunately, our cameras come with some useful tools to help us determine the dynamic range of our sensors. The first is the histogram. This graph type indicator shows us the distribution of light throughout our image.
Some cameras have live histograms others you have to check after taking. Think of the histogram as a horizontal bucket of light. Any of the light that is spilling out of the left of the graph is underexposed and prone to noisy shadows.
Any light spilling from the right is over-exposed and is virtually impossible to recover in post production. The secret is to control our exposure so that the light remains completely in that bucket. If it spills out both sides at the same time, you have gone past the dynamic range of your sensor. In this case, it is better to exposure for the shadows and remove excess noise in post production.

Histograms are a good guide to dynamic range. By LeighMilwardRMIT
The other technique for seeing issues are the highlight and shadow clipping tools. Some of you might know these as the annoying flashing red and blue blocks in your image previews or live preview.
Annoying they may be but they are also very useful. The red flashing indicates where the image is over exposed, the highlights are beyond the range of the sensor. The blue flashing does the same for the shadows.
Again the secret to maximizing your dynamic range is to eliminate both of these.
Increasing Dynamic Range
There is one caveat to the two tools we mentioned above. They base their measurements on a jpeg output. The actual sensor range is greater than that. Which leads us to ways to increase dynamic range.
- The first is to use RAW files. These give us the fullest dynamic range that our sensors can handle.
- Second is to avoid blowing highlights. It is easier to reduce noisy shadows than to recover highlights so it is favourable in high contrast situations to shoot to the left of the histogram.
- Thirdly of course there is HDR or High Dynamic Range. This is where we've shot a series of identical shots, varying the exposure from under to over. We then use Photoshop or other post-production software to merge them together to give one image with a greater dynamic range than our sensor can produce alone.
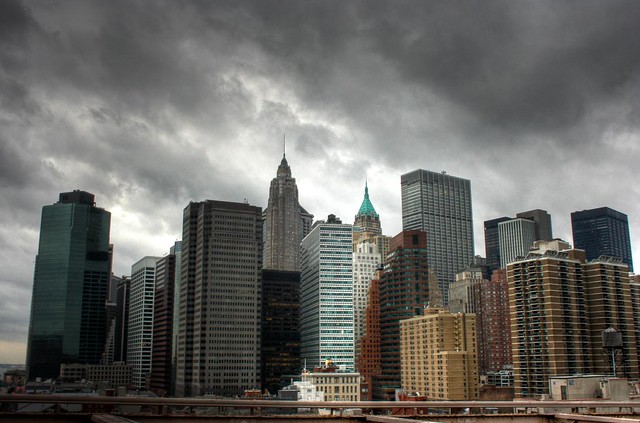
HDR can help us extend our dynamic range. By Juan Camilo Trujillo
Summary
Understanding the basics of dynamic range is not too difficult but by knowing how our sensors cope with light, we can unleash the full potential of our cameras!
Light Skills are absolutely essential components to making an image “correctly exposed” and continually improving your photography. This course guide “Fundamental Light Skills” will take you through the essentials you need for getting those images looking perfect!



1 Comment
Thank you for your many helpful tutorials. I’m sorry to note that you totally confuse me with your discussion of histograms. For instance: ” Any of the light that is spilling out of the left of the graph is underexposed and prone to noisy shadows.
Any light spilling from the right is over-exposed and is virtually impossible to recover in post production. The secret is to control our exposure so that the light remains completely in that bucket. ”
What do you mean by light spilling to the right or left?
Or: “it is favourable in high contrast situations to shoot to the left of the histogram.” What does shoot to the left of the diagram mean?
I have been doing photography and post-processing for over 50 years and never could figure out how to read a histogram.
Can you help?
Thanks