Those of you with more than a passing interest in smartphone film making will undoubtably heard of Filmic Pro. It is an app designed to get the very best video quality out of high end Apple and Android phones.
It first shot to prominence in 2015, when it was used to capture the award winning Hollywood film Tangerine. This was shot using just three iPhone 5s and edited in DaVince Resolve. Since then Filmic Pro has gone on to become one of the most important apps available for mobile film makers.
It enables such features as log color and 100 mbps plus recording rates on our devices. Now, the Filmic Pro team have turned their attention to stills photography with their new Firstlight app. Today we are going to take a look at it.
What Is Firstlight?
Unlike certain other apps, Firstlight is purely designed for capturing the image. It gives the photographer as much control over that capture as possible. What it is not, is either an image editing or image management program. There are, however easy to use workflows to bring your images into editing and management apps such as Lightroom Mobile.
Currently Firstlight is only available on Apple IOS devices and requires IOS 13 or later. An Android version is in development but there is not indication on a release date.
Yes, there's a free version!
The app is available both as a free version and also as a premium edition with a number of extra functions. The premium edition costs 99 cents/pence per month on a subscription basis or $7.99/£7.99 per year. Given the number of tools available, its a very good price.
So let’s look at the differences between the free and paid versions.
Firstlight Free Version
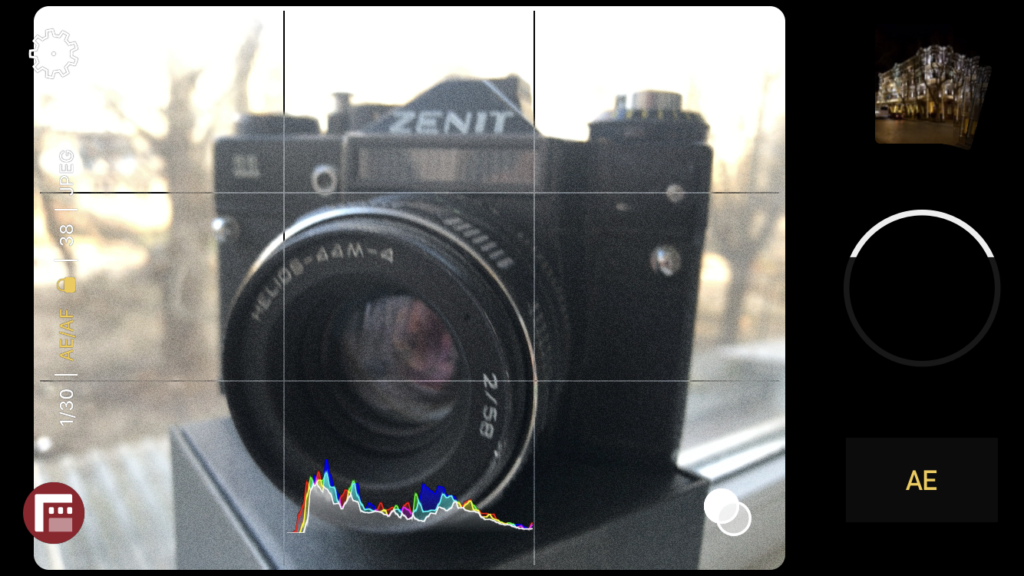
Despite its free price tag, the basic version of Firstlight offers a decent amount of functionality to the smartphone photographer. Chief amongst these is the ability to shoot in DNG, Adobe’s proprietary raw format. As with larger cameras, the ability to shoot raw, gives us a greater latitude of control over our images.
As well as raw you can shot JPEG, TIFF and the new HEIC format.
You can control different aspect ratios such as 4:3, 16:9 and 1:1 and use burst mode, self timer and control the flash.
You can also overlay grids to aid your composition.
One useful function for Filmic Pro owners is the addition of a dedicated quick launch button. This allows you to quickly move over to shoot high quality video.
The downside?
The main limitations of the free version is that you can only shoot in AE, auto exposure mode. This means you have no control over shutter or ISO.
Firstlight Premium
With the premium version you get a raft of very useful additions, most important of which is shutter and ISO priority. This is useful particularly in low light situations. Here, you might want to hold the ISO down to a low value whilst using the phone on a tripod with a slow shutter speed.
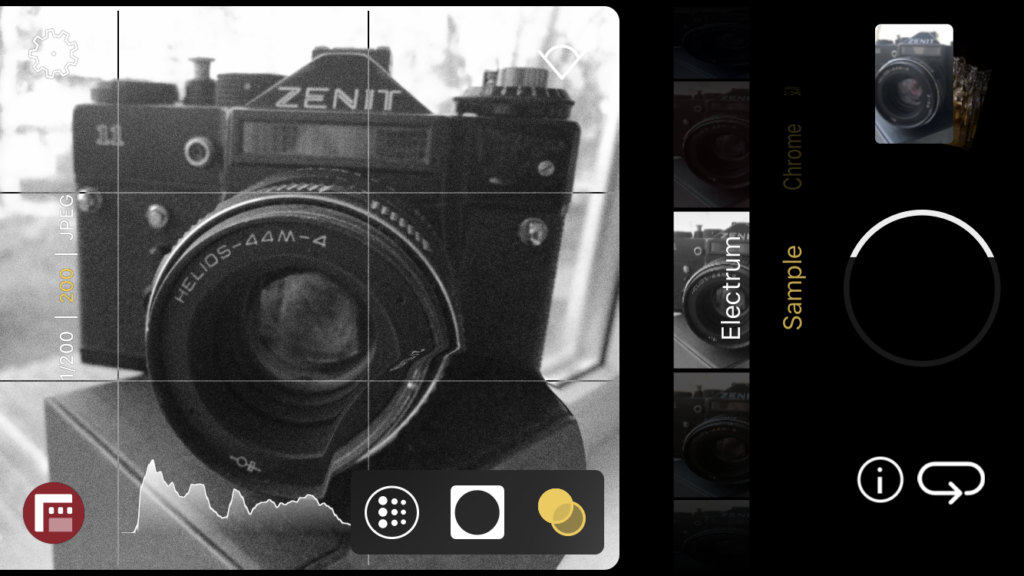
Another useful addition is film simulation modes to give your images a specific look. These however, do not work when shooting DNG raw.
You can configure the burst rate from low to normal to high. The actual shots per second will vary depending on the phone you are using.
One very useful addition is the live analytics. This allows you not only to see a live RGB histogram but also zebra patterns denoting the under and overexposed aspects of the image. You can also focus manually with the aid of focus peaking.
What You Need to Know About The Firstlight Interface
When you first open the app, you will see the main image viewer slightly left of centre in landscape format. To the right is a large and quite prominent shutter button. The phone’s volume button can also be used to trigger the shutter.
Below the shutter is the exposure mode selector. On the free version this is defaulted to AE. Selecting ISO or Shutter Speed will inform you that you need an in app subscription. With that subscription you can drag up once for ISO priority and twice for shutter priority. Sliding either of these left or right will change the ISO/Shutter Speed.
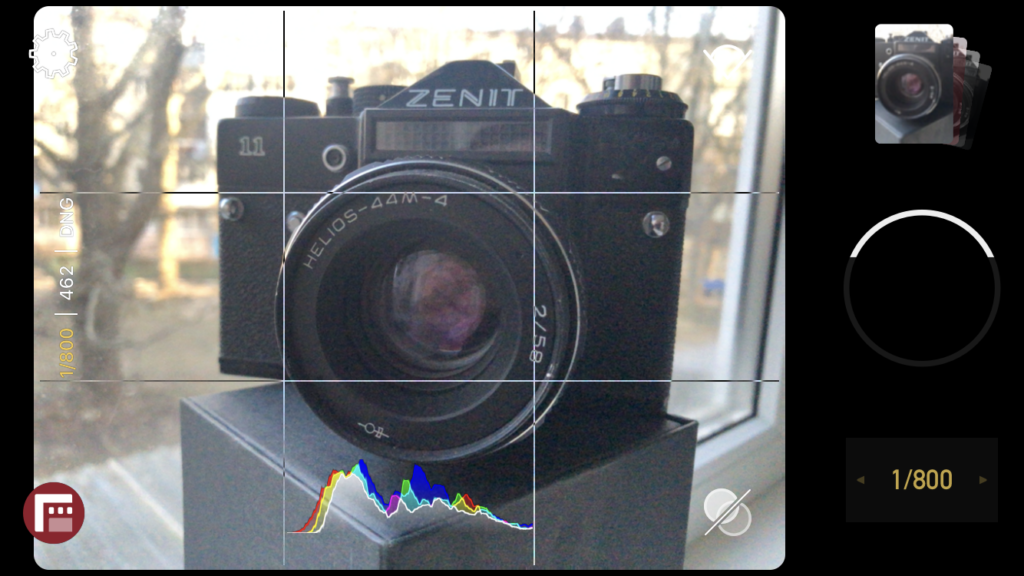
You can adjust both focus and exposure by swiping left/right or up and down on the main viewfinder section. Focusing manually will show focus peaking aids and exposing manually will show zebras for over and under exposing. You can configure the colours for the focus/exposure aids in the settings.
To the left side of screen is your exposure and format information. This is written vertically which is odd at first but you soon get used to reading it. Top left of the screen in the settings icon.
Firstlight Settings (Premium Version)
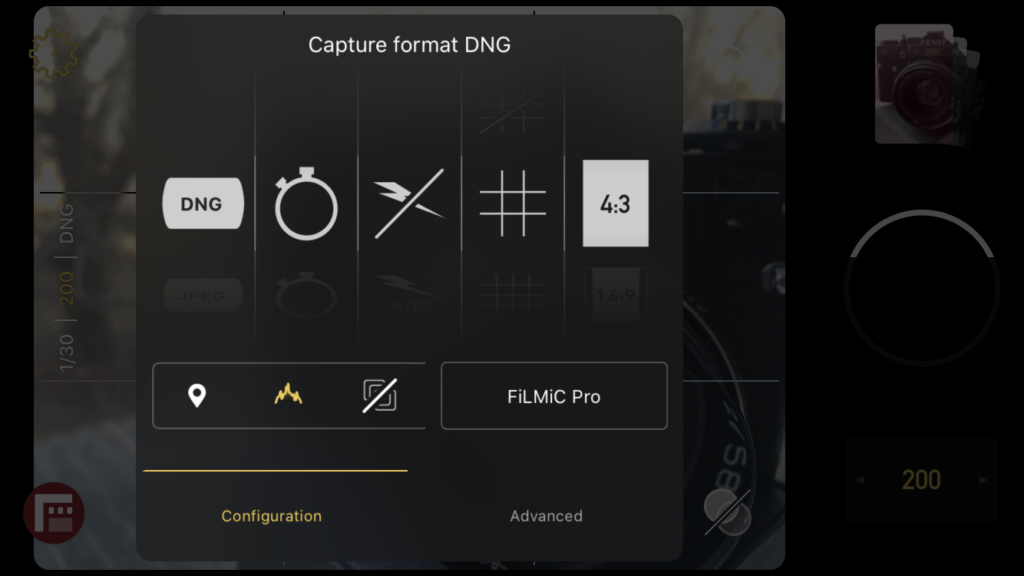
The settings menu is a very clean and easy to use interface. On the main screen you have five controls. These allow you to change file type, self timer duration, flash on or off, overlay grid type and aspect ratio. Below you can turn on or off geolocation, histogram and burst mode. Note that burst mode is not available in DNG or TIFF formats.
You also have access to advance controls such as the analytic colours and metadata.
Firstlight In Use
Being a long term Filmic Pro user for video, I took easily to Firstlight. The shooting interface is intuitive and contains plenty of useful information without that information becoming intrusive. The Filmic Pro quick launch button was very useful enabling me to switch over to video very quickly.
However as yet, I do not see a return to Firstlight button on Filmic Pro. This kind of negates the advantages. I am sure they will add that in in a future update.
One really useful feature I found was that as I had Filmic Pro setup to use my DJI Osmo Mobile gimbal. I could trigger the shutter button directly from the Osmo. The vertical exposure information takes a while to get used to but it does allow the interface to be clean.
And quality?
Its difficult to comment on image quality. This would technically differ little from using other apps such as Lightroom Mobile, particularly when shooting raw. However in JPEG, the film modes are very nice although somewhat limited in number at the moment. They will be added to in future updates for premium subscribers.
Final thoughts…
Overall I am very impressed with Firstlight. My go to app for more serious smartphone photography had been Adobe Lightroom. However it always felt a bit of a faff to navigate through to shooting modes.
Firstlight dispenses with all the extras and concentrates on being purely a capture app.
Because of that it will become my app of choice when shooting on the iPhone. I rarely edit on the go but Firstlight still incorporates an easy way to get your images over to Lightroom. Given the very reasonable subscription price, I think it’s a bit of a no brainer to get the premium version.
You can download Firstlight for IOS here.


1 Comment
Firstlight has had an Android version for some time. I have the Filmic Pro and the Firstlight app on my Samsung Galaxy 10. Both are excellent programs.