We all have our own personal processing preferences that we do 99% of the time. From the moment we import files into Lightroom to the time we export a file for printing, we can create presets when we find a look or style that we like and that can be used repeatedly. Although the newest version of Lightroom is Lightroom Classic, there are still a lot of users who continue using Lightroom CC and in this article we thought we will explain how to create your own presets using Lightroom CC.
Note: We will cover how to create presets using Lightroom Classic in a different article.
Creating presets is not a difficult task and is an easy process if you understand what the preset does and how presets need to be created for different scenarios and purposes.
What is a Preset?
A preset is the method of naming and saving processing steps for future, repetitive use when needed. Presets can be used in a myriad of post processing steps. Some examples of where presets can be used include:
- Metadata
- Importing
- Developing
- Auto Layouts
- Local Adjustment/Graduated Filters
- Exporting
- File naming
Why Should We Create Our Own Presets?
Most of the time when editing images, we follow our own style of repeatedly making certain adjustments for a particular set or type of images. Doing the same actions over and over again can be a waste of time and creating a preset will take away the hassle of a repeated action and help us apply the effect in a single click. This is the reason why it is recommended to create presets for settings or effects that you will be repeatedly creating.
Besides the editing part, presets can be created for various other actions like we discussed above – adding metadata, file naming, colour management, camera profiles, etc. Presets are easy to create.
We'll walk through how to set up a preset using 2 examples from the list above:
- Develop Preset
- Export Preset
Develop Preset Example
There are development adjustments I would apply 99% of the time I import my raw files in to Lightroom. These include:
- Take out sharpening – Lightroom automatically applies a small amount of sharpening to a raw file. My preference is to take out the sharpening. I may add sharpening later in my workflow on a given image if needed.
- Lens corrections – Lightroom has the ability to modify and adjust an image based on the lens that was used. I would always check both the Enable Profile Corrections and Remove Chromatic Aberration in the Lens Corrections Panel.
To take care of these steps, I created a User Preset titled “Landscape Standard” that performs those three actions with one click.
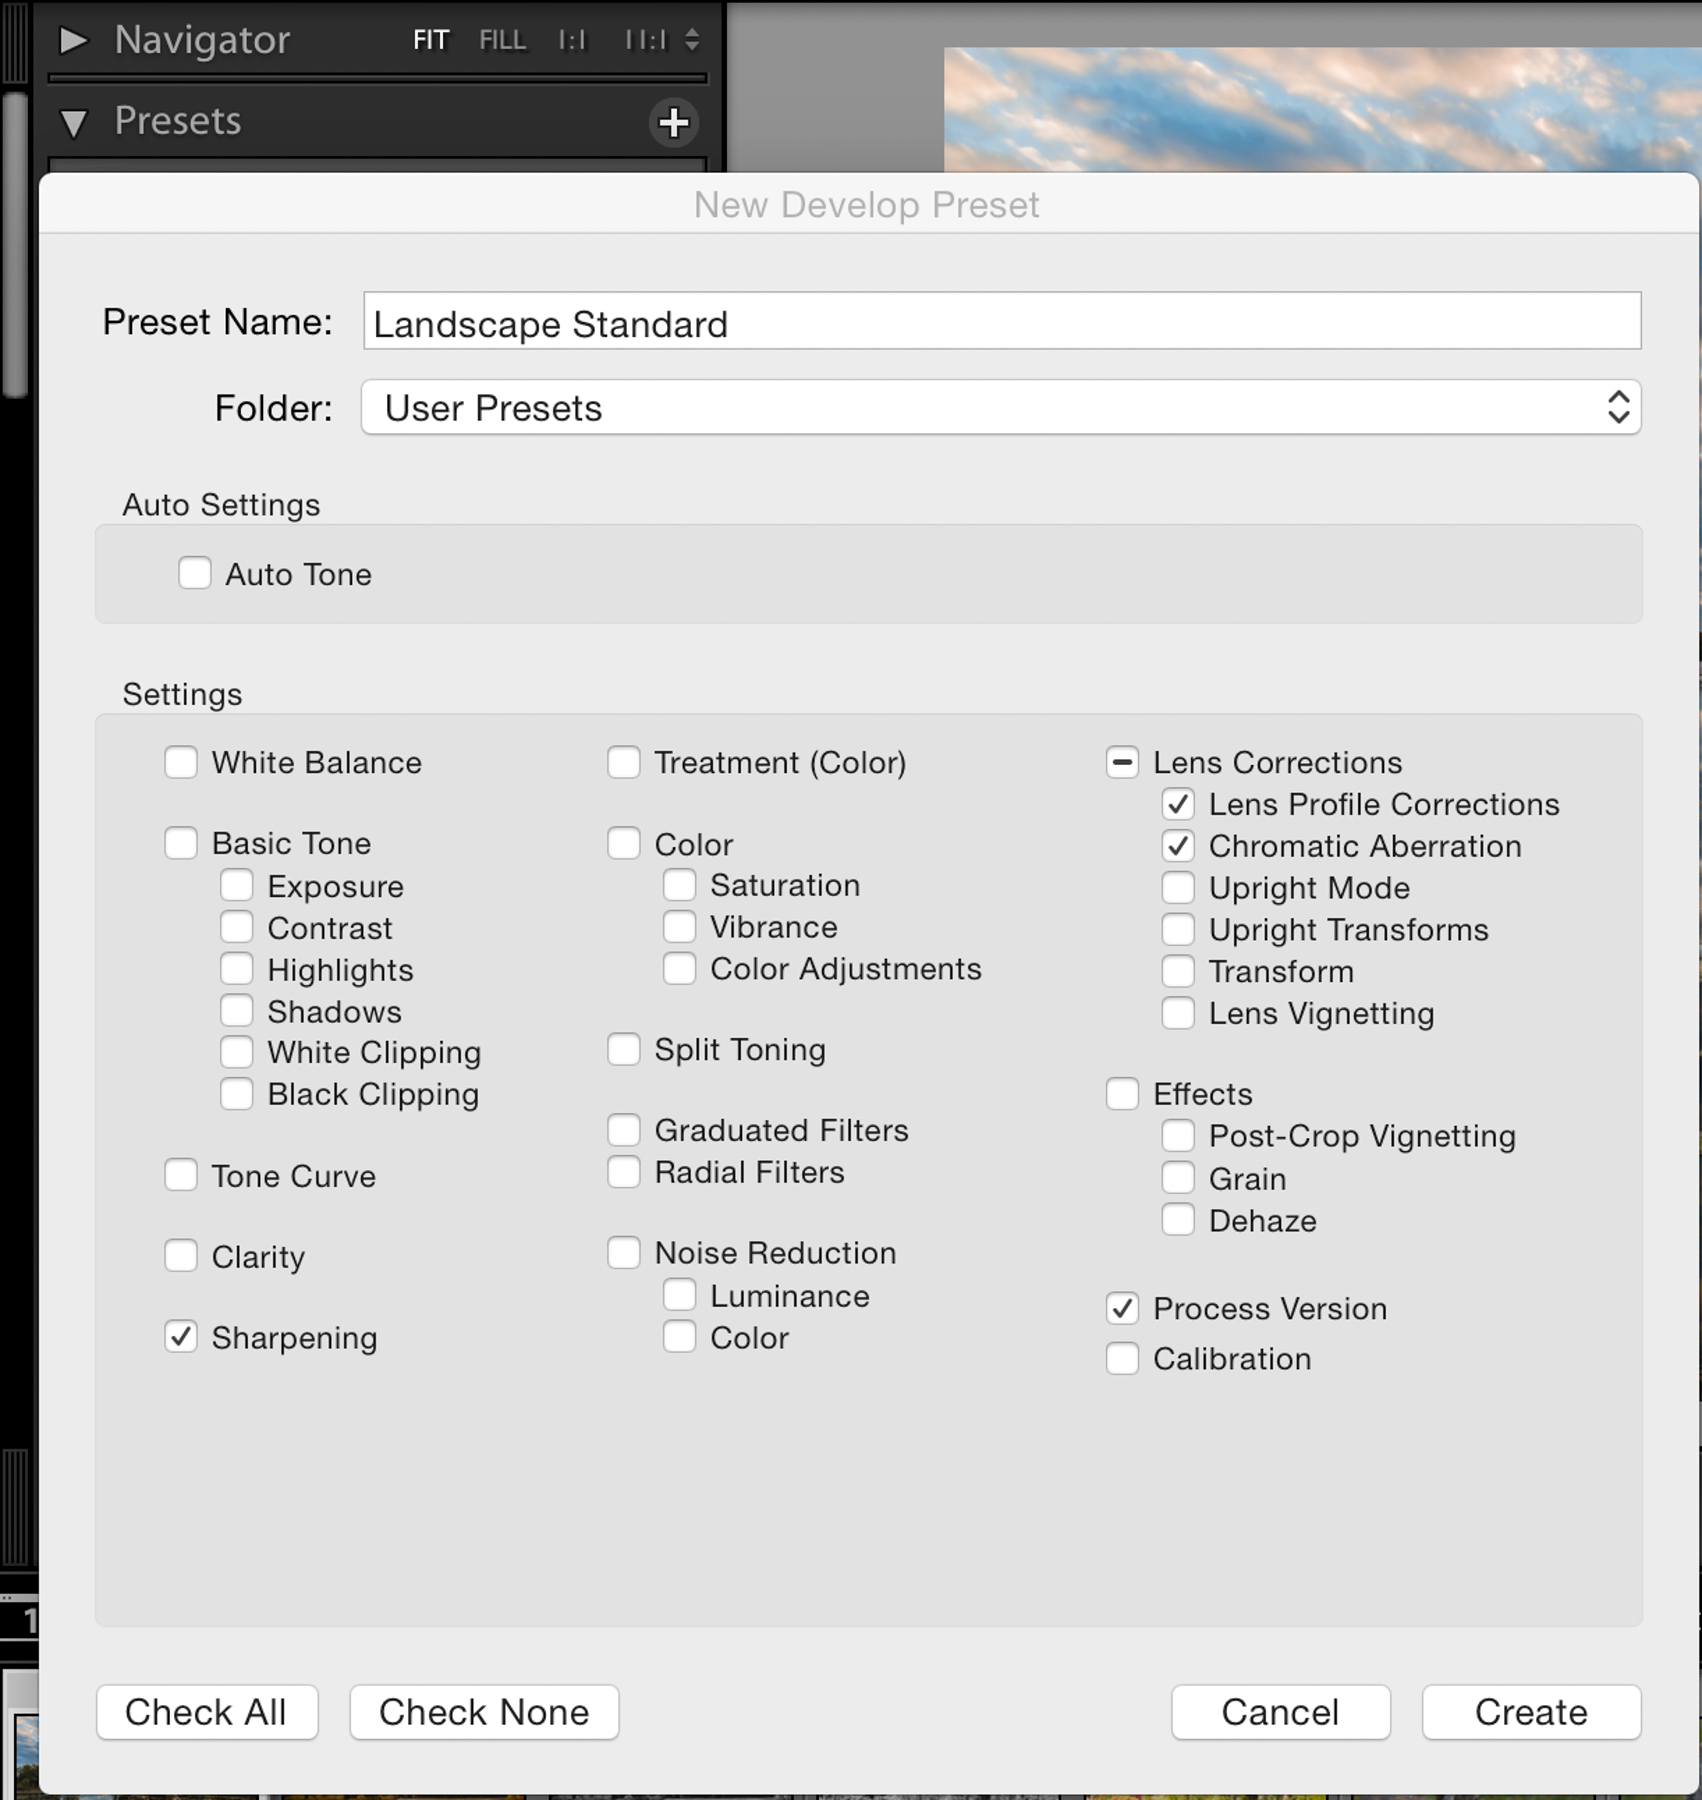
If you are looking to create a preset for basic adjustments like contrast, highlights, shadows, blacks and whites, clarity, tone curve, colour adjustments, etc., make those adjustments in the image and then check those boxes when creating the preset.
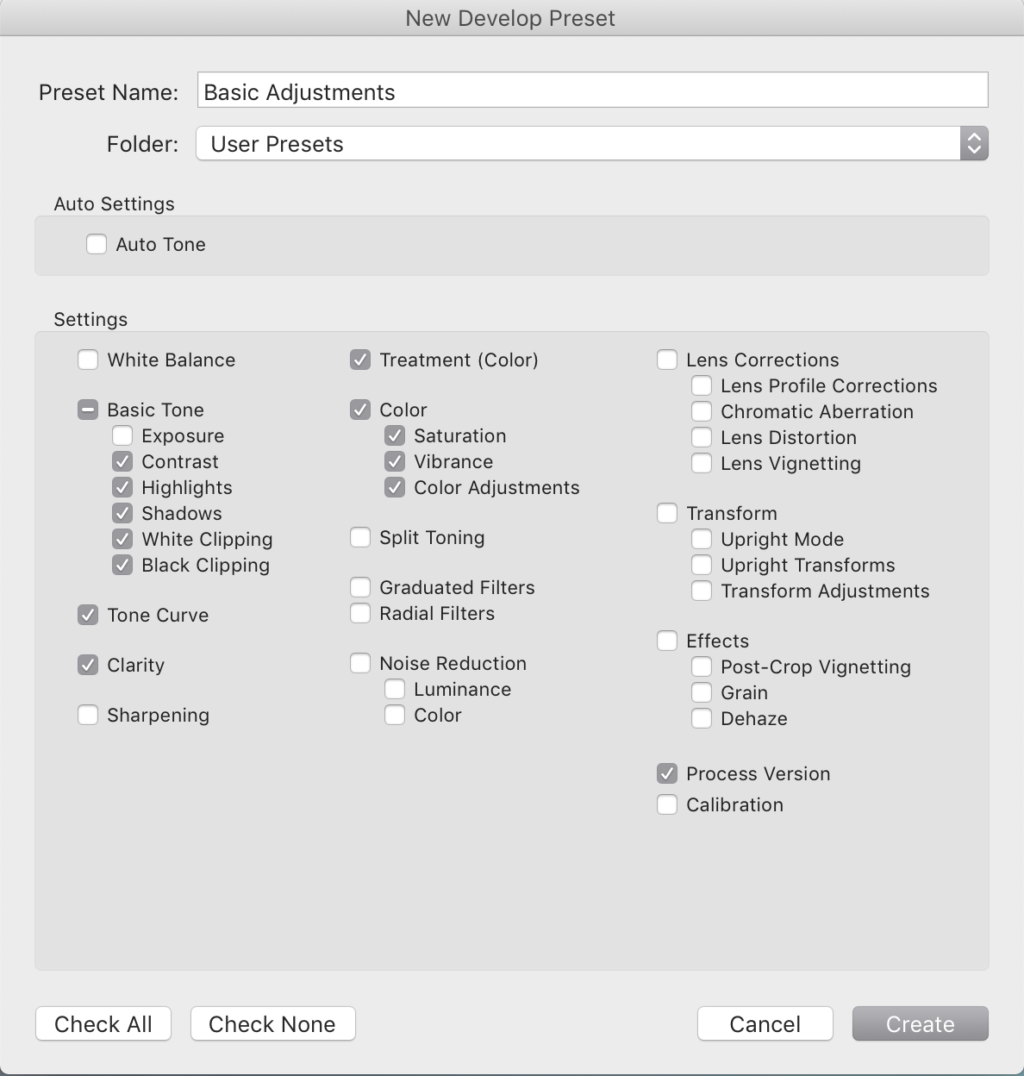
This way you can have various presets for different settings for your image and can use them when necessary.
To create a Develop Preset:
- Import an image where you want to make the adjustments and open it in “Develop Module“
- Press the “Reset” button at the bottom of the right panel, so all the sliders set back to zero, just to make sure you start making the adjustments from scratch.
- Make the standard adjustments you want to save for future use
- Go to the Preset Panel on the left side that's underneath the Navigator Panel. Select the ‘+‘ next to “Preset” and the window shown above will pop up

- Or, on the top menu, click “Develop” and “New Preset.” The same window shown above will pop up.
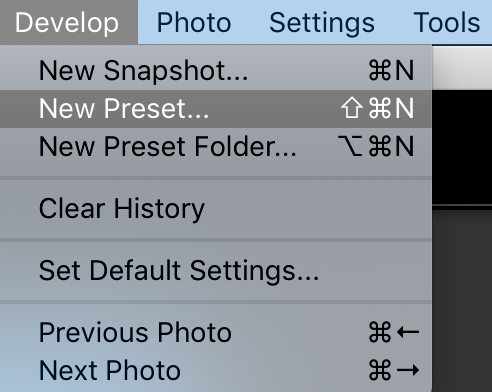
- Select the settings you want to keep (only tick those checkboxes) or apply on other photos in the future, give the preset a name, add it to a specific preset folder or create a new folder for your presets if required and click “Create.” If you do not give a folder name or choose a folder, then by default, the presets that are newly created go into the “User Presets” folder.
- To apply the preset to a different image, open that image in Develop module and then click that specific preset. The adjustments will be applied in a single click.
Export Preset Example
Creating an Export Preset is another example of saving a few steps in your workflow. I typically export files for use in social media or for my website. For my website, I export large files and do not use a watermark. For social media, I scale the file size down and apply a watermark.
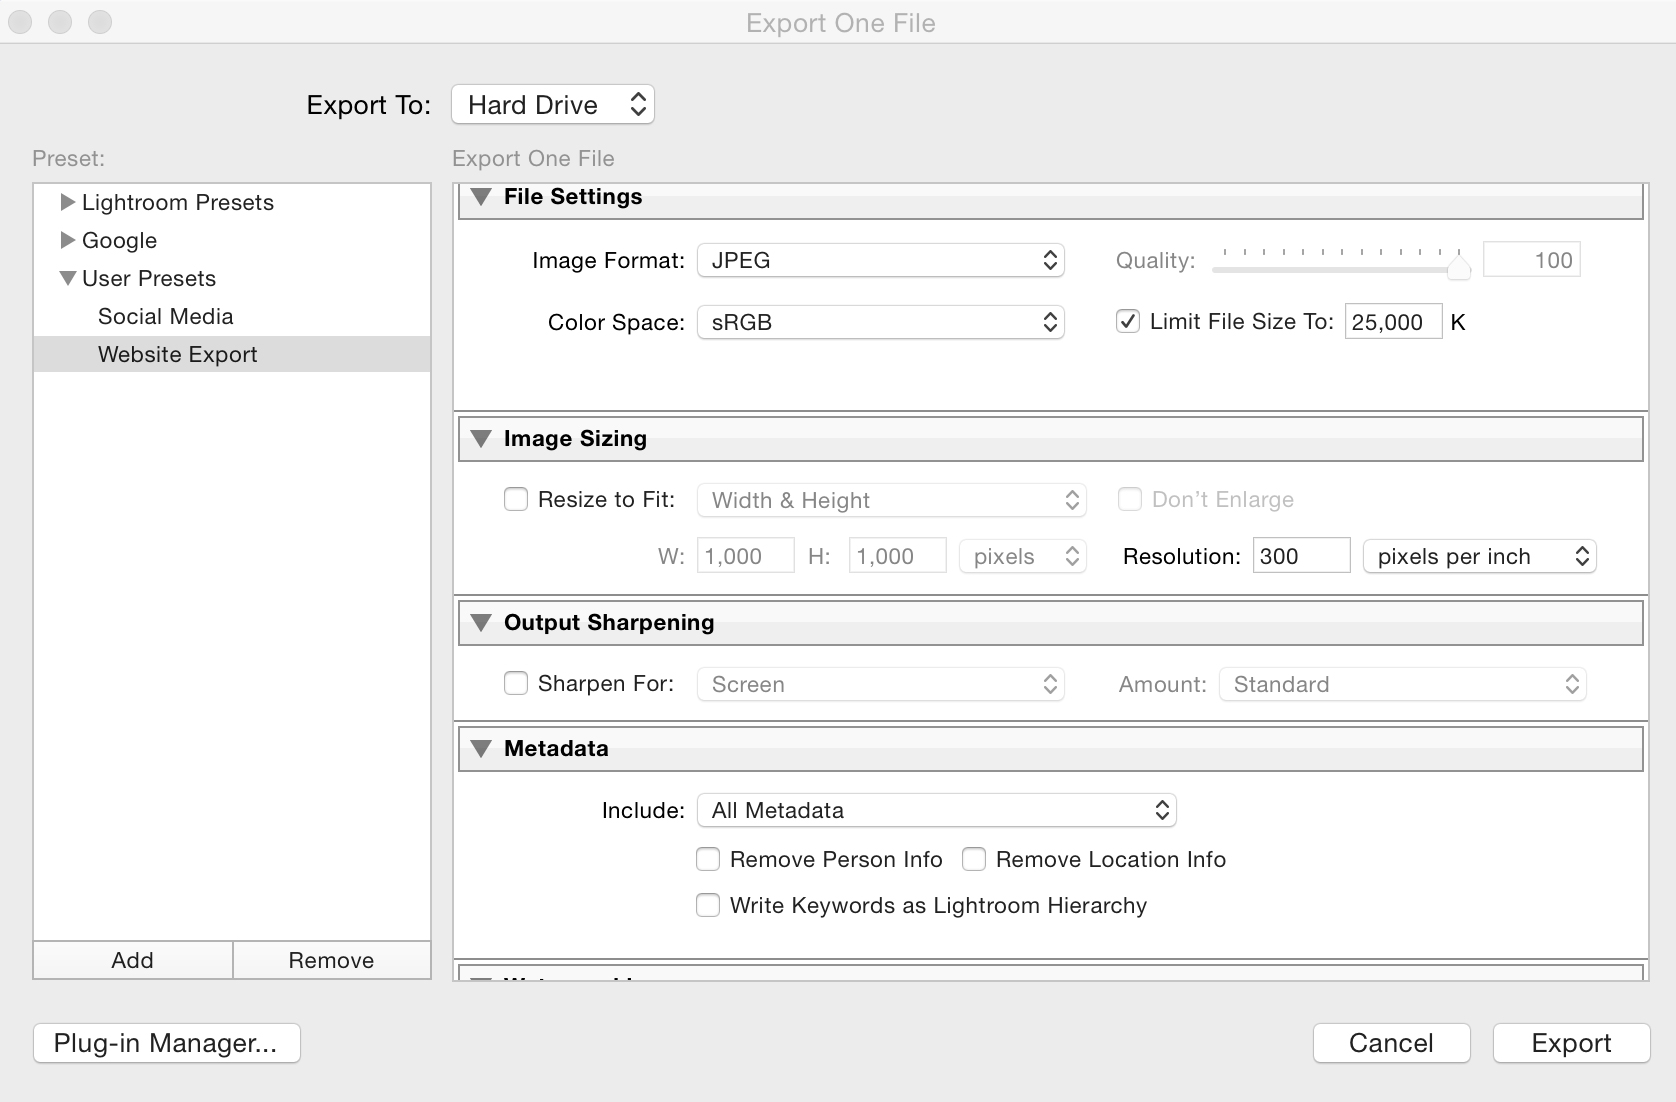
To create an Export Preset:
- Open the export dialog box by right clicking on the image/s you wish to export. Right click on the image/s, select “Export” and again “Export” which will open the Export dialog box as seen above.
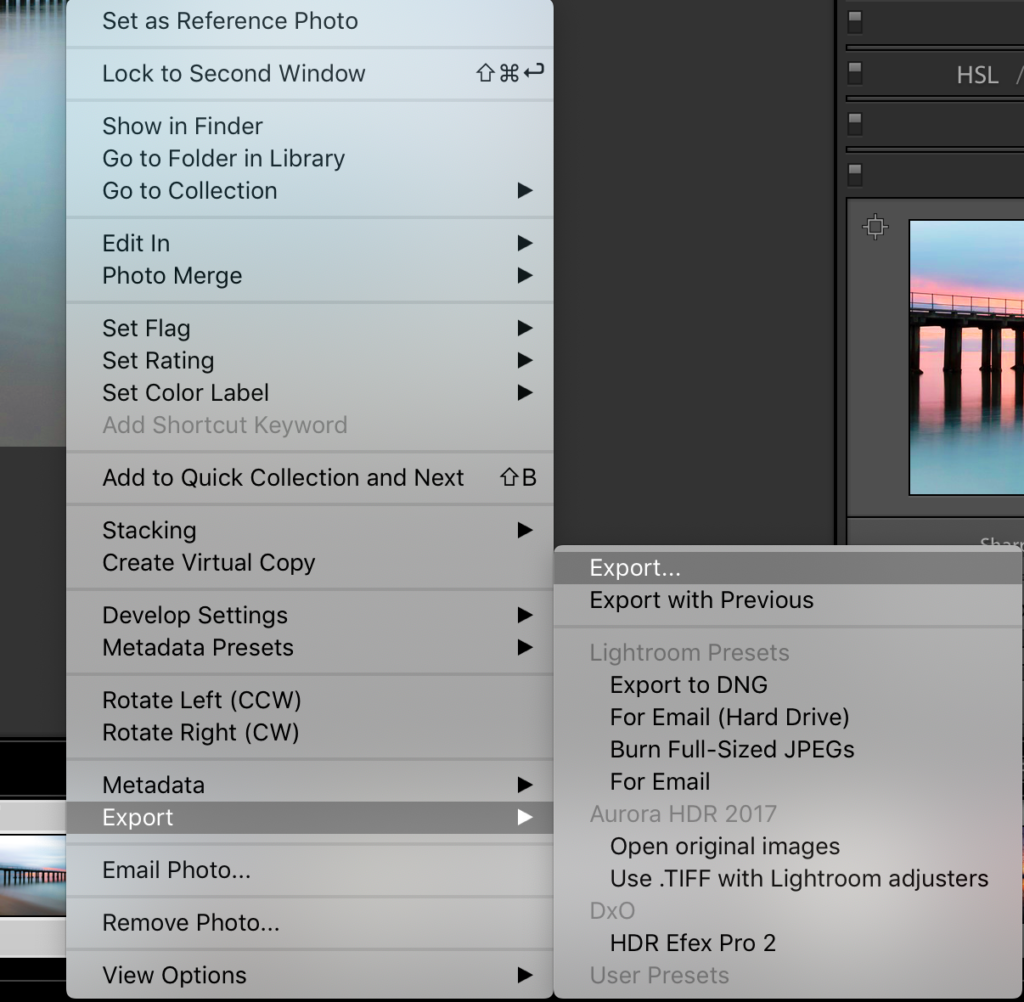
- Or, on the menu on top, click “File” and “Export” that will open the export dialog box as seen above.
- Select and customize the options you want to apply in the export panel
- Click on “User Presets” and click “Add”
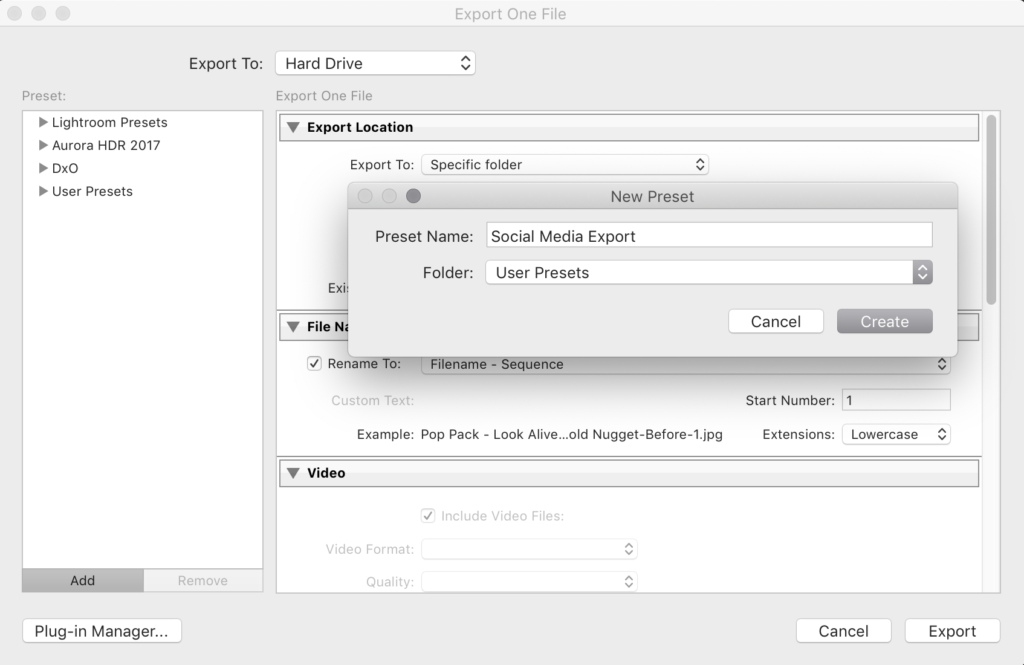
- Give a name for the preset and click “Create“
- Next time you export an image, you can export by applying the export preset by right clicking on the image, select “Export” and then selecting the created preset.
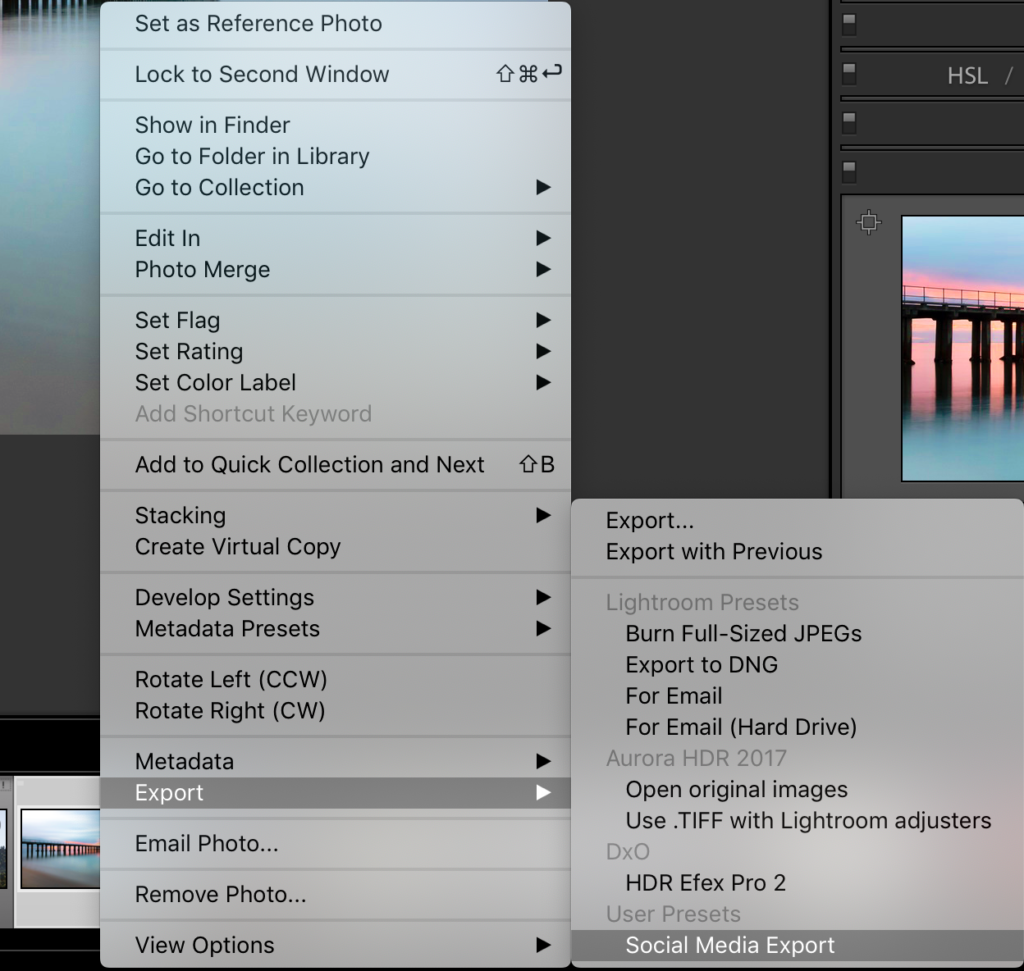
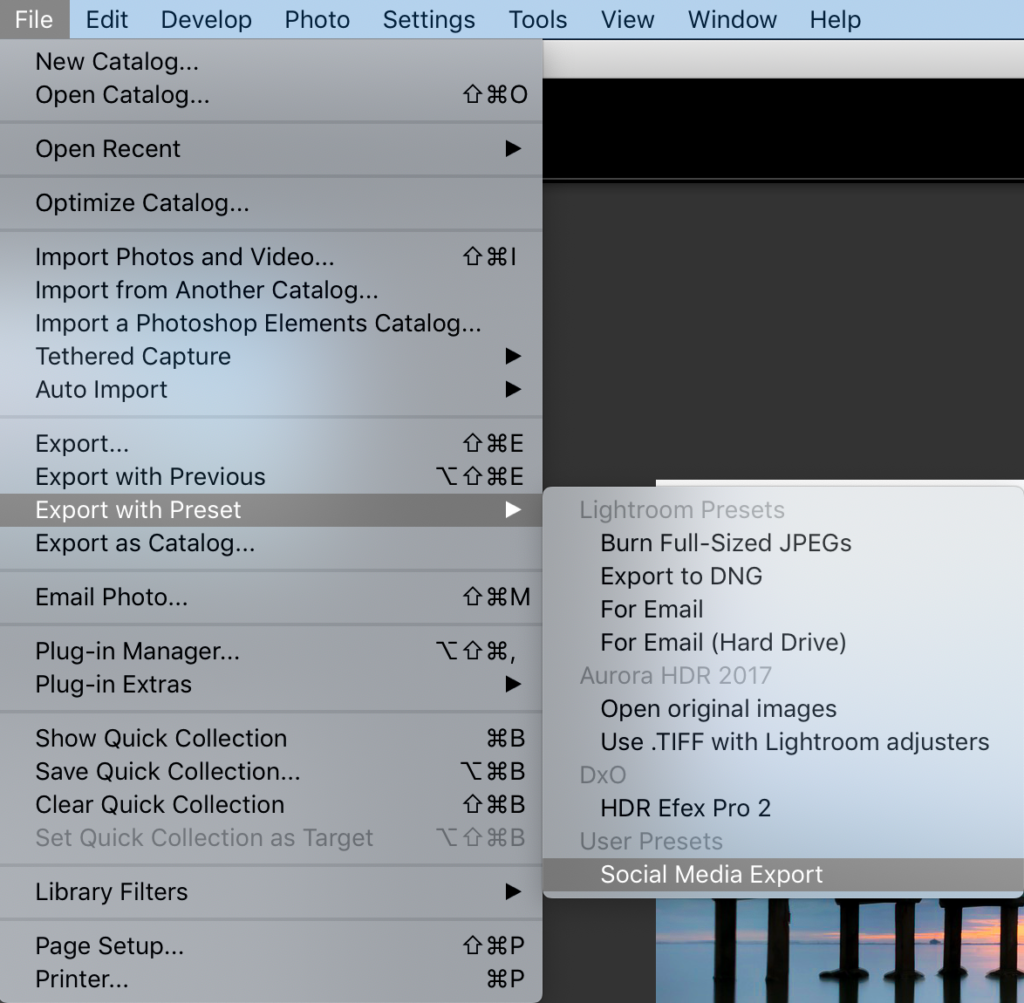
- Or, on the menu on top, click “File” then “Export with Preset” and choose the created Export Preset and export the file.
Some Points To Keep In Mind When Creating Presets:
- Since applying a Lightroom preset will change the slider values of all the adjustments you made and selected when creating a preset, it is best not to include certain values like “White Balance” when creating a preset. The reason being, if the preset was created for a golden hour image with a particular white balance value, the preset will look odd if it is applied to an image shot under a different lighting condition for example blue hour or an indoor fluorescent light. However some users may include white balance settings in the preset for creative purposes.
- It is good to create different presets for different lighting and scenes as the colours, contrast and other values will differ at different times of the day and under different lighting scenarios.
- It is always better to adjust exposure manually because if you add exposure values to a preset to correctly expose an underexposed image, applying the same preset to a correctly exposed image, will overexpose it.
Over the course of time, I've created multiple presets to perform standard actions. They are easy to create and save time. Additionally, there are presets that have been created by others (photographers, groups and companies). Some are free and some have a fee.




2 Comments
I have created presets and find them quite useful, as does the author and many others. However, I know that if one applies a preset to an image, then applies another preset that contains some or all of the same settings which contain other than the default values, the latter preset’s setting values overwrites the former. In many cases that would be undesirable. It is possible to determine which settings and values have been applied or would be applied by using an individual preset. What’s needed is to right-click the actual preset in the Preset Panel, then export it to a file folder, such as your Desktop, then open the exported file using a plain text editor, and voila, you can read the individual settings that were applied. However, I haven’t yet found out how to do that with a file that was post-processed without saving the steps and settings as a User Preset. That is quite a cumbersome procedure, as is reading the file and noting only the settings which were modified from the defaults. Is there an easier way do accomplish this?
Useful post; to the point and easy to follow.
You should perhaps consider updating this in the light of the changes Adobe have made re. CC/ Classic.
I have referenced this article in the journal section of my blog.
Thank you.