One of the best ways to enjoy landscape photography that you make is through prints. With the rise in digital photography and social media sharing, most photographers do not have much experience with printing professional images or getting them ready for printing. However, if you want to get into fine art photography, you should understand the printing process better. You might be wondering what are acrylic prints, what is inkjet printing or what are dye sublimation metal prints… This terminology is something that you will learn step by step.
There is tremendous joy and satisfaction when you get to see fine art paper prints hanging on the wall. Iconic landscapes are something that simply works, and they feel monumental as a wall art! Art buyers know this very well.
Why?
Looking at images digitally and physically is different. In a printed image, you get to enjoy all the details in the image as a whole and above all, it helps you to become a better photographer. As landscape photographers, all the work you put into creating beautiful landscape photographs pays off when you see the beautiful fine art prints out of the printer, and it takes you back to the moment you photographed them.
Landscape photos are actually the perfect material for improving or learning printing skills!
So, How Do You Prepare Fine Art Prints?
Printing photographs is very different from printing text on a sheet of paper, but with practice, you will get to learn the basics of color management and how to prepare your image for printing, and from there, it gets really simple.
You may have, at times, printed a few images without putting much effort into getting them ready for printing. But with some effort, like preparing your landscape photos and choosing the right printer, ink, and paper, you can print professional fine art prints.
In this way, your work will be categorized as fine art photography.
Best Practices For Fine Art Prints:
The aim is to help photographers prepare their landscape images for printing purposes, but the information here can be applied to printing all types of photographs.
Some Basic Facts To Keep In Mind:
- Make sure you have the correct resolution required for printing your landscape photos. A higher-resolution image means you can produce larger prints without sacrificing picture quality. You need to decide on this before you take the image.
- Crop the image to get the composition right and remove unwanted elements if you did not do that in your camera while shooting. Also, crop it to the aspect ratio that you are planning to print as otherwise, there are chances that your image could be stretched, compressed or you may lose the edges.
- Make sure that you set the print resolution to 300 pixels per inch to get crisp detailed prints.
Calibrating Your Monitor:
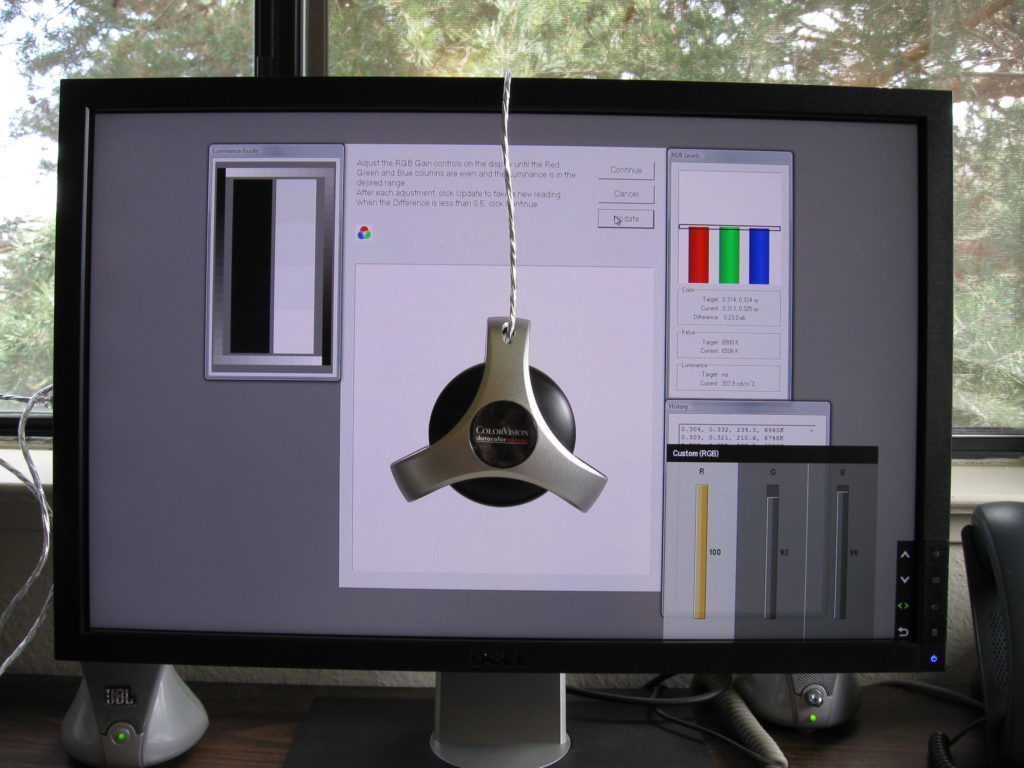
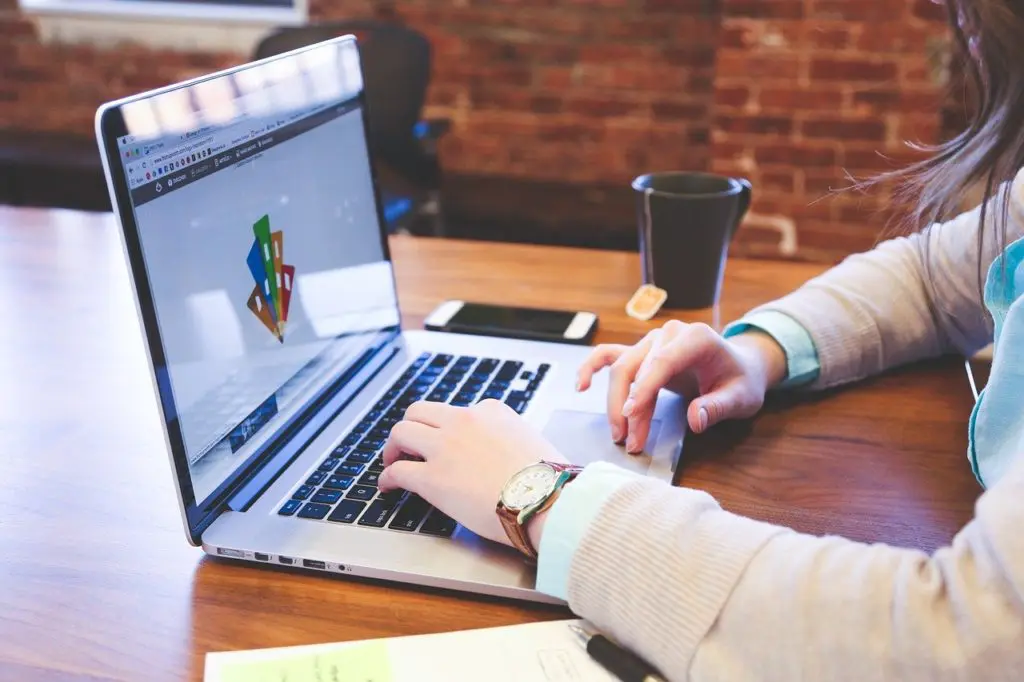
This is the most important step towards creating the best image for printing purposes. Spending time in front of your monitor post-processing your images would be a waste of time if you have not calibrated your monitor.
You may wonder why!
If your monitor is not calibrated, it will not display the correct or standard colors, thereby making your images look different on other screens and when printing. Your white balance could look off, making your image look cold or warm and for example, your pinks could look orange or green in color, and your reds could look orange, and so on.
To avoid disappointment and wasting ink and paper, your first step towards successful fine art prints should be calibrating your monitor.
What happens during the calibration process for fine art photography?
Adjustments are made for color balance, saturation, contrast, brightness, etc. It is recommended this is done at least once a month.
Some computers come with a built-in option to calibrate the display, but there are many display calibration systems in the market that you can use. For example, one of the most popular display calibration systems is the Datacolor Spyder5PRO, and another one is called X-Rite Colormunki Display.
Colour Management For Fine Art Photography:
The next step towards preparing your image for printing will be to understand the basics of color management. Colour management is the way you maintain consistency of colors between all devices in the whole process – that is, from your original image to the image that is printed.
Don’t be intimidated by this – to be honest, there are two critical components that you need to consider when it comes to color management.
- As we discussed in the previous section, calibrated monitors have a default profile and let you see an accurate version of your image on the screen. This will lead to outstanding fine art prints!
- Similarly, printer profiles let you see what exactly you will get when printed.
Different printers, inks, and paper combinations will produce different print results. A specific profile will need to be created for the specific ink, printer and paper combination that will be used to print an image. It is the profile that will help you to evaluate the type of paper you will be using to print a particular image.
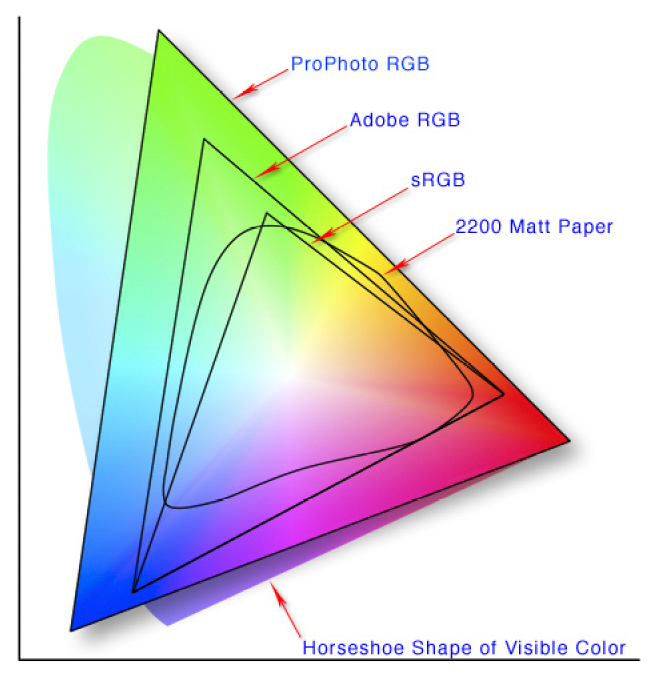
When you are printing your image, you need all the colors possible in your image to be reproduced in the print. So it is better to use the ProPhoto RGB color space as it has the widest color gamut and in order to achieve its full potential, it requires a 16-bit file. The problem is that very few printers can reproduce all these colors and hence Adobe RGB is the most commonly used color space.
In order for all the colors to be printed in your final image, you will need to use the right color setting when exporting your images, for example, from Lightroom, ACR, or Photoshop, and you will need to use the correct printing profile for your fine art prints.
What Are Printer Profiles?
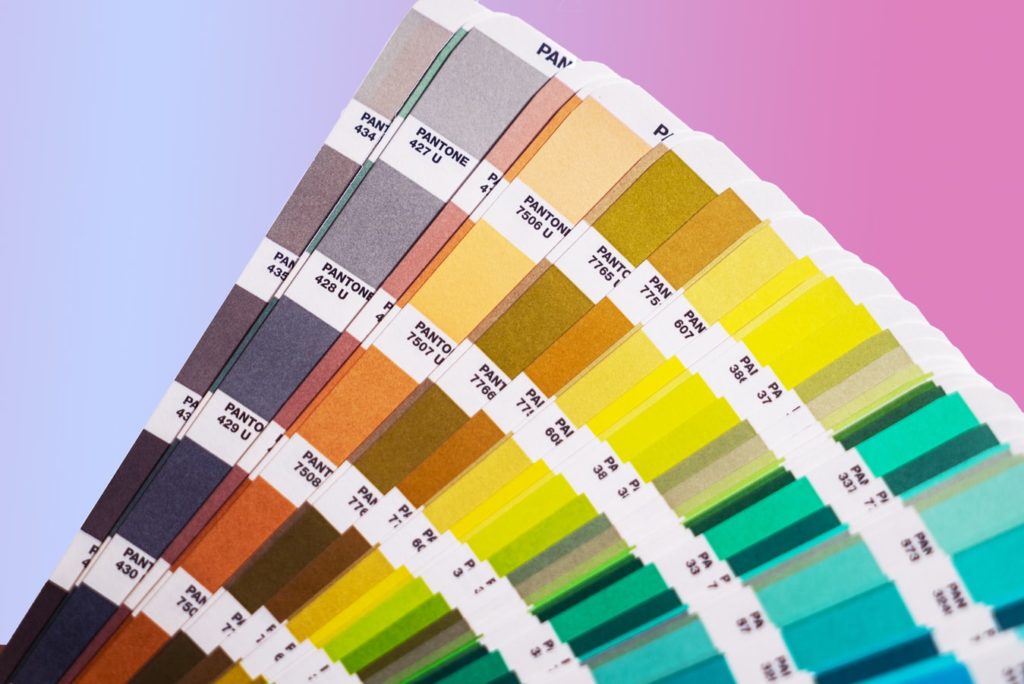
Printer or printing profiles, often called ICC profiles are files or profiles that determine how colors will be printed for a particular combination of printer and paper. If you have a printer, the ICC profiles for the printer and its recommended papers will be installed while installing the printer driver. Usually, print labs let you download them for free and so do the print paper manufacturers. You can download the one that is for your printer and paper combination.
Once you have downloaded the ICC profile, you can choose soft proofing in the Develop module of Lightroom where you can choose the type of printer and paper. It will simulate what the final print will look like, so you can make adjustments here if necessary (making changes will let you work on a proof copy and not the original). This helps with color and print accuracy it instructs the printer to adhere to color standards.
Note: Choosing the right color profile for the printer, depending on the print paper and ink used helps the printer print an image with colors and details very close to what you see on your screen.
If you will be using professional printing services, you do not need to worry about printer profiles, as the print service specialist will get that part done for you. However, you need to make sure that your monitor is calibrated so that you get a print of what you exactly have on screen.
Once you are sure that your screen is calibrated and have a basic understanding of color management, you will now need to get your image ready for printing. Here is what you need to do to get the best results.
Setting Up Screen Brightness:
What you need to know about brightness in printed images is, they will never look the same like what you see on the screen. This is because your screen emits or transmits light – it is backlit, whereas your print reflects light and hence both cannot display the same brightness.
In order to compensate for this difference, you can do one of the two things below:
- You will need to reduce your screen brightness so that you post-process an image with a brightness that will look the same when printed.
- To compensate for the brightness you see on your backlit screen, you can add around 20 to 30% more brightness to your image, sometimes even more, depending on the image, so that the brightness on your prints closely matches what you see on the screen.
Make sure you do a small test print to see if the brightness in the printed image corresponds to what you are looking for.
Necessary Adjustments And Colour Corrections For Fine Art Photography:
Using your favorite application, make basic adjustments like you normally would for any image. Make sure that you straighten the horizon, remove dust specks, if any, and get your landscape image ready for the next process.
Sharpen The Image Specifically For Each Print:
When it comes to sharpening images for printing, the printed images usually show different levels of sharpness when printing on different media and different sizes. In order for the images to be reproduced correctly, you will need to apply sharpening based on the medium and size that you will be printing.
Sharpening images beyond a certain limit can sometimes make digital noise evident and show up as unwanted artifacts in printed images. So be careful with how much sharpening you apply. For example, prints on metal can look over-sharpened compared to prints on canvas and larger prints can reveal more noise and artifacts due to sharpening compared to smaller prints.
In general, sharpen more for smaller prints and lesser for larger prints.
Soft And Hard Proofing:
While soft proofing, you will be able to preview an image to see how it will look when printed on a specific medium using a specific printer. Here is where the ICC profiles help. This is not always how your picture will look exactly when printed as a hard copy, but it lets you get an idea of how the print may turn out.
Because of the light transmitted by the screens, the images will look high in contrast to what you would get when printed. So it is better to increase the contrast a little more than normal to get the right contrast in the printed image. There is a soft proofing option in Lightroom that you can use to get the images ready for printing.
Hard proofing is a test print that lets you physically see how your final print will look like and lets you make any adjustments you need to make before you can go for the final printing process.
Exporting Images From Lightroom:
Once you have edited your image and done the soft proofing part, you can export the image to either print on your printer or to be sent off to a professional print service. Here are a few points to keep in mind when exporting your image for printing using Lightroom.
Open the export dialog box. Once you have chosen the export location, file naming, etc. the most important section is the File settings and Image sizing.
File Settings:
- It is best to use an image format as TIFF as it does not lose any details and contains a lot more information compared to a jpeg. If you are sending away for print, most good labs accept TIFF files, but make sure that the print services accept this file format; if not, choose jpeg.

- Set the “Quality” to 100 – this is very important for the best quality images.
- When choosing “Colour Space,” it is best to choose ProPhoto RGB, but make sure that your print device or the printer in the lab you are sending to supports this. If not, go for Adobe RGB that is supported by most high-end print devices. If your printer device or the printer in the lab does not support Adobe RGB and supports only sRGB, then you will need to export using sRGB color space. Remember, Adobe RGB has richer colors than sRGB, so use sRGB only if your printer or the printing services do not support AdobeRGB.

Image Sizing:
- Leave the “Resize to fit” unchecked as this can reduce the quality of your images.
- Choose the “Resolution” as 300 pixels per inch

Output Sharpening:
If you wish to sharpen the image for printing, you could choose to do it here, depending on the type of paper you will be printing on. If you are printing on canvas, choose “Sharpen For” option as “Matte.” You could choose “Standard” for the “Amount” of sharpening. Be careful with this part if you have already sharpened your image enough during post-processing.


When printing images, the sharpening depends on the printer, ink, and paper used. So most of the time, it is best to ignore this section in the export dialog box so the printer can do the appropriate sharpening required.
Choose The Right Medium For Printing Fine Art Photography:
There are various media like paper, canvas, fabric, metal, etc. in which you can print your images these days depending on the purpose. The most commonly used medium is specialized photo paper and these come in various weights and finishes like gloss, semi-gloss and matte. Choose the one that is right for you depending on what look you are going for with your prints and what purpose the printed image will be used for. Print size also matters!
Choosing a finish really depends on choice, but it is good to use glossy paper for landscape images with rich colors. Semi-gloss goes well with all types of prints. Matte papers can be used for black-and-white images because they can hold in a lot of blacks and produce high-contrast images. These choices of papers are again, subjective, and you can go with what feels right for the look you are going for in your final image.
FAQ About Fine Art Prints:
Photographers looking to print images that require professional quality are often confused over a few things and may have a few questions in their minds. Here are some of them.
1. Can You Print Professional Quality Images At Home?
Yes, of course, if you have access to a professional quality printer that is capable of printing the size that you are looking for, you can go ahead and print your images at home. For example, there are a few affordable printers in the market that come with different colored inks for color and black and white prints, so they can reproduce the correct colors and wide tonal range, plus print up to 17 inches wide.
2. What Printers Are The Best For Professional Printing?
Inkjet printers are the best, as some high-end printers come with up to 12 colored inks, including a Chroma optimizer. Moreover, it is good to choose dye-based inks as they have a wider color gamut, are vibrant, less expensive, and do not display metamerism when compared to pigment-based inks, but they can, however, fade when exposed to sunlight for longer periods of time.
Also, dye-based inks look best on coated papers. So if you want to print on fine-art papers, then pigment inks could be your choice. Inkjet printing can also be applied to a wide range of media like paper, canvas, fabric, metal, etc.
3. Where Can You Print Your Images?
You can print your images at home if you have a professional-quality printer. If not, you can look for a local print shop that has an experienced specialist so you can discuss your needs, like the type of medium, ink, etc., you are looking for. Besides these, you can look for online print-on-demand services where you will have a wide range of media and finishes to choose from, with the only downside being the lack of face-to-face contact to discuss your needs.
4. What Are The Advantages And Disadvantages Of Printing At Home?
When you are printing at home, you know what you are printing and how your print turns out and can make any adjustments if required. You are in total control of the situation.
The disadvantages would be you will be limited to the size your printer can print and to the type of paper you can use. Moreover, printing at home can be quite expensive if you do not frequently make prints on a large scale because the cost of printer, ink, and paper can add up to a lot. Print size is something that will dictate your printing setup and location.
5. What Are The Advantages And Disadvantages Of Printing In A Lab?
When printing in a lab, you have a wide choice of print sizes and can look for prints on a wide range of printing papers. Labs have roll papers that can print images of any size, and moreover, you have a wide range of choices on printing media as well, like metal, canvas, acrylic, and even wood. This will lead to beautiful prints!
However, the downside to printing in a lab is you will not be totally in control of the printing process. The image may not be up to what you expected it to be, but again, if you choose a good lab, it should not be a problem.
Final Tips For Your Fine Art Prints:
- If you are ordering your prints online, you could do a test print if you have a printer at home to get an idea of the colors, contrast, sharpness, and resolution in the image. It may not be accurate but it could give you a rough idea of any setting that may need adjusting.
- It is best to use the ink and paper recommended by printer manufacturers to get the best quality print output and long print life for your fine art photography prints.
- If you are printing at a print shop, it is always best to ask for a hard proof or two so that you can look at the colors and print quality before the whole job is printed and make any adjustments. Beautiful prints require serious dedication.
Printing can initially be a tough and confusing process. Once you get to learn the basics and follow them, it will make the process much simpler and faster.
With experience, you can save on the expensive ink and paper you wasted learning how to print. After applying our tips, you will be able to get fine art photography prints in no time! You may also start collaborating with art buyers for landscape photography.


2 Comments
Thank you so much for this very detailed article Dahlia , Printing has always intimidated me and there seems a lot to take in to make it work , i will save this info ..Thank you 🙂
Hi Patrick, thank you. Glad it was helpful 🙂