While landscape photography is massively popular, I have to admit to having a strong preference and affinity for outdoor photographs taken near the sea – seascape photography. The cliffs, beaches and rock formations of the coast provide such fascinating subject matter for photographers that I find myself returning to it again and again, not to mention the wonderful things you can do when photographing water.
This seascape photography article has been put together with Rob Wood, Chris Gin and Christopher O’Donnell.
Note: Here are some alternative landscape photography ideas.
But when you start to dig down and study the best coastal landscape and seascape photographers, you find that the genre has a few recurring themes that others don’t (at least to the same degree). I thought it would be interesting to explore a few of those themes and how they affect the craft.

Fundamental Tips for Seascape Photography
Watch the Weather
Anybody who enjoys shooting outdoors around the coastal regions will probably be obsessed with the weather. Now, while that is true of most outdoor photographers, there is special significance for coastal shooters.
Sure, weather conditions can dictate the nature of the images you capture. Light and cloud are obviously important.
But for coastal shooters, there is also a safety element – you don’t really want a rogue wave to wash you off the rocks. If you think this is a small concern, then just type “washed off rocks” into Youtube and you will see how dangerous it can be. It’s no joke.
But what else are they looking for?
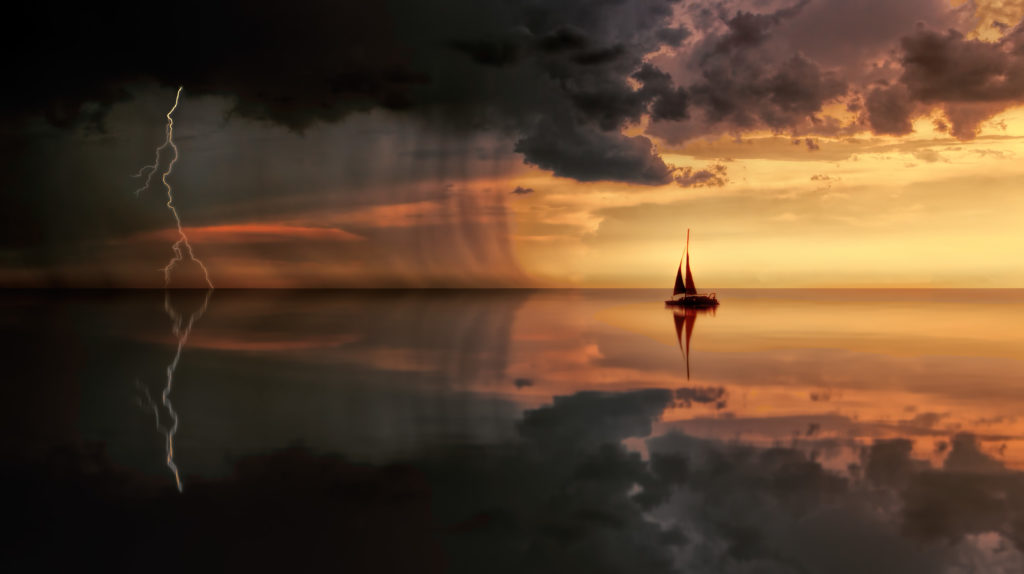
Well, in general terms, any kind of cloud formation is going to give you something in terms of an interesting sky for seascape photography. Some cloud is (usually) better than no cloud depending on what type of shot you’re going for.
But what is the jackpot?
Specifically: High cloud at the golden hours. (Or blue hours).
This is probably the weather event that most seascape photographers love to hear forecast. This type of cloud will pick up beautiful light from the sun and can result in some amazing patterns and textures in a photograph.
At the other end of the scale is wind. Wind is the enemy of all landscape photographers. Usually, landscapers want to use slow shutter speeds, and hence, a tripod. Windy conditions shake the camera and make this very problematic.
Having Foreground Interest Makes Things a Lot Easier
We have talked a lot about foreground interest as a compositional element for good photographs in the past. And it’s worth going over it again.
Now, while I wouldn’t say it’s essential for a good landscape or seascape shot to have foreground interest, I would say that having some makes getting a good shot a hell of a lot easier.
If you cruise around Flickr or Instagram looking at waterside areas in outdoor photography, it quickly becomes apparent that 90% of the great shots all include an element of foreground interest. Now that might be in the form of texture or leading lines or mixed in with other compositional elements, but it’s often there.
While you certainly don’t have to get obsessed about finding foreground interest, your life will be made easier by being able to spot it and include it in your shots.
Foreground Interest in Composition Links:
- https://www.lightstalking.com/how-adding-interest-to-foregrounds-can-make-your-images-pop/
- https://loadedlandscapes.com/foreground-in-compositions/
- https://www.naturephotographysimplified.com/landscape-photography/create-visual-interest-depth-using-foreground/
The Big Secret of Seascape Photographers is Often Their Filters
Lens filters and knowing how and when to use them is a big part of life for most serious landscape and seascape photographers.
But filters become somewhat of an obsession if you’re regularly taking images in coastal areas.
The sky, sea, and land together in a shot throw up all sorts of challenging exposure problems that often necessitate the use of filters to solve.
Which filters?
In general, the filters used by coastal photographers fall into three categories:
- Polarising filters
- Neutral density filters
- Graduated neutral density filters
So what do they do?
- Polarising filters mute reflections and highlights (like reflections off water).
- ND filters reduce the overall light getting through the lens
- Graduated ND filters reduce the light getting through the lens in part of the scene (usually the sky which is comparatively bright)
What are the best filters?
For landscape photography, past a certain level of quality, there is some debate on who makes the best filters.
In general terms, Lee filters are probably regarded as the best due to their lack of color cast. But other manufacturers such as Nisi, Haida and Benro are also highly regarded. At a certain level, it becomes a factor of personal taste.
Note: A great way to choose a filter is to type its name into Flickr and compare the results to others. It’s a good way to get a quick and broad idea of the type of image that each results in.
Some resources on filters:
- https://www.photographytalk.com/landscape-photography/7698-the-most-important-filters-for-landscape-photography
- https://expertphotography.com/ultimate-guide-filters-landscape-photography/
Ignore the Crowd
It always amazes me that when you go to a popular spot for seascape or coastal photography at sunset that well-equipped photographers seem to follow the crowd.
Everyone waits for the sun to set, then disappears home.
That completely misses the opportunity for shooting in the blue hour which is often even better than the golden hour as a time for great photographs.
Sure, you’ll get some great photographs as the Sun sets. Nobody would deny that. But you have more time!
The extra advantage is that you will be alone, even in popular spots which often gives you an opportunity for even better compositions.
Post Production Is Essential for Photographs That Pop
If you have followed all of the best landscape advice, you will arrive home with a raw file(s) that has a nice, slightly right-sided histogram.
Assuming it is well composed, you have all of the ingredients for a good shot.
But it will probably be a little flat. Raw files usually are.
If you have gone to all of the trouble to get the best shot in-camera that you possibly can, then it is a sin not to put a solid effort into finishing it off well by editing it.
For most of us, the weapon of choice for this is Adobe Lightroom though there are many other very good software packages.
Almost all shots can benefit from a little tweak to the black slider, highlight slider, clarity, and saturation. Where you go from there is up to you, but remember this is where personal style and taste come into it.
If you’re not sure where to go with your edits, then its a very good idea to get the basics of editing under your belt. For that, Kent Dufault’s guide to Fundamental Editing is an excellent guide for any photographer. You will learn the key ingredients to this essential part of finishing off your photographs.
Try Different Perspectives
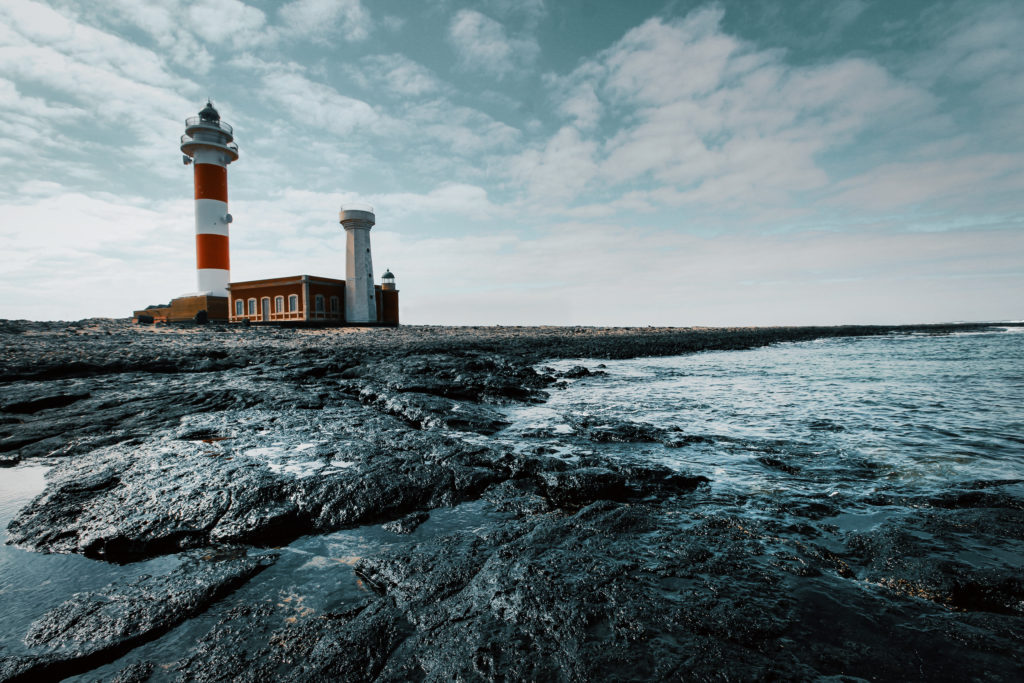
Not exactly a shocking tip since it's a general rule for photography, but it works so well when photographing coastal scenes that it must be mentioned. A simple photo taken at eye level can be turned into something truly unique by lowering your perspective a bit.

In this image, the low perspective provided a unique view of the rocks, seen from an angle only achievable by getting low – this creates a strong foreground subject with much texture.
Use Wide Angle Lenses
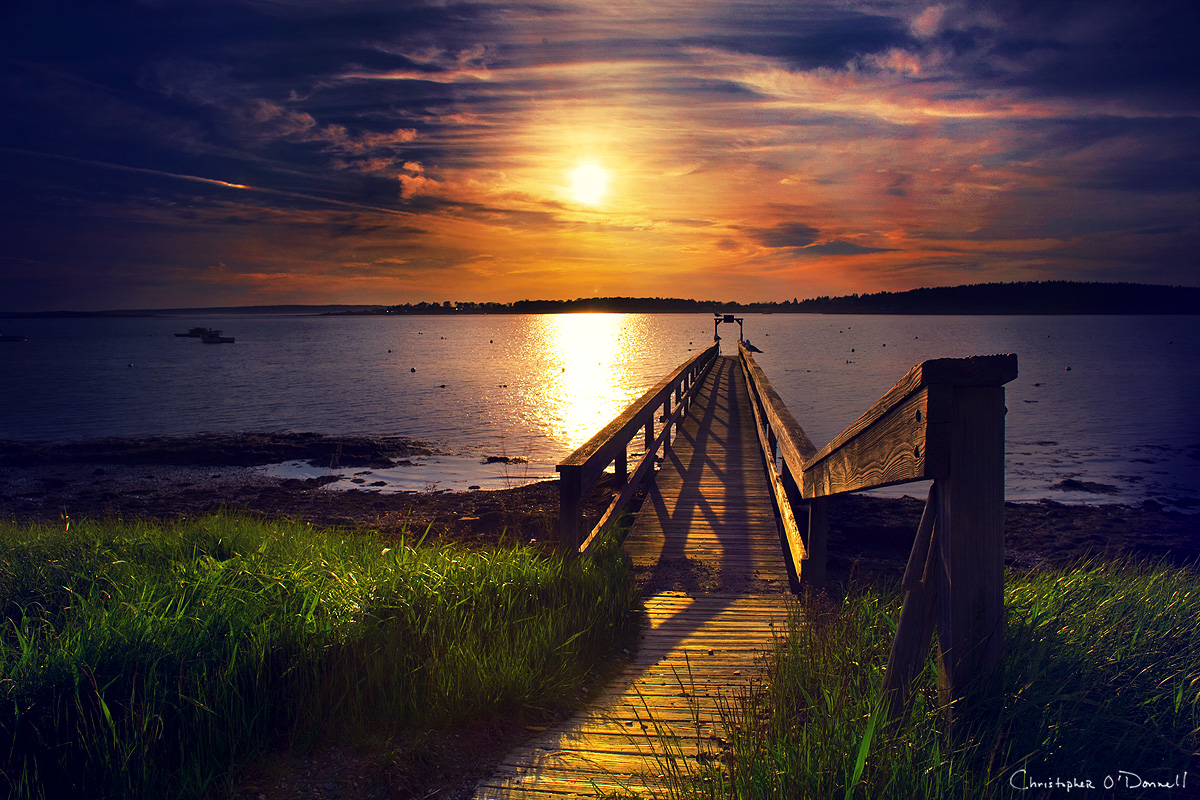
In order to get a low perspective like in the image above, you need a wide-angle lens to help you out. Typically, you’re in an environment where it’s difficult to capture all the elements in your field of view – such as the entire beach or, in the image above, both the rocks below and the bridge. A wide-angle lens will work especially well for coastal shots of water moving along the sand or in between rocks.
In general terms, you will want anything wider than about 28mm. The classic landscape (or seascape) photographer’s lens is the 12-24 f/2.8 (part of the “Holy Trinity” of lenses). Of course, there are a million exceptions to this so if you like the effect of shooting with other focal lengths, then go for it!
Follow the Light
When photographing coastal scenes, focus on the light and how it can change your image. Sunsets and sunrises on the horizon line will cast a beautiful color across your photo, but it can also be a distraction since it can reflect off of waves as blown highlights. Depending on your intention, it can overpower your image.
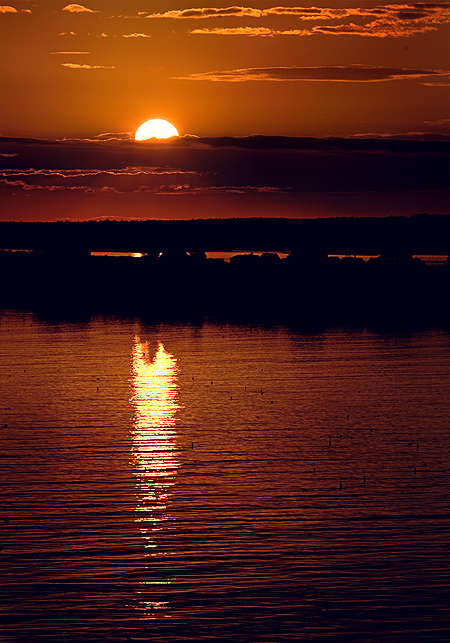
In this image, the reflections in the water do not distract too much from the rest of the image as it fills up an otherwise uninteresting foreground, but this may not be the same case for every composition.
Also note that you can photograph your coastal scene with the sun behind you – as in, if you live on the east coast where the sun will rise on the ocean horizon, you can still capture stunning light with the sun setting. It would be a good idea to scout your location first to find out how long your landscape will allow a front lit image (for example, if there’s a large hill behind you that will block the sun an hour before sunset).
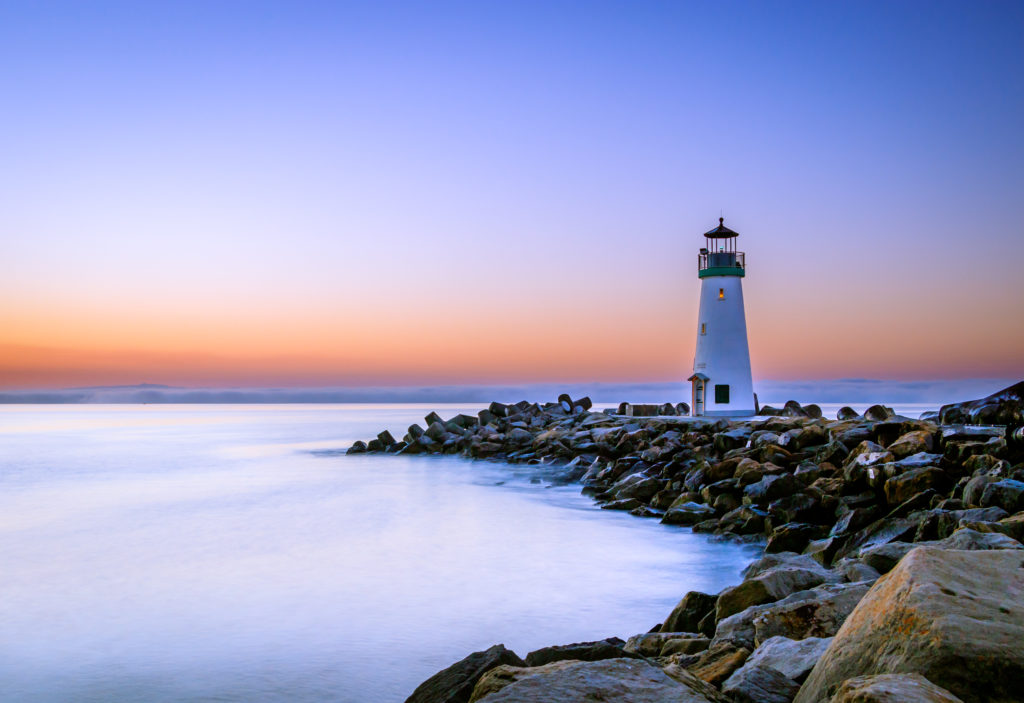
When photographing into the sun, a wide aperture will soften and widen it, while a smaller aperture (f/11 and up) will give you those nice star-shaped rays that we associate suns with (as seen below).
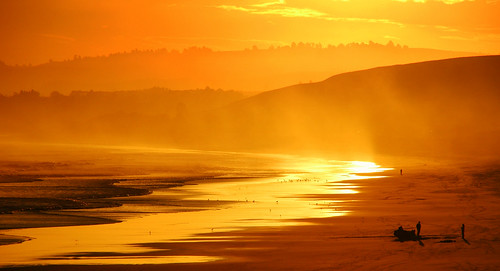
Additionally, during the golden hours, the sun is at an angle where it will illuminate mist, giving you a great golden fog when the weather conditions permit it.
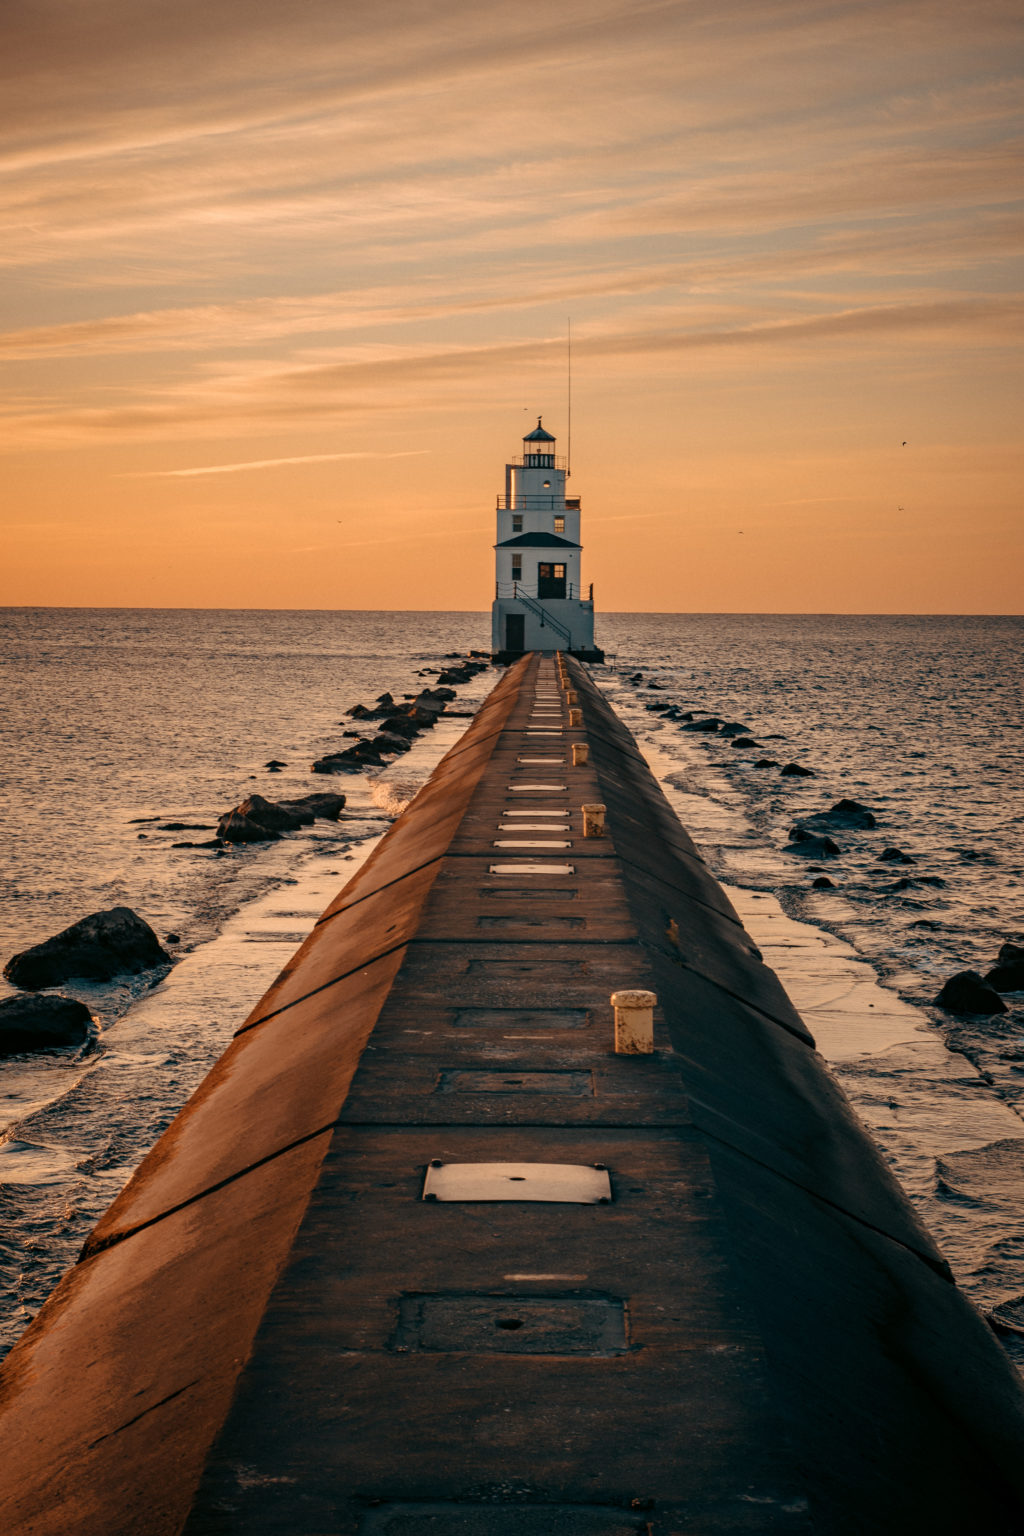
Long Exposures
Since water is a moving subject, using a long exposure can create wonderful images showing the flow of the ocean. There are typically two areas of long exposure photography when it comes to moving water – photos that have exaggerated movement, and photos that appear to be a clear sheet of ice.
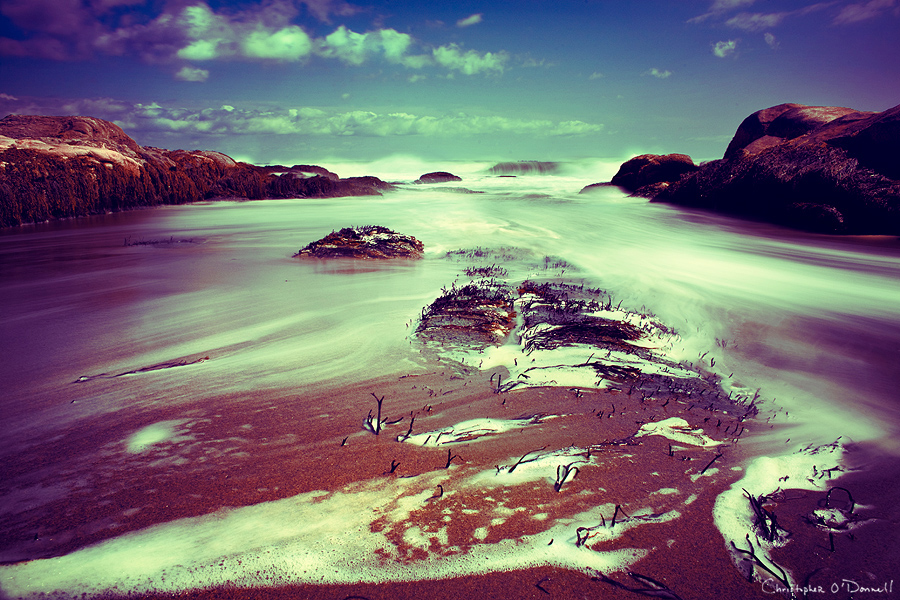
In this first image, you can see that the tide created these great lines in the water as it receded. This was a 3 second exposure and is a typical shutter speed for this kind of effect (1-3 seconds) – any longer would blur the lines too much, and any shorter wouldn’t be effective.
When trying to capture tidal movement like this, try to photograph the tide as it goes out instead of approaching as that is when these lines are created.
The other option for long exposures is to have a ridiculously long shutter speed (up to 400 seconds or beyond) using one or several ND400 filters. This will allow you to capture even the choppiest waters as a flat, smooth surface, which makes for great black and white photos. Moving clouds that are blurred are an added bonus to this method.
What to Know When Shooting Waves
If you go to the coast to photograph waves, always start shooting a few seconds before you anticipate a wave crash and shoot continuously throughout. The most interesting photos could be right before the wave breaks.
If you’re in an unsecured location (that is, where the water can reach you), take precautions with your gear – especially when photographing approaching waves on the beach. The tide is unpredictable – just when you think you know how far the water will travel, a rogue wave will come up and take your gear with it. Many photographers have lost their camera, lens, and/or car keys from a wave that simply “came out of nowhere”.
Instead, calculate how far you think a wave can reach and add 20 feet to that amount. You can also leave your camera bag on your back, or put it high up on a rock – whatever you do, don’t leave your camera bag on the sand and never leave your camera on a tripod unattended. A wave can easily come up and knock it over – always be prepared to pick up your camera and tripod if necessary.
Scout Your Location
I think the best tip I can give any photographer looking to photograph the coast is to know your location. If it’s an area you’re not familiar with, scout it first, making note of any interesting rock formations, beach perspectives, or notable features on the horizon (like a peninsula or lighthouse in the distance).
This will allow you to not only plan where you’ll be taking your photos, but also give you a feel of what the light looks like. Are you on a sunrise or sunset coast? Will your scene be hidden in the shadows during the golden hours? Also, remember to know your tide – a simple internet search will give you the approximate high and low tide times so you can make sure that your composition won’t be affected by the water (for example, important rocks in your composition that become hidden at high tide).
There are certainly a few things to consider when photographing the coast. However, the more time and preparation you put into your coastal shots, the more often you’ll come out of it with the image you were looking for. Alternatively, you can just visit the coast during good lighting conditions and see what you can come up with (what I usually do). Either way, the tips outlined above will surely help you capture the coast in unique and interesting ways.
Seascape Case Study
We asked New Zealand landscape photographer and Flickr superstar, Chris Gin, to tell us how he got this great seascape photograph. Here's what he had to say:
Every now and again I get asked how I get such vibrant colours in my photos. People often assume I have really good Photoshop skills or use HDR software to achieve that look, but if I get good light at the time I take the photo then I don't need to do a lot at the post-processing stage.
Here's a shot I took in 2010 that remains one of my favourite coastal shots to date. I'm also pleased to say it won the Sunset to Sunrise category in the inaugural Outdoor Photographer of the Year competition. Below I'll discuss how I got the shot, from planning to post-processing.

Planning
Normally when I'm on a photo trip I'll scout an area beforehand to try and pre-visualize my shot. However, this shot was taken locally and I knew the area fairly well so I didn't do much in the way of scouting. I also find that coastal shots can be hard to plan for due to the constantly changing tides. I tend to use interesting rock formations with water flowing over them in my shots and often the tide dictates which ones are suitable to shoot at any given time. I usually just arrive at the beach about an hour before sunrise/sunset and do some scouting then.
Equipment
I have a standard kit for the majority of my landscapes which consists of the following:
- Canon 40D
- Sigma 10-20 wide-angle lens
- Tripod
- Hitech GND Filters
- Remote shutter release
- Micro-fibre lens cloths (very useful when doing coastal photography as you're often plagued by seaspray).
On Location
When I arrived at the beach I struggled to find a decent composition at first. While there were plenty of rocks around they were all pretty ordinary, and since I already had a large collection of ‘ordinary' images I was after something special.
I walked up and down the beach and kept looking. Eventually, I was running out of time – sunrise was only minutes away – but I finally found this large flat rock which was getting covered by the incoming waves. I set my tripod up and composed the shot as best I could, trying different angles until I found one I liked, then waited for the sun to come up.
At first, the sunrise was disappointing, with little cloud in the sky and subdued colours, but within minutes things changed considerably. A large ominous cloud came in from nowhere and sat above Rangitoto Island in the background, and the colours intensified as the sun rose. Things were looking good so it was just a matter of timing my shutter clicking with the incoming waves.
With coastal photography, there are various ways you can capture the water. You can go for a fast shutter speed to freeze the water action, a really long exposure to give the water a milky effect, or anything in between. (Some people dislike the milky water effect saying it's overused or just a passing fad, but it's one of the things that attracted me to photography and I can't imagine it ever going away – or at least I hope it doesn't).
I decided on a fairly fast shutter speed to capture the splashing waves while still blurring the water a little. I set my camera to Aperture Priority mode, ISO 100, and f/18 and then just clicked away. I bracketed my exposures (0, -1, +1) not just for the usual reason of capturing the entire dynamic range, but also to give me a variety of shutter speeds to choose from. I find it's always a bit of trial and error when trying to capture waves. The shot I chose had a shutter speed of 1/3 sec.
Also, be prepared to get wet when taking these kinds of shots. At times some big waves would come in up to my thighs while I was taking this shot. Just be sure to hang onto the tripod so it doesn't tip over – cameras and saltwater don't mix too well! Also, remember to clean your lens/filters in between shots as they are bound to get sea spray or water drops on them.
I used a 4-stop GND filter to control the dynamic range. I started out using a 3-stop one which is my most commonly used for sunrise/sunsets, but as the sun rose the sky became pretty bright and I needed a slightly strong filter.
Post Processing
Once I have my photos on the computer I'll browse through them and decide which one(s) to process first using Lightroom. I tend to make this decision using thumbnails because I find if an image is striking at a small size then it's going to look pretty good at full size. If I'm unsure then I'll choose various candidates and view them at full screen.
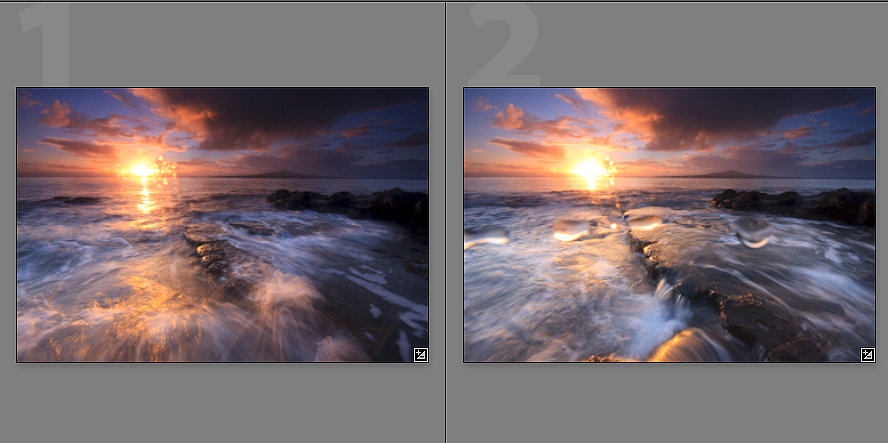
In this case, there were two images that caught my eye:
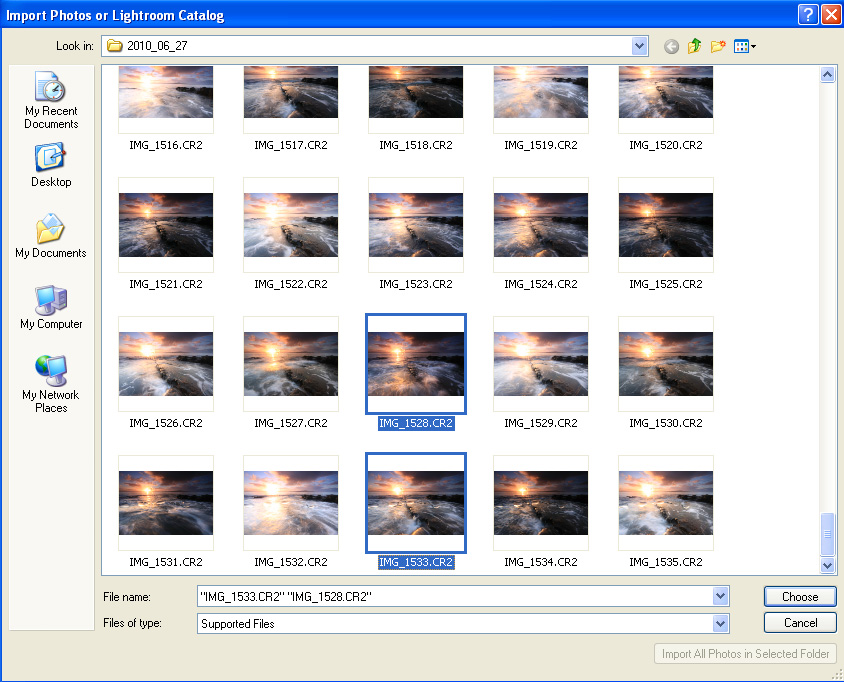
I liked the first shot the most but there were a few elements from the second one that I really liked too. Normally I would just choose the better shot but in this case, I decided the bit of water cascading off the foreground rock in the second shot was too good to leave out, so I decided I would blend this into the final image.
Once I've selected the best image(s) I'll load the RAW files into Lightroom for initial processing. The very first thing I do is apply the ‘Landscape' camera style to the images. This mimics the in-camera processing that occurs when you shoot JPEG and it's also what you see on the camera's LCD.
At times I find the camera styles don't produce a pleasing image in which case I abandon them and apply vibrance, saturation etc myself, but in this case, I was happy with the result. I also made some local exposure adjustments (+0.7) to brighten the rocks near the horizon.
At this stage I will also check the histogram for clipped shadows and blown highlights and if necessary add some Fill Light and/or Recovery. Adjustments to white balance would also be done here but in this case, I left it on ‘As Shot'.
After I've finished making changes in Lightroom, I'll export the images as JPEGs using the sRGB color space (I use sRGB because my photos are primarily viewed on the web rather than printed and sRGB is more suitable for this).
The next step is to complete the processing in Photoshop. Here I loaded the main image, pasted the other one on top as a layer, and then blended in the parts I wanted using a simple layer mask:
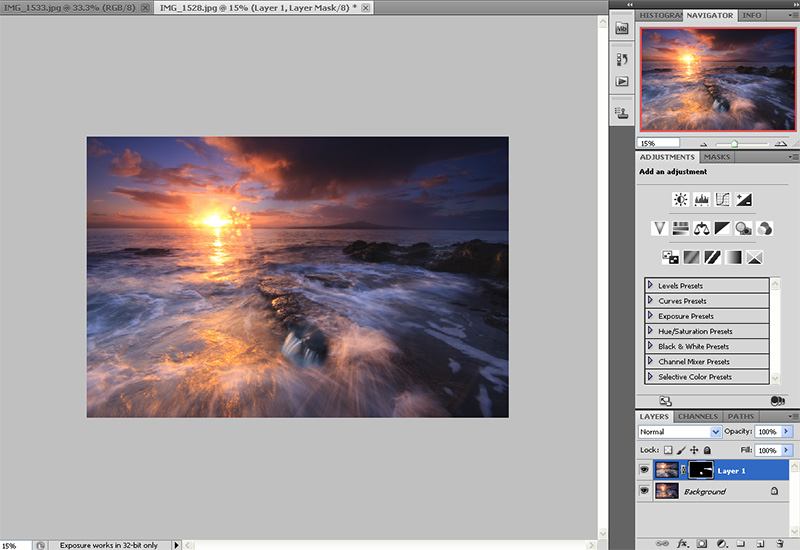
The main image suffered from a strange spotting effect near the sun due to a combination of a wet GND filter and sun flare, so I had to clone these out. In addition to that, I removed some dust spots, straightened the horizon, applied noise reduction to the sky (using Noise Ninja), and sharpened the foreground. Sometimes I will also adjust curves, add some vibrance/saturation etc but in this case, none of that was needed.
Once I've finished processing an image it's just a case of saving JPEGs at various sizes suitable for my website, Flickr etc and I'm done.
Seascape Case Study Summary
Getting a good photo is mainly a combination of good light, composition, technical knowledge, and a bit of luck. Post-processing is required to fine tune things, but you don't have to be a Photoshop expert in order to enjoy photography.
You can view my other photos on my website (www.chrisgin.com), Flickr page, or on Facebook.
Further Free Downloadable Seascape Ebooks
Here are a few freebie ebook downloads so you can take them out with you on your phone or read them at your leisure.
7 Easy Tactics for Coastal Landscape Photography
From Rob Wood, this free guide outlines some easy basics for getting started in coastal landscape photography. This guide covers some tips you may like to think about next time you have your camera down near the sea including, the best time of day to shoot, filters that you shouldn't be without, dealing with low light and even thinking about converting your seascape to black and white.
This is a great quick guide to give you a brief but relevant overview of the basics.
Photographing Seascapes
A great guide from Jason D Little, Photographing Seascapes gives you just that. Here Jason gives you valuable information about shooting conditions including the weather, time of day and tide. Also, this free guide covers some of the gear you'll need to capture that perfect coastal shot, and Jason also provides some interesting and useful information on composition. This guide is a great all-rounder to hone your seascape skills.

Coastal Photography
Here Kent DuFault has written an excellent (and extensive) eBook on how to infuse drama into your coastal photography. In this free guide, you can learn just how to make your coastal images award winners.
Here are just some of the things you will learn in this ebook:
- How to inject some sense of perspective into a subject that is simply wide and flat
- Why it can be beneficial to include the shoreline and the water in the same shot
- How to add interest with common elements found around the coastline
- Inserting people to add drama
- If there is wildlife around, why you should use it
- Adding long exposure fun to your coastal visit
This is definitely your ultimate guide to creating awesome coastal photography.
Seascape Gallery
Let’s round it out with a bit of inspiration with this curated collection of some of, what we think is, some of the best seascape photography around at the moment. Enjoy, and use them to emulate and practice your seascape craft with the tips above.


