The Blue Hour is that period of time just before the sun rises and just after the sun sets. Depending on location and time of year, it lasts for different periods of time. However it is a time that is a great inspiration to photographers.
Get notified of our free six part video series on photographing the blue hour by signing up here.
Blue hour can also be problematic to shoot correctly. The light is low and of mixed colours. There are different intensities of light from a low brightness of ambient light to hight powered artificial light. In this article we will look briefly at how to shoot a blue hour image. More importantly however, we will look in depth at how to process it into a beautiful shot in Lightroom.
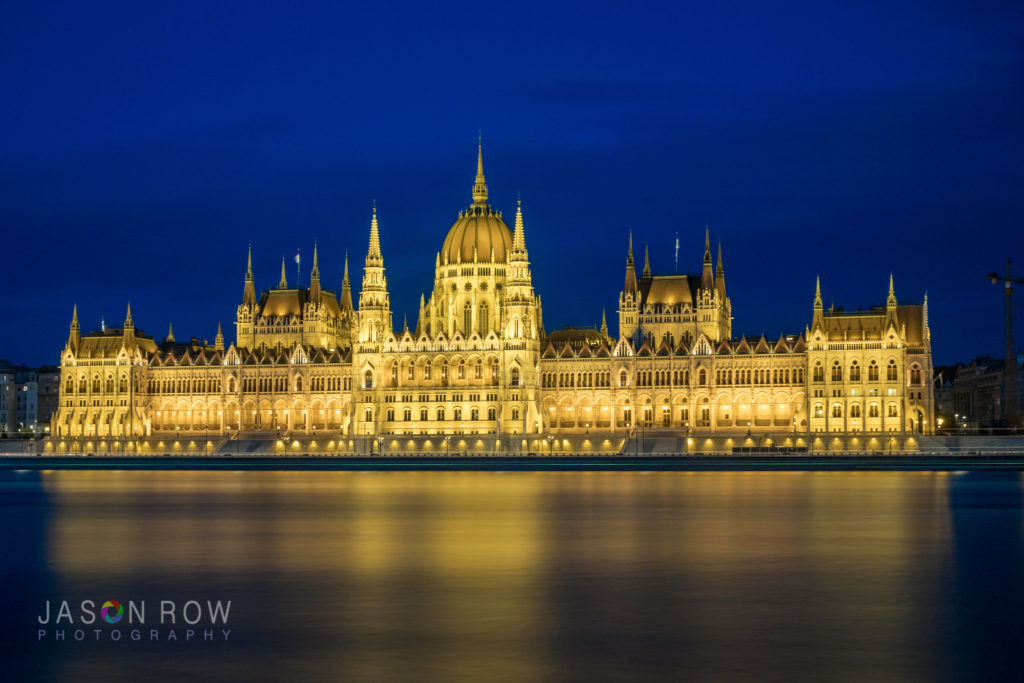
The Best Settings for Blue Hour Photography
There are two essentials to shooting at this time of day, a tripod and your camera set to RAW. Because the light levels are low, your shutter speed will be slow. Whilst you could bump the ISO, you want the cleanest image possible as there will be a fair bit of manipulation in Lightroom.
Shoot raw format as it’s very difficult to determine the correct white balance in such difficult lighting conditions.
Set a mid range aperture of around f/5.6 to f/8.0. This will give you a reasonable depth of field but more importantly prevent artificial lights turning into starbursts. This can happen with smaller apertures.
Set your shutter speed to match the aperture. Aperture Priority mode or Manual will be best.
Because you may have a diverse range of exposure levels, keep an eye on the histogram, looking for any highlight clipping (you don't want a histogram stacked against either edge). Adjust the exposure to bring the brightest highlights just inside the right end of the histogram. If using Aperture Priority, you can use exposure compensation for this. If you can, it’s best to shoot a bracketed exposure to make sure you nail it.
When you get home and upload the image to your computer, you might feel a sense of disappointment. This is where Lightroom comes into play.
The Sample Image
To demonstrate how to edit we are going to use this blue hour shot taken in Budapest.
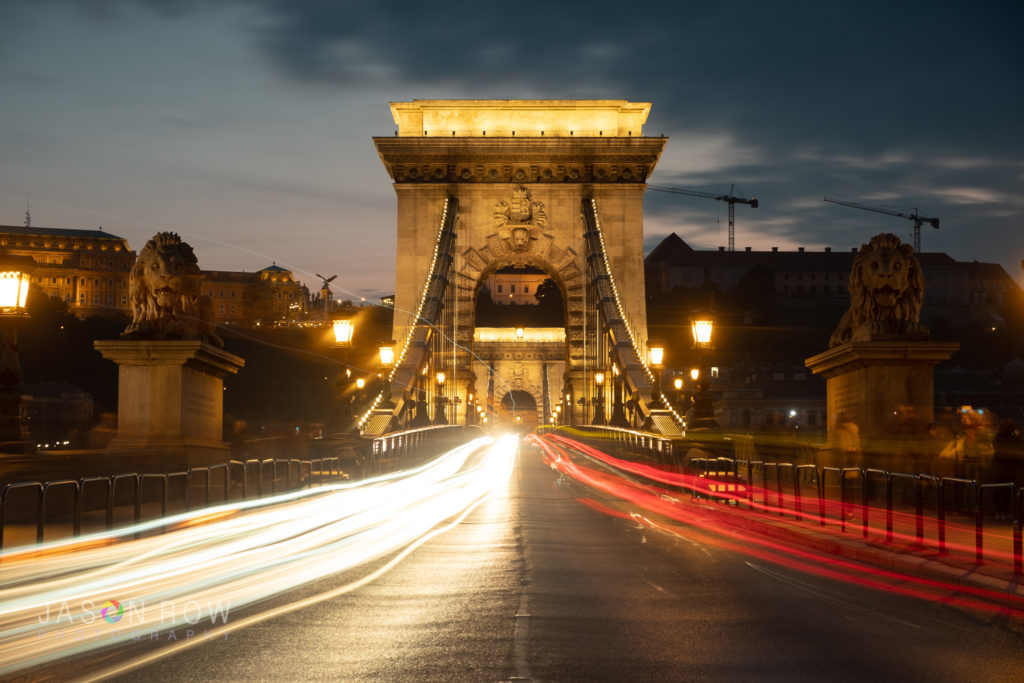
Its taken on a Fuji X-T2 and the exposure was 50 seconds at f/6.4, ISO 200 – base ISO on the camera. The shutter speed was so long because we are using an ND filter in order to capture the light trails.
As you can see the image is both flat and quite muddy. The flat, lack of contrast comes from being a raw file, whilst the muddiness is due to a less-than-perfect white balance.
Don’t forget to sign up for our free six part video series on photographing the blue hour here.
Lightroom – The Basic Edits
You might think that you could simply slide the over to a cooler white balance and the image will look much better. In reality however, this will add blue tones to everything. This makes the stone towers have a blue/green cast and completely dulls the beauty of the street lamps.
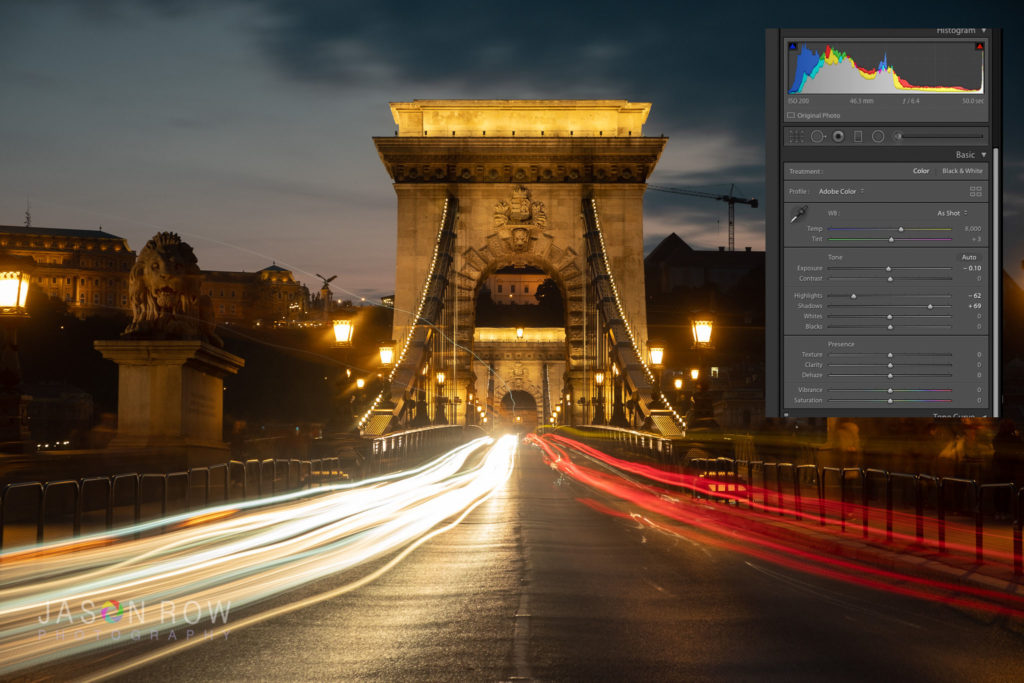
In fact, our first steps should be to correct the exposure. From the histogram, we can see there is a slight clip of the highlights (histogram stacked against the right). This is the whiteness of the car light trails. To counter this we can reduce the overall exposure slightly and then push the highlights slider to the left a touch more. Juggle these two sliders to get a good exposure. Then we will push the shadows slider to the right in order to raise some detail in the darker areas of the image.
Only once we are happy with the exposure edits do we move onto white balance.
Lightroom – Getting The White Balance Right
As we mentioned earlier, getting a good looking blue hour shot is not as simple as setting a cooler white balance. However we do need to set a good white balance before we move on to perfect the image.
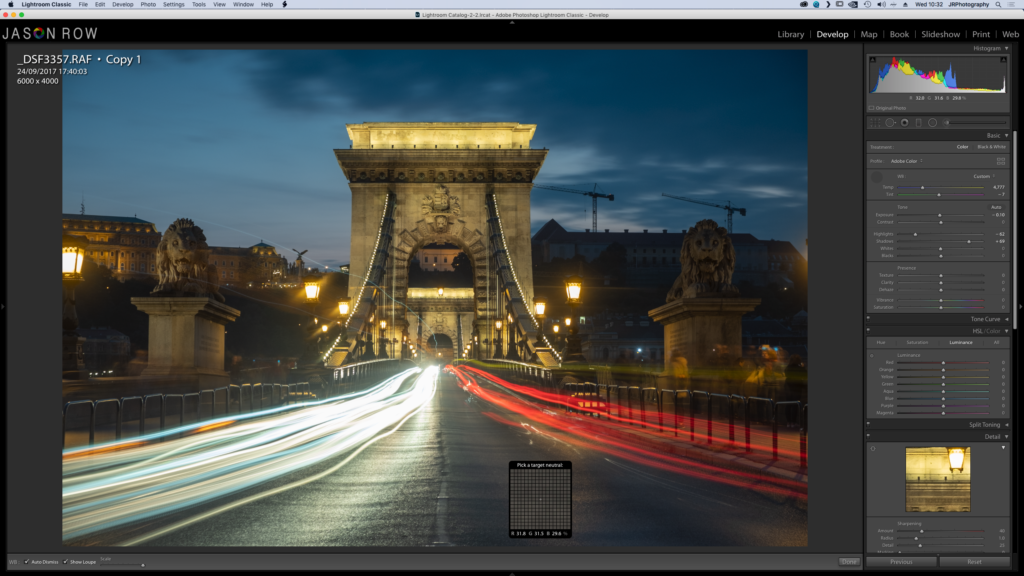
To do this we can slide the Color Temp slider until we are happy and fine adjust with the Tint slider. However in this case we have simply used the White Balance Selector tool and clicked on a neutral part of the image.
In this shot, that is a mid tone part of the road’s surface. Once that has registered, we can make small adjustments to suit.
Lightroom – Fine Tuning The Image
Very often, even after the basic edits and white balance correction, the image does not have the “blue hour” feel. Sometimes this is because the sky doesn't feel dark and blue enough. Giving the image a more blue feel will also punch out the artificial lights giving a much nicer contrast.
Our first port of call is the vibrance slider. Pushing this to the right will increase the saturation in the sky, making it look more blue.
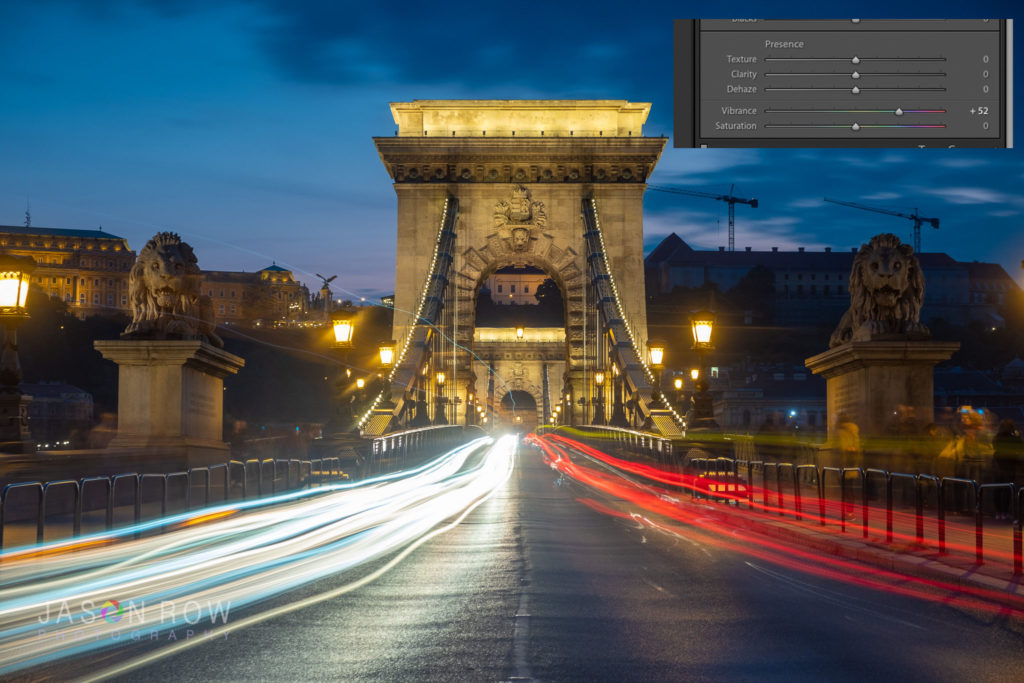
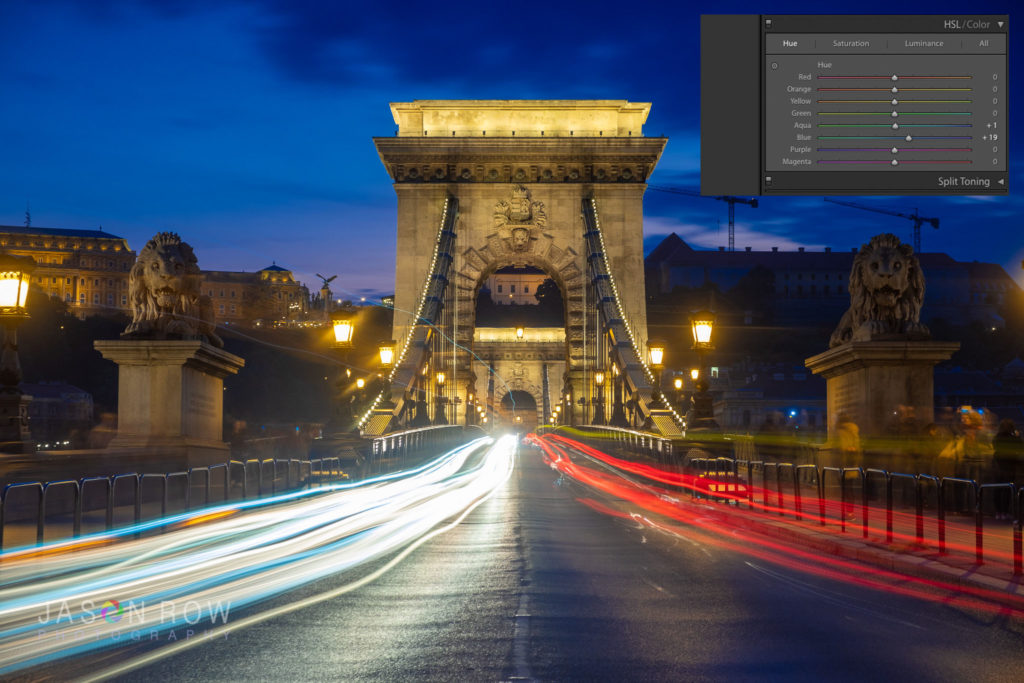
However, to make that blue look more blue, we need to head over the the HSL panel. We are going to select the Hue tab then select the tiny round icon just below the word Hue. Move that over a blue part of the sky. Then click and drag until the blue tones become more appropriate. You can repeat the same procedure to increase the saturation. If the sky is too light or too dark, use the same tool to change the exposure.
The overall effect is the increase the blueness whilst maintaining the saturation of the other colours in the shot. You can use the same picker tool to adjust the hue, saturation and luminance of other colors such as the glow of the street lights.
Once happy with the colour and exposure we make make final adjustments such as adding some Clarity or Texture, further saturation and sharpening as required. Also zoom into 100% to check that no noise has crept into the image, this is always a possibility when making so many edits.
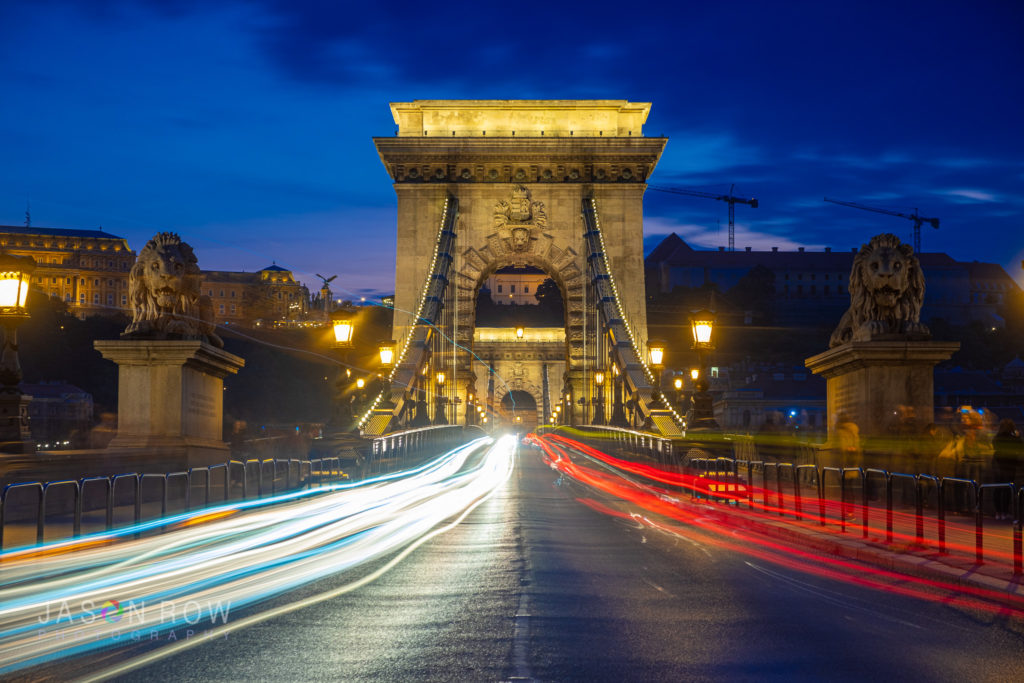
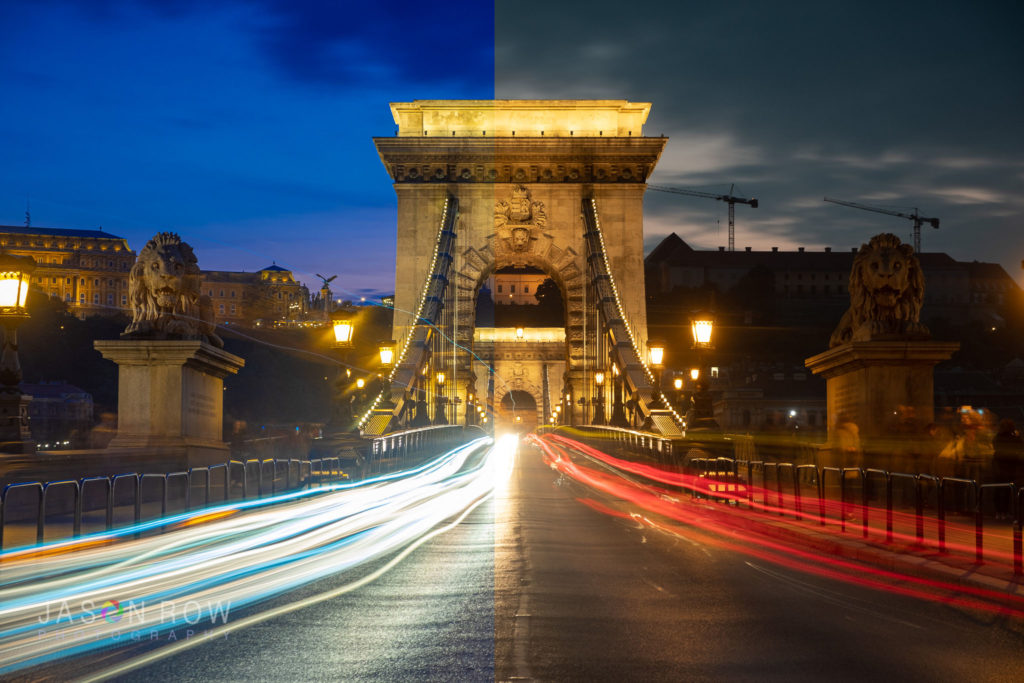
Blue hour shots can be incredibly emotive and powerful given the right subject. However, out of the camera they are likely to disappoint. By following this guide you will be able to create stunning blue hour shots using some fairly simple edits in Lightroom.
Jason Row and Light Stalking will be releasing a free six part video series on taking amazing images in the blue hour. Sign up here so you don’t miss out.



1 Comment
Thank very much Jason i enjoyed watching some of your process , great results as well.