In photography, we are always aiming for or are advised to capture images with proper exposure, but did you know that you can break this rule and capture creative images where you use the exposure that suits your creative vision? Depending on the scene and the subject that you are photographing, you can deliberately underexpose or overexpose or expose in other creative ways to portray the image or story that you have in mind. In this article, we will look at how to use exposure for creative photography.
Exposure in photography can be the image itself or the brightness of an image and it is based on the amount of light that falls on the camera's sensor when capturing a photograph. Before we go further into the article, we will first look at what is correct and incorrect exposure.
What Is Correct Exposure?
You would have understood the term “correct exposure” from the term itself. It means getting the image correctly exposed in the bright and dark areas of the scene. You set how bright you want the brightest areas (highlights) in the image and how dark you want the darkest areas (shadows) in the image.
With correct exposure, the shadows and highlights have enough details with no clipping and the image looks natural similar to how you saw it with your own eyes. Remember, it is not always possible to capture exposures that you see in a location, simply because our eyes see differently compared to what the camera sees in terms of dynamic range.
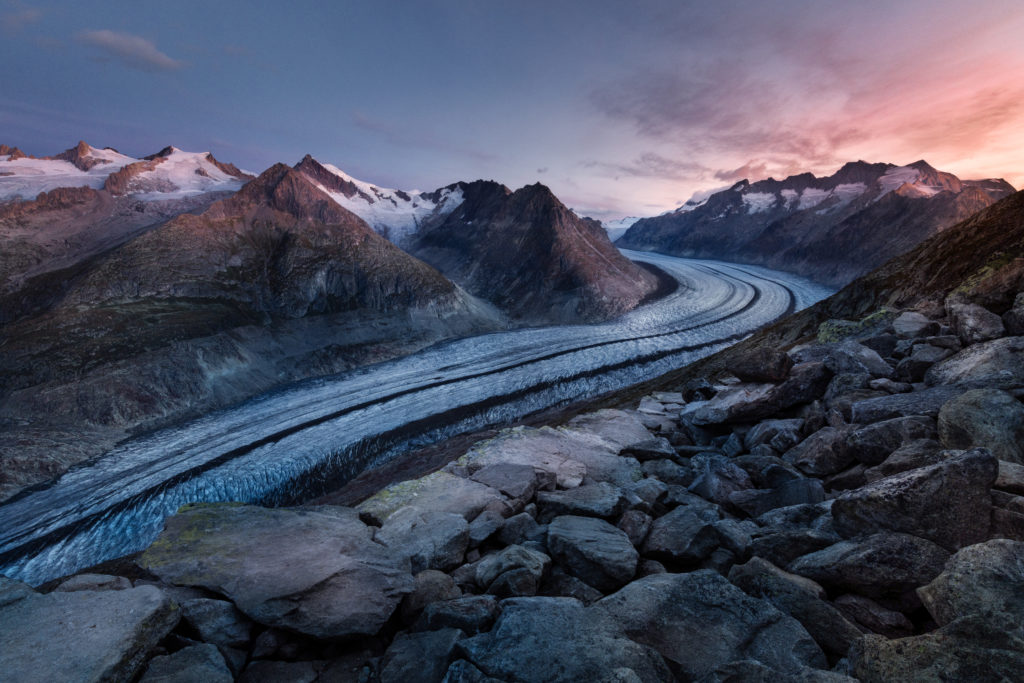
When an image is correctly exposed, there will be a balance between the different areas of the frame in terms of exposure. Sometimes if there is a huge difference in the intensity of light across the scene, which means a huge dynamic range, then the camera may not be able to capture all of it. In these situations, it is good to bracket exposures and combine them when post-processing or use exposure creatively to highlight the most important part of the image.
What Is Incorrect Exposure?
Incorrect exposure is when there is no balance in exposure in the images. Your image may have dark shadows with no details or can be very bright with blown-out highlights. As a result, the images will be either underexposed or overexposed and these exposures can be termed incorrect exposures, but again it depends on what you wish to show in a photograph.
What Is Underexposure?
Underexposure is when a photograph is not exposed correctly either intentionally or unintentionally. It can have very dark “shadow” areas with no distinguishable details, medium bright areas with some details, and very bright areas with acceptable details. These photographs can appear unbalanced and look dark in general and can be classified as underexposure, but at times, with the right type of lighting and creative vision, this technique can be used for creative photography.
What Is Overexposure?
Overexposure is the opposite of underexposure when the image is overexposed either intentionally or unintentionally and it sometimes has “highlight” areas with no distinguishable details. It will also lack any shadow details and can appear unbalanced in terms of exposure. With the right techniques and lighting, you can make overexposed photographs work if that is what you intend to create in the resulting photograph.
Note: Sometimes proper and overexposure may work well for a particular image and the same applies to proper and underexposure. Exposure for a scene depends really on the photographer's creative vision. What works for one photographer may not work for another photographer.
Thoughts On Exposure
Now that you know what correct exposure, overexposure, and underexposure are, do they really matter?
Correct exposure depends on the photographer’s creative vision and choice because photography is a creative process and there are no rules to hold on to. A photographer may choose to photograph a subject or scene based on their creative view of the scene and so they can creatively and deliberately work with over and underexposure to capture beautiful images. For example, in this creative process, the photographer may suppress parts of the scene using underexposure and make the subject stand out. These images if captured with the “correct” exposure may most of the time look boring.
For some scenarios, overexposure or underexposure will work and make the image more powerful or help show the reality, whereas, in other scenarios, one would want a perfectly exposed image, for example, documentary photography. A dark scene can be used to create a low-key image, a bright scene to create a high-key image, or sometimes a normally lit scene itself can be used for creating high and low-key photographs. So when needed, over or underexposure can be used to create artistic images.
Going by the above discussion, there is no overexposure or underexposure and it all lies in what the photographer’s creative vision is to achieve a particular look and mood in the images to tell the story. Only the photographer knows how they need the exposure, for example, which part of the scene should be bright and which should be dark, and how bright and dark they should be.
In order to execute your visual story, you need to set the camera to take the shots based on your visual perception, dialed in settings, the camera uses those inputs to capture the image.
- When capturing subjects in a very bright location, you may want to expose for the subject which will in turn throw the surrounding areas in darkness. This usually happens when you shoot in situations where you subject is in a bright spot of light compared to the surroundings. If you wish to expose everything in the frame correctly in this scenario, your subject may end up being overexposed, which may not be the result you were looking to achieve.
- Similarly when your subject is backlit or in a slightly low light situation, if you expose for the surrounding bright scene, you will end up with a silhouette. If you try to expose for the subject, then you will need to sacrifice on the surrounding details.
Capturing what the photographer needs in situations like these will be decided by the photographer.
Remember that one of the most important things to keep in mind is that when you need a particular exposure, get that exposure right in the camera itself. Overexposing or underexposing by mistake and then trying to recover details when post-processing will result in clipped highlights and shadows which may not be recoverable when post-processing or when recovering may result in high noise and/or artifacts.
Factors To Consider For Exposure
If you have already been doing photography for some time, you will know that the exposure of an image is influenced by three factors – aperture, shutter speed, and iso which form the exposure triangle. These three factors need to be in balance in order to create correct exposures. If you are a beginner and are slightly confused as to how they work together, this quick discussion below along with links to articles will help you understand how these three are related and work together for proper exposure.
Aperture, shutter speed, and iso are the three major things that control exposure but they do it in different ways. You will soon understand why!
Aperture, shutter speed, and iso affect the exposure triangle, and altering one of these factors will make the image look brighter or darker. You can brighten one setting by a few stops and darken another setting by the same number of stops, to keep the exposure the same. This is how the exposure triangle works in achieving the right exposure while also having the desired values for aperture, shutter speed, and iso for creative photography which we will discuss in a bit.
While controlling the factors, make sure that you keep the exposure on the image to the desired values based on your creative vision.
Aperture
Aperture is the opening in the lens that allows light to pass through the camera and fall on the sensor. It is measured in stops of light called an f stop.
Depending on the choice of aperture, it also controls the depth of field in an image. Wider apertures like values between f/1.4 to f/5.6 help to achieve more background blur giving a shallow depth of field, which is used in portraits or in situations where you want to isolate your subject/s from the background. Narrow aperture values like f/11 or f/16 help to capture everything in the scene in focus thereby allowing a large depth of field which is mostly used for landscape, architecture, and other scenarios where you want the entire scene in focus.
So when looking at just one factor, that is aperture, you can use the aperture values to capture photos based on your creative vision. Wider apertures give blurry background whereas narrow apertures have the elements in the scene in focus.

Shutter Speed
Shutter speed is the amount of time the shutter remains open to let the light enter the camera through the lens to fall on the sensor. The shutter speed depends on what and how you wish to capture the image. To freeze action, you will need to use a faster shutter speed, and to capture movements, you will need a slow shutter speed.
- When using faster shutter speeds, the shutter will be open for a tiny fraction of a second and hence you will need to adjust the aperture (wider) and iso (higher) depending on the light conditions to get the exposure right.
- For slower shutter speeds, depending on what you are capturing, for example long exposure photographs, the shutter will remain open for a fraction of a second for example 1/2s to a few seconds or minutes sometimes. During day time, in these scenarios, you will need to adjust the aperture (narrow) and iso (low) to get the exposure right.
ISO
ISO indicates how sensitive a film is to light falling on it and in digital cameras, it is the light sensitivity of the camera’s sensor. It is mostly the final setting that you should increase in order to get brighter exposures because high iso values can increase digital noise in images which is not always desirable. Low iso values like iso 100 or 200 mean the sensor will be less sensitive to light and for high iso values, the sensor will be more sensitive to light. This increase in sensitivity is achieved by amplifying the light (light converted to electrical signals) falling on the sensor.
Once you have the desired aperture and shutter speed for the shot, if required, you can use high iso values for desired exposure. High iso values are required in low light conditions when you have less light in the scene and when photographing the night sky.
Accessories And Filters For Creative Exposure
While aperture, shutter speed, and iso help to get the creative exposure you are looking for, there are times when the light will not be enough or there will be too much light even if you have adjusted all the settings possible. In these situations, you will need to make use of other accessories to get the correct exposure you want.
- In low light situations, when you want to freeze motion of a particular subject, sometimes a wider aperture, the right shutter speed and high acceptable iso values may not give you the desired exposures. In such situations, you will need to use a flash to get the desired shot.
- In very bright situations, sometimes even a narrow aperture and low iso value may not help with the desired long exposure time. Or, you may want to shoot a portrait with wide aperture and with low iso and fast shutter speed, the scene may still look too bright in very bright light conditions. In such situations, it is good to make use of an ND filter to cut the light entering the camera.

Here Are Some Things To Remember:
- For a given scene and exposure, when you change your aperture values from wide to narrow, you will be cutting down the light entering the camera and so will need to adjust the shutter speed and iso to get the correct exposure.
- If you are shooting a moving subject where you need to freeze action, you will need to use a faster shutter speed and so adjust the aperture and iso to get the desired exposure.
- If you wish to capture long exposures, you will need to blur some elements in the scene. In this case you will need to narrow the aperture, slow down the shutter speed and use low iso.
By understanding how aperture, shutter speed, and iso work, you can go out and capture images with proper exposure based on your creative vision. You can either use manual mode or shoot using aperture, shutter priority depending on the scenario and subjects you are shooting.
Exposure Compensation
Exposure compensation is a function in the camera that will allow you to capture brighter or darker exposures. There are times when you adjust the exposure setting based on the light meter in your camera and your image turns out either over or underexposed than you needed it. In situations like these, depending on how much brighter or darker you want the image, you can dial in positive or negative exposure compensation.
If you wish to read more on how exposure works, here are some very detailed articles that you can refer to.
- The Rule of Equivalent Exposure
- A Guide To Reciprocity In Photography
- When and Why Should You Use Exposure Compensation
- This is Why Knowing the Exposure Triangle Will Make You a Better Photographer
Creative Ways To Use Exposure In Photography
You now have an idea of correct and incorrect exposures and the factors that affect exposure in photography. Depending on the situation, light in the scene, and the story you are trying to tell, you may want to correctly expose, underexpose or overexpose your images. This can be done creatively and can lead to some interesting effects without looking like a wrong exposure.
Creative and correct exposure can be almost the same based on a photographer’s vision. Some of the creative types of exposures are discussed below and remember, these are not incorrect exposures, but exposures that are used for creative types of photography.
Here are some creative techniques that you can try by controlling exposure in photography.
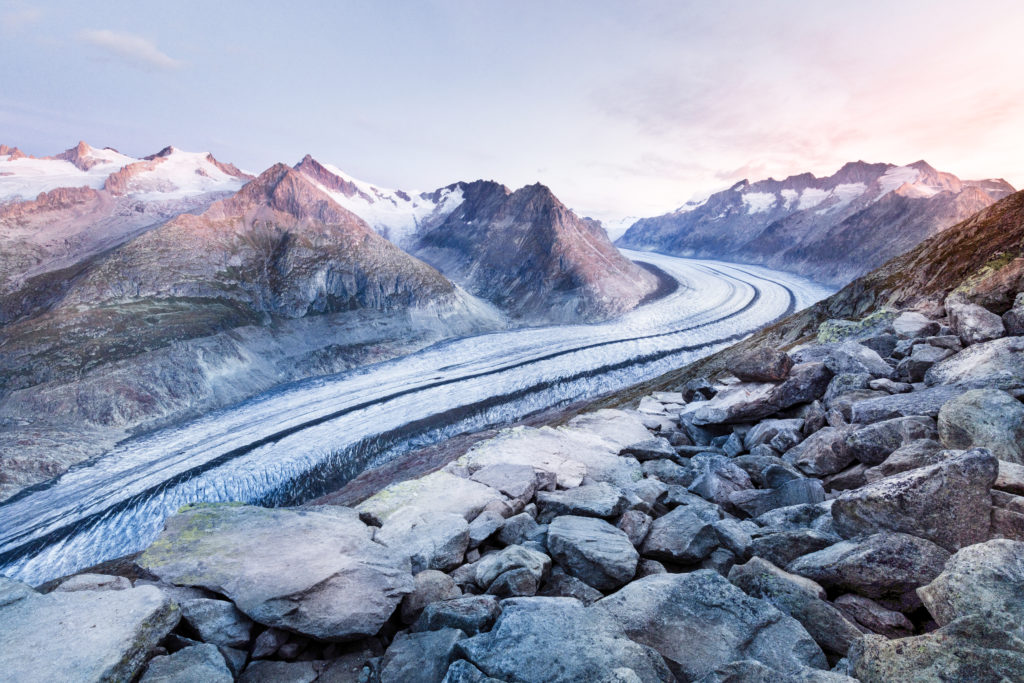
High-Key
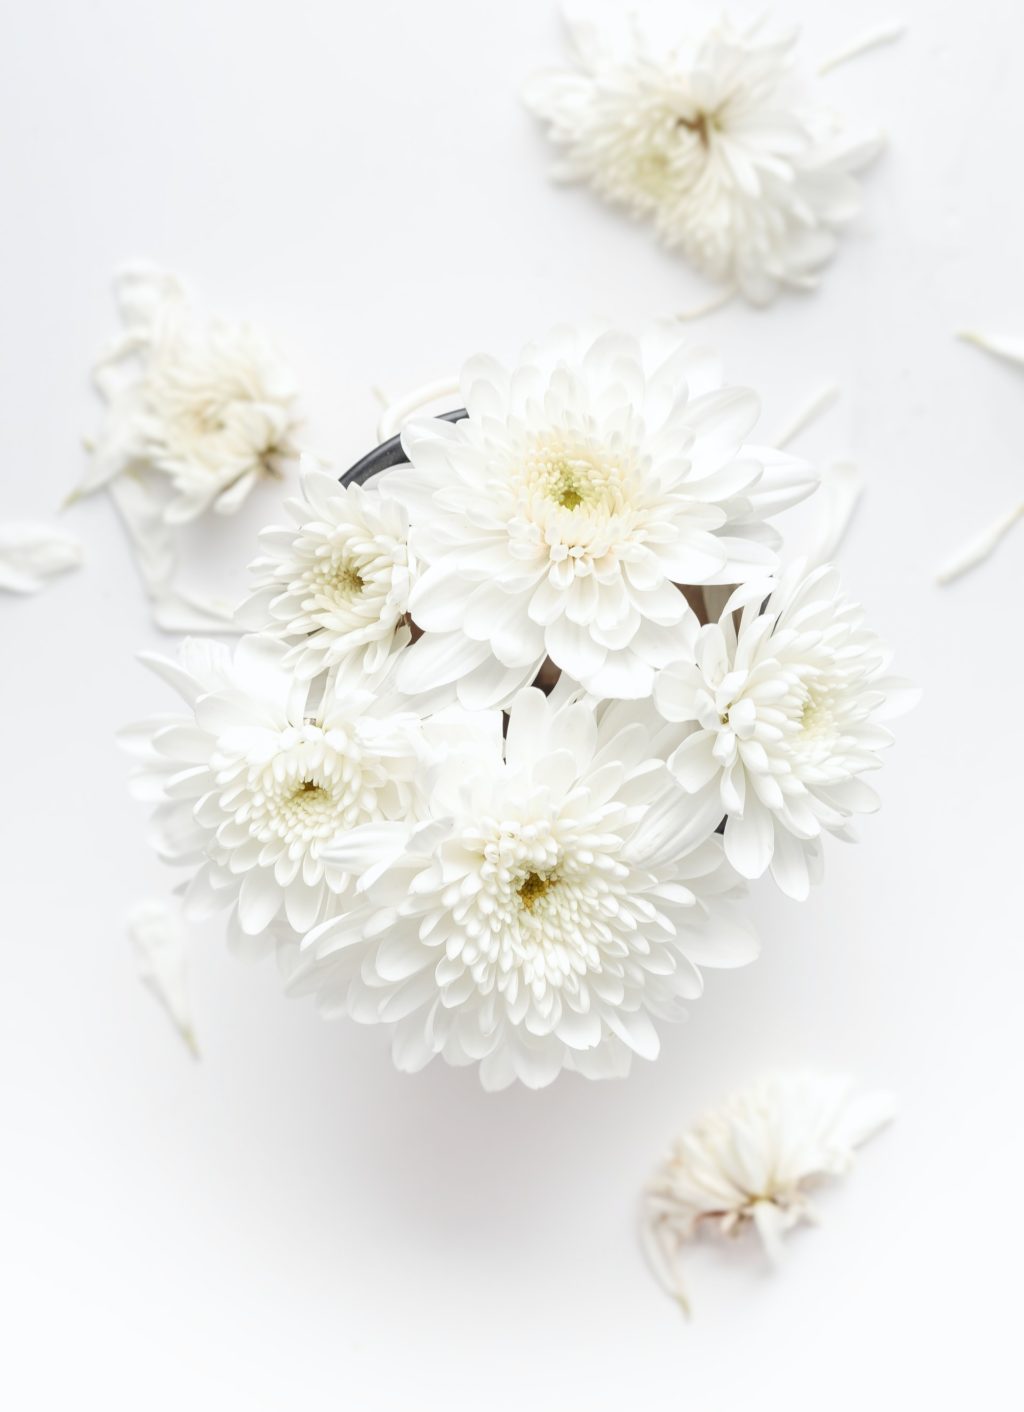
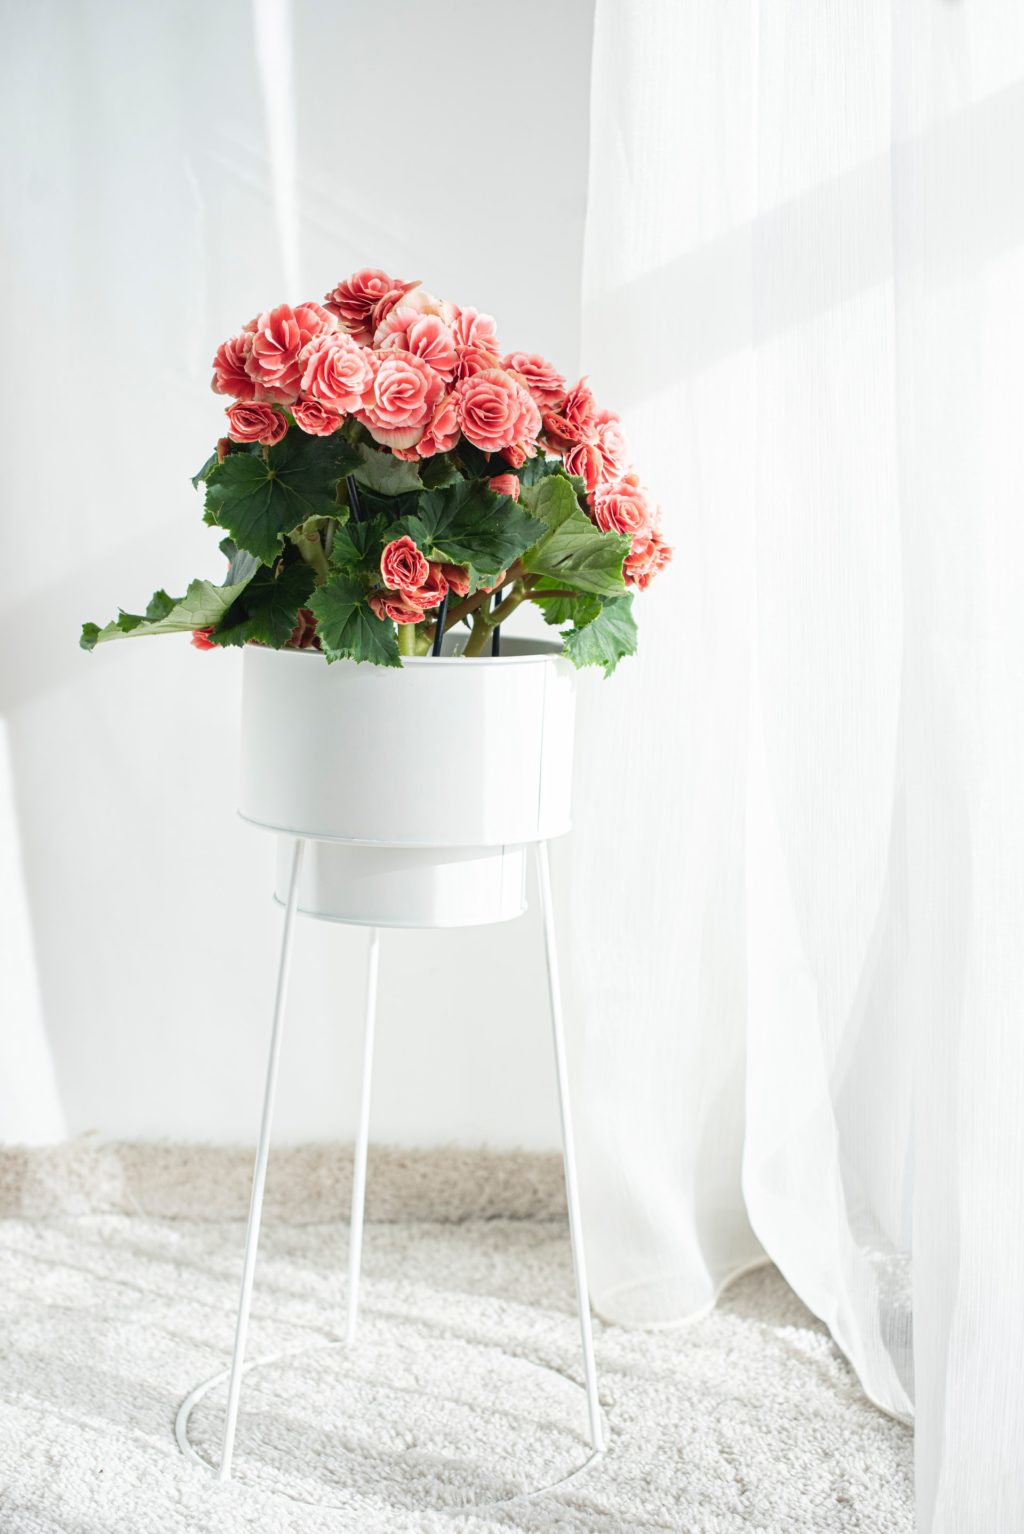
High-key photographs use bright lighting so you can eliminate the dark shadows in the image. These images are generally pleasant to look at, have light tones dominantly and have a light and airy feel.
In high-key photographs, you do not have very dark shadow areas in the image. The image is mostly bright but does not have blown-out highlights and so you will have all parts of the image correctly exposed. The histogram is mostly towards the right. You can use positive exposure compensation and increase it in stops to get the desired results or use external lights to get the desired look.

Many genres of photography like portraits, fashion photography, still life, flower photography, abstract, etc., can be shot using the high-key technique. High-key photography can be done in a studio or outdoors. Remember that just increasing the exposure in a photo does not make it a high-key image, but you need to take care of the right lighting, background (light backgrounds are good), and exposure techniques.
If you wish to learn more about high-key lighting and setup, check out “What is high key lighting and how to set it up.”
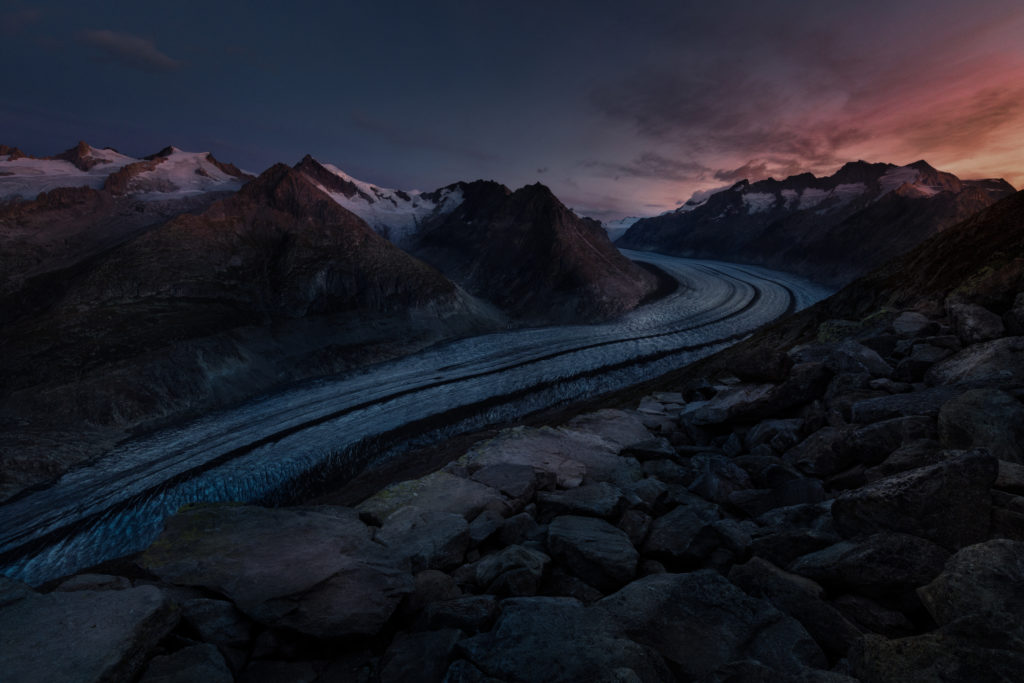
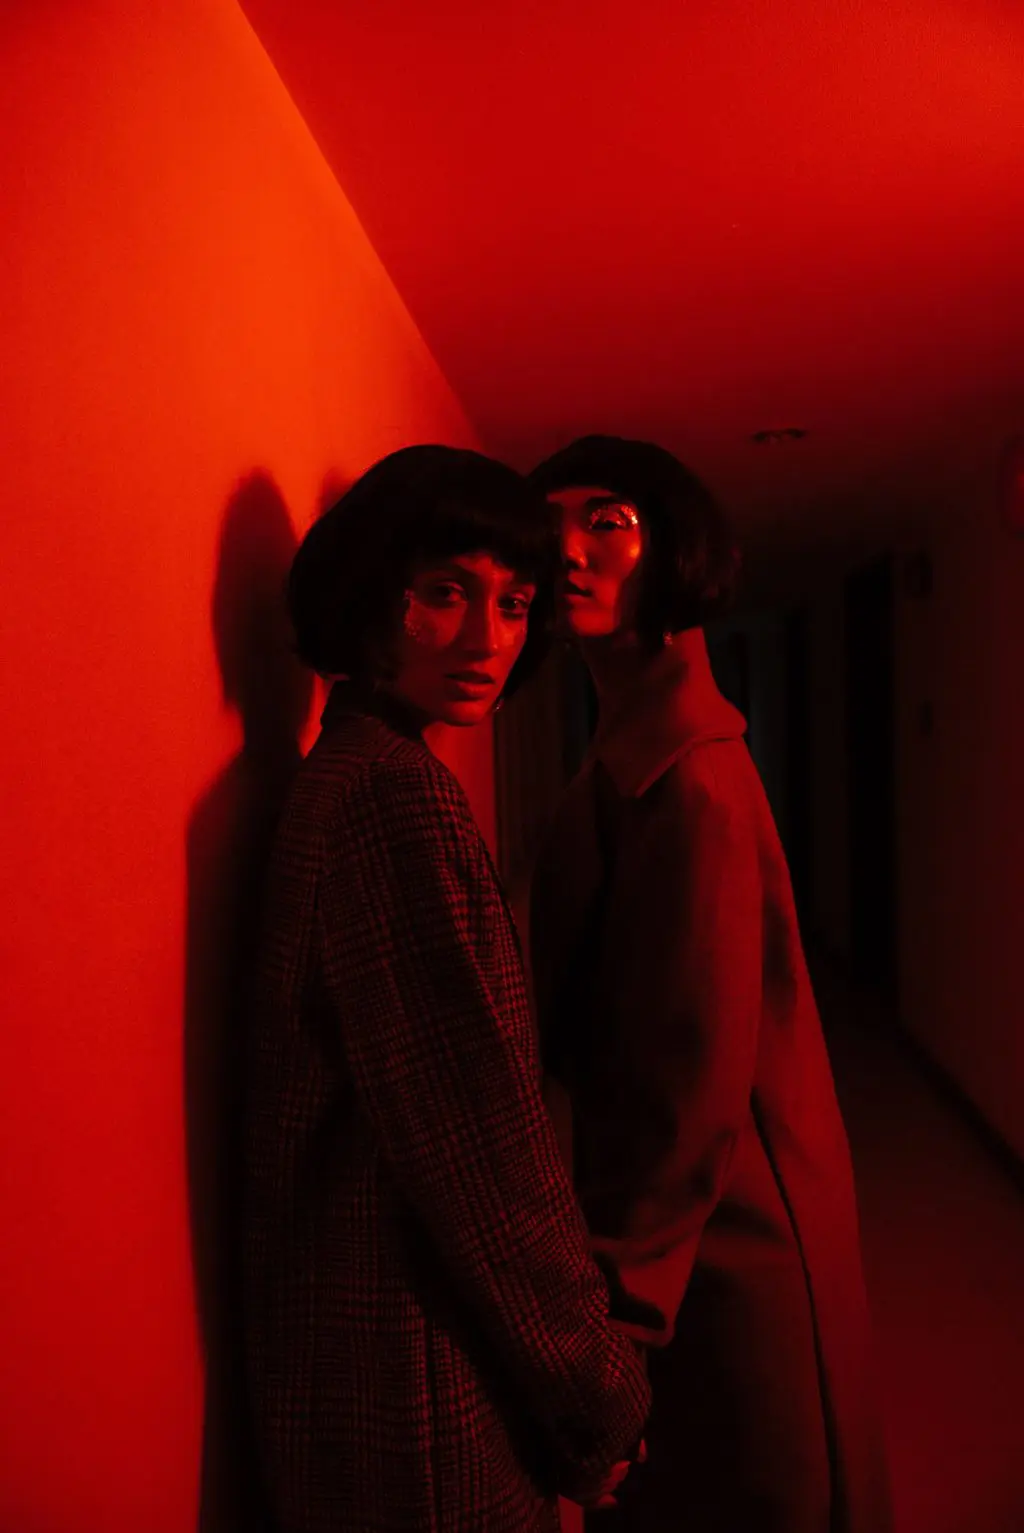
Low Key
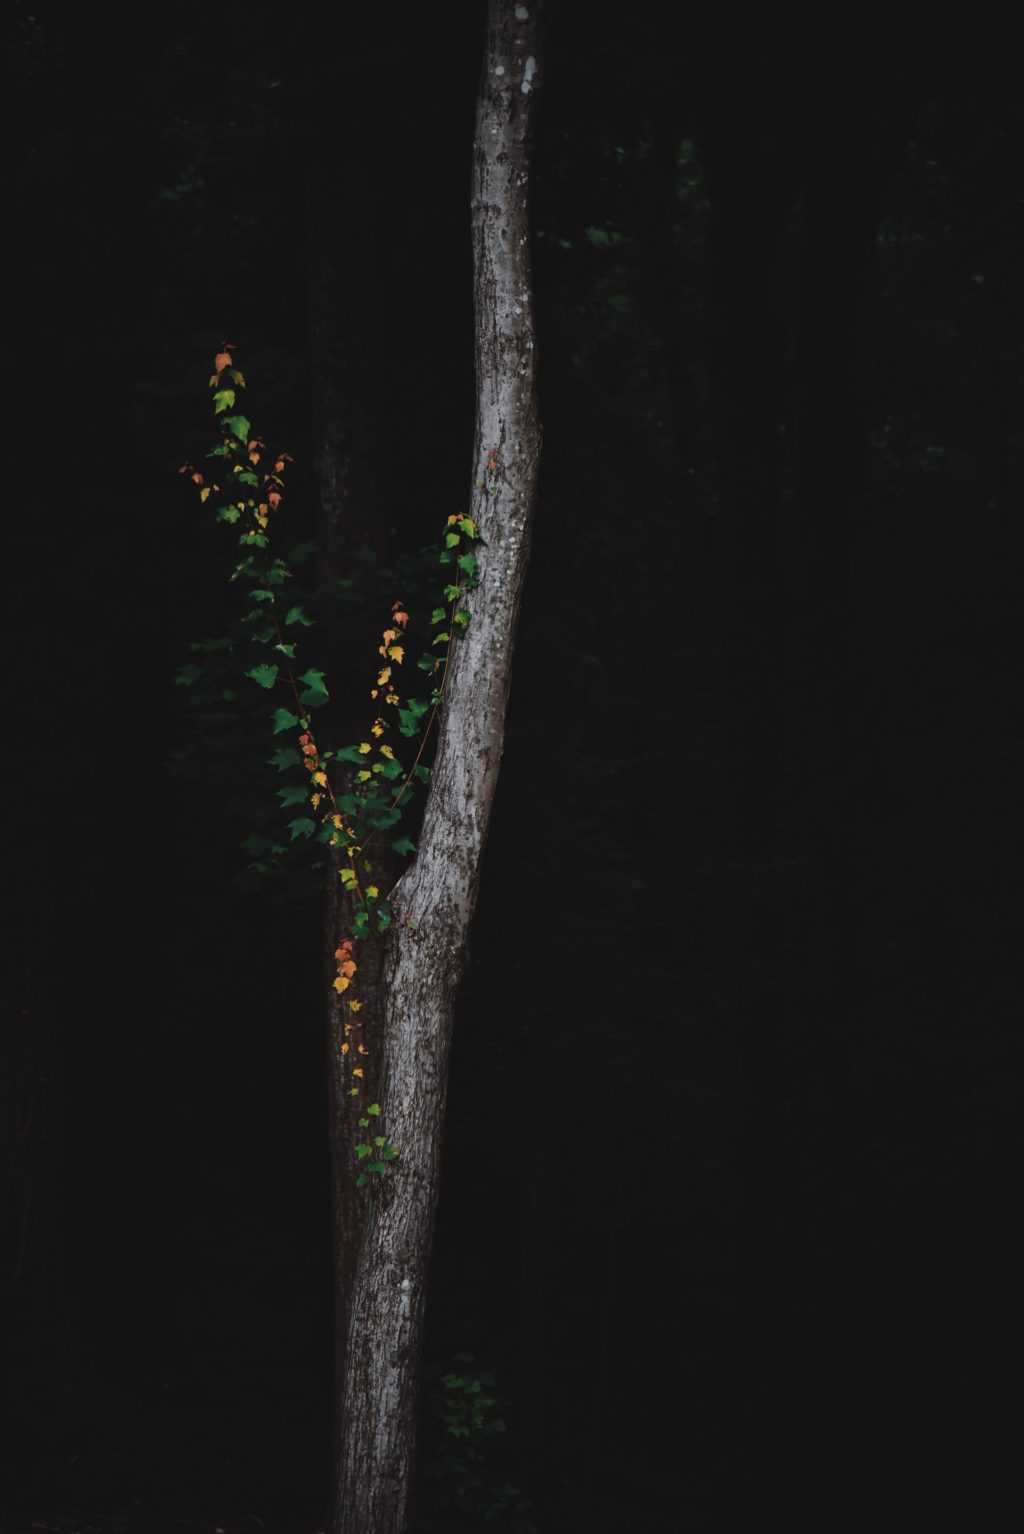
Low-key photographs look mysterious and they have more dark tones in the images. Low-key images unlike high-key images have a dark mood and look more dramatic and so this technique is mostly used to shoot dark-colored scenes where more emphasis is given to a specific part of the image which is the subject.
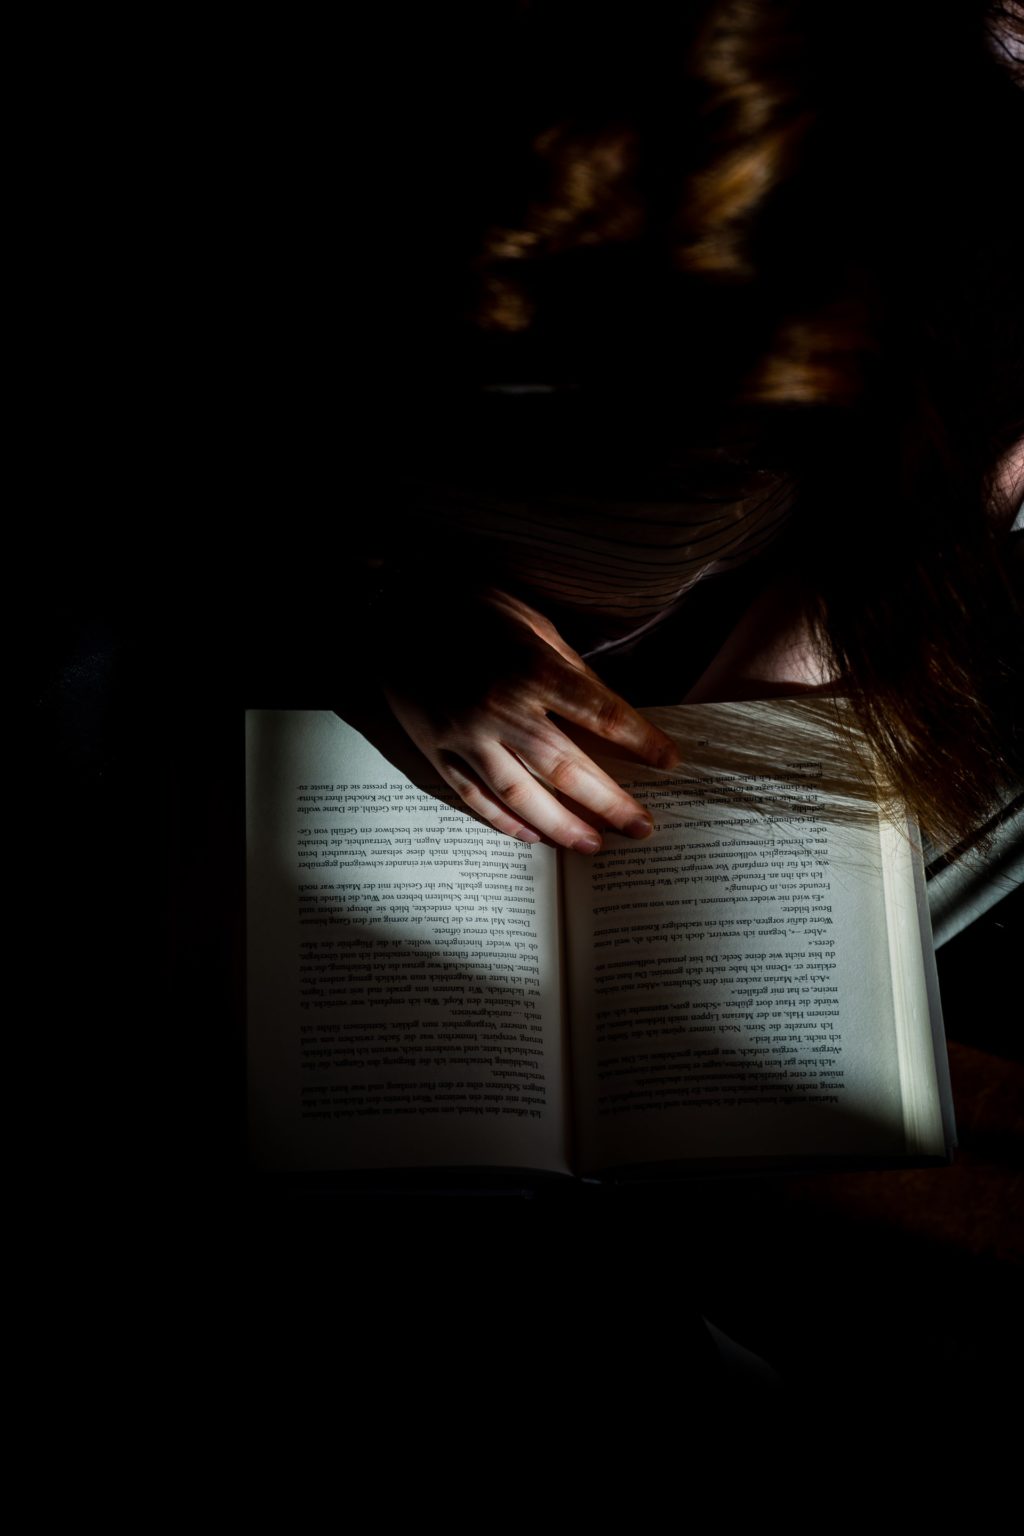
In low-key photographs, you do not have very bright areas and so the images are characteristic of darker tones in general. The low-key technique can be used to shoot genres like portraits, still life, abstract, nature, etc. Low-key photographs are generally dark and the histogram is mostly towards the left. You can also make use of negative exposure compensation to get the desired results.
Low-key photography can be done indoors in a studio or outdoors. Make sure that the main subject in the scene is well exposed.
Here is a detailed article on low key photography – Low key photography for beginners
Silhouettes
Silhouettes are where you have a dark image of the subject against a comparatively bright background. This could be a partial or full silhouette and it mostly shows the outline of the subject/s against the bright background. Backlit scenes like example sunsets, window light, or similar studio lighting setups are great for photographing silhouettes.
Silhouettes can look dramatic and it is important that you photograph meaningful subjects with distinctive outlines for interesting silhouette photographs. In silhouette photography, you expose for the background and hence the subject will be thrown into a shadow area causing the silhouette. If you expose for the subject in this condition, your background will become blown out with no details unless you use artificial lights or reflectors to illuminate the subject.

Find out how to capture striking silhouettes here – How to Capture Striking Silhouettes in 7 Easy Steps
Long Exposure
Long exposure is another creative way to capture photographs with a dreamy atmosphere. For these kinds of images, you will need a longer shutter speed and moving elements in the scene. This could be moving water, clouds, traffic lights, people, or still elements like the night sky, etc.
For long-exposure photographs, one needs to have the camera on a tripod and use longer shutter speeds to capture the movement. The shutter speed depends on how much movement one intends to capture and the resulting effect depends on the chosen shutter speed.

In brightly lit scenes, one will need to make use of an ND filter to lengthen the exposure time. This article on “How to use a neutral density filter for daytime long exposures” will give you all the necessary details and settings required for long exposure photography.
HDR
You may sometimes come across extreme variation in light intensities in a particular scene where you expose for one area correctly and the other areas either become underexposed or overexposed. These are scenes where there is a huge dynamic range and the camera is not capable of capturing it.
Some situations where there can be a huge dynamic range are landscapes especially during sunsets and sunrises, architectural photography both indoors and outdoors, etc. In these situations, one will need to bracket exposures (at least three to five) and blend them when post-processing to get all the areas of a scene in the right exposure. This technique helps to capture maximum details in both the highlight and shadow areas.
To conclude, exposure is something creative and is more than the exposure settings and correct exposures we talk about when it comes to photography. In order to creatively expose photographs, it is important to understand how the exposure triangle works, so you can capture the “correct” exposure based on your creative vision. Play with different settings to see what you can capture and that is the way to learn to creatively expose and capture photographs.
What are your thoughts on correct and creative exposures? Share your thoughts with us in the comments section below!
Further Reading:
- Every Photographer Must Get to Grips with the Exposure Triangle by Understanding ISO
- 7 Essential Resources To Help You Understand Exposure
- 3 Free Guides That Will Help You Get the Hang of Exposure in Photography
- Exposure Compensation: Use it to Master Exposure and to Explore Your Creativity
- 3 Simple Ways to Make Sure You’re Getting Good Exposures


2 Comments
A ton of great information as always Dahlia.
Thank you very much Patrick. Glad that you found them useful 🙂