Statues are found around us in most places, especially historic places and old towns. Besides there are sculptures too and these statues and sculptures can be of famous historic figures or other abstract forms, replicas and photographing them is not very easy. A photographer needs to capture these artworks from an artistic point of view.
When photographing a sculpture, it can tell a story. It can also be ‘just another sculpture photo that does nothing other than document its existence.
We'll explore different techniques and images for inspiring your own creative view when you photograph sculptures. When photographing ‘art', a simple shadow could be the difference of making an impact, or being a distraction.
Before we get into the steps involved in photographing statues and sculptures, we need to know where to find them, so they can be photographed.
Where Can You Find Statues And Sculptures?
Finding statues is mostly easy and they can be found in many public places like parks, libraries, museums, churches, town and city squares, etc. Historical. political and government buildings commonly have statues in remembrance or to celebrate their lives. Sculptures can be found in parks and areas where sculpting works are done. You can also find sculpture parks where sculptures are made and exhibited which will make a great place for photographing sculptures.
Once you find a good place or places to photograph statues and sculptures, you need to know ways to photograph them. There are some important factors you need to consider when photographing statues and sculptures.
Here Are Some Steps On How To Photograph Statues And Sculptures:
We'll look at
- Lighting
- Perspective & Angles
- Attention to the Details and lastly,
- Telling the Story from Your Eye.

1. Lighting
Lighting is important in any form of photography and has a huge impact on your photographs in terms of setting the mood, adding depth and feeling to photographs. Light may or may not work in our favour all the time.
Cloudy, overcast days minimize harsh shadows for more evenly distributed lighting. On bright, sunny days statues with intricate details, curves, crevices and angles can easily be overpowered by harsh shadows but choosing to shoot at the right time of the day like morning or evening (especially during the golden hour) can help with the details adding to provide more depth and meaning to statues and sculptures.
If you're on vacation and have just a few hours, you have to work with what nature provides. Slightly overcast, even lighting provides the most flexibility in photographing a total statue.
If there are a lot of shadows due to unfavorable lighting, use those to your advantage. Harsh shadows and details may be further enhanced in post processing to convey age and drama. If allowed, you may try using a reflector to fill in light in very dark shadow areas or in very low light situations, if you have a flash, you could bounce it off a reflector to create a soft light to illuminate the statue or sculpture.
Light and shadow can emphasize unique features that may have gone unnoticed in the total statue but are no less interesting on their own. Backlighting can offer silhouettes. Side lighting brings elongated shadows.

If you are photographing statues at night or indoors in low light, try to use a tripod where possible and shoot at the lowest possible iso for good quality images. A cable release would help in these situations. If using a tripod isn’t possible, open up the aperture and increase the iso to get the shot.
2. Perspectives & Angles
If you're just getting started with photographing sculptures, consider starting with the same techniques as you would in your other work. As a portrait, look at the subject from a ‘person' perspective to get the creative eye going.
If you're an event photographer, try starting with what's happening around the statue. For nature photographers, consider zooming into the statue's features.
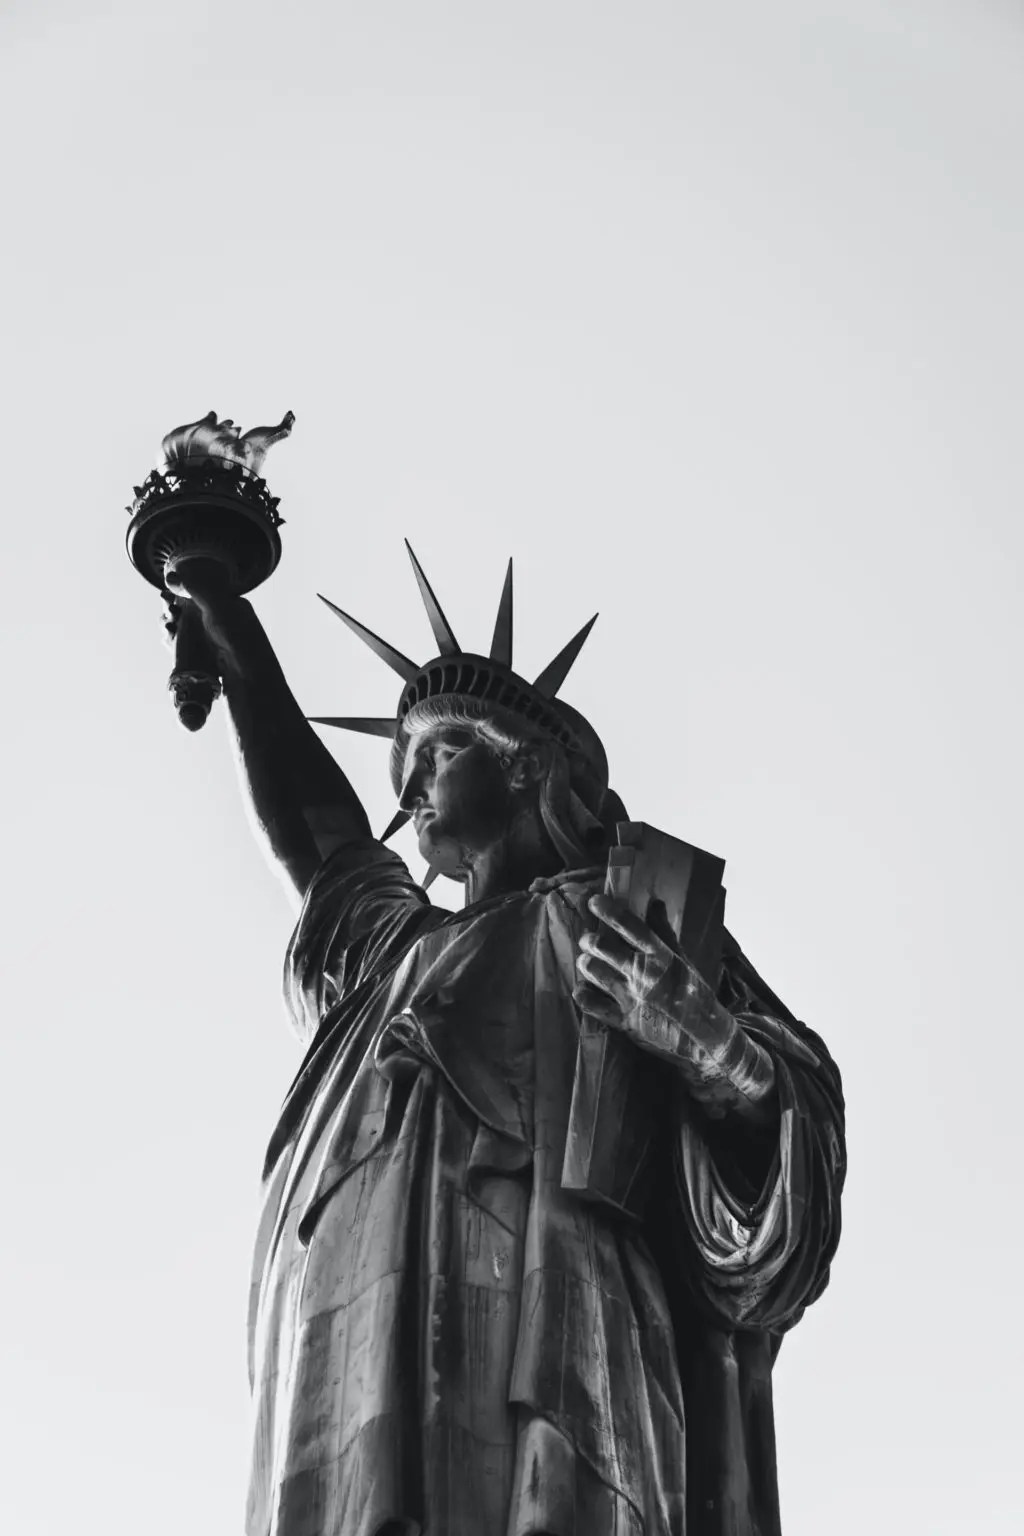
With statues, you are most probably going to be shooting from a lower point of view as statues are usually raised up on top above eye level. In situations like these, make sure you shoot from a desirable distance and zoom in to avoid weird distortions and to get a more realistic image of the statue. If you can by any means get the image of the statue from eye level by climbing on to something to get the shot, then by all means do that.
A few ideas:
- If you're working up close, step back to re-survey the scene. If working from a distance, move in. Either case, moving your feet, going lower and looking up or standing on an elevated surface to reach eye level will change what your eye sees.
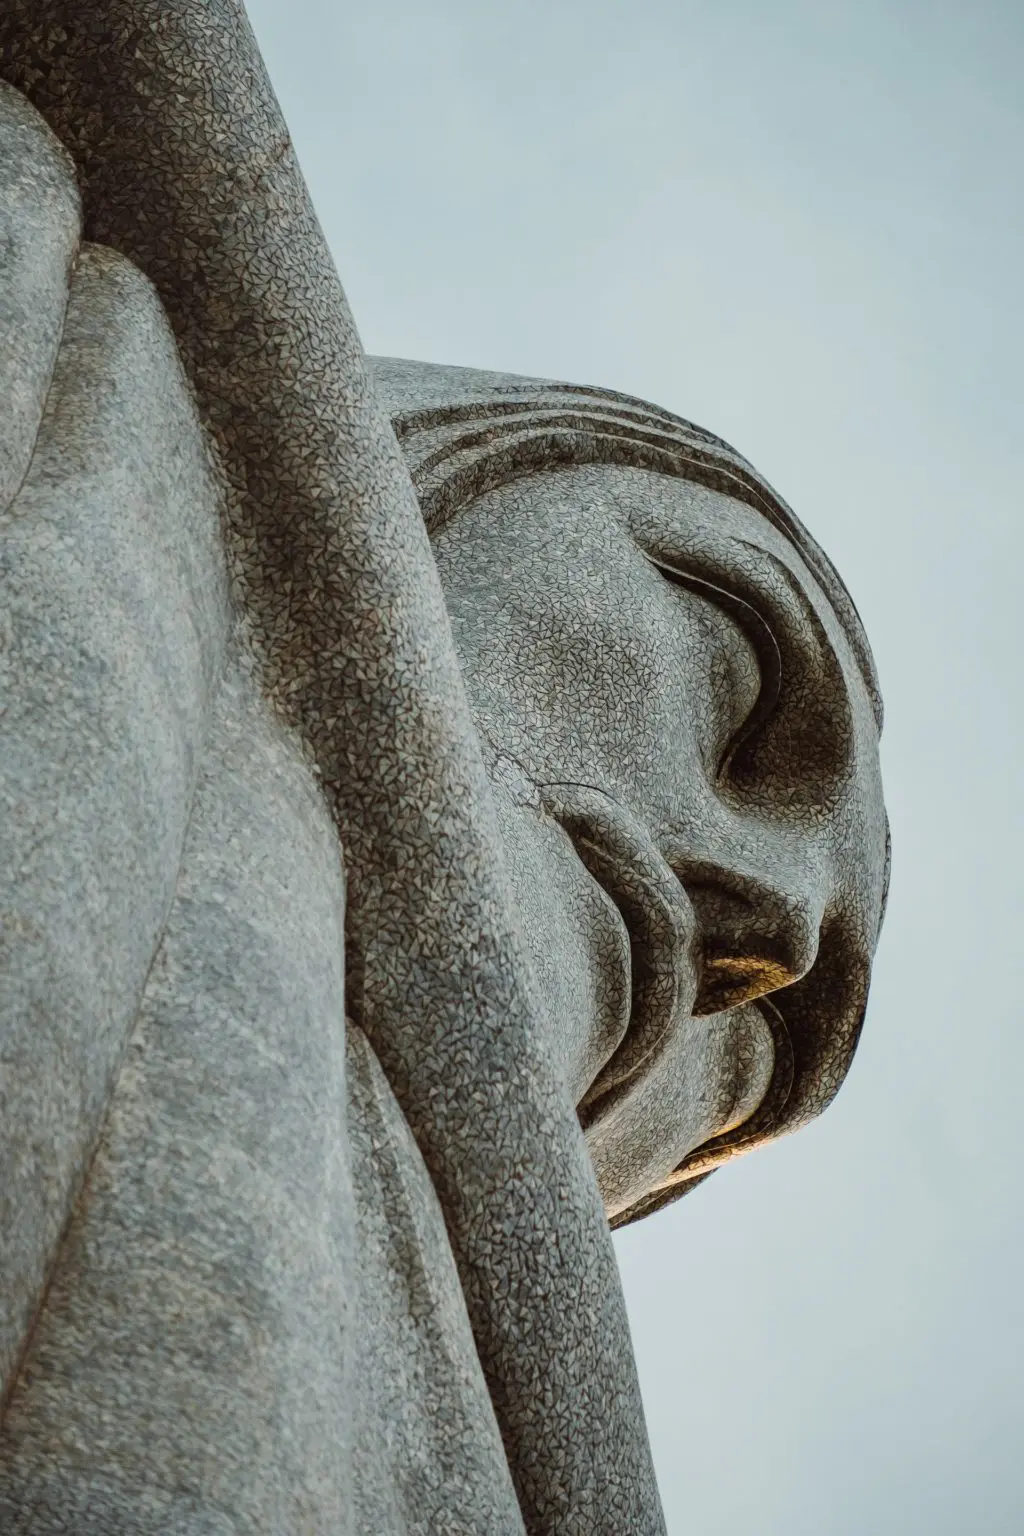
- Work with a shallow depth of field to illuminate the feature of interest and soften surrounding details of the sculpture. Fill the majority of the frame with the point of interest.
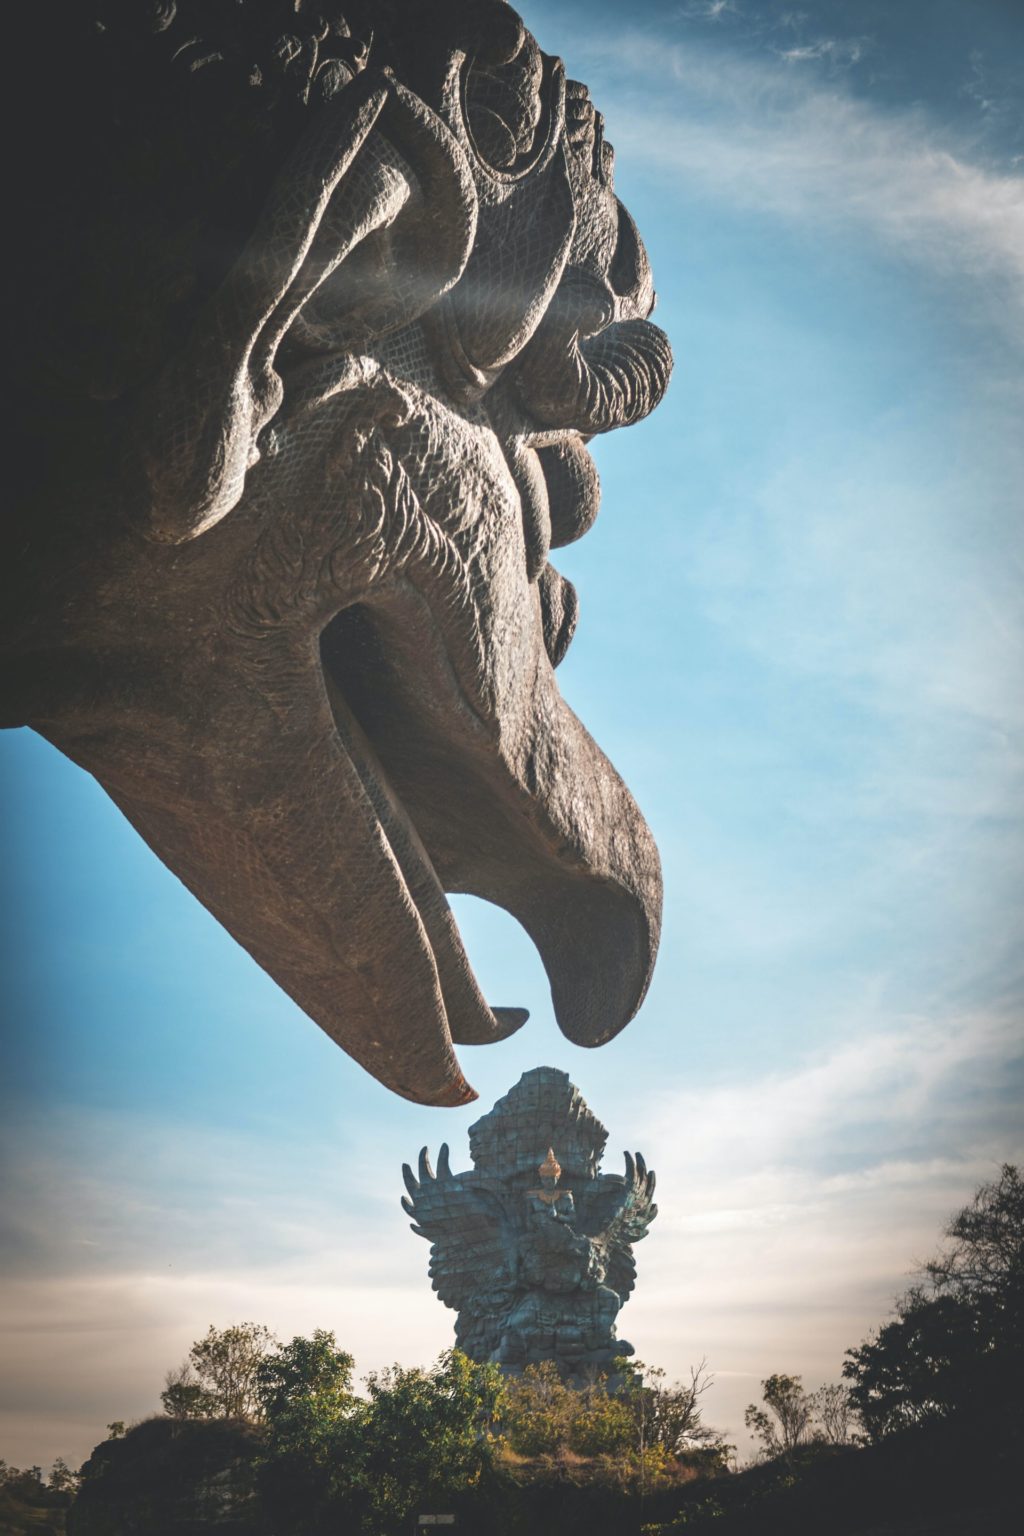
- Try photographing only part of the statue. It can make for really interesting images.
- When taking in the total statue, some of the surroundings include too many people, unattractive buildings. Take the photo anyway!
- Use a tripod and neutral density filter to capture motion as it happens around the statue for a natural blur frame or create a blur surrounding in post processing. Tripod and cable release needed for this one – see the photo below by Mike Warot.
- Study other photographer's sculpture work. If there is a specific statue/sculpture that you have in mind – trying googling images to see what photographs have been taken (and what angles to avoid).
- Taking a full frontal shot will document that you were there.
- Walk around the statue and around the area in general to find the best light (direction of light), perspective, background and framing that will enhance the look of the image.
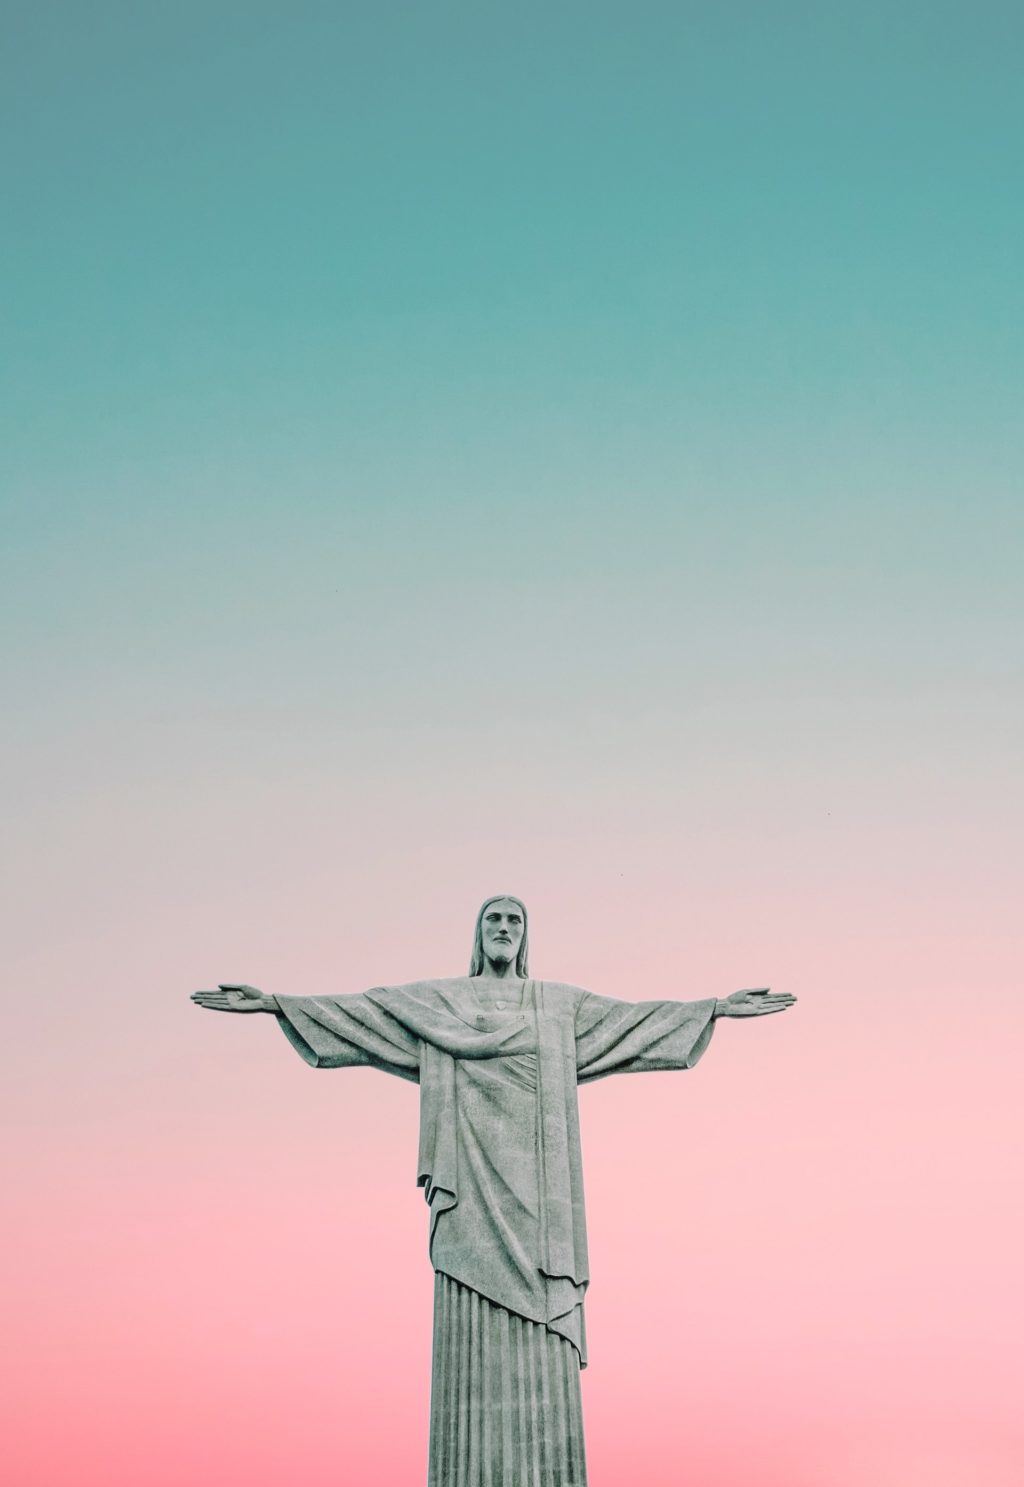
Try minimalism as it can be a powerful way to make your statue or sculpture stand out and bring more importance to it in the frame.
3. Attention To Detail
While surveying for perspective, also look for distractions. If your statue is in a city or town, are street signs and street lights in the frame? Are there wires and cables overhead? Some distractions can be corrected in post-processing.
It's better to eliminate distractions before you get to post processing when possible.
Trees and branches may provide a nice framing element to your subject. Trees and branches could also look like a distraction ‘hat' if right behind the statue's head.
Statues made with materials that have reflections or glare may have blown highlights in various lighting conditions. Check the histogram to look for blown highlights. Bracket your photos to have multiple conditions to work with in post processing. If working in brighter times of the day, trying using a circular polarizer to protect and enhance color saturation and minimize glare.

4. Telling The Story
As the photographer, how do you envision representing the art? The creator of the work had a vision. That vision inspired you to want to take a photograph.
It may be the surrounding elements that caught your attention, the overall work itself or the lines and angles. Part of the story happens when you snap the shutter, the other in post processing.

From a personal perspective, I took the below photo a few weeks after a young family member had passed away. She loved dancing and music as do her children. When I walked up to the statue, the position of the statue's face led upward to the beautiful summer sky. It immediately reminded me of the song “Is there Dancing in Heaven?” that reflected the emotions we were all feeling at the time.

Take creative liberty with exploring subtle adjustments to the dramatic. Over-saturate a color or colors, desaturate a color or colors. Push the limits on your choices of clarity and contrast, exposure, highlights, shadows.
Go for black and white. An average photograph in color may move to ‘wow' when converted to black and white.
Statues and sculptures also represent the ‘perfect poser' giving you ample time to survey lighting, finding perspectives and paying attention to the details. It's up to you as a photographer to tell your eye's story of another artists' work.


1 Comment
Really useful.