We all know that there is no photography without light and light is an amazing element that works magically during different times of the day and during different times of the year depending on the weather and the seasons. There are various types of light and using the available light wisely and creatively will help photographers capture the best photographs.
In order to use light correctly and make the right choice of camera settings, one needs to understand how the three elements aperture, shutter speed and iso work together. Making changes to one or more of these values for a given exposure means you need to make changes to one or more of the other values to get the same exposure. Besides, adjusting aperture and shutter speed in different ways can help to capture different types of photographs.
Last week, we shared a bunch of tutorials to help beginners understand exposure in photography. If you haven't checked it already, here is the link – Aperture, Shutter Speed And ISO – Understand The Exposure Triangle For Better Photos. This week we have a few more advanced tutorials to help you understand these factors better and to creatively use them for photography.
A Guide To Reciprocity In Photography
Reciprocity is the relation between the aperture and shutter speed values and these two values are inversely proportional. This means if one value is increased, the other needs to be decreased to maintain the right exposure. Understanding reciprocity will help the photographer master manual mode and make creative decisions on the field. This guide will help you understand the law of reciprocity in great detail.
How To Use Exposure For Creative Photography

Exposure in photography can be interpreted as either the brightness of an image, or, the image itself. Photographers always aim to capture the image at the right exposure in their camera, but what is right exposure?
Everyone sees and photographs things differently. One photographer may capture a scene slightly overexposed for a “light and airy” feel while another photographer may slightly underexpose to get a “dark and moody” feel. Read to understand more about exposure for creative photography.
Depth Of Field And How to Use it for Better Photos
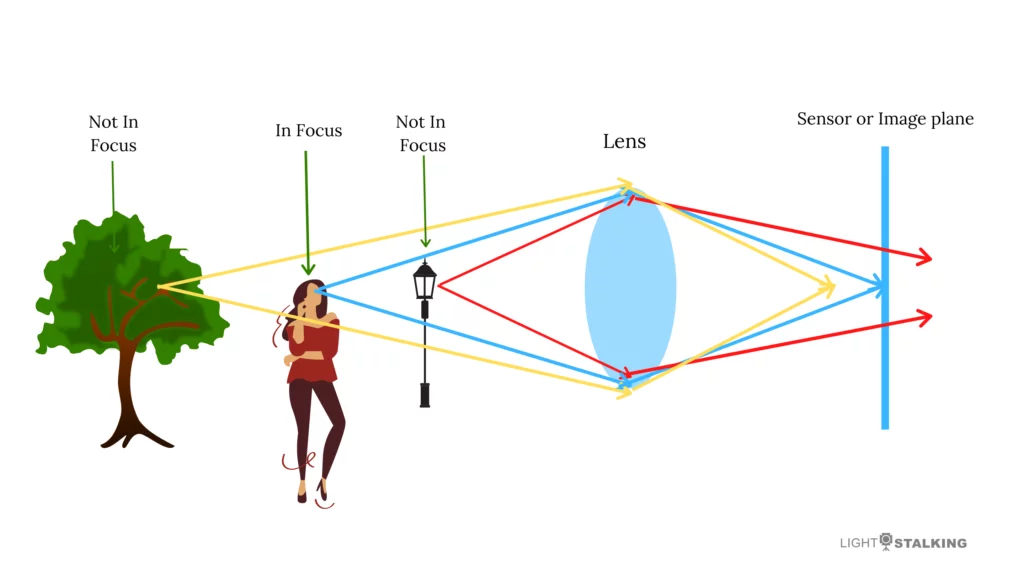
If you have been in photography for a while, you would have played around with the various aperture values and seen the differences in the resulting images. Depending on the purpose or results that you are trying to achieve, you will need to creatively make choices for aperture – wider apertures for creamy bokeh to make your subject stand out or narrow apertures to have deeper depth of fields, for example, when photographing landscapes. This article discusses depth of field in great detail so you will get a better understanding to use it for creative photography.
Exposure Compensation: An Easy Guide

There are times when photographers do not want or cannot shoot in full manual mode because they are constantly capturing images and will not have time to keep adjusting exposure for every single shot. For example, sports and wildlife photographers seem to use aperture priority or shutter priority a lot depending on what they wish to keep constant while the other two values change. It is when using these modes, that the camera's light meter may sometimes not give the right reading for exposure and you may need to slightly under or overexpose the images. This article is an easy guide to understanding exposure compensation.
Exposure Compensation: Use it to Master Exposure and to Explore Your Creativity

Our camera's light meter works differently under different lighting conditions and modes and there are times when the cameras light meter may make a reading based on the light in the scene and make us capture images that may be slightly over or under exposed. This can depend on the light in the scene, the metering mode used and also the modes used in the camera like aperture priority, shutter priority or program mode. In order to overcome this situation, cameras come with exposure compensation features that will help to control the exposure of the image to get the correct or desired results. Check out this article for more details.
Exposure Bracketing: What Every Good Photographer Should Know

If you have dealt with high dynamic range situations in photography, especially when shooting landscapes during sunsets or sunrises, you will know how difficult it is to get the exposure right in all areas of the frame. The sky may be very bright compared to the foreground and even ND grad filters many not be very helpful sometimes.
Bracketing exposures can help to capture the huge dynamic range in the scene through three or five different exposures and then combining them when post processing. Read to find how exposure bracketing can help to capture better images.
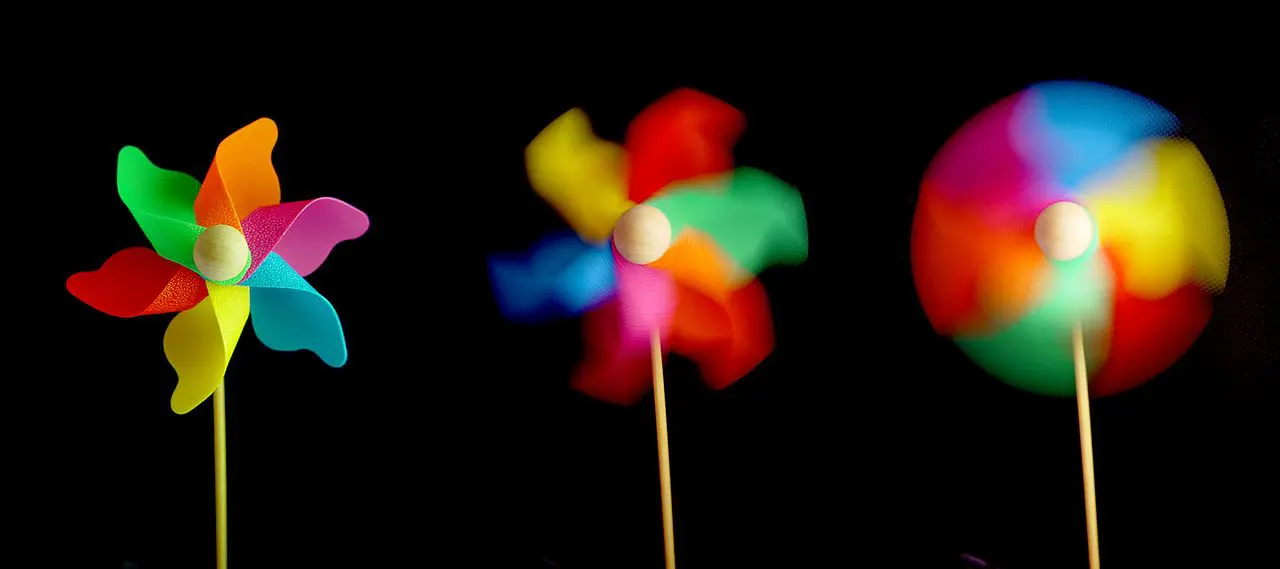
How to Use Slow Shutter Speed to Create Cool Effects in Your Photos

Of all the three factors that control exposure in a photo, we think that shutter speed is the one that allows for more creativity and visual appeal. By tweaking the shutter speed, you can come up with incredible images that can look like pieces of art. It allows the photographer endless creative possibilities. This article discusses several ways in which slow shutter speeds can be used to create cool effects in your photos.
What Is ISO Invariance And When Should You Use It
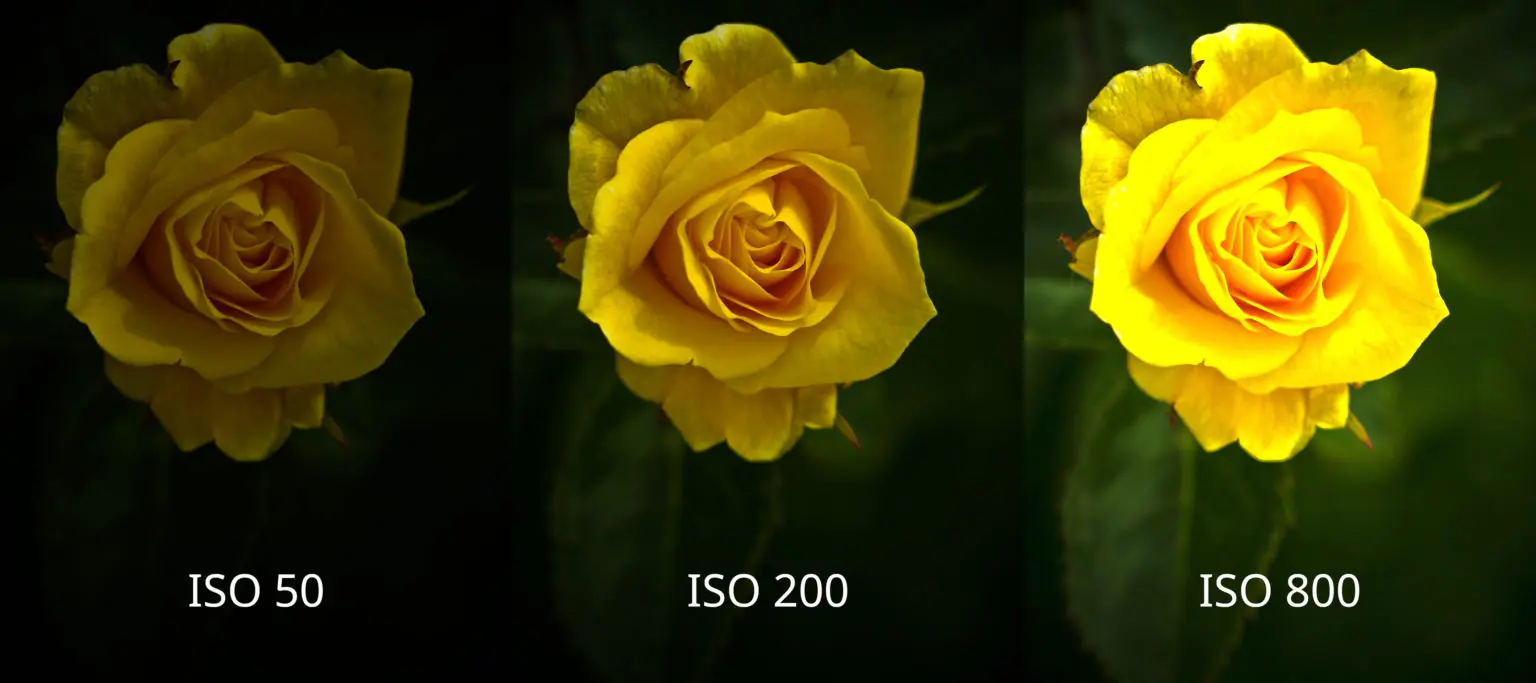
If you have a basic understanding of how exposure works, you will know the three main factors that control exposure in photography and photographers make creative decisions by choosing a combination of these values to get the results that they have visualised. Iso is a measure of how sensitive to light the camera's sensor is and iso invariance is an interesting term and a feature in some cameras where the resulting images have the same quality despite the iso values used to photograph them. This article discusses iso invariance in detail.
How to Use Auto ISO on Your Camera
Auto iso is not something that photographers want to use all the time because it can lead to the camera choosing high iso values when not needed and result in low quality images. There are situations when auto iso would be useful, for example sports and wildlife photography or situations where the light keeps changing often and you want to shoot without having to keep changing the iso or other settings manually. This article discusses auto iso and when to use it.
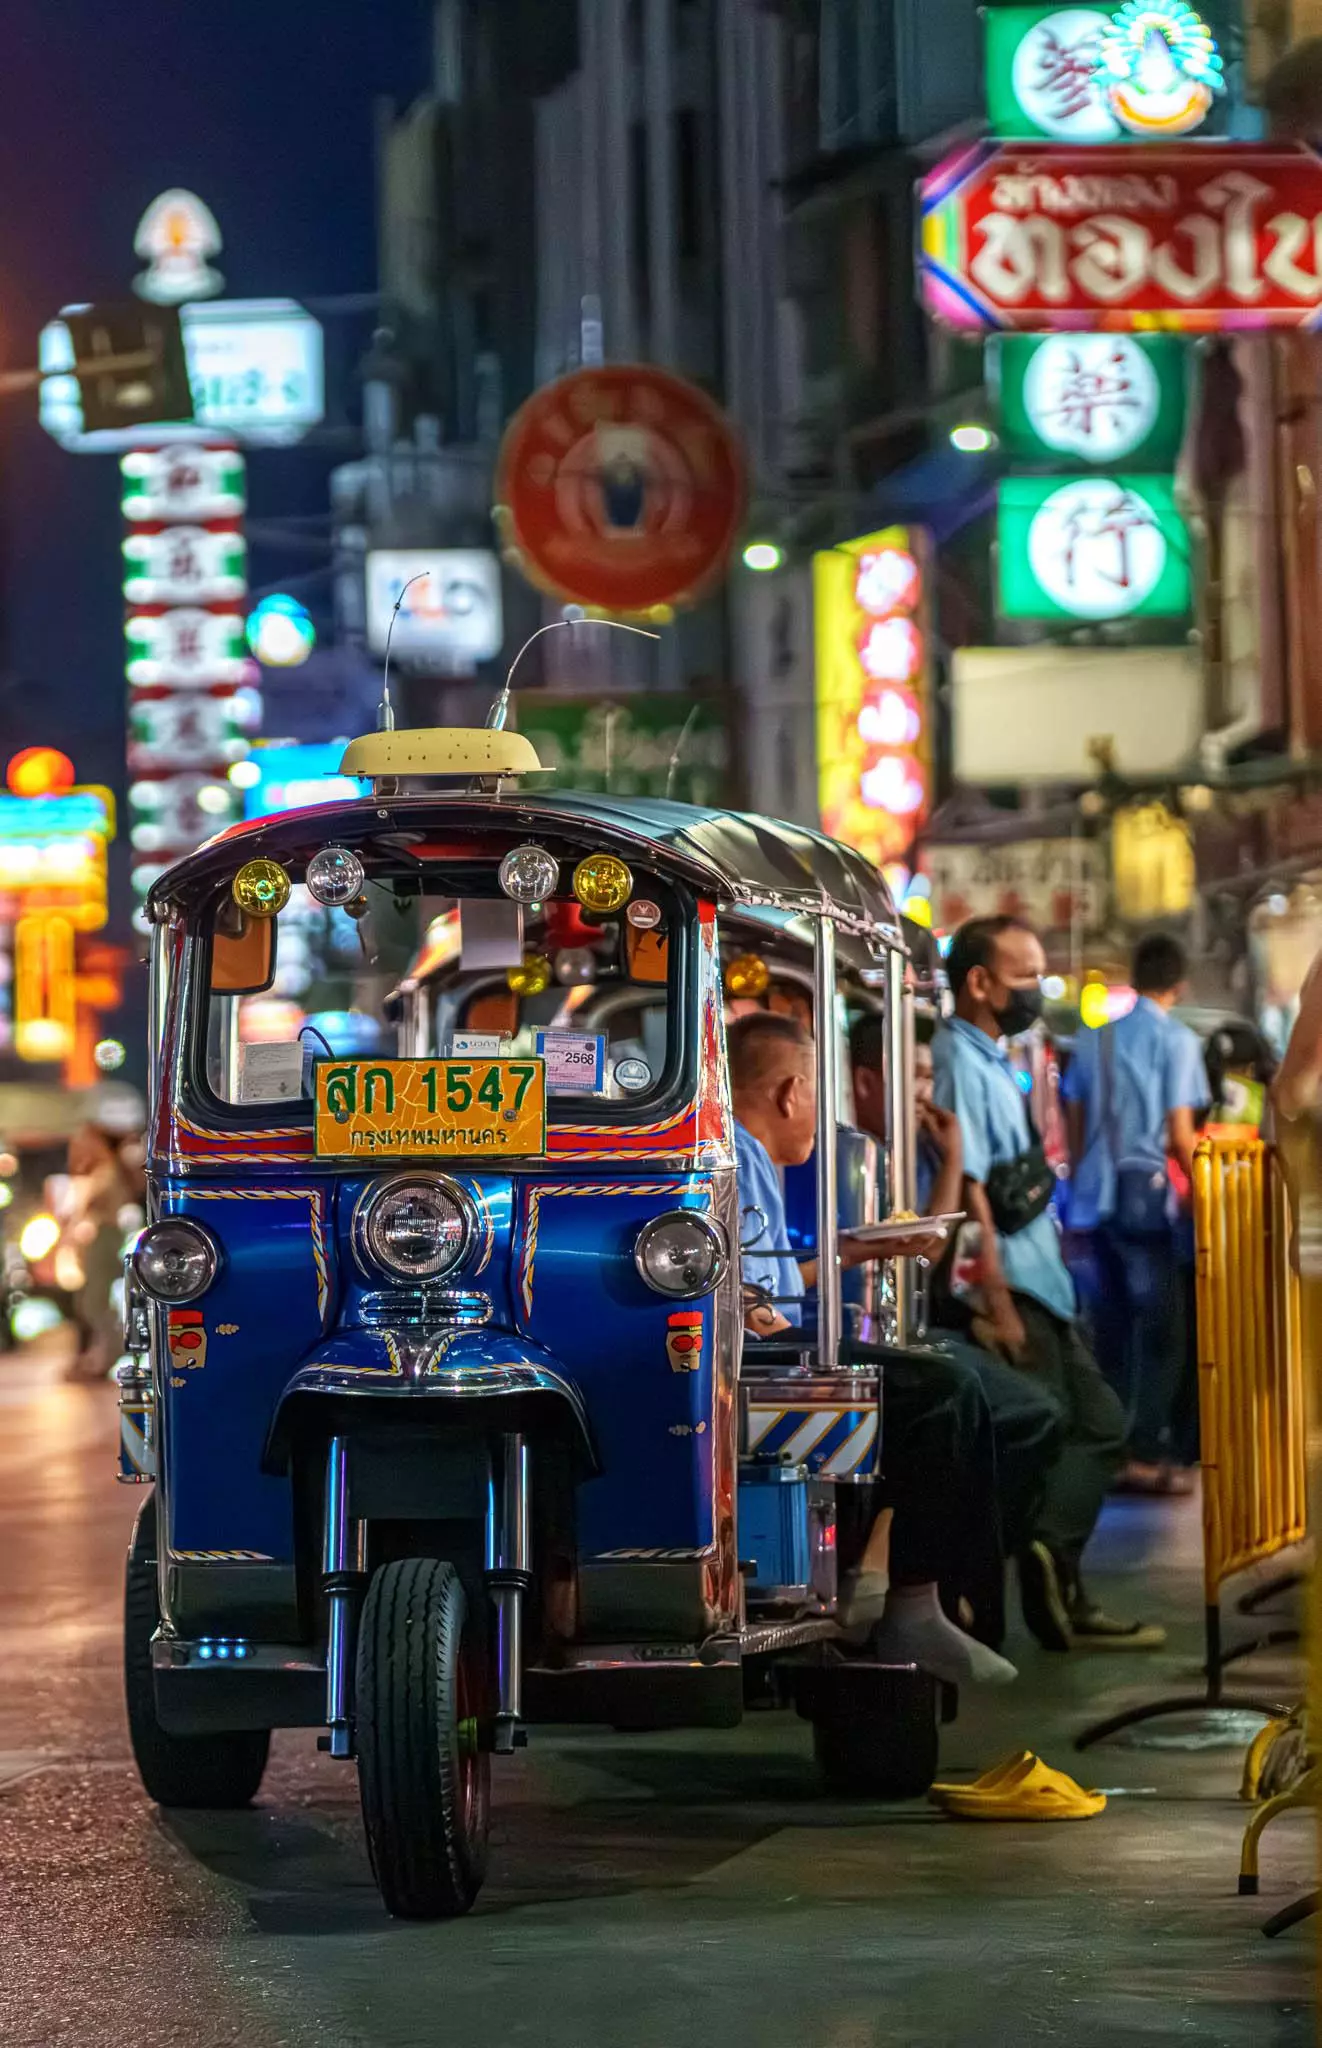
Does High ISO Matter Anymore?
If you have been a photographer for a long time, you would remember having the fear of shooting at high iso values. There was a time when shooting at high iso meant the resulting images were mostly useless with unwanted artefacts and no amount of noise reduction during post-processing helped. Recent or modern cameras come with powerful sensors that handle high iso very well along with powerful Denoise tools that most post-processing software provide. Read to find more about high iso and if it matters anymore.
Further Reading
- 3 Free Guides That Will Help You Get the Hang of Exposure in Photography
- Check Out These Interesting And Useful Rules In Photography
- How to Get Great Photo Effects With Camera Shutter Speed
- These 3 Ways Of Checking Exposure Are More Trustworthy Than The LCD
- 7 Things You Need to Think About Before Pressing the Shutter


