Many of us know and understand the benefits of shooting raw files. Chief amongst them are the ability to set white balance in post production and the possibility of extracting more exposure data from an image. Typically this might be pulling back blown highlights or expanding dynamic range.
Whilst there are numerous different post production apps, the tools we use to work on raws are levels or curves. There is, however, a very powerful Photoshop tool that can be used to extract more dynamic range from a single RAW file. That tool is the Luminosity Mask and today we are going to look at how to use it.
Stage One – Adobe RAW
In this brief guide we will take you through processing a single image to extract more dynamic range from it. We will start in Adobe RAW as this is where we will work on our reference image.
Luminosity masks allow us to extract highlight and shadow detail and combine them to improve the dynamic range. Because we have control over what we extract, the edited images generally look much better than HDR images created with multiple RAWS.
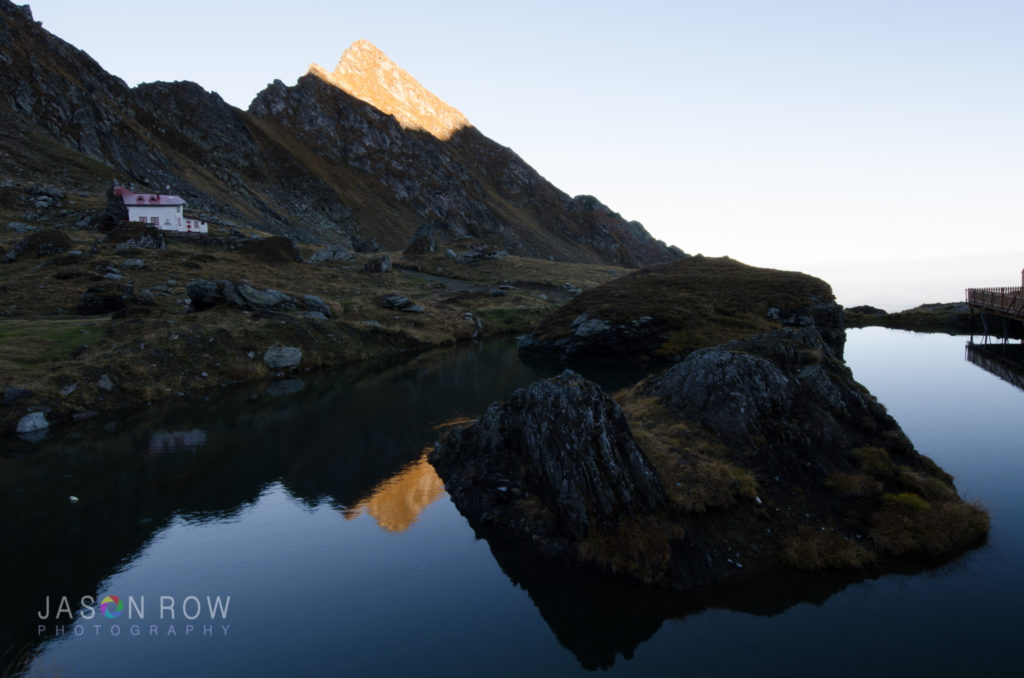
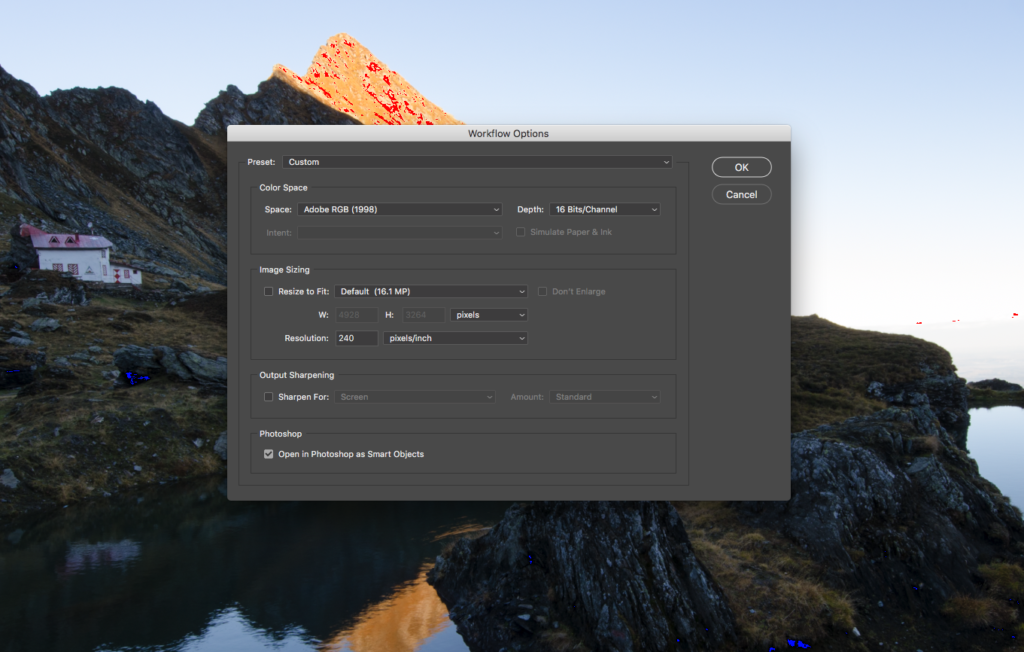
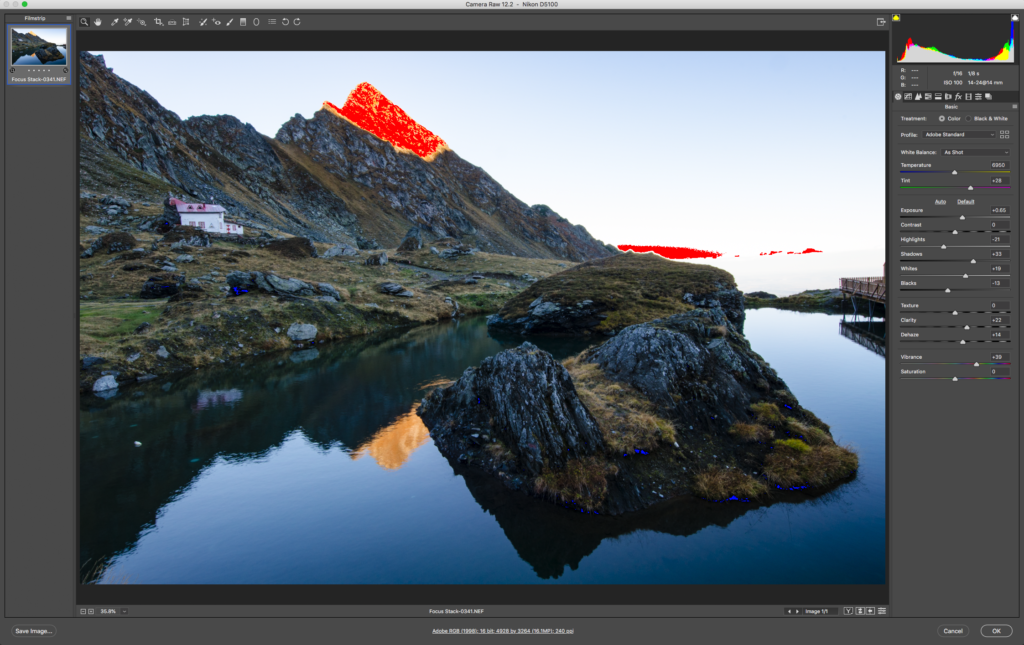
This is the image that we are going to work on. It is currently open in Adobe Raw. Before we do anything to it, we are going to click on the information bar at the bottom. Make sure that the Color Space is set to Adobe RGB. Set the Channel depth to 16bit – this will allow us to access the full range of the RAW file. At the bottom make sure Open in Photoshop as Smart Object is checked. This is important as it allows us to re-edit in Adobe Raw once the image is in Photoshop.
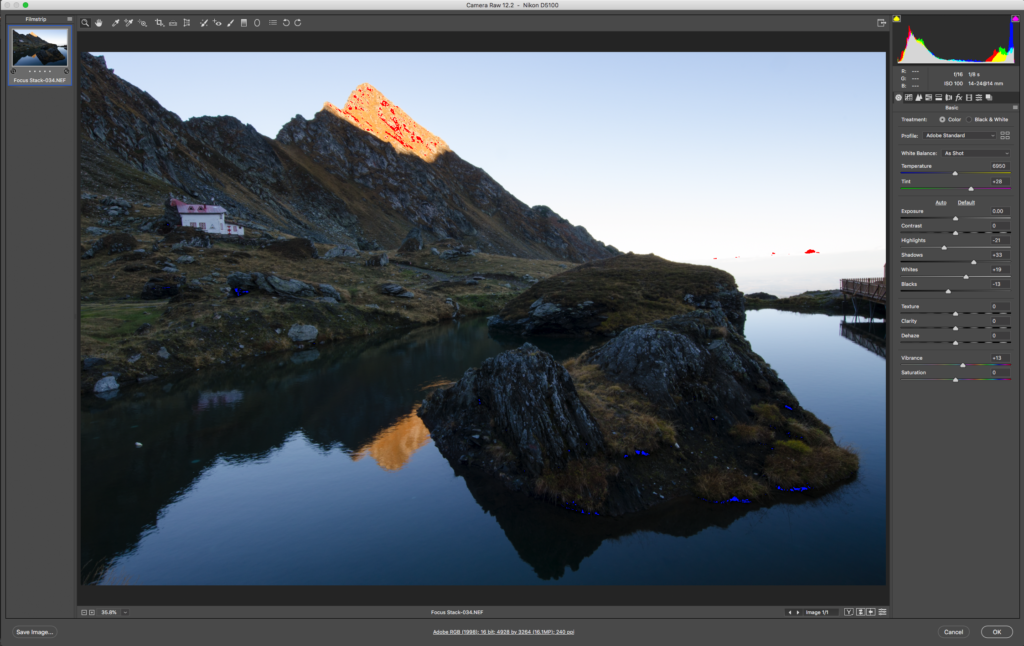
As this is the base image, we need to get it looking as good as possible without pushing the histogram beyond the limits.
This image has a lot of very light highlights and some significant dark areas. It is very contrasty. To get the best out of it, I have moved the Blacks and Whites sliders to the limit of the Histogram. I have lifted the Shadows and reduced the Highlights. I also added a touch of clarity. Clicking on OK will now open this in Photoshop.
Stage Two – Creating Multiple Exposures
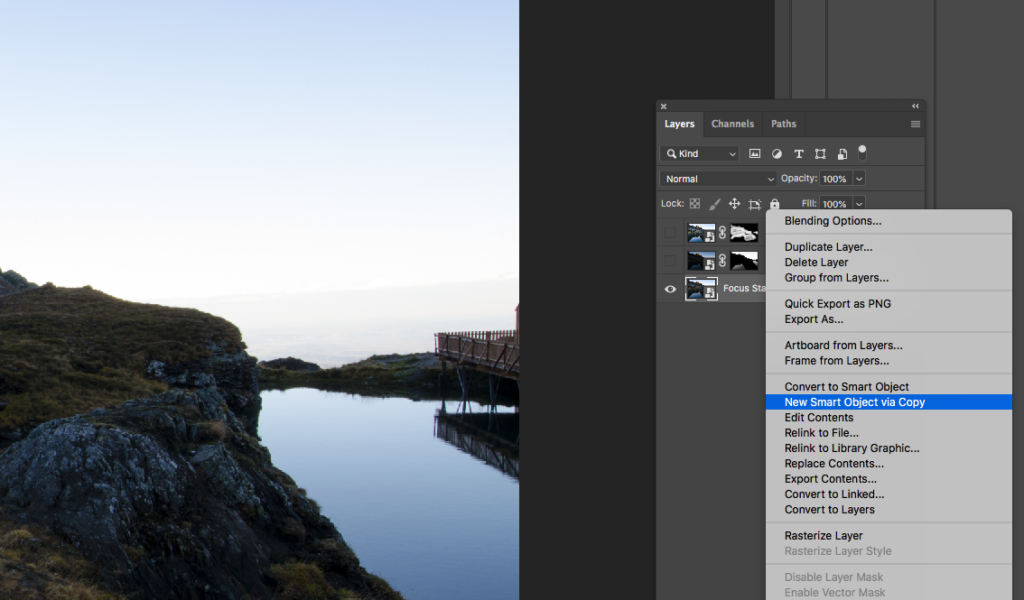
The key to improving the dynamic range of this image is to have multiple versions of it at different exposures. For this example we will have three versions. The current, default version, a dark version and a light version. As we opened the image as a Smart Object we now need to duplicate it twice, as a Smart Object.
To do this right click on the image in the layers palette. Select New Smart Object Via Copy. Rename that Smart Object to Shadow Layer. This can be done by double clicking the existing name. Now repeat the New Smart Object Via Copy. Name the third layer Highlight Layer.
Now double click on the thumbnail for the Highlight Layer and you will see that it opens in Adobe Raw. We are going to use the Highlight Layer to recover the image highlights. For this reason we need to make the image darker. In this case I have reduced the exposure by about -1.5. This brings definition back to the sky and the mountain top. Click OK.
Now double click on the Shadow Layer thumbnail to open it in Adobe RAW. With this layer we are going to recover the shadows. I do this by increasing the shadows by +1. Click OK to return to Photoshop.
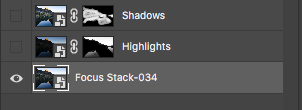
Stage Three – Creating The Luminosity Masks
Select the Highlight Layer in the Layers Palette. At the bottom, click on the Add Layer Mask icon. You will see a new thumbnail appear next to our Highlight Layer thumbnail. Select this new Layer Mask thumbnail then from the top menu select Edit – Fill. Make sure that Contents is set to Black and click OK.
You will immediately see that our Highlight’s layer disappears. This is because we have masked it with black, concealing it. Now we are going to return just the highlights areas.
To do this, make sure you select the base image in the layers – not the shadow or highlights. Click on the Channels tab next to the Layers Tab. Now CMD or CTRL click on the RGB layer. This automatically selects all the highlight areas. Return to the Layers tab and select the Highlight Layer Layer mask.
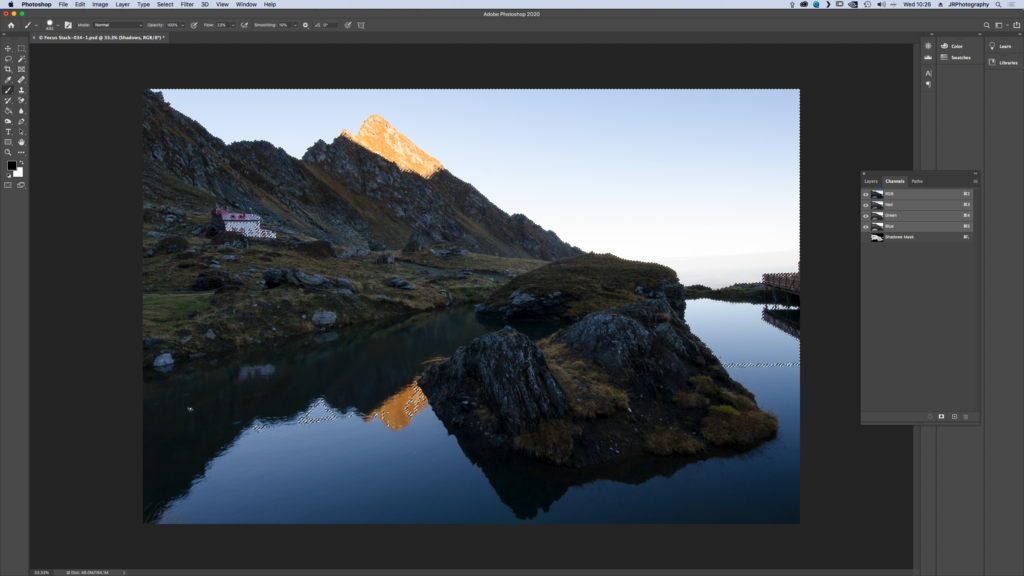
Stage Four – Brushing in the Edits
Now select a large soft edge brush. Around 800 to 1200 pixels is fine. Set a low flow rate of around 20% and start to paint white over the highlight areas in the image. You will start to reveal the detail we regained in that particular version of the RAW. Paint until you are happy with the highlights you have recovered.
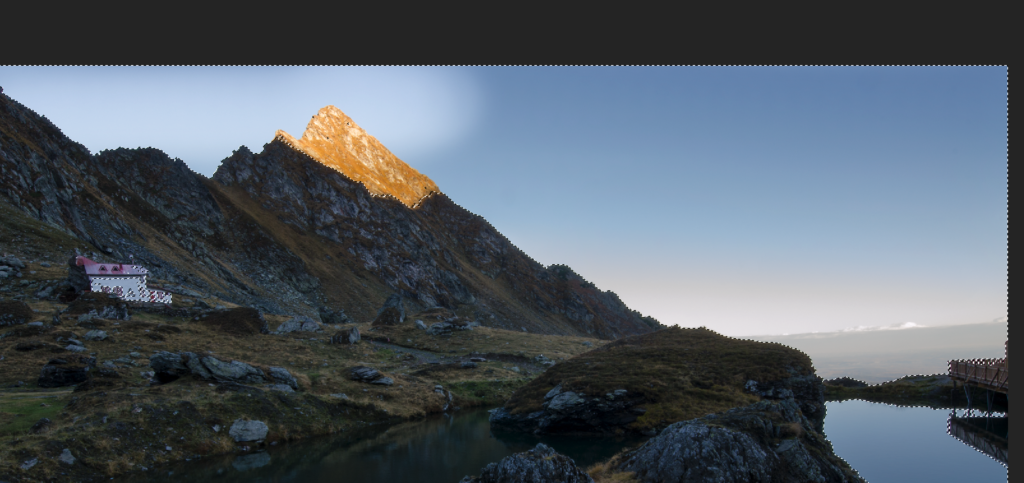
Next we will repeat this for the Shadow Layer. With Shadow Layer selected click on the Add Layer Mask icon. Select the Layer Mask Thumbnail and from the top menu select Edit – Fill. Make sure that Contents is set to Black and click OK.
Deselect the Highlight and Shadow Layers. Select the base, reference layer and return to the Channels tab. CMD or CTRL click on the RGB Channel. Again this has selected all the highlight areas. Now click on the Shadow Layer Mask Thumbnail. From the top menu, click Select – Inverse. This will change our selection from the highlights to the shadow regions.
Again pick a large soft brush and with white selected paint over the shadow areas that you wish to lighten. To see the improvement you have made to the image, deselect the Highlight and Shadow layers.
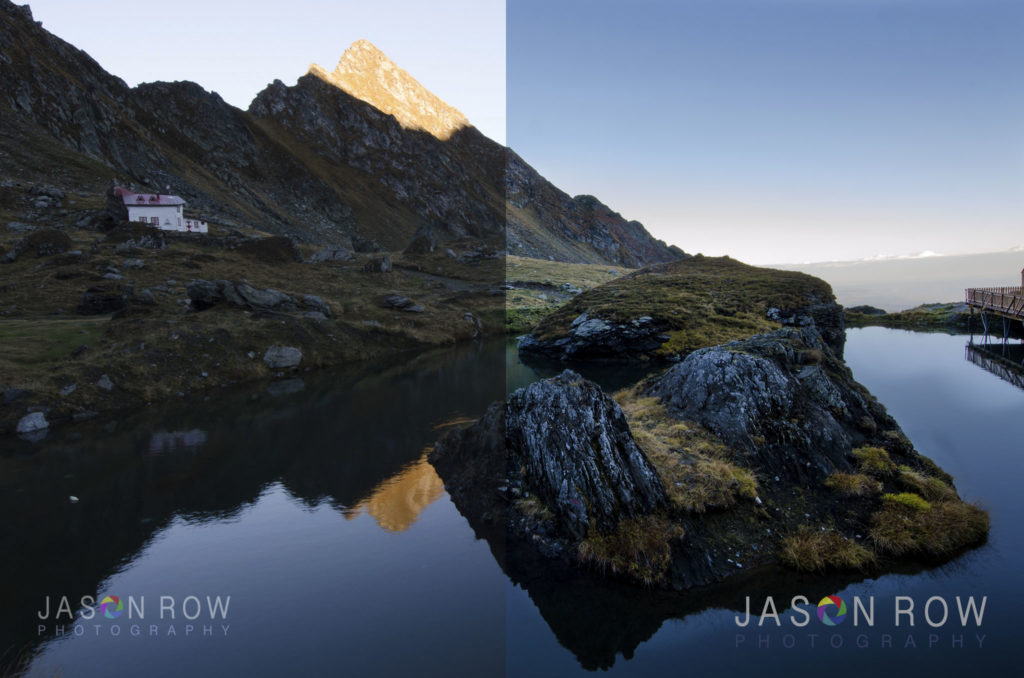
The real power of Luminosity and Layer masks is that you can combine them to manipulate very specific parts of an image. Not just for exposure but for colour, vibrance, clarity or many other edits.
For example let’s say I wanted to make the sky more blue in this particular image. I would duplicate the Highlights Smart Object. Open it up in Adobe Raw and change the colour balance to a more blue temperature. Refill the Layer Mask with black then paint over the sky areas that I wanted more blue. If I felt it was too blue, I could just re-edit that version of the RAW.
You can create very dark or very light versions and then create Luminosity layers to work just on those areas.
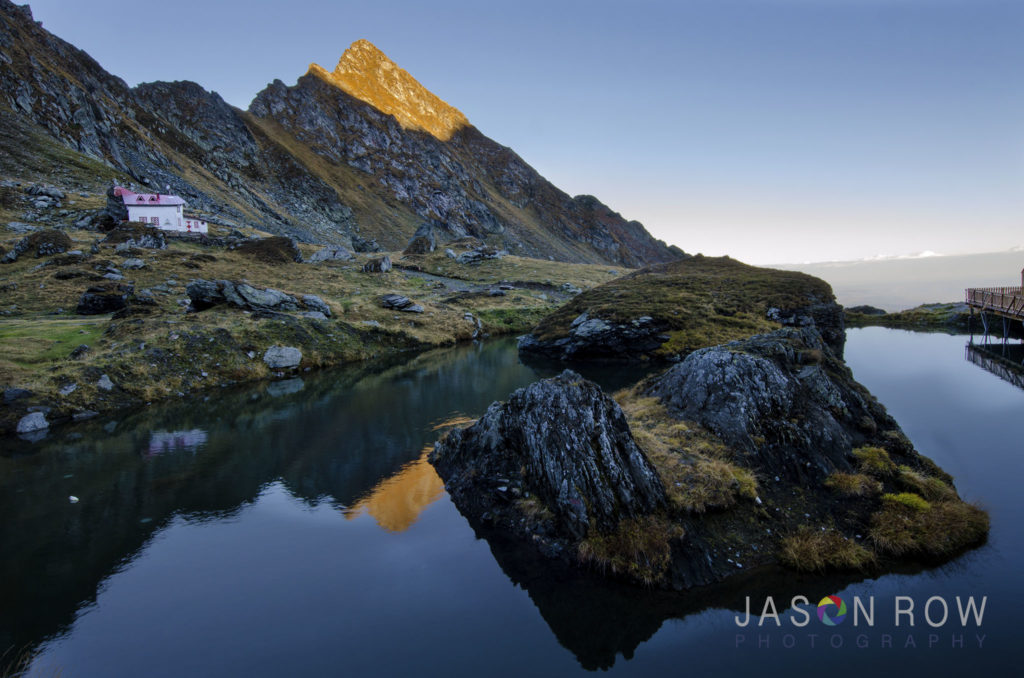
In this article we have really only touched on the power of Photoshops' Luminosity mask. With time and practice you can recover and improve a vast range of detail in virtually any RAW file.
If you are the type of person that prefers a visual guide, we have created a tutorial video to accompany this article.


2 Comments
Foreground rocks and water great, sky okay, bright mountain a touch too light, the triangle of rock looks like a bad HDR and unreal. To each his own but not for me, sorry Jason
I usually do my editing in LR and rarely open PS. I have seen articles before about luminosity masks but havent followed up. Once I can get out and do some more landscapes I’ll have to try luminosity masks in PS.
Thanks Jason for all your articles!