Have you noticed slight blurriness in your images, even after using the right settings and focussing accurately on your subject? This may be because the lens focused slightly to the front or back of the subject, which led to an error in accurate focus. Most of the time photographers are not sure how to avoid or correct this issue, but this error can be corrected using a process called autofocus micro adjustment. In this article, we will take into consideration Canon cameras and discuss how to perform autofocus micro adjustments on them.
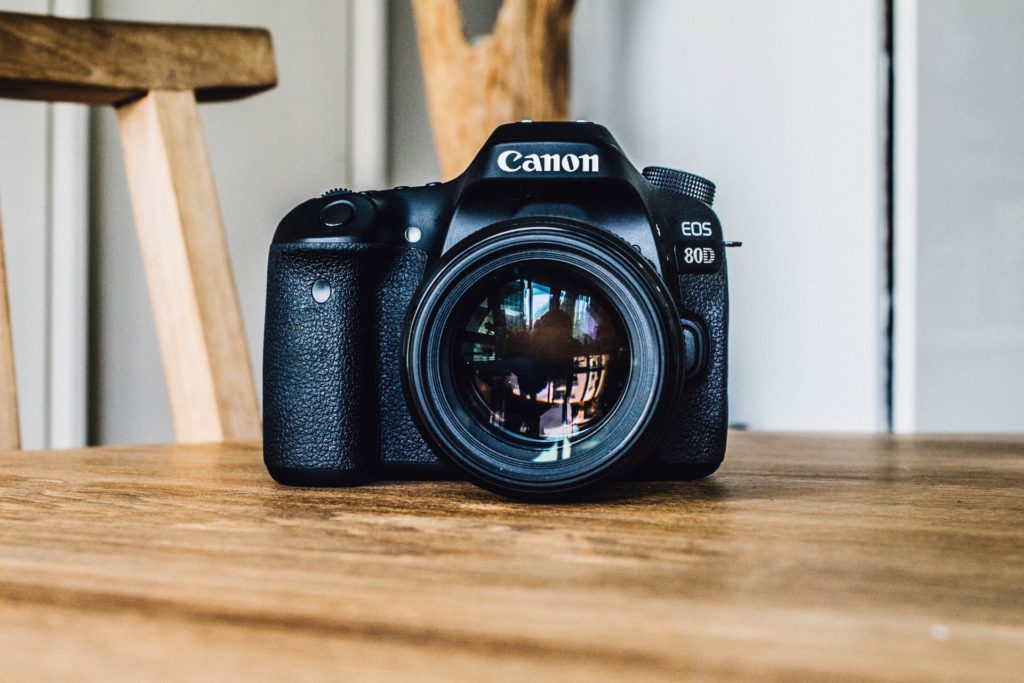
Note: In this article we are looking at making AutoFocus Microadjustments on a DSLR and not on a mirrorless camera.
What Is Autofocus Microadjustment?
Autofocus microadjustment is a feature in the camera that helps you correct focusing errors like front focusing or back focusing. It allows you to make fine adjustments to the focus systems in your camera for particular lens combinations, which is basically calibrating the camera for a particular lens, so that you get the focus sharp. Autofocus issues can be either on your camera or lens and hence the adjustment should be made for each camera-lens combination.
Why Is Autofocus Microadjustment Important?
Autofocus microadjustment is important because if there is a problem with the calibration of either the lens or the camera, then your images will not turn our exceptionally sharp.
Focus issues are a great problem with newer cameras because as the sensor resolution increases, the errors in autofocus become more evident. Also, photographers are used to viewing images at 100% especially if they need to print them large, and doing so will reveal the focusing issues in the image.
Photographers who shoot using narrow aperture values may not worry too much about micro adjustments because the depth of field is large and so these errors do not show up – for example, architecture, landscape photography. But when it comes to genres like portrait, wildlife, macro, etc., the issue gets worse because photographers like to open up the aperture, for example wider than f/2.8 which makes the depth of field very shallow.
So, if the lens focuses slightly behind (back focus) or in front of the subject (front focus), it will render the subject looking soft or out of focus. Making autofocus microadjustments is therefore an important task when you buy new lenses and cameras. It can help rectify autofocus problems.

When Should You Perform Autofocus Microadjustment?
Before making autofocus microadjustments make sure that you have tried the following because you may otherwise be making adjustments to a lens that is performing well and does not have any autofocus issues.
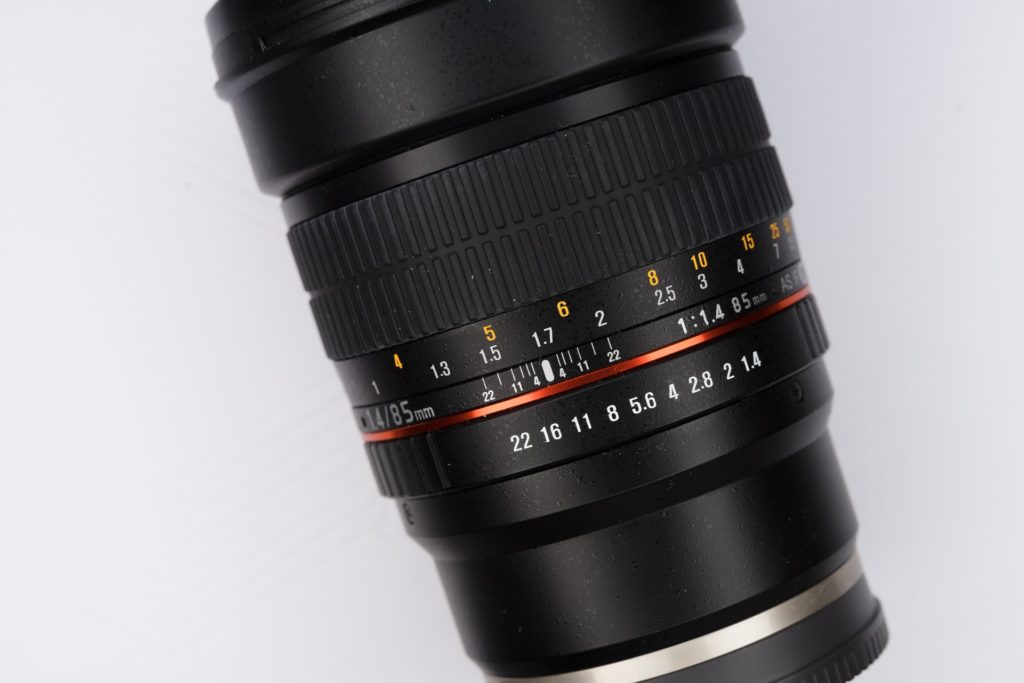
Read the following information carefully before starting with autofocus microadjustment:
- If you are a beginner and just getting into photography, make sure you learn the techniques, gain experience and in the long run if you are sure that there is a problem with the camera and/or lens, then look into making autofocus microadjustments.
- Check that you are shooting at the right shutter speed and that the blur or out of focus issue is not caused as a result of slow shutter speed.
- Make sure you are using the correct focusing modes for each scenario and type of photography. Without this you may be focusing wrong and trying to micro adjust as a result of that.
Here Is A Quick Test You Can Perform:
This is a quick test to check if your camera-lens setup may have autofocus issues. You can perform this as a quick preliminary test before going into the whole set up.
- Put the camera on a stable tripod and switch off image stabilisation.
- Put the camera on live view and position the camera and subject in a way that the subject is in the middle of the screen. Switch the AF point selector to “Single point” and place it in the centre of the screen.
- Maintain a distance of about 25 to 50 x focal length between the subject and the camera.
- Have the lens at the widest aperture value. Choose an iso and shutter speed and focus tack sharp on your subject.
- Once done, switch from live view to viewfinder shooting and choose “One shot” AF.
- Now press the shutter button half way through while keeping an eye on the focus ring to see if the ring rotates either way when focusing on your subject. If your focus ring rotates and moves to a different position to focus again, then it means it is focusing away from the intended point and requires micro adjustment.
Here Is What You Need To Know Before Performing Autofocus Microadjustment:
Autofocus performance of a camera, lens or camera-lens combination may vary due to shooting conditions, harsh treatments and at various focal lengths on a zoom lens. So, performing autofocus microadjustments does not mean that the camera and lens will perform a 100% perfect focus. In situations where this happens, you will need to send your equipment to the camera manufacturer.
Also, autofocus microadjustment occurs within the camera body and not the lens and you also need to know that focusing systems are not always 100% perfect.
When it comes to focusing methods, DSLRs have two types of autofocus methods that employs two systems of AF:
- Phase detection AF – Active when using the optical view finder. This focusing system uses another AF sensor or focusing array that is built underneath the mirror set up. As a result of this, there are chances for focus issues if there is a slight misalignment between the focusing systems. This system is fast, but not always very accurate.
- Contrast detection AF – Active when using the live-view. This system uses focusing points built into the sensor. So if images are in focus during live view, you will get exactly the same results you see on the screen and this method is slower compared to phase detection AF.
The two methods work differently which we are not going to in-depth at the moment. So when you are doing autofocus microadjustments, it has to be done for the optical view finder only as focus errors appear when focusing by looking through the view finder.
Can You Make Autofocus Microadjustments On All Canon Cameras?
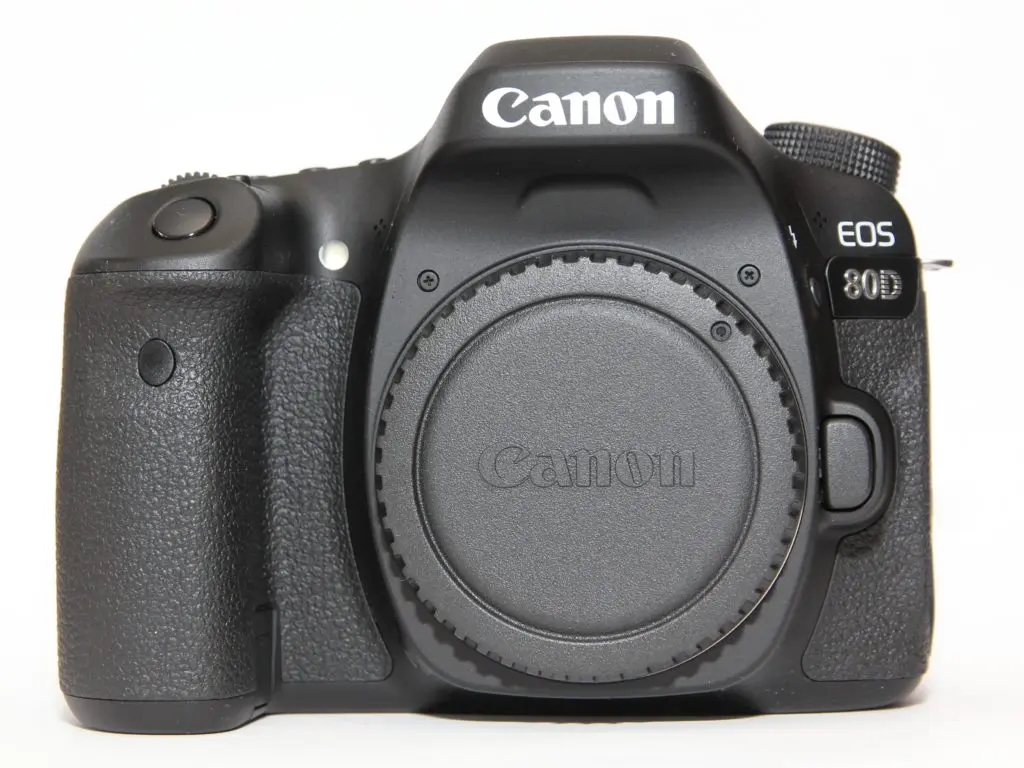
Unfortunately no. There are only a select number of cameras that offer this feature. Here are some of them:
- EOS 50D
- EOS 70D
- EOS 80D
- EOS 7D
- EOS 7D Mark II
- EOS 6D
- EOS 5D Mark II
- EOS 5D Mark III
- EOS 5DS
- EOS 5DS R
- EOS-1D Mark III
- EOS-1Ds Mark III
- EOS-1D Mark IV
- EOS-1D X
- EOS-1D X Mark II
How is Autofocus Microadjustment Done?
There are a few ways in which autofocus microadjustments can be done one of them being physical calibration that involves disassembling of lenses for the micro adjustment process. This should not be done at home and should be done only by the manufacturer. Moreover making any changes to your lens physically can cause irrevocable damage to the lens and will void the warranty on it.
Besides the physical adjustment, autofocus microadjustments can be made in the camera for various lens combinations and this is what we will be looking at in this article. There are quite a few methods that you can try.
Types of Autofocus Microadjustment:
There 2 types of autofocus microadjustments that you can do:
- Adjust by lens: This option is available for specific cameras only and in this type of adjustment, you can enter information individually for quite a few lenses, that can be stored in the camera. This way, when you mount a specific lens, the stored autofocus adjustment setting for that particular lens will be automatically applied for autofocus. There are also options in some cameras where different values can be stored for the same lens – for example zoom lenses can have values stored for their wide and long focal lengths.
- All by same amount: In this type of adjustment, a common adjustment is made in the camera irrespective of the lens used. If the camera back-focuses, adjustments are made to make it focus slightly to the front and if the camera front-focuses, adjustments are made for it to slightly focus at the back. So each time you use a camera-lens combination, irrespective of the lens used, the camera makes adjustments depending on the autofocus microadjustment value.
How Does Autofocus Microadjustment Work?
Autofocus microadjustment works by applying the adjustment value you have set in the camera or for a particular lens each time you focus on your subject. This way the subject is focused correctly if you made the adjustments accurately.
What Do You Need To Perform Autofocus Microadjustment?
- A DSLR
- One or more lenses
- A tripod
- A cable or remote release
- A vertically flat surface depending on the method you will follow.
- Printed focus test chart – you can get one here or you can use any printed material from newspapers or magazines with text that have high contrast (preferably large black and white text)
The Autofocus Microadjustment Process:
When performing autofocus microadjustment, you need to carefully follow certain steps and patiently take care of every detail in the process. You need to:
- Prepare the camera and lens set up for the process
- Shoot images for the micro adjustment process
- Finally make the adjustments.
1. Preparing For Autofocus Microadjustment:
Here are the initial steps that you need to follow before the exact AF microadjustment process.
- If you are a photographer who mostly shoots outdoors, then do the test outdoors or if you have an indoor studio where you do most of your photo shoots, then perform the process indoors. Make sure the target or subject is well lit from a direction to avoid reflections.
- You need to choose a rough shooting distance and you do not want to be within the minimum focusing distance as your lens will not focus. The camera will need to be at a distance of somewhere between 25 to 50 times the focal length of your lens although 5 to 50 times the focal length is ok too. Going too far away from your subject will make the depth of field deeper making it difficult for you to check focus accuracy. If you are not sure about the distance between camera and subject that you most often shoot, Canon recommends staying between 25 to 50 times the focal length of the lens.
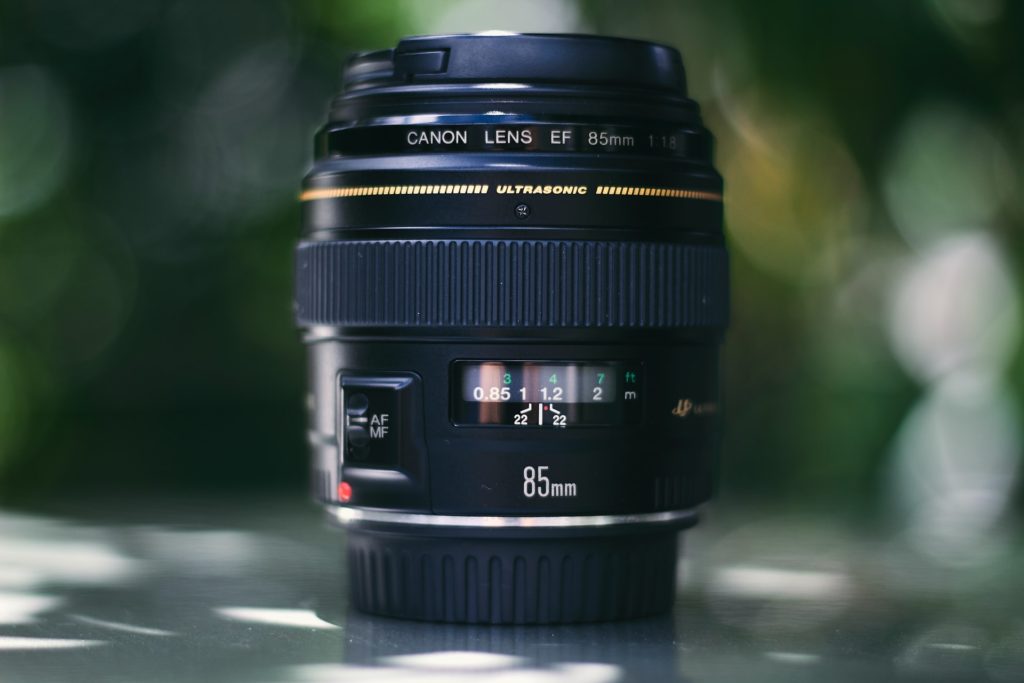
- For example if you are shooting portraits with an 85mm lens, you may move back and forth for different types of shots, but choose a camera subject distance that you most often use as this will help with making precise AF microadjustments. If you are unsure of this distance, multiply the focal length of the lens by 50 and use that as the shooting distance. In our case here, 85mm x 50 = 4250mm = 4.25 metres.
- You now need to choose a subject to shoot. This should be a page with a bit larger text or illustrations in black and white so it has high contrast, for example newspapers, magazine papers or something similar. You need to mount this on a perfectly flat surface so it can be kept in a straight upright position. This could be on a wooden frame or flat on a vertical wall.
- Mount the camera along with the desired lens on a tripod and turn off image stabilisation on both camera and lens. Adjust the height of the camera so that the subject and the camera are at the same height and at right angles (lens perpendicular to the subject) to each other. This is because you need to shoot flat and straight on to the subject at 90 degrees. So shooting on a tripod is recommended than doing it handheld.
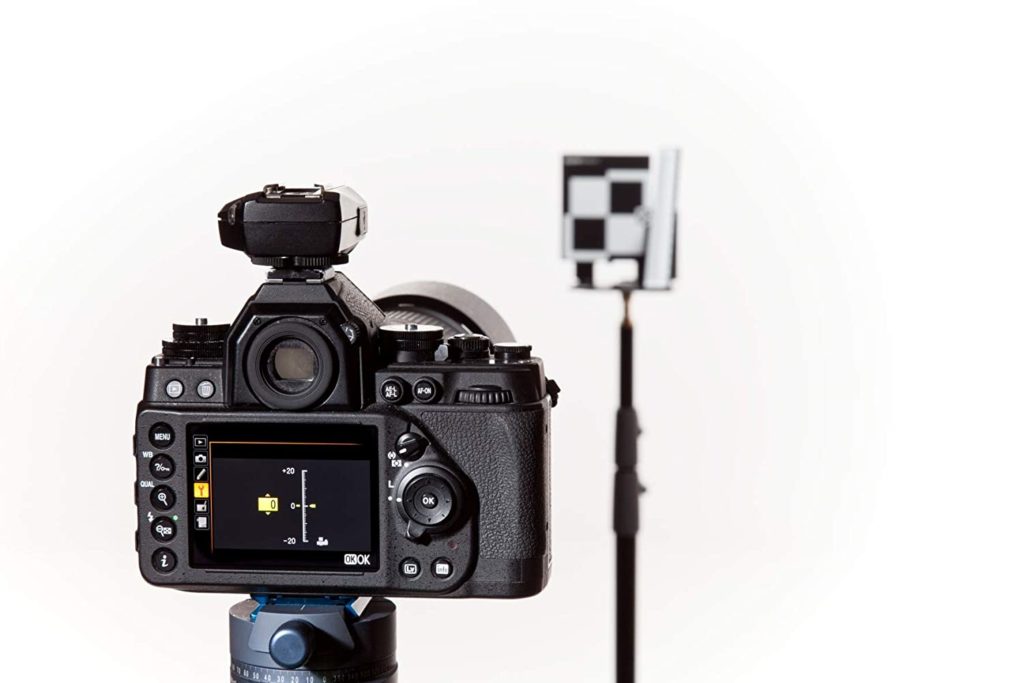
- Use the mirror lockup feature and a cable or remote release to avoid camera shake. If you do not have a shutter release, use the timer delay feature in the camera.
- Now photograph your subject and verify for focus and sharpness at 100% on a large screen.
2. Camera Settings For Autofocus Microadjustment:
With camera settings for the autofocus microadjustment process, you will need to go by the normal settings that you usually or more often use. Here are the camera settings you need to set:
- Set your camera to Aperture Priority (Av) mode. You can also use manual mode.
- Set the aperture value to the widest opening. For example if the widest aperture for your lens is f/2.8, set it to f/2.8. This way, very slight shift in focus can be observed. Some lenses are not the sharpest at their widest aperture values and so you can slightly narrow the aperture down to say f/4 and then at f/5.6 and repeat the process for the adjustment test and compare the results.
- When it comes to iso, dial in the value you normally use for the type of photography that you do often.
- Check the light meter and set the shutter speed. Since the camera is on a tripod and the subject is stationery, there will not be any camera shake.
- Set the white balance to the one you usually use often.
- Other than the above, you need to set the focus point to “One shot”, drive mode to single shot, metering mode should be the one you always use.
3. The Shooting Process:
Here are the steps followed for the shooting process that will help you check for autofocus accuracy:
- As discussed in the camera settings section, you need to use single point autofocus. You need to set your autofocus to “One Shot” and select “Manual Select: Spot AF.”
- Manual Select: Spot AF is used for pinpoint focusing over a very narrow area compared with Single-point AF.
- Position your camera in such a way that the subject is right at the centre of the screen.
- Shoot a few test images as the focus tends to vary with atmospheric conditions like haze, heat, etc. You need to autofocus on the subject and make single shots of about 5 to 10 images initially and even more if required, so you can find the average focus point for the camera-lens combination. You can manually defocus the subject after each shot by slightly turning the focus ring, so the lens again makes the autofocus system on your camera to work, making it focus on the subject again before taking the shot. This is a means to test autofocus accuracy in your camera with each shot taken.
- If you are using a zoom lens, perform the above task for both the wider and longer focal lengths. This works only for select models of Canon cameras.
4. Comparing Images For Autofocus Accuracy:
- View the test images large on a computer screen at 100% zoom. If you do not have a computer, you can zoom in and check for accuracy in focusing on the camera's rear LCD screen, but that will not give very accurate results.
- When you check for focus in the images, if the photos are slightly out of focus, you will not be able to say whether it is front-focus or back-focus. A very easy method that Canon recommends to check for focus variations is to install Digital Photo Professional, open the images in that application and play them at 100% magnification.
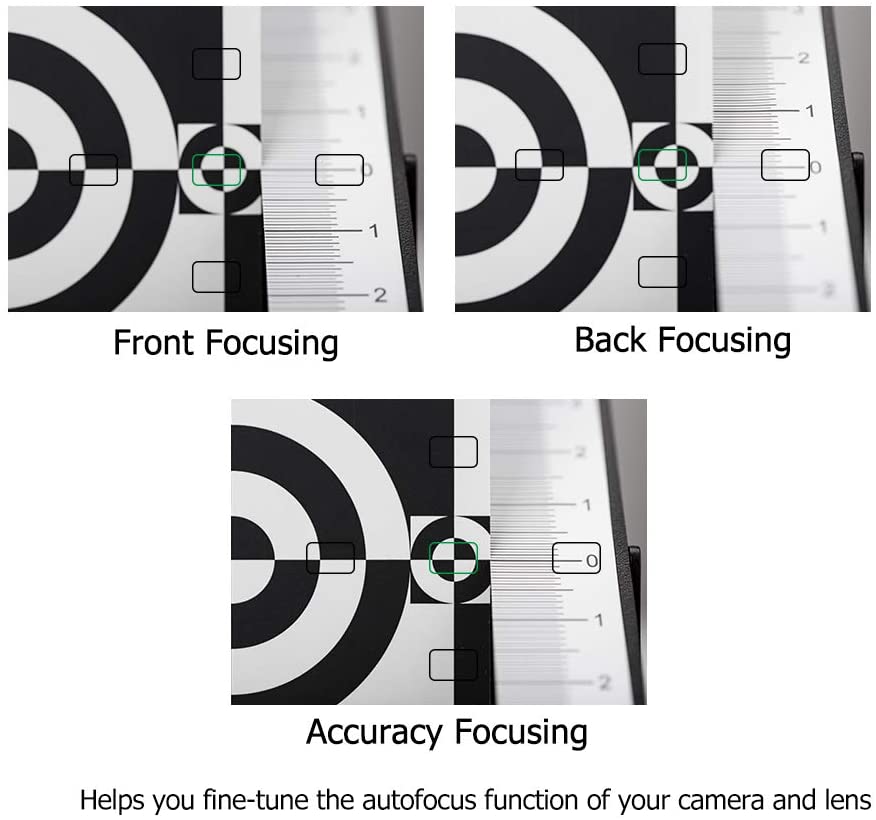
- If a majority of the images have the point of focus slightly to the front of the targeted point of focus (front-focus), then your camera has a tendency to front-focus and it needs to be adjusted to focus slightly to the back.
- If a majority of the images have the point of focus slightly to the back of the targeted point of focus (back-focus), then your camera has a tendency to back-focus and this issue will need to be rectified by adjusting the camera to slightly focus in the front.
- If there are no errors in autofocus, which means the autofocus is accurate in all the test shots, then there is no adjustment required.
Other Shooting Processes:
Since the set up discussed above makes use of a flat subject, unless you are using Digital Photo Professional, it is not possible to tell if the camera actually front or back focuses. To overcome this problem, the suggestion is,
- To use Camera Lens Auto Focus Calibration Alignment Test Charts that you can purchase online or
- To mount the subject at an angle of 45 degrees to the camera.
Shooting Using Alignment Test Charts:
You need to follow all the preparations and setup steps in sections 1 and 2 above. Instead of the subject that we used there – a newspaper or magazine, we are using the lens calibration tool here as the subject. One such tool is the Datacolor SpyderLENSCAL or JJC Auto Focus Calibration Alignment Test Chart.
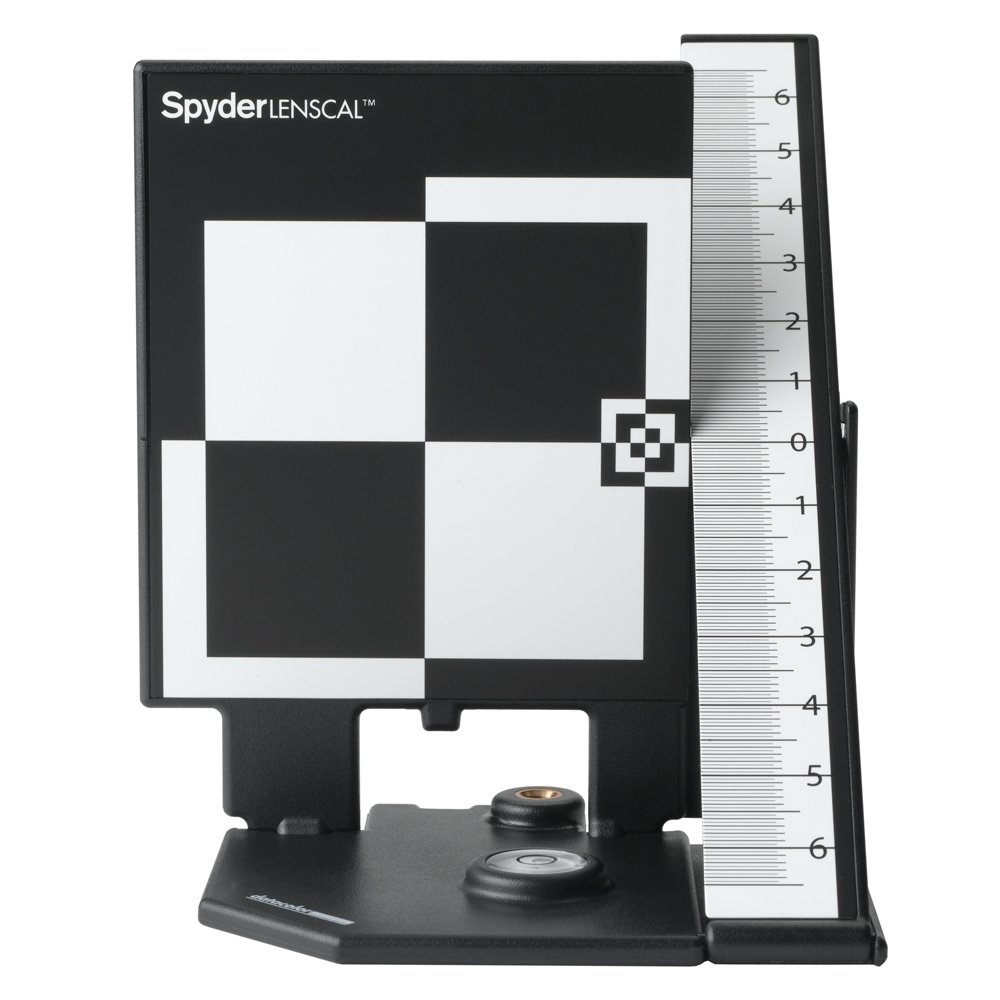
You can recreate the above setup at home using any cardboard boxes with contrast text and a ruler. You could use a cereal box or cardboard box and ruler, text books and ruler or anything similar if you do not want to invest in a tool like the above.
- Mount the test chart on a stand or a tripod.
- Keep the test chart at a distance of 25 to 50 times the focal length and make sure that the chart and the camera sensor are parallel to each other.
- Light the subject properly if you are doing this test indoors.
- Shoot tethered if possible so you can check for accurate focus on a big screen instantly.
- Place the AF point at the centre of the camera and autofocus on the centre of the chart by looking through the viewfinder.
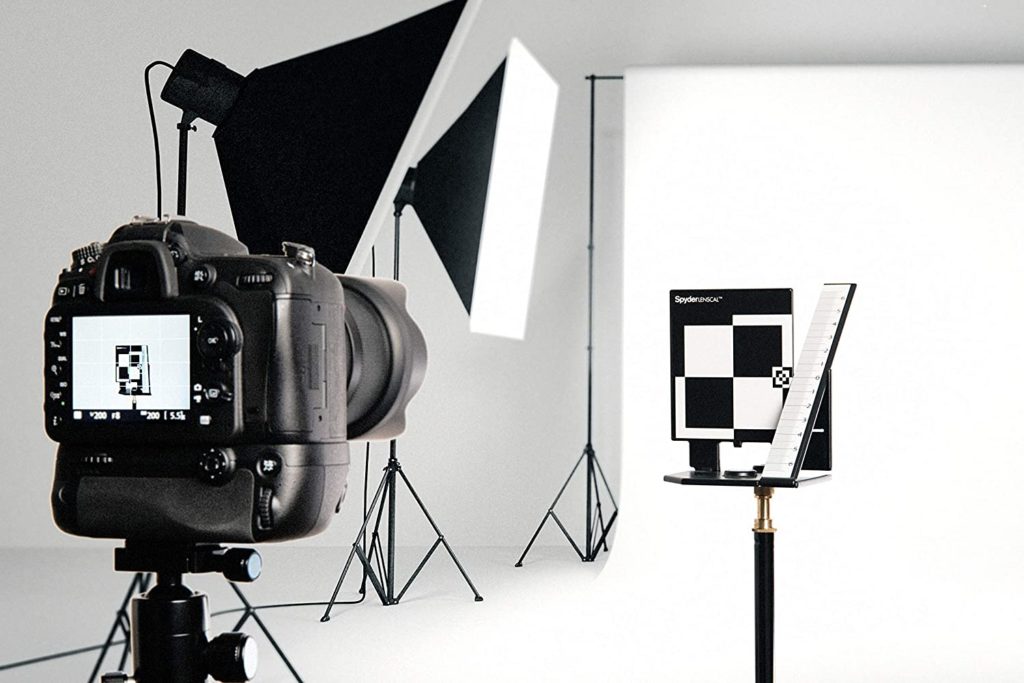
- Take several images, about 10 to 25 and compare the images to see where the focus point is on the majority of the images. This way you can decide if your camera-lens combination front focuses or back focuses. Based on this you can go on to make autofocus microadjustments.
Shooting The Test Chart At An Angle Of 45 Degrees:
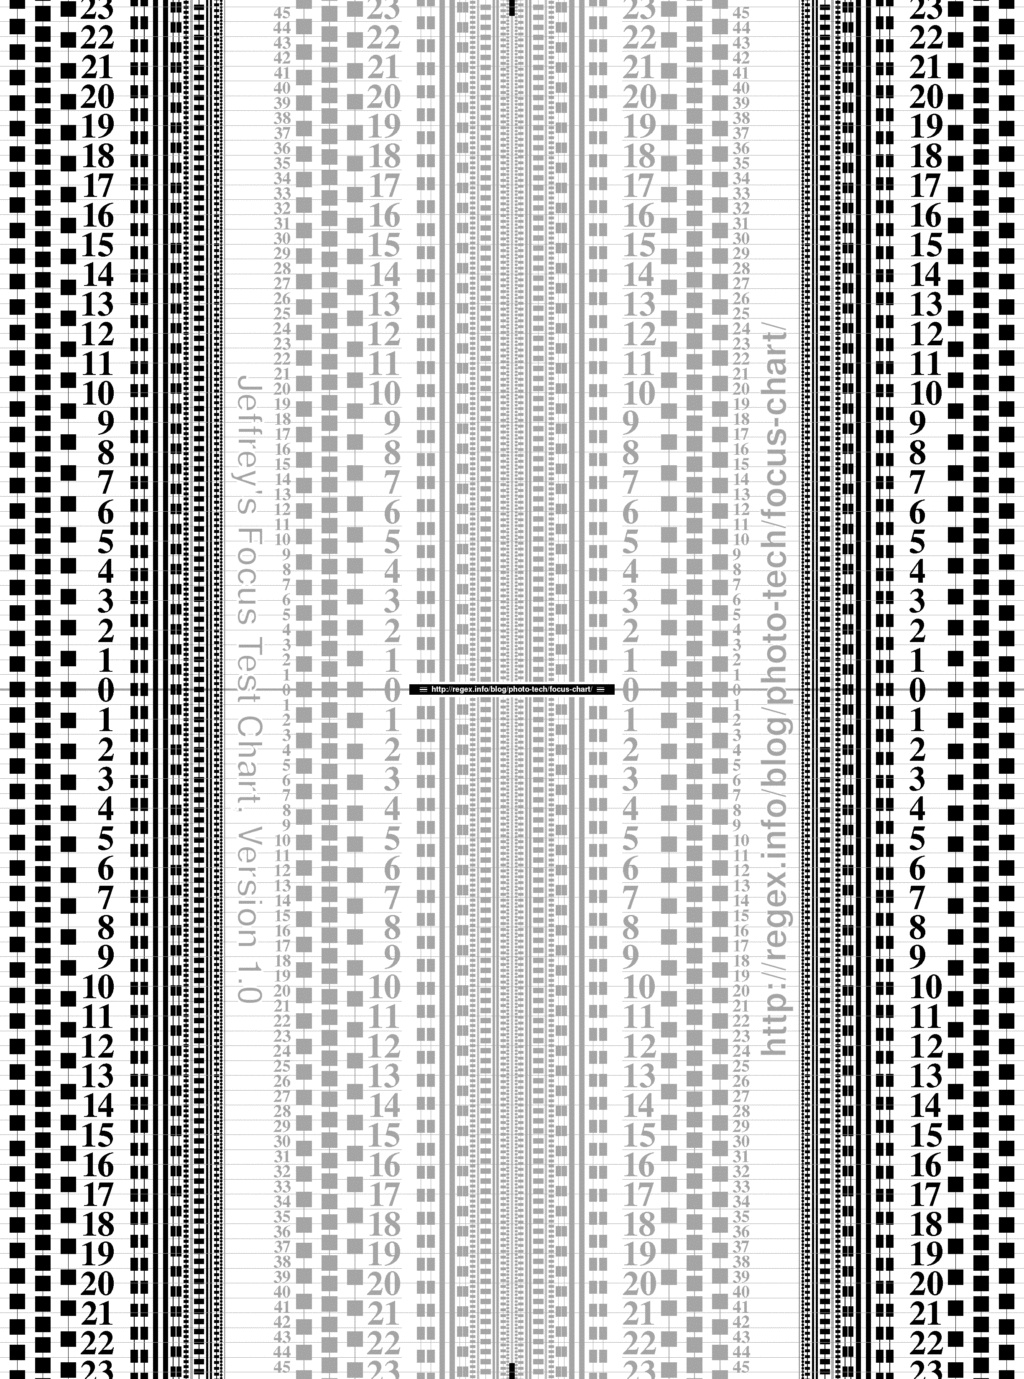
In this method, you can download and print a test chart that is available on this website or the direct link to the chart is here. The high contrast black bar at the centre of the chart can be used as the point to focus on.
You can also buy a cheaper setup that is readymade online, like the DSLRKIT Lens Focus Calibration Tool Alignment Ruler Folding Card.
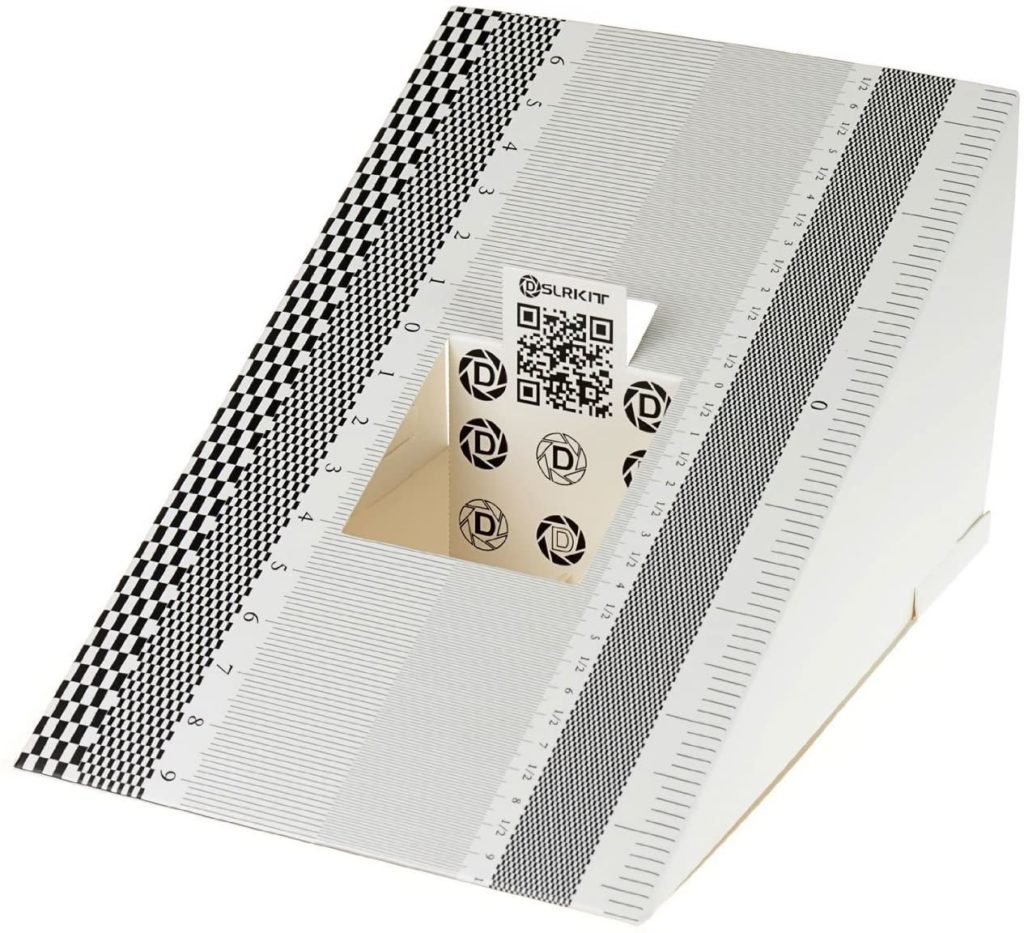
- Mount the chart at an angle of 45 degrees to the camera.
- Keep the test chart at a distance of 25 to 50 times the focal length
- Light the chart properly if you are doing this test indoors.
- Shoot tethered if possible so you can check for accurate focus on a big screen instantly.
- Place the AF point at the centre and align the chart so that the centre of the chart (black bar) is on the AF point. Now autofocus the camera-lens combination by looking through the viewfinder.
- Take several test shots and compare the images to see where the focus is on the majority of the images. This way you can decide if your camera-lens combination front focuses or back focuses.
- The advantage of having the subject or chart at an angle is that the focus issues can be very easily identified as the centre of the chart where the black bar is, will cut through the plane of focus.
Now that you know what type of focus error your camera has, you will need to make adjustments based on the results you get. If your camera or lens does not have any focus errors, you do not need to do anything.
5. Making Autofocus Microadjustment
We saw previously that there are 2 ways in which autofocus microadjustments can be done.
- Adjust by lens
- All by same amount
We will now look at how to make adjustments using both the above methods.
Adjust by lens
- In your camera, enter the C. Fn menu, select “AF Microadjustment” and select “Adjust by lens”
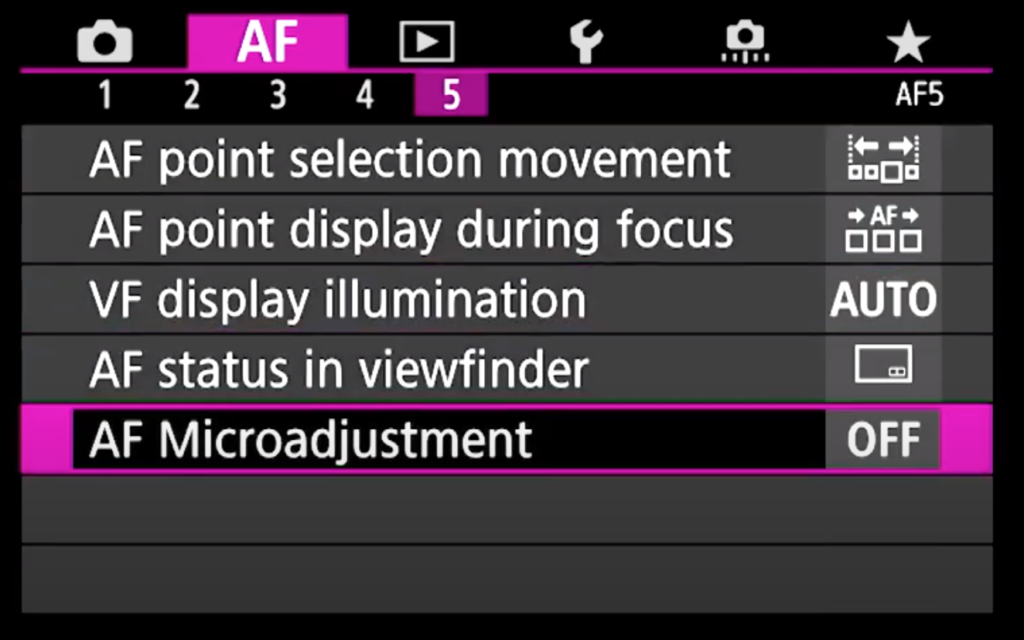
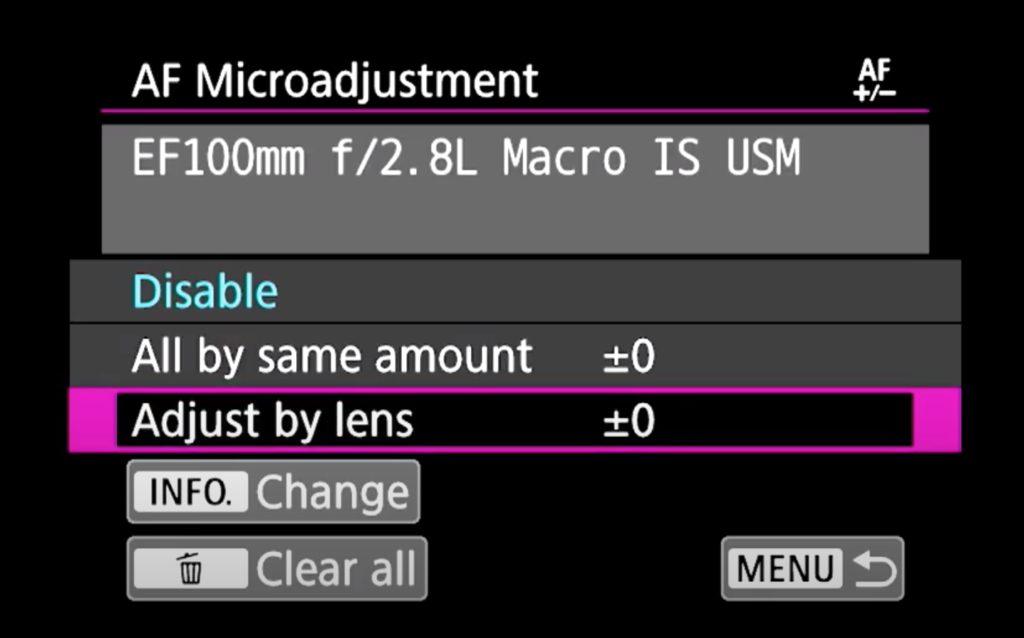
- Press the “INFO” button and confirm that “Adjust by lens” screen is displayed.
- Now when you press the “Q” or “INFO” button, the name of the lens and a 10 digit serial number will be displayed. When the serial number displays on the screen, select “OK”
- If the serial number was not identified or confirmed, you will see a set of 0s in there. Follow the steps below:
- With the help of the “Quick control dial” select the number to be entered in each place and press the “Set” button.
- Repeat this for each digit that needs to be entered.
- Once all the digits are entered, turn the “Quick control dial” and select “OK”. Press the “Set” button.
- Now make the autofocus microadjustments. The process is slightly different for a prime lens and a zoom lens.
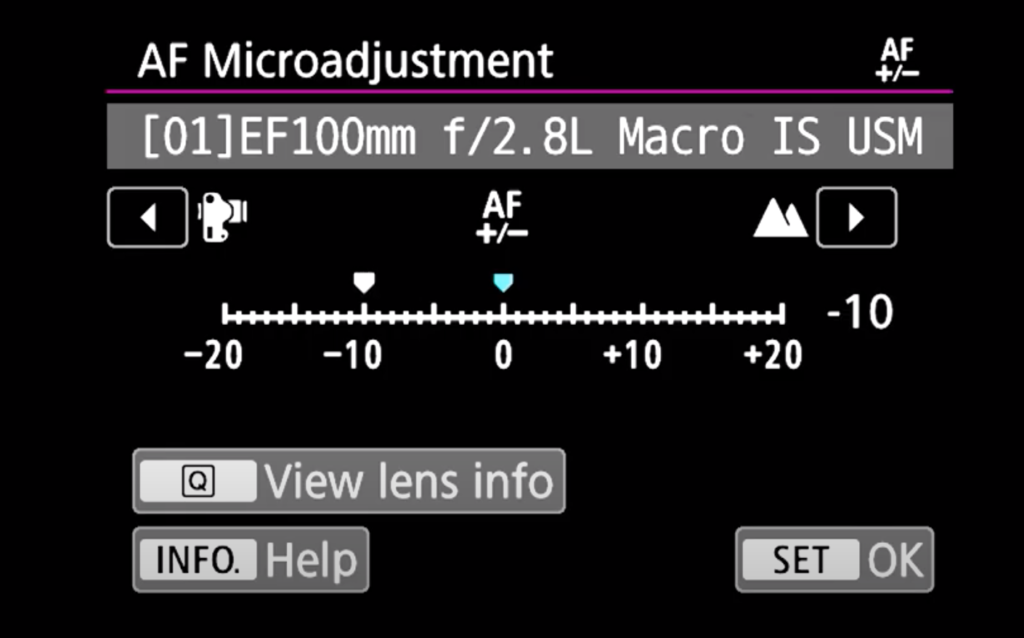
- For a prime lens: In the screen that displays, you should be able to see the autofocus microadjustment values from -20 to 0 and then +20. So you will be able to make up to either +20 or -20 steps of micro adjustments.
- Setting the micro adjustment values towards the negative side (camera icon) will move the plane of focus towards the camera and setting micro adjustment values towards the positive end (mountain icon) will move the plane of focus away from the camera.
- Once you have chosen the desired value, press the “SET” button to lock in the value.
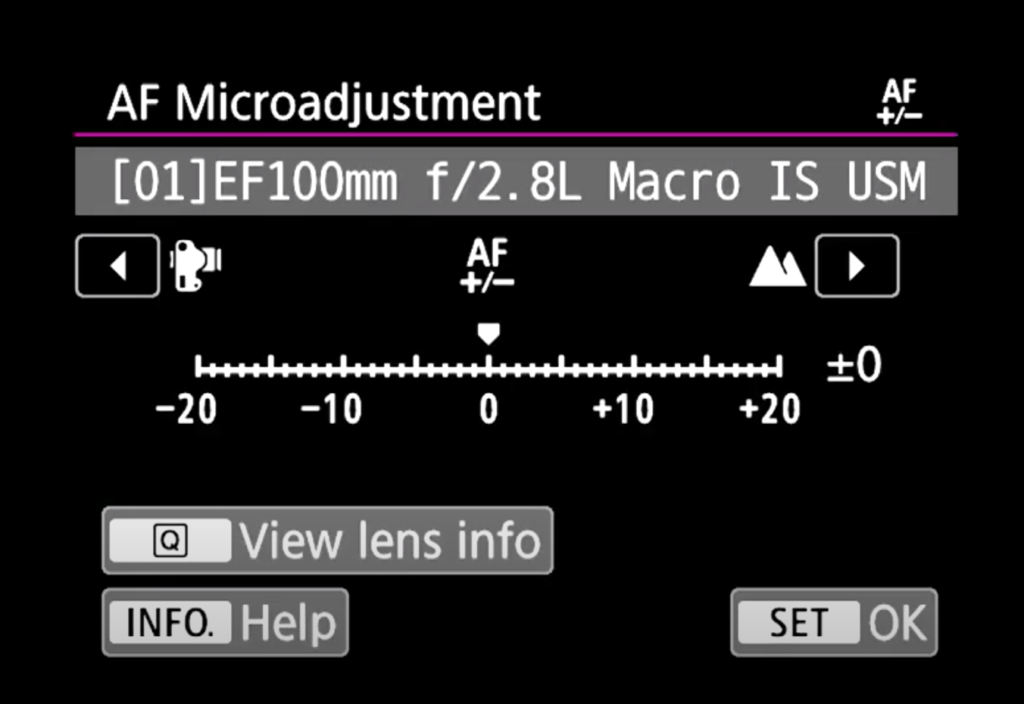
- For a zoom lens: For the zoom lens, you will see that micro adjustments can be made for both the wide (W) and telephoto (T) ends. Using the “Quick control Dial” select either “W” or “T” and make adjustments for the wide or tele focal length ends just like we did for the prime lens. Only some cameras let you make adjustments for both the wide and telephoto ends.
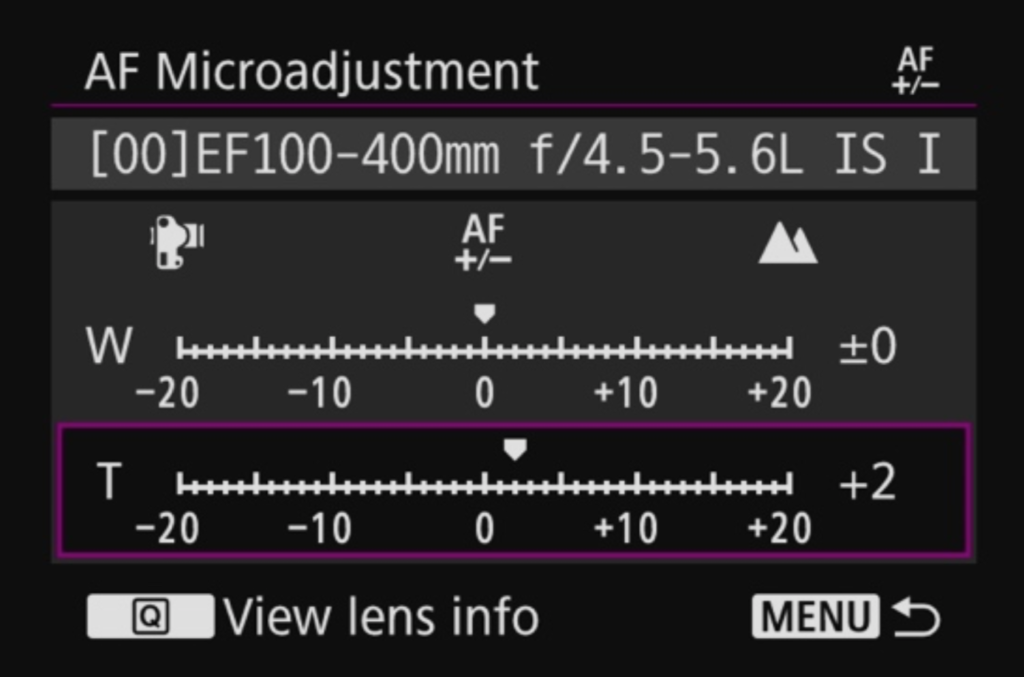
- Depending on the aperture value of the lens, you may need to make adjustments in one or two steps at a time. After each adjustment, you need to make test shots, check the results and make adjustments till you achieve the desired results.
- Verification Process for Microadjustment:
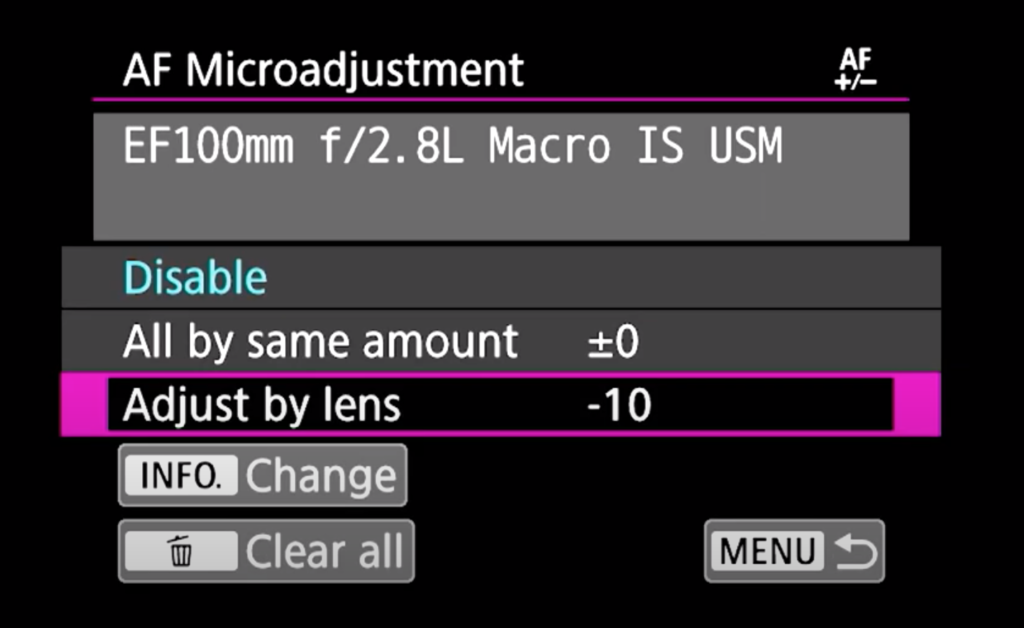
- Once you have made adjustments and chosen the accurate adjustment value, you will need to press the “SET” button so the adjustment value is set for “AF Microadjustment” -> “Adjust by lens”
- For this, you will need to return the previous screen which is “AF Microadjustment”
- Make sure the adjusted value displays next to “Adjust by lens” on the menu.
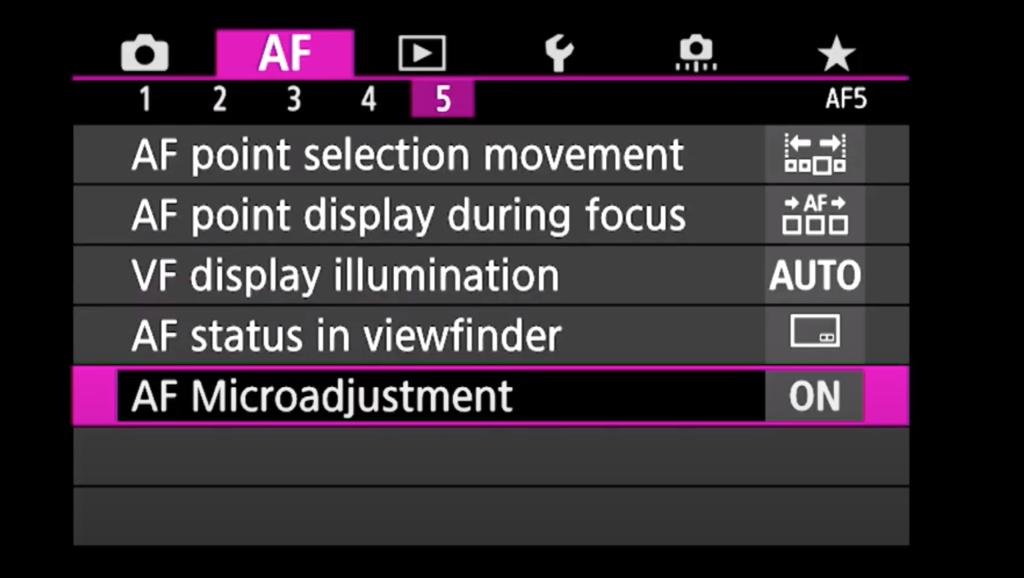
- Make sure AF Microadjustment is turned “ON” on your camera.
- Make a final test shot and check the final results on your computer screen. If the point of focus is accurate, then your micro adjustment task has been successful. Any time you need to make adjustments, you will need to follow the above procedure.
- If you use an extender along with the lens when making micro adjustments, the adjustment values will be registered for the lens and extender combination.
Note: For front focus, make micro adjustments to the “+” side and for back focus, make micro adjustments to the “-” side.
Adjust All By Same Amount:
- In your camera menu, select “AF Microadjustment”, press “Set” and select “All by same amount” You will see a message “Adjust focus for all lenses by the same adjustment amount”
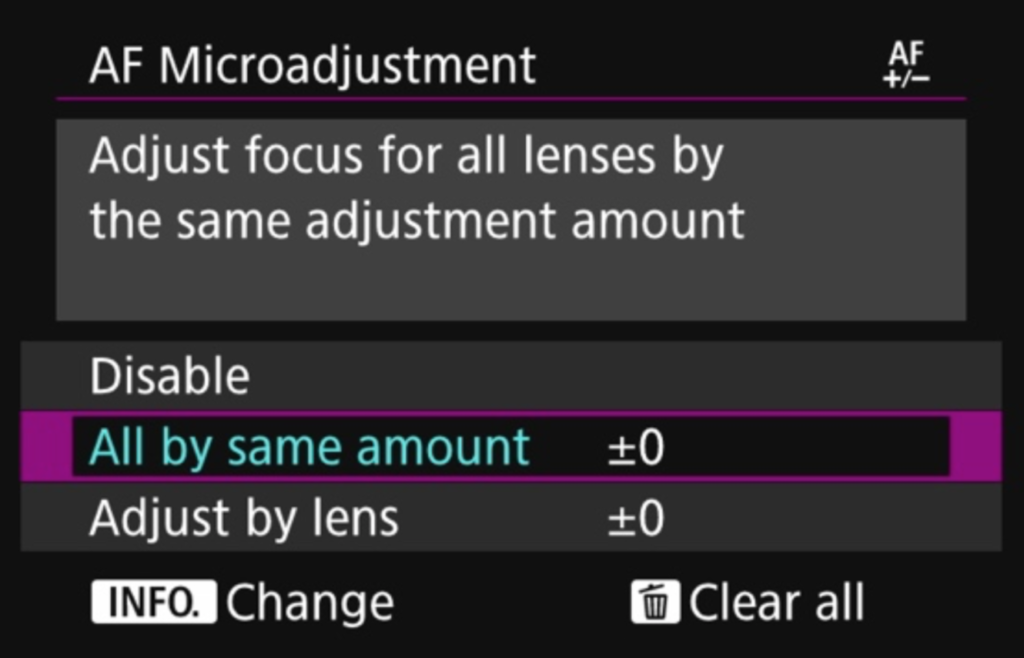
- Press the “Info” button to make changes to adjustment values. In the screen that appears, you will need to make adjustment values using the “Quick Control Dial” You will see values from -20 to 0 to +20 steps. Similar to what we did for “Adjust by lens,” making adjustment values towards the positive values will move the plane of focus away from the camera and making adjustment values towards the negative values will move the plane of focus towards the camera.
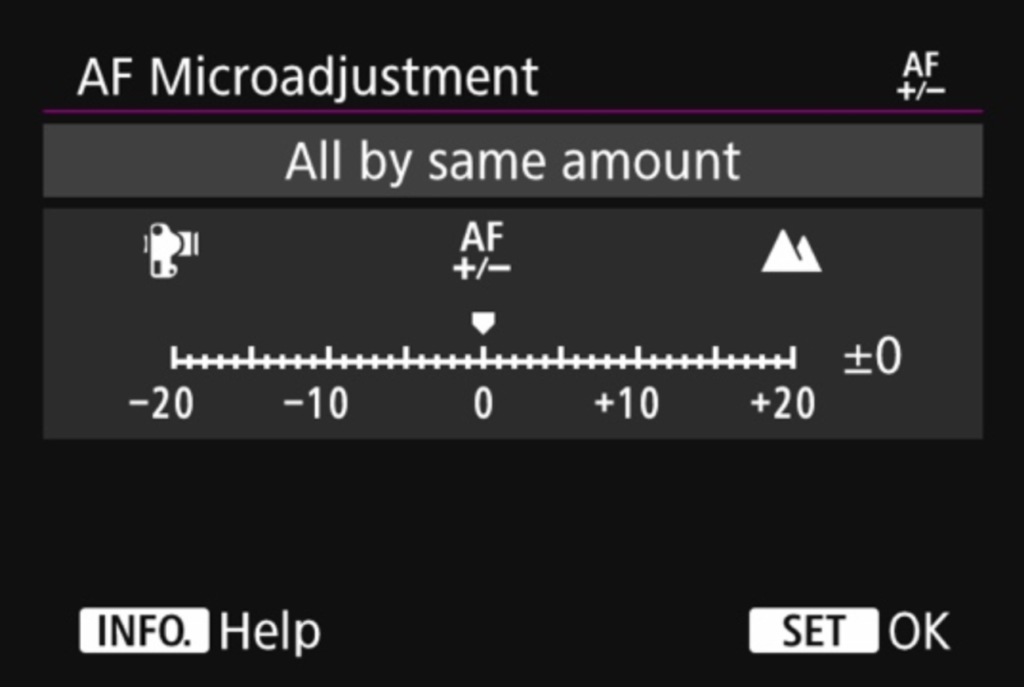
- When you have made the adjustments, press the “Set” button and move to the previous screen. Make sure the adjustment value is displayed next to “All by same amount.”
- Once done, make test shots and check the results on a computer. Make adjustments further if necessary or if accurate, complete the process.
- In this method, separate adjustments for wide and telephoto focal lengths for a zoom lens can be performed only on certain camera models.
You can also shoot images in steps of 1 right from -20 to +20, then compare to see which image has the sharpest focus and set your micro adjustment value to that particular one.
Note: If you want to clear all the AF microadjustment data, press the “Clear all” button on the “AF Microadjustment” screen.
Situations Where AF Microadjustments May Not Work Well:
We know in general, there are some situations and conditions in which AF fails to perform well, which means the camera really struggles to focus correctly even if it does not have focus issues. So, if you are performing your autofocus microadjusments in any of these scenario, then your micro adjustment results may not be accurate. What you may actually do is, make wrong adjustments to a correctly focusing camera-lens system.
Here are some situations where AF microadjustments may not work accurately:
- Low light situations: this is a very common situation in general where the camera can struggle with autofocus in general. Making micro adjustments in low light may not yield accurate results.
- Backlit situations: this is a scenario where the intense light from the back of a subject can cause confusion to the camera's autofocus system.
- Hazy or foggy conditions: in hazy situations if the atmospheric heat is high and if there is high humidity in the atmosphere, it can confuse the autofocus system as the contrast will be quite low. The same applies to foggy or misty atmosphere where the contrast and light will be low, making autofocus difficult.
- Other situations where autofocus can struggle are, having bright elements next to the subject, having other strong elements closer or to the back/front of the main subject, repetitive patterns, textures, reflective surfaces, tiny subjects – especially macro subjects, etc.
Other Methods for Autofocus Microadjustment:
After following the manual methods above, if you find the process too tiring or you want to go for something more reliable and accurate, you may want to think about a focus calibration software called FoCal which makes use of a semi-automatic method for calibrating the camera-lens combination.
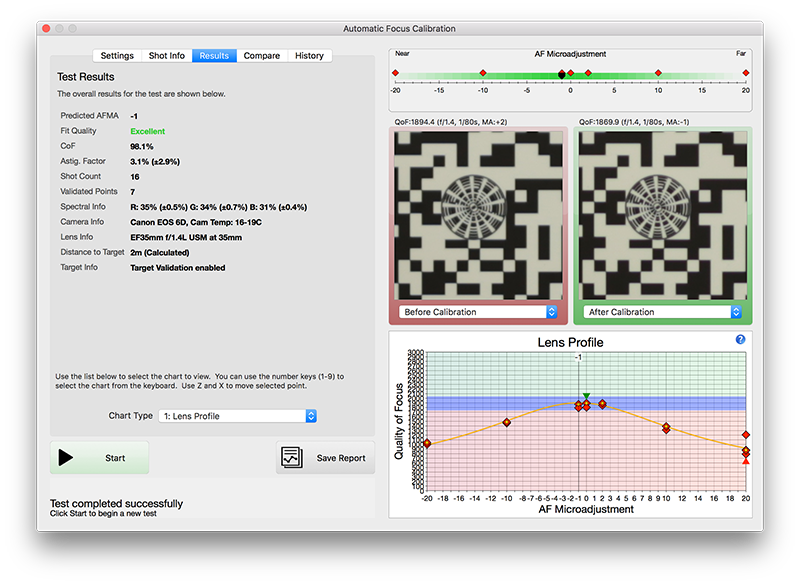
How FoCal Works?
Here is a brief overview of how FoCal works:
- The software is pretty cheap and comes with a QR code kind of image that can be hung on a wall.
- You will then need to set the camera and lens on a tripod with the image and the camera sensor parallel to each other.
- Connect the camera to the computer via the USB port and open the FoCal app. The app will guide you to set up the camera perfectly with the image on the wall.
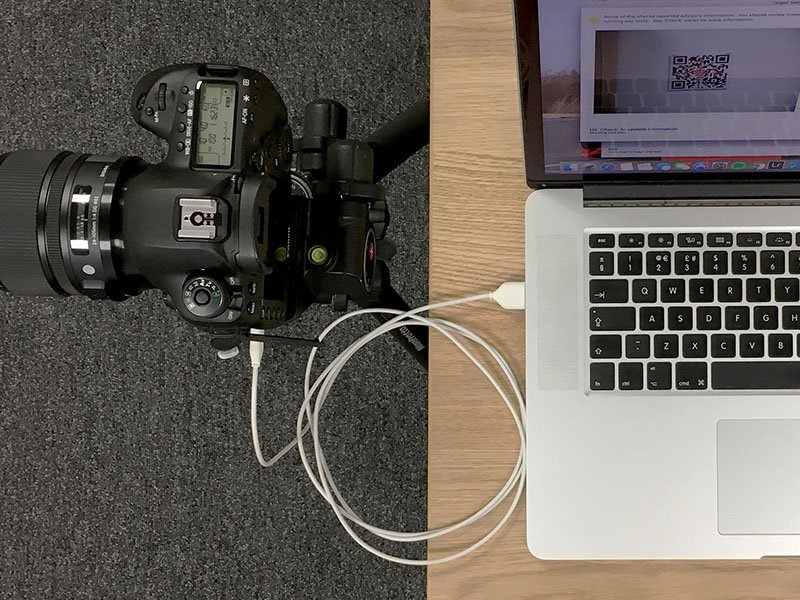
- Once done, you will be able to view the image on the computer screen and this aids with making real time micro adjustments manually in the camera while viewing the image on the screen.
- The whole process is very quick unlike the manual methods above.
How Often Should You Perform Autofocus Microadjustment?
The frequency for autofocus microadjustment depends on how often you use your camera and on some other factors.
- If you use your camera and lenses frequently, it is advisable to perform the micro adjustment process every six months.
- If you are someone who heavily uses your gear, then maybe micro adjust once every three months.
- If you are not a frequent user, then once a year should be fine.
- Since micro adjustment values can change with change in weather and/or temperatures, it is also good to calibrate the gear every season.
- If you are a frequent traveler, it is good to check for calibration issues after each travel as your gear can be subject to various climate, temperature variations and vibrations when traveling.
Have you made autofocus microadjustment to your camera-lens systems? If so, what method did you use? If you have any other tips, share them with us in the comments section below.
Further Resources:
- What You Need to Know About Your Camera’s Auto Focus System
- How to Successfully Focus on Fast Moving Subjects
- How To Achieve Perfect Focus In Macro Photography
- How to Set Up Back Button Focusing on Your Canon
- Microadjustment for Lens and Camera Front/Back Focusing Issues
- Calibrate Your Lens (And AF Settings For 6D Mark II With Sigma 120-300 2.8)


3 Comments
I notice the Canon 5D Mark IV is not on the list of cameras with AF micro adjustment function. Did Canon discontunue it on the Mark IV?
My Canon 77D does not have Autofocus Microadjustments is there a way for me to calibrate it anyway? I’ve been having some focus issues lately (will test it first, but not sure if that is useful because of the lack of micro adjustments)
Hi Sharon, did you solve the Autofocus Microadjustment for your 77D ? I also have the 77D and have the same issues. My Nifty Fifty 1.8 suddenly won’t focus sharply on the eyes of portraits when I’m shooting at 1.8. It’s fine with my other lenses but is focusing elsewhere when at 1.8 on the Fifty.