If you are a beginner in photography, you may be struggling to get into grips with the settings when situations are different on the field. Most beginners start with auto mode settings, but that will not allow you to get the best results and will block your creativity. Manual mode will allow you to be creative but will not suit all shooting scenarios. Make sure to shoot raw for all genre in photography.
In this article, we have put together some quick camera settings that you can start with for any genre in photography.
The Best Settings For Landscape Photography
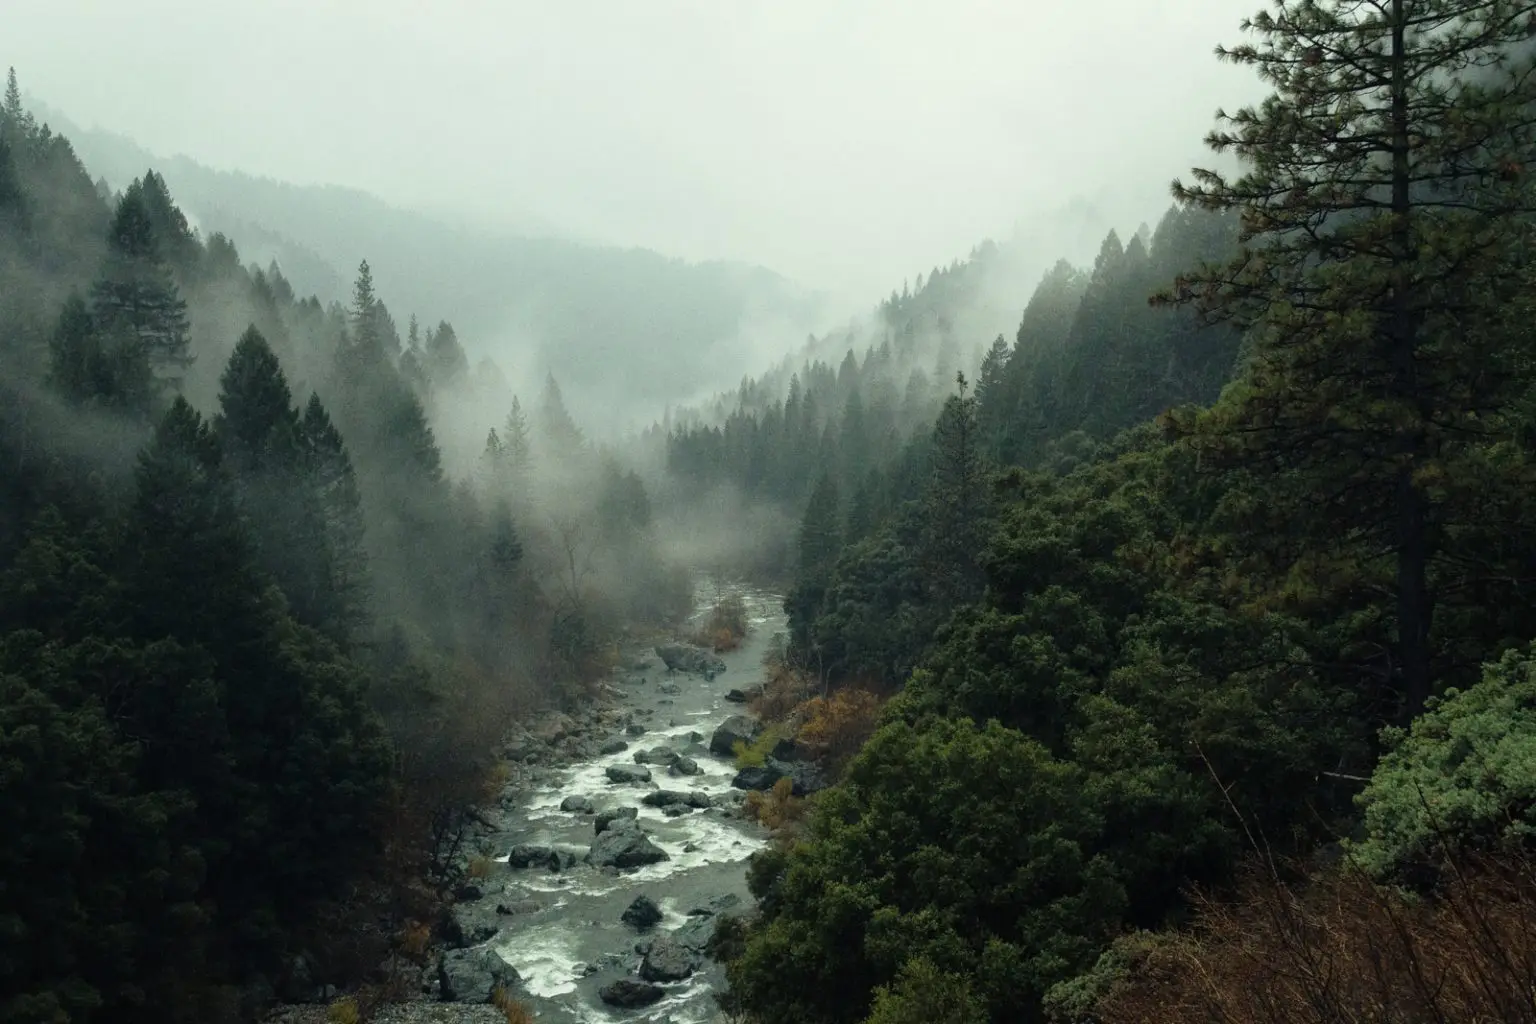
When shooting landscapes, you will need to put your camera on a tripod and avoid any camera shake. Using a remote trigger will be a great choice to eliminate any further camera shake. You will need to use narrow aperture values to get the entire scene in focus and low iso values for clean images. Based on these, choose the shutter speed, while also keeping in mind any moving elements in the frame.
- Mode: Manual mode
- Aperture value: between f/8 to f/11 or even f/16, preferably your lens' sweet spot
- Iso: 100 to 200 depending on your camera
- Shutter Speed: depends on the light – adjust the value till you get the right exposure while keeping an eye on the histogram. If hand-holding the camara, make sure to have the shutter speed greater than (1/focal length) taking into account the crop factor.
- Where to focus: Use the hyperfocal distance or focus one third into the scene.
- Others: tripod, remote or cable release to avoid camera shake, use the mirror lockup feature if using a DSLR on the tripod.
Settings For Sunrises And Sunsets

Getting a good sunrise or sunset shot takes a bit of practice and they are one of the best times to capture interesting landscapes. Grab every opportunity to watch and photograph a sunrise and a sunset as no two sunsets or sunrises are the same. The light can be quite tricky but magical as the sun is low in the horizon and the scene will be backlit. Also the dynamic range can be very huge. Making a few decisions on the field while keeping an eye on the histogram will help.
- Mode: Manual mode
- Aperture value: between f/8 to f/16, preferably your lens' sweet spot to ensure both the foreground and the dramatic skies are in focus,
- Iso: start with 100 to 200 depending on your camera to keep noise minimal
- Shutter Speed: depends on the light – adjust the value till you get the right exposure while keeping an eye on the histogram. Best to expose for the bright areas. If hand-holding the camera, make sure to have the shutter speed greater than (1/focal length) taking into account the crop factor.
- Where to focus: Use the hyperfocal distance or focus one third into the scene. For closer shots, focus on the Sun.
- Dynamic Range: You can use a graduated ND filter to get a balanced exposure, but the best option would be to bracket exposures to capture the dynamic range in the scene.
- Others: tripod, remote or cable release to avoid camera shake, use the mirror lockup feature if using a DSLR on the tripod. Turn off image stabilisation when on a tripod.
The Best Settings For Portrait Photography
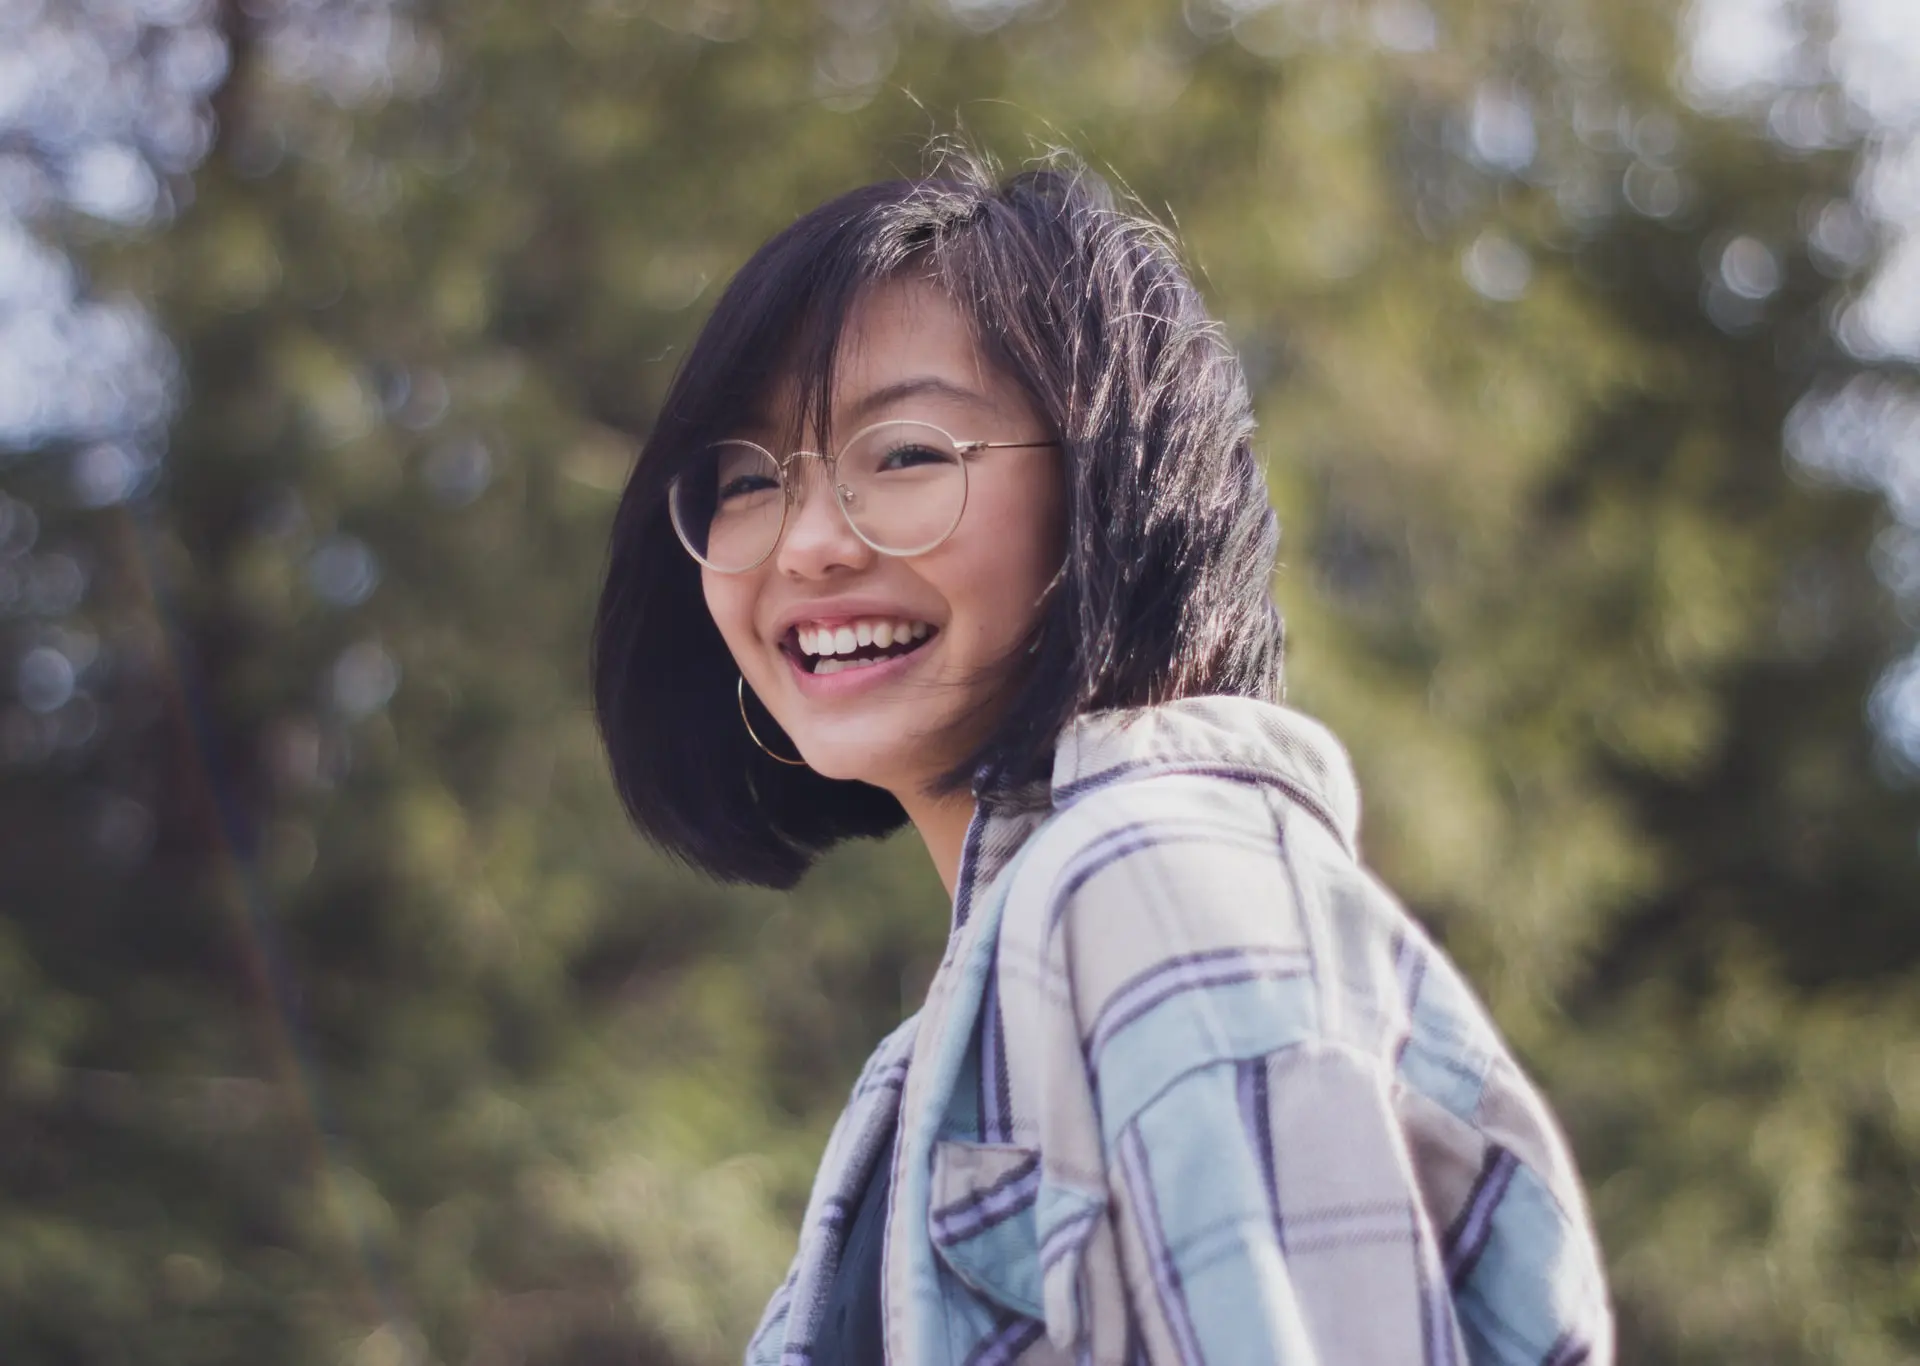
Portrait photography can be done either indoors or outdoors. When outdoors, you make use of the available light and use it to your advantage and this light can change with the weather and time of day, whereas in a studio setting, you have full control over lighting. Besides, depending on the type of portraits, you will need to make decisions on gear and settings. Wider apertures for day to day portraits and when shooting environmental or street portraits, it is good to close down to f/4 or f/5.6 to get some of the environment details in the frame.
- Mode: Manual mode, but you can try aperture priority if your subject is moving or if the light is changing.
- Aperture value: between f/1.4 to f/2.8.
- Iso: start with 100 to 200 depending on your camera to keep noise minimal. Increase based on light in the scene to keep shutter speed optimal.
- Shutter Speed: depends on the light and movements. Make sure to have the shutter speed greater than (1/focal length) taking into account the crop factor. 1/250s is a good start for sharp images.
- Where to focus: on the eye closest to the camera. Use manual focus or focus peaking feature if needed when shooting using wide aperture values.
- Lenses: A 24-70mm f/2.8 or prime lenses like 50mm or 85mm f/1.8
- Check out this article for studio portraits.
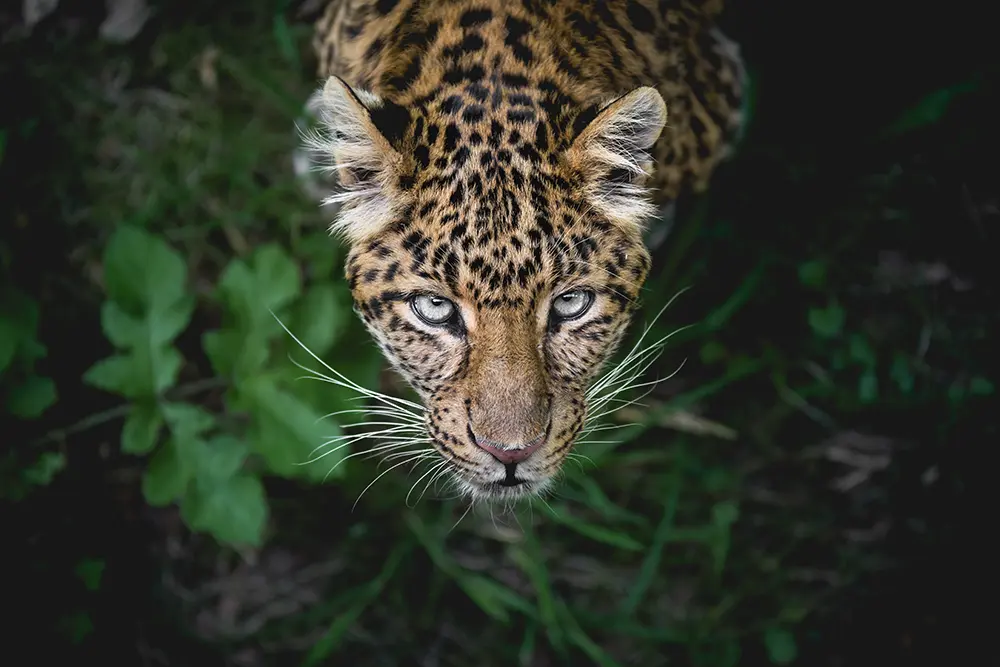
Quick Tips And Settings For Wildlife Photography
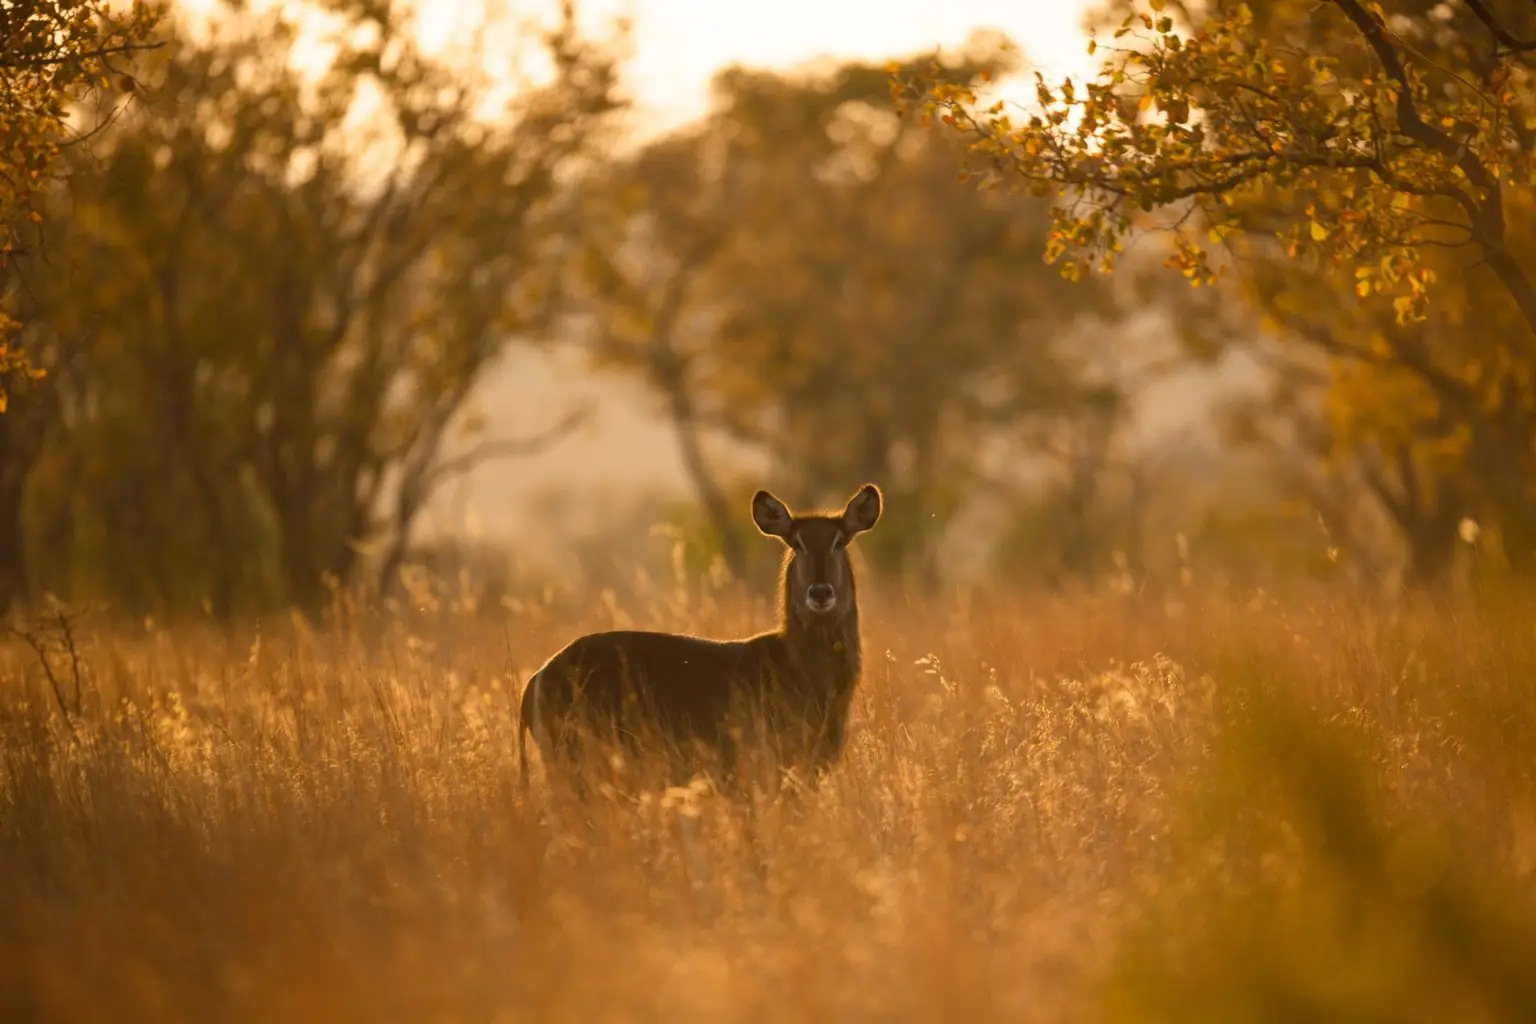
Wildlife photography is a very rewarding genre but the photographer needs to be prepared to truly capture the behaviour of animals in the field. Wildlife photographers need to be ethical and responsible when capturing photos in the wilderness, study animal behaviour to anticipate the shots and be ready with the settings to capture the most important actions and moments.
- Mode: aperture priority since the subject will be moving and the light will be changing.
- Aperture value: between f/2.8 to f/5.6 depending on the intended results. F/4 is a good value to maintain sharp images, but go wider if you are experienced and your lens allows it.
- Iso: start with 100 to 200 depending on your camera to keep noise minimal. Increase based on light in the scene to keep shutter speed optimal.
- Shutter Speed: depends on the light and movements. Make sure to set the shutter speed greater than (1/focal length) taking into account the crop factor and subject movement.
- Where to focus: on the eye closest to the camera. Use focus peaking feature if available
- Tracking: Focus tracking and continuous shooting in burst mode. Backbutton focusing will be helpful.
- Lenses: start with the kit lens 70-300mm and then when upgrading, go for the 150-600 or the 200-500mm lens.
Astrophotography & Everything You Need For Night Sky Photography
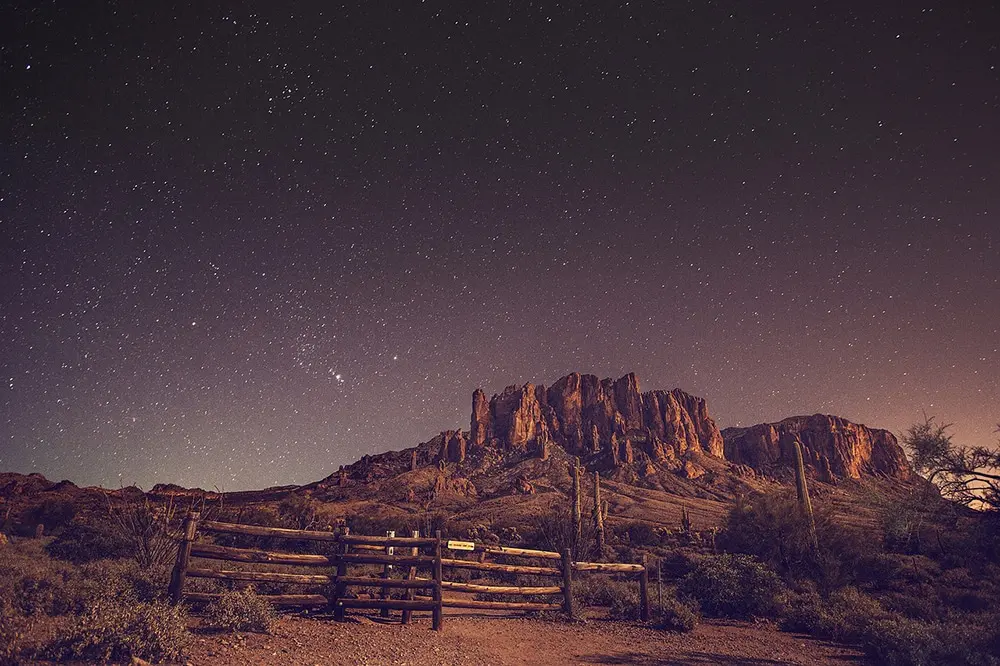
Astrophotography and night sky photography need dark skies for the best results, but if you live in a city, you can find places with less light pollution in order to capture some subjects in the night sky. Many photographers are intimidated by the term astrophotography and stay away from it thinking it may need special gear or advanced skills. Start with the simplest of subjects and then advance your way – astrophotography becomes easier with practice and also addictive.
- Mode: manual mode as you will need to make decisions based on the scenarios.
- Aperture value: use the widest aperture that your lens will allow – f/2.8 is advisable as we need to gather as much light possible.
- Iso: start with lower values like 640 to 1600 depending on the aperture values chosen, increase (or lower) if needed and we need to have shutter speed fast enough to avoid star trails.
- Shutter Speed: depends on the focal length used. Start with the 500 rule (divide 500 by your focal length) taking the crop factor into account.
- Where to focus: manually focus on a distant star.
- Lenses: start with a wide angle lens. If you have the 24-70mm f/2.8, use it or use the 18-55mm kit lens.
- Accessories: You need to put the camera on a tripod and use a remote or cable release. Turn off image stabilisation.
- Also check Star Photography: Dos And Don’ts When Photographing The Stars
Best Settings For Dynamic Sports Photography

Sports photography requires great skills, attention to detail and a good knowledge of the sports you are shooting. For even better results, it will be good to study the skills of the players, so you can anticipate moments and be ready to capture their most important moves and moments. Sports photography needs a lot of patience and experience for the best results and the camera settings are very important to get the desired results. Skills and techniques like panning, focus tracking, etc., will also be greatly helpful.
- Mode: shutter priority since you do not want to compromise on shutter speed and induce motion blur unnecessarily.
- Aperture value: start from f/4 to f/5.6 as wider apertures can make focusing tricky on fast moving subjects. For action shots with greater depth, close down to f/8
- Iso: 400 or greater to keep the shutter speed high. Lower if you have very bright light.
- Shutter Speed: do not go below 1/500s and for fast actions, stay around 1/2000s
- Where to focus: focus on the most important subject or element. Make sure the eyes are in focus.
- Lenses: fast autofocus lenses depending on the sports. 85mm, 135mm, 300mm or 400mm prime lenses and the 80-200mm, 200-400mm, 200-500mm, 150-600mm zoom lenses.
- Shooting Mode: focus track in burst mode or high-speed continuous shooting mode
- Accessories: when required, you need to put the camera on a tripod or a monopod and turn off image stabilisation.
Still Life Photography From The Comfort Of Your Home

Still life photography is something that you can turn to when you want to do some photography from the comfort of your home. It is also a genre that will help you to learn photography, understand light, work with compositions and understand the exposure triangle. Still life photography is also a way to overcome creative block and come up with ideas to shoot with simple subjects that we find around our house.
- Mode: manual mode, so you can creatively control the exposure
- Aperture value: f/1.8 and f/2.8 or even f/4 if you want your subject to stand out against the background. Or, you can close down the aperture to between f/5.6 and f/11 depending on how much of the background you need in focus
- Iso: 100 or 200. Increase in low light situations or for optimal shutter speed.
- Shutter Speed: stay at around 1/250s but make sure that you have the shutter speed at least greater than 1/focal length taking into account the crop factor.
- Where to focus: focus on the important subject or element.
- Lenses: 35 or 50mm lens or your kit lens if that's what you have
- Accessories: You can use a tripod for better flexibility in composition and clean images and turn off image stabilisation if using one.
Zoo Photography For Some Bird and Animal Shots When You Cannot Go On A Safari
A lot of photographers love to photograph animals but they may not always have access to their natural habitats or go on a safari. If you have a zoo nearby, you can go there often and capture some photos without disturbing the animals. Zoo photography will not give you the satisfaction of photographing animals in the wild and it also comes with a lot of limitations. If there is a fence, get very close to it.
- Mode: manual mode, so you can creatively control the exposure
- Aperture value: use the widest aperture to blend out the fence. f/1.8 to f/4 whichever is the widest that your lens will allow.
- Iso: lowest possible between 100 and 200 but go to between 400 to 1000 if needed, as the light can be quite low in some areas.
- Shutter Speed: stay higher than 1/500s but make sure that you have the shutter speed at least greater than 1/focal length taking into account the crop factor. Use faster speeds and continuous shooting mode based on activities and movements.
- Where to focus: manually focus on the eye of the subject as you will be focusing through a fence or glass and autofocus can struggle. If autofocus, use single point autofocus and focus on the eye.
- Lenses: longer focal lengths will allow to blur the unwanted foregrounds and backgrounds. A 70-200 f/2.8 or the 70-300mm kit lens will be helpful. Use 50mm f/1.8 for closeup shots.
- Accessories: use a lens hood to minimise glare when shooting through glass.
Urban Cityscapes With A Wow Factor
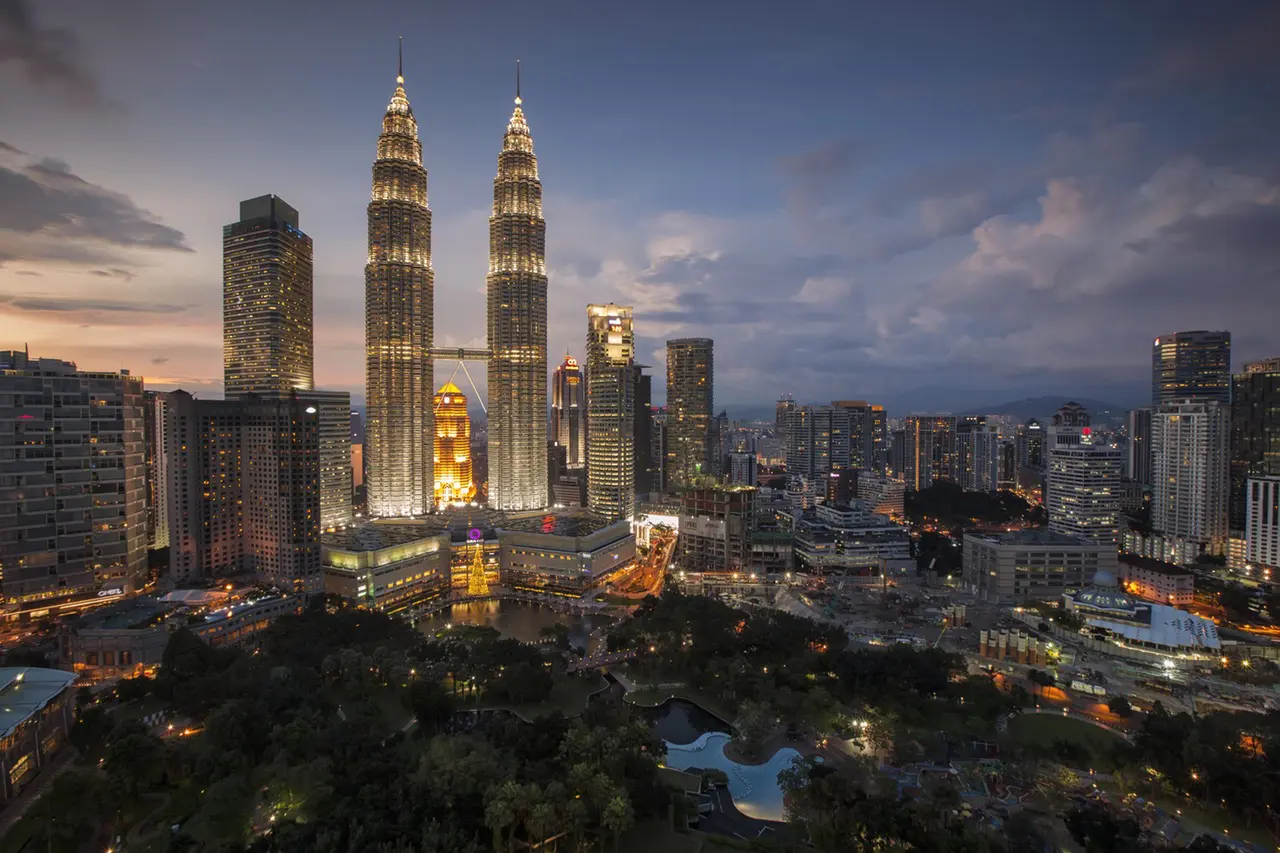
A lot of people live in the cities and even though they think that the photography opportunities in a city are very low, it's quite not true. Cities just like other areas provide a lot of opportunities for photography and one of those is capturing cityscapes. Cityscapes can be captured from different perspectives and during different times of the day for example the blue hour and weather conditions like a foggy morning. Each situation will lend a different mood and atmosphere.
- Mode: manual mode, so you can creatively control the exposure. You can also try aperture priority mode where you manually set the best aperture and ISO so that the camera calculates the right shutter speed for you
- Aperture value: use between f/8 to f/16 depending on your lens' sweet spot to get a greater depth of field and sharp details.
- Iso: lowest possible between 100 and 200
- Shutter Speed: based on light situations but make sure that you have the shutter speed at least greater than 1/focal length taking into account the crop factor if you are handholding the camera.
- Where to focus: manual focus one third into the scene for sharp images.
- Lenses: use a wide angle lens – about 24mm to get a wide shot of the cityscape.
- Dynamic range: bracket shots if the dynamic range in the scene is high.
- Accessories: use a tripod and a shutter release for the best results. Turn off image stabilisation if using a tripod.
Capture The Story Of A Location Through Street Photography

Not everyone takes up the challenge of walking with a camera on the streets and capturing street photographs. This genre takes a bit of time and practice to get used to capturing strangers and places on the streets. There is a fear when getting started, that can be overcome by continuously pushing yourself to get out and shoot. It is also important to develop communication skills to initiate conversations with your subjects if possible, so you can capture compelling street photos.
- Mode: manual mode, so you can creatively control the exposure. If you are quickly shooting on the go, use aperture priority mode.
- Aperture value: use between f/8 to f/11 but narrow down to f/4 or f/5.6 for street portraits.
- Iso: lowest possible between 100 and 200 but in low light situations increase the iso to maintain the right shutter speed.
- Shutter Speed: based on light situations but make sure that you have the shutter speed at least greater than 1/focal length taking into account the crop factor of the camera. If you are capturing moving subjects, increase the shutter speed accordingly.
- Where to focus: focus on the eyes of your subject if they are looking into the camera.
- Lenses: 35mm is great for street photography, but you can also experiment with 28mm and 50mm.
Simple Steps To Get Started With Long Exposure Photography
Long exposure photography is a skill that can help you to produce dreamy images both during the day and the night. There are many subjects that can be photographed when it comes to long exposure – clouds, water features, sports, street, night sky and many more. Since the exposure will be from a few seconds to minutes, stabilisation is of great importance.
- Mode: manual mode, so you can creatively control the exposure. The exposure is calculated based on the amount of movement the photographer decides to have in the resulting image.
- Aperture value: use between f/8 to f/16 depending on your lens' sweet spot.
- Iso: lowest possible between 100 and 200 but in low light situations increase the iso to maintain the right shutter speed.
- Shutter Speed: based on light situations and the resulting effects you desire. Could be from 1 second to a few seconds or minutes.
- Where to focus: manually focus on the static element in the frame.
- Lenses: usually a wide angle lens. 18 to 35mm is a good range.
- Accessories: tripod for stability, shutter release to avoid camera shake and ND filter if the light is too bright.
Further Resources:
- Camera Controls And Settings That Will Help You To Capture Sharper Images
- Understand These Basic Camera Settings To Capture Better Photos – A Beginner’s Guide
- The Best Bird Photography Settings
- Do You Set Your Camera Settings in the Correct Order?
- Better Beach Photography. Make A Splash With These Tips On Gear, Settings, And Composition


