Toys are not only adored by children but there are a lot of adults who absolutely love them and are great collectors. We are talking about action figures and other famous or most loved characters from movies, anime, etc., and they come in all forms and sizes. The number of toy collectors are only increasing by the year around the world and some of these collectors just display the toys in their cabinet, whereas there is another more enthusiastic group of collectors who are photographers, and they go creative and use these toys for photography. Here are some creative tips and techniques for stunning toy photography.
What Is Toy Photography?
Toy photography is a kind of still life photography and it is taking photographs of toys and telling a story with it. In this process, toys are used as subjects instead of real-life subjects. That’s the main difference between toy and portrait photography.
Toy photography could be done for various reasons including marketing, ads, product shots, etc., but many professionals and amateur photographers have a huge passion for toy photography and they tell stories, create their own scenes, and even recreate movie scenes through their setup, composition in photography. Other than just creating lifelike scenes, toy photographers bring their creativity and imagination to life through their photographs.
With toy photography, you cannot just point and shoot, but you need to put toys in realistic scenes and shoot them from a good perspective to make them look real and visually appealing. These toys are photographed either indoors or outdoors and many toy photographers also photograph their toys in everyday scenes. They carry their favorite toys and figures in their bag so they can photograph them when there is a scene that they come across, which can be used in their photography.

Gear And Accessories Required For Toy Photography
Gear is the most important part if someone wants to take up photography as their career or hobby. With so many advanced gear, accessories, and others in the market today, there are specific gear and accessories for all genres of photography. You do not need to buy any specific gear for toy photography – the camera and lens that you have in hand can be used, even if it is a kit lens on a beginner’s camera. Once you develop your skills in this genre, it is good to have the right gear to take your toy photography to the next level.
Camera
Toy photography is fun, interesting and allows the photographer to go creative. When you are just beginning with photography or toy photography, start with the camera and lens you have in hand. It is good to have a camera that will allow you to manually adjust settings so you have complete control over the exposure.
Lens
For a start, if you have only the kit lens, that is great. Shoot at the longest focal length if possible. When you think that there are limitations in your photography, you can upgrade to a prime lens like a 35mm or 50mm f/1.8 for better toy photography. If you have a macro lens, it can also be used for stunning toy photographs.
Tripod
Tripods are one of the most important accessories you will need for toy photography. It is not that you cannot shoot while hand-holding the camera, but having a tripod will allow you to compose the shot flexibly, set up the lighting while looking at the scene, and also will come in handy when you need to focus-stack your images and take shots where you may have to remove a toy stand, etc. Besides, toys are tiny subjects that require precise focusing and detailing, and using a tripod will help you achieve blur-free shots.
Shutter Release
A remote shutter release or a cable release is one of the most important accessories for an amateur or a professional photographer. When your camera is on a tripod, your scene set up, it is wise to use a cable release to avoid any camera shake that can cause blur in your images. Many cameras come with shutter release apps that can be used in a smartphone. If you have one of those, then by all means, use that feature to release the shutter.
Stage And Platforms
When you are looking to create neat toy photographs, you need to set up a stage, scene or a neat platform that will go well with the story you are trying to tell. Instead of trying to set these on the floor, if you frequently shoot toy photographs, it is good to have a dedicated table along with some black plexiglass or you can use any table, like a dining table or work table, with the plexiglass to create toy photos.
Backdrops
Backgrounds for toy photography are very important and are a huge part of the storytelling process. If you are just photographing toys as part of product photography, you can use neutral colored plain backdrops to photograph them, but if you are doing creative toy photography, then you need to pay serious attention to your backgrounds but there are some scenes that can be done on a plain white or dark background as well based on the story you are creating.

Depending on the scene you want to create and your choice of location, you will need to choose your backdrops wisely. If your scene requires outdoor elements like trees, rivers, etc., then scout for locations that would suit the story you are looking to create. If you will be shooting indoors, there are a lot of other ideas and things that you can try.
Some Ideas On Backdrops For Toy Photography
- You can create your own landscape on a tray with some moss and other plants, twigs, rocks, etc.
- You can shoot in your garden outside your own house or in a public garden.
- You could use printed backdrops of the scene you want as a background or, if you have a digital copy of the scene, open up the scene on a monitor so you can have it as a backdrop.
- When using digital or printed copies of backgrounds, check copyright information. If it is something that requires permission, then take it before you shoot using those backdrops.
- If you will be selling your toy photography as prints or for other magazines, etc., you will need to create your own scenes and backdrops or use backdrops for which you have purchased a license for commercial use.
- Take your toys along with you when traveling and visiting places, so you can shoot them against natural backdrops like forests, fields, meadows, mountains, beaches, rivers, waterfalls, etc.
- If you are just doing product photography, then use neutral-colored backdrops like white or grey so the image stands out.

Props
Toy photos do not need a lot of space or expensive props to get brilliant outcomes. Mini versions of everyday objects like for example, twigs, leaves, grass, barks, flowers, moss, etc., from your garden or backyard can be used to create a jungle scene indoors. Sand and mud can be procured from the outdoors. Kitchen items like salt, sugar, other household items like cotton, etc., can be used to create sandy and snowy landscapes.
Besides, if you are interested in craftworks, you can create custom sets or dioramas that can be used as props for the toys. These can give the toy photography a more realistic look and add a great natural mood to the scene. You can also use a digirama as background initially if you do not want to use dioramas or you are not able to procure props to create the scene for toy photography.
Note:
- Diorama: A diorama is a model or a miniature version or a three-dimensional replica of a large figure, landscape, object, or structure. It can be considered a mini film set that can be used to photograph your toys.
- Digirama: A digirama is an image displayed on a digital screen and used as a background for your subject which is toys or action figures in our case.

Lights
Lights are very important for toy photography especially if you are shooting indoors. As you advance and improve your toy photography, you will be working with different types and colors of lights to create interesting moods and scenes so that they go well with the background story. This will result in you needing to use colored LED lights like red, blue, green, magenta, neon colors, etc. to show interesting effects in your photographs. You may even use two or more different colors of light for a scene to show what you have visually imagined.
If you do not wish to invest in lights that can be sometimes a bit pricey, you can use colored plastic films, colored bottles, or any colored transparent material in front of the white light that you have, to create different colors. If you own a flash, the colored gels that come along with it can also be helpful.
Here are some manufacturers that manufacture lights that are most popularly used by toy photographers. Some come with colored gels while there are some that come with LEDs that allow switching between different colored lights.
- Lume Cube
- Ulanzi
- Weeylite LED lights
- Godox LED Lights
- Apurture LED Lights
- Manfrotto Lumimuse LED Lights

Reflectors
Reflectors are a great accessory to fill in light in darker areas that require some light. You can use any white surface, even a white sheet of paper as a reflector. To create a permanent reflector, stick it onto a piece of cardboard and mount it using a stand made using metal wires or other wooden frames you can find around your house. Some light situations may need more reflective light and in these cases, a tin foil can help greatly as a reflector.
If you intend to buy a reflector, there are many available cheaply online and they come in different colors as a set. These are portable, can be folded, and carried in the bag for outdoor shoots.
Other Accessories And Tools
Besides the above, here are some other tools that may come in handy for toy photography.
- Action figure stands: These are stands that you can buy called action figure stands. In reality, you can bend metal wires to create your own stands.
- Flight stands: These are stands that can be used to pose your figures in a flying position or even for a fight scene. These can be useful if you are photographing fight scenes and again these can be created by bending a metal wire.
- Mini tripods: These can help with holding the lights at various perspectives and angles.
- Spray bottles: These can be used to spray water to create the rain effect when shooting the photo. If not possible during the shoot, the rain effect can be added as a layer, later when post-processing.
- Tweezers: These help to hold and position the toys if they are too tiny.
- Blue, white or green tack: These help to stick the toys in position so they do not fall off when photographing.
- Cellophane tapes: They can be used to keep objects in place.
- Binding or craft wires: This can be used to keep the figures in place or to make holding stands discussed above.
- Twines or transparent wires: These can be used to suspend toys in the air, for example in a flying pose or fighting pose, etc.

Camera Settings For Toy Photography
When photographing toys, unless you are photographing a bigger-sized toy, most of the time you will be dealing with small-sized toys that will need to be photographed from a closer distance. This makes the depth of field narrower but allows you to create photos with stunning bokeh.
Settings vary with the type of scene you are photographing, the lens used, the distance between the subject and the camera, the size of the toys, how much depth of field you are looking to achieve, etc. In the following sections, we will look at some of the most common settings required for better toy photography.
Aperture
Setting the aperture for toy photography dictates how much depth of field and bokeh you have in your shot. For most toy photographs, you want to include the subject details sharply and not want to compromise by having blurred areas in the toy figures. So the recommended aperture value is between f/5.6 and f/8 depending on how close your camera is with respect to the subject, the focal length, and how much of the depth you want in focus.
Sometimes, when you are photographing from a very close distance and there is more than one element in your scene that you want in focus, you will need to go down the route of focus stacking.
ISO
It is advisable to use a tripod for toy photography because it will allow you to shoot at very low iso and the flexibility to focus and compose your images well. It is always advisable to use the lowest iso your camera will allow you to set – 100 or 200. This will help you to shoot images that are free of noise, especially in low-light situations.
Shutter Speed
Based on the above aperture and iso settings, you will need to meter the light and set the desired exposure. Since the toys will not be moving, and you are shooting using a tripod, you can have slower shutter speeds to get the desired exposure. Keep an eye on the histogram, so you do not clip highlights or shadows especially when there is harsh light in the frame.
If you are not using a tripod, you may have to increase the iso for better exposure, especially when shooting low-light scenes. In this case, make sure the shutter speed is greater than (1/focal length) taking into account the crop factor of the camera.
Focus Type
Toy photography requires precise focus on the eyes of the subject or if using other figures and toys, it definitely requires precise focusing. When shooting stories or scenes indoors in low-light situations, autofocusing can be quite difficult. So it is better to use manual focus to get the focus right where you intend to have it.
Some scenes may be quite easier to shoot than others, especially when there is light in abundance. It depends on the situations that you are shooting in and also on the aperture values and toys used. If using autofocus, make use of the focus peaking feature if you have one in your camera so you know the focus is on the right point/area.
Metering Mode
If you are shooting a scene that is evenly lit, then you can simply make use of matrix metering. If there is a backlit scene and you want the exposure right on the subject, then you will need to use spot metering so that the subject does not appear dark as a silhouette in the resulting image.
Locations For Toy Photography
Toy photography is not product photography, unless you are photographing your toy to just sell it. So you need to get creative and deviate from the product shots idea, when it comes to toy photography.
Outdoors are great places for photographing toys especially if you are looking for a more natural look and perspective in your toy images as there are many stunning locations with creative possibilities for toy photographers. As with all genres of photography, avoid the harsh midday sun and try to shoot early in the morning or late in the afternoon when the light is soft. You can alternatively shoot in the shade or on overcast days when the light is diffused.

Depending on the direction of light, sometimes some areas may fall under shadows which may not be desirable. Use a reflector to fill in some light.
Places For Creative Toy Photography
- When you are outdoors, look for fields, lawns, and meadows where you can photograph your toys in a natural environment. These are the most common and you can use leaves, tree barks, branches, stones, pebbles, etc., to create the scene.
- Concrete floors and walls, brick walls, etc., are another common thing where you can put your toys for photographing.
- Based on seasons, you can use trees, flowers, and other plants in your toy photography.
- Autumn and Winter can be great seasons in the outdoors to create toy photographs with those seasonal atmospheres.
- Besides the above, look for public places like bus stops, landmarks, historical buildings, architectural structures to photograph toys.
- On a rainy day, the falling rain and puddles can be creatively used for toy photography.
- If you love a bit more adventure, look for forests, mountains, beaches, rivers, waterfalls, etc., which can be stunning backdrops and locations to photograph toys.
- Do not forget to take your toys out in the night to shoot them against the beautiful city lights for impressive toy photography.
- Your own garden or backyard can be a great location to shoot toys.
- If shooting indoors, you can create the setup on the floor or on top of a table easily.
Lighting For Toy Photography
Lighting is a very important factor for toy photography and it is very similar to how you use lighting setups to shoot portraits. You can either use natural or artificial lights for toy photography and it depends on the scene you are creating, time of the day, indoor or outdoor, available light, and the story you are trying to tell. As much as possible, use soft light when setting up lighting for toy photography.
When shooting indoors, you can start with the available light like window light, a lamp, flashlight, torch, etc., and later invest in other lights for toy photography if you wish to take it up seriously. There are cheaper LED lights that work well for a start or even use the smartphone flashlight. Use what goes well with your subject and budget.
Lighting for toy photography can sometimes be a bit complicated as you may have more than one subject/element in the scene. You will need to work on the lighting and take a few test shots till you get the desired effect. With time and trial and error, you will get an understanding of how different setups need to be lit for perfect final results. Start with lightings that you use for portraits and then work your way up from there.
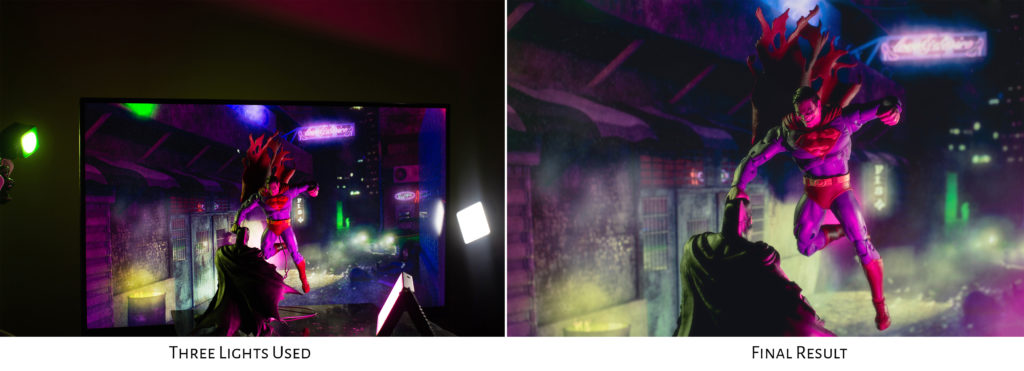
Here is a sample of a lighting setup for toy photography. Different coloured lights were used to get the effect in the scene. You can see the final results.
Composition For Toy Photography
As with every genre in photography, composition is very important for toy photos as well. Place your subject in the right part of the scene or if you have multiple subjects or elements, arrange them in such a way that they all work together to tell the story. Do not clutter the scene making it look chaotic. Even if the scene requires a lot of elements, arranging them in a pattern or order will help to create a harmonious image.

As a toy photographer, you will be using toys to stage the shots and set up the scene. Use the rule of thirds, rule of odds, golden spiral, patterns, leading lines, etc., for effective toy photographs. Composition along with the right props, right angle, and perspective will help you achieve effective shots. Forced perspective is a great technique to try for more realistic toy photography and once you start photographing toys, a lot of new ideas will come to mind.
Trending Toys For Toy Photographers
A lot of types of toys can be used for toy photography. Depending on your interests and what you would like to shoot, any toy big or small can be used to tell the story that you have visualised. The story can be part of your own creativity or scenes that are from a movie, series, comic or fictional stories.
Many of the toys created these days have a realistic look and are a replica of the characters you see on screen. However, there are a variety of cool looking toys that are a deviant from the real character and then there are others that have evolved out of someone’s creative thoughts.
When it comes to posing, bendable or articulated toys (flexible with good joint movement) are the best and they can be quite expensive. If you do not want to spend much on toys, thrift stores are great places to buy affordable toys.
Here are ideas on some types of toys that are a good choice for story-telling through toy photography.
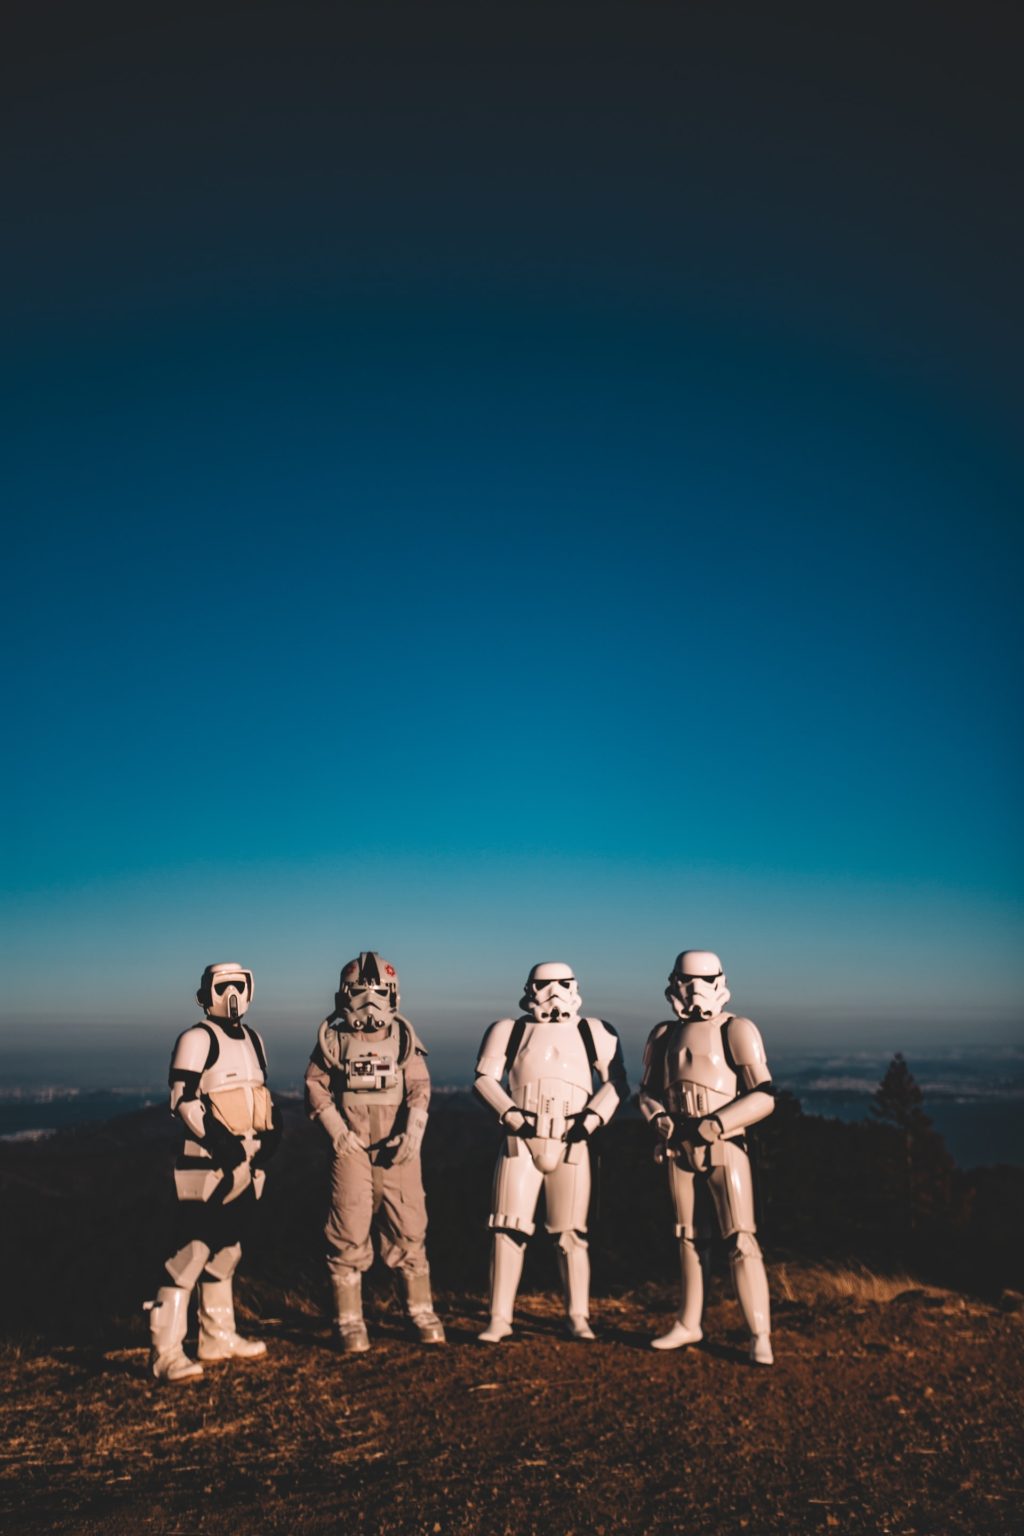
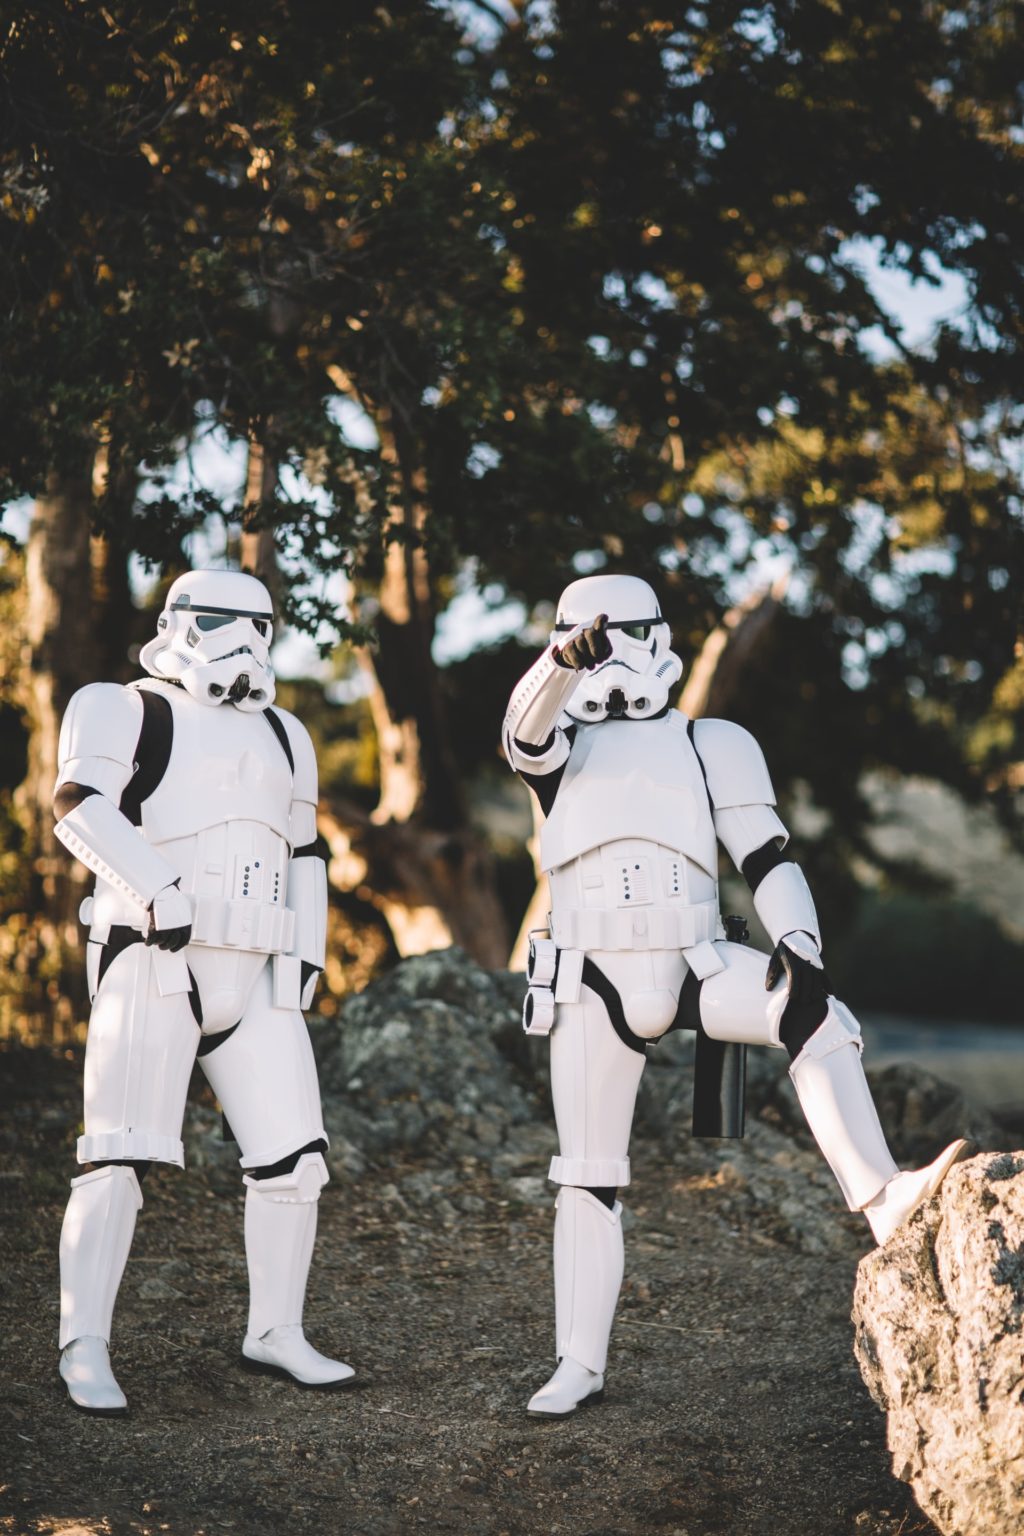
- Star Wars toys – their Black series collection are the most popular with a high level of detail. Even an antagonist character like Darth Vader is very popular.
- Marvel Legends
- Lego people
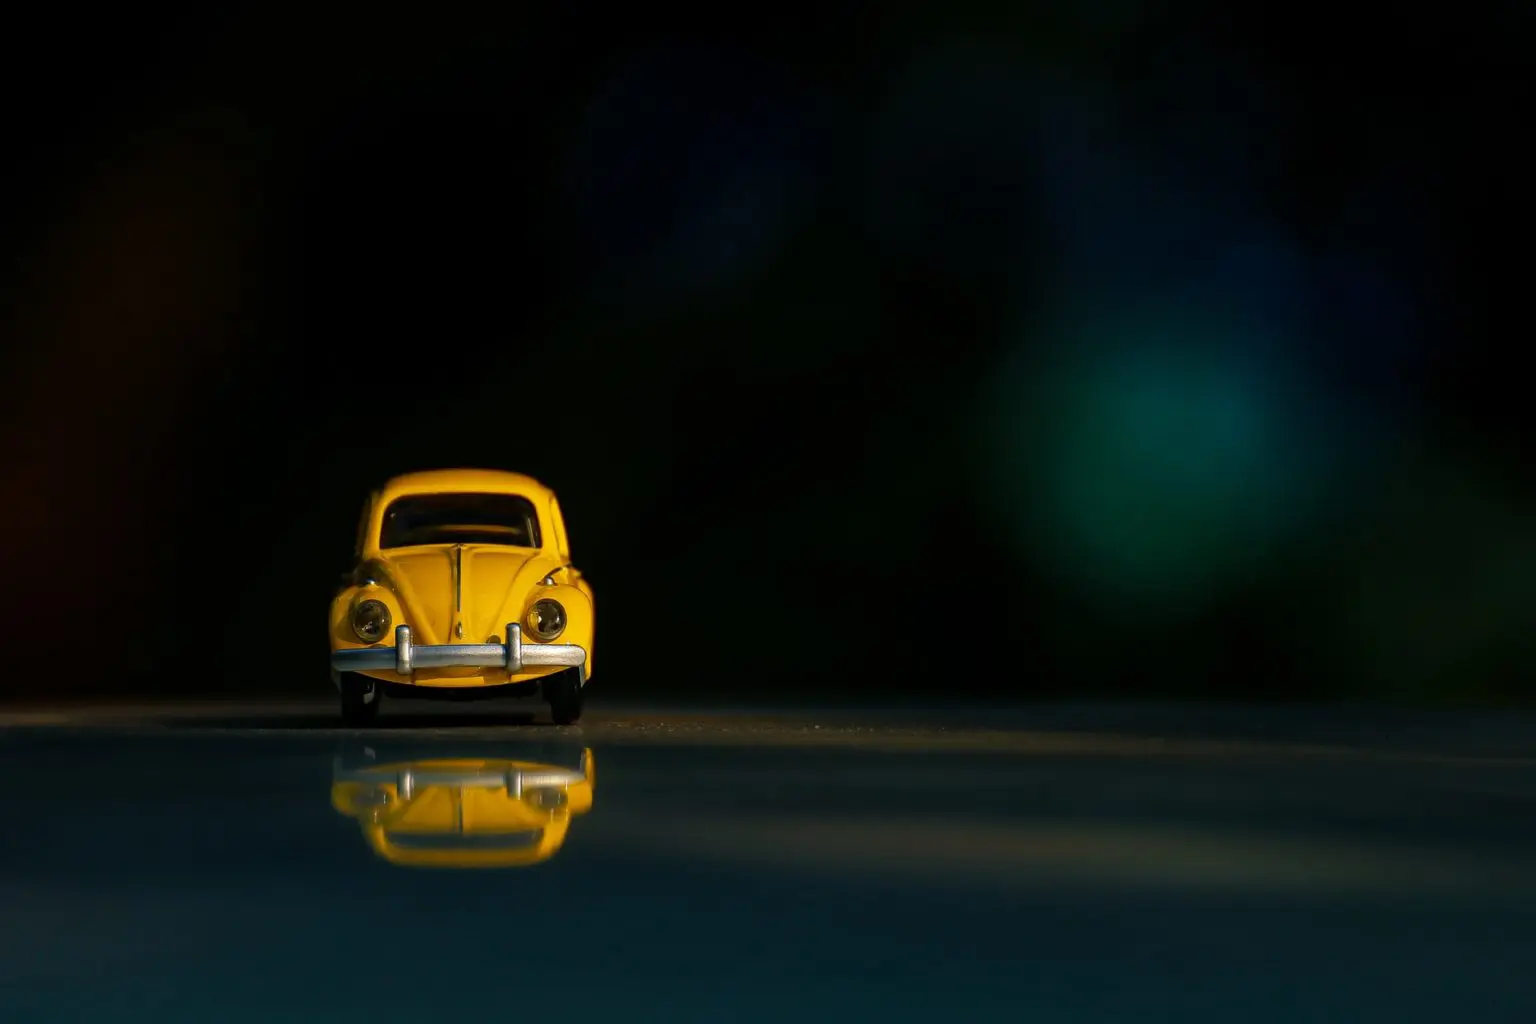
- Toy cars, for example, The Hot Wheels
- Funko
- Nintendo
- Disney
- Minions
- Japanese anime and toys from Medicom, Bandai
- Cultural souvenirs
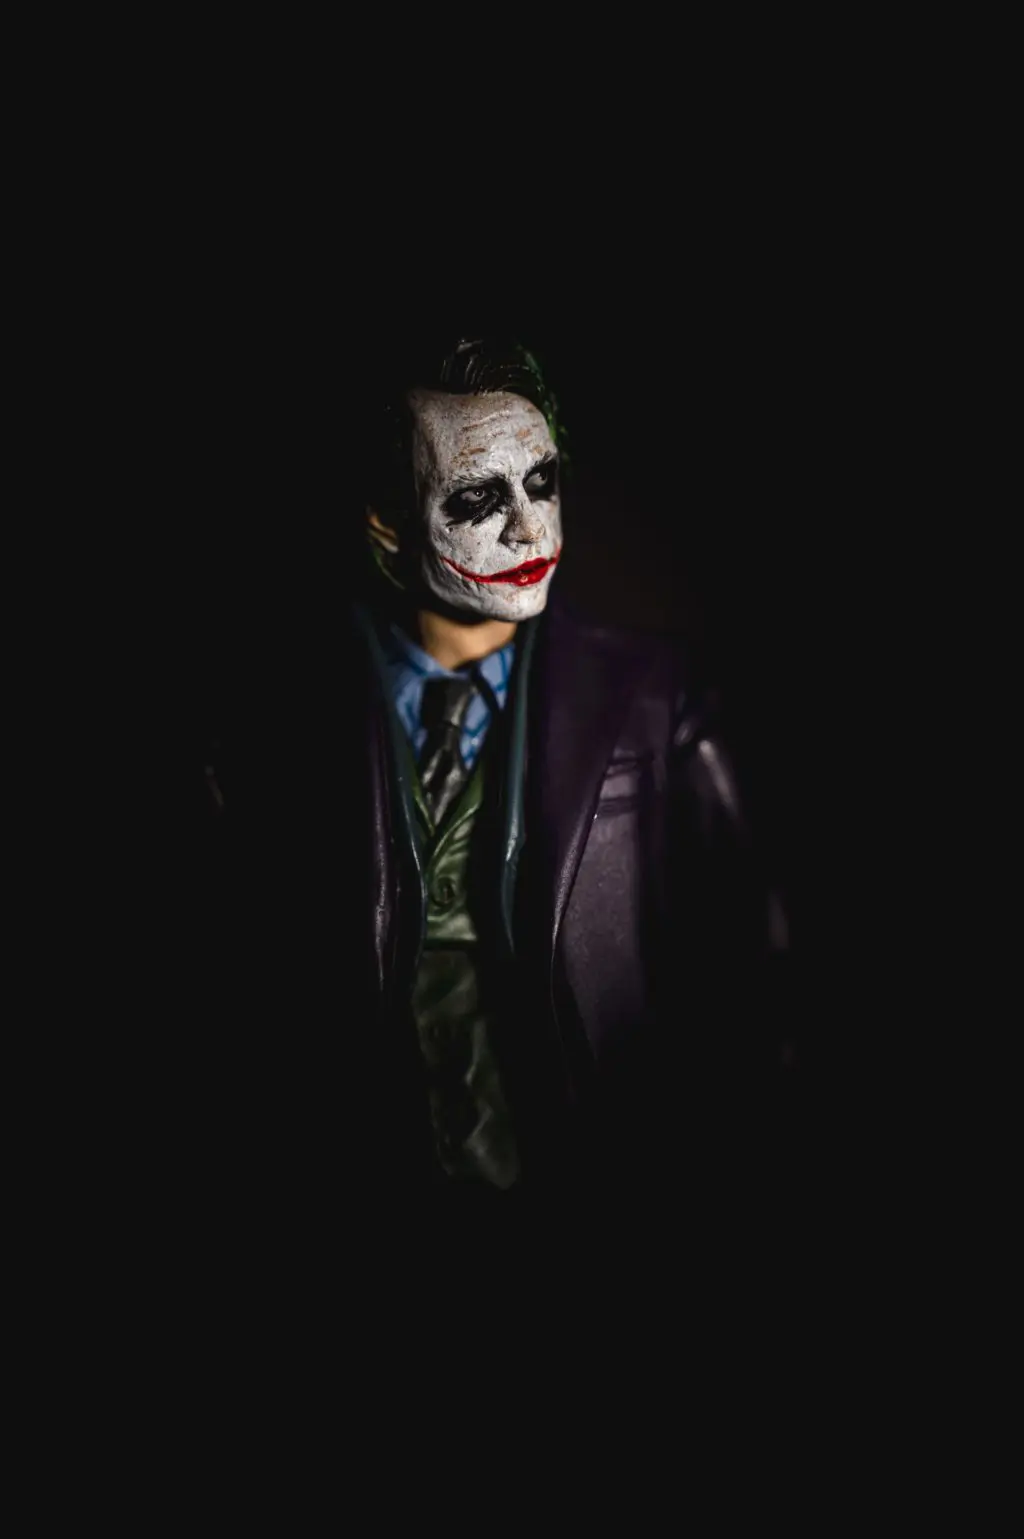
- Characters from comics and storybooks
- Or any toys lying around in your house
Setup For Toy Photos
Once you have a location or have a stage setup for your toy photos, you need to place your subjects also keeping in mind the compositional guidelines. You may wonder how to try different poses. Make use of stands, wires, twines, metal wires, etc., to pose your toys for difficult poses like jumping, flying, fighting. Etc.
These wires, twines, stands, etc., can be removed when post-processing. You can either use the content-aware fill tool or clone, patch, healing tools if you take a single shot. But if you take two shots, one with the toy and another with the toy removed, you can easily use masking on the layers to remove the stand from the image making the toy look like they were off the ground. For multiple shots, make sure you use a tripod to get the shots.
Here are two examples showing before/after where the toys were posed using a metal wire and the wire removed when post processing.


Creative Photography Tips For Toy Photography
Toy photography is about telling a story when you photograph your toy figures unless you are doing it as product photography. Here are some tips so you can photograph your toys creatively.
- Perspective: Toy photography is something that works well when you use the right perspective to get the shot. Using the right perspective will help you create life-size photographs. Besides these, explore new angles to get interesting shots of the toys and this can be a great fun experiment.
- Storytelling: The best part about toy photography is telling a story. Make use of props, suitable locations/background, lighting, poses to make the story effective. When you have more than one subject or toy in the scene, create a story that shows the relationship or interaction between the toys or characters.
- Create portraits: Shooting portraits or close ups of your toys can be an effective way to showcase their character up close. Follow the steps for a portrait shoot in terms of lighting, pose, and types of portraits. Try various lighting techniques that you would use for portrait photography.
- Dynamic effects: When shooting a scene where the story requires movement of the figures like running, fighting, etc., it is good to create a dynamic effect where you can attach the toy to something like a ruler and move it along the desired direction when the shutter is open. You will need slightly long exposures to record the movement. Other effects like smoke, spraying water, etc., also help to add dynamism to toy photos.
- Humor: Include humor in toy photographs where possible to keep the viewers engaged and they will be on the lookout for more of your works.
- Themes: If you have an affinity for a particular brand or type of toys or characters from a particular series, movies, etc., you can create your works around a particular theme. This will help you to maintain consistency in your work.
- Mood and emotions: Try to bring in specific moods and emotions when photographing your toys. It will add more to the storytelling part of your toy photography. Make use of props to make the story meaningful and powerful. If there is more than one toy in the frame, show the emotional relationship between them.
- Keep it simple: Do not clutter the frame, instead use one or three toys/elements that will go well together for the story you are creating. Be clear and focused on what you are trying to portray through your toy photo.
- Do not use a flash: It is good not to use a flash for toy photography unless you are using it in low power as a fill light. Using a flash can bounce off shiny surfaces and create an awkward look in the image and take away the natural mood.
- Compositions and colors: Make use of effective compositional guidelines that will work for the scene and background story. Look for contrasting colors or suitable colors that work with the story you are creating.
- Make them look life-size: Most of the time, shooting from a lower perspective can make the toys look life-size, for example eye level or even lower to the ground. This angle particularly makes the toys look big and tall.

- Take the toys everywhere. You do not know what scene or light will unfold in front of you so you can take some brilliant photographs.
- Tools: Have some tools in hand if you are working with very small toys. Tools like scissors can help with cutting off unwanted elements and other things in the scene. Tweezers can be used to handle tiny or delicate toys, blue tack can be used to keep the toy in one place/pose and prevent it from falling down, etc.
- Have some soft cloth and cleaners to clean your toys when shooting outdoors. You do not want dust to be a distraction in your toy photograph unless it is part of the storytelling process.
- Social media: Look for photographers on social media who also do toy photography. You can get inspiration and ideas from their work but beware, this can get you addicted to this genre.
Techniques And Skills Required
Focus Stacking
When photographing toys, since the subjects are tiny, you will be photographing them from a very close distance. Sometimes, even if you shoot at slightly narrow apertures like f/8, you will not be able to get the depth of field to have everything that you wish in focus. This may be the entire subject or all the subjects in the scene. In situations like these, you will need to try focus stacking.
- Take a series of photos where you take each photo with a different focal point starting from the front to the back making sure you do not move the camera during this process.
- For each shot, move the focus point slightly further away till you complete the subject’s entire depth of field as required by you.
- When post processing, combine these images to get a resulting image, that has greater depth of field with all the areas in focus.
Here are two articles that tell you everything about focus stacking: Focus Stacking in Photoshop: How to Get Pin Sharp Macro Shots and Photography Tutorial: Focus Stacking

Lighting Techniques
Learn a bunch of lighting techniques that you can make use of, for toy photography. Start with the basic side lighting. This itself can help you create dramatic and visually pleasing images. Try changing the angle of this one light both sideways and up or down. You will be amazed at how the whole scene, mood and effects change with change in angles and perspectives.
Once you know how light works, you can move on to two or more lights. Try lighting from the back, down under to create mysterious images and from top for more dramatic images. Learn to also work with the intensity of light. You can use diffusers like a piece of white linen, etc., to control the amount of light. Lights sold for toy photography come with switches for varying intensity levels.
Post Processing Skills
Since post processing plays a huge role in getting the final finished image, there are a few skills that are effective in achieving a great final image.
- Object removal: This is necessary if you want to remove unwanted elements like wires, stands that were used to hold the toys. Use content-aware tool or masking techniques to remove unwanted objects.
- Brushes: These can be helpful in achieving dreamy effects when post-processing. For example, to add fog, snow, rain in the scene.
- Textures and overlays: Instead of brushes, you can find a lot of overlays online that are licensed free and come in png format. Use these in the images to get the effects you are looking for.
- Working with layers: Masking, adding effects using textures, using brushes, require working with layers.
- Blend mode: Play around with layer blend modes finally to get desired results.
Toy Photos With Smartphone
Can you do toy photography with a smartphone? Of course yes. With advanced camera systems in smartphones, toy photography is possible with smartphones. Just like how you would use a camera to take photographs, do the same with smartphones. For long exposures, use specific apps. You can also make use of the portrait and night mode if you have them in your camera.
Post Processing Toy Photographs
Post-processing toy photographs is a must and requires quite some investment in time to get the final result you like. Editing toy photographs can be a fun thing to do as you can make an image more effective through your post-processing skills. Having some photoshop skills in hand can help a long way with editing toy photographs, but that is not really a must as you can make a clean edit in all advanced post processing applications.
- You will first need to adjust the white balance.
- Then straighten and crop the image and make sure any horizon line in the frame is straight unless you intended it to be slanting.
- Remove any unwanted spots, specks, etc., if any.
- Add some contrast as it makes the photograph look effective.
- Play around with the HSL panel to work on specific colors.
- Remove and toy holders and other holding wires in the frame to bring life to your staged shot.
- Apply an effective vignette if required as this can bring more attention to the main subject.
- If you wish to play around with different effects like smoke, rain, fog, these require working with various layers. Add them if they are needed for the story you are trying to tell.
Photographing toys can be a slow and relaxed type of photography as you can take your own time to create a story and share your love for toys and photography. Toy photography is different compared to other genres of photography because the photographer uses subjects to create a story that looks very similar to a real-life or fictional story. There are no limits to what one can do in toy photography and above all, you do not need to stick to the stories when using a figure, but try fun stories to create humor through your photography.


2 Comments
Great reading 🙂
Thank you Patrick. Glad you enjoyed 🙂