For some photographers, Lightroom represents the perfect specimen of an editing application. Not only does it allow you to organize your files, Lightroom possesses virtually everything you need to do serious photo editing. Unless you need to work with layers — but even then, Lightroom integrates seamlessly with Photoshop.
While Lightroom is nowhere near as feature-rich as Photoshop and its bottomless pit of features, I’m always pleasantly surprised to find something new (to me) that makes my time in Lightroom just a bit easier.
Here are four Lightroom tips that I use all the time, and you should too.
While this list is written with a focus on Lightroom Classic, I will include instructions for Adobe’s cloud based version of Lightroom when applicable.
Resetting
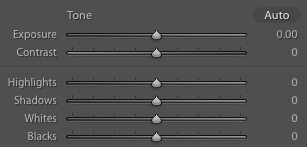
The “Reset” button sits rather prominently near the bottom right of the Develop module. With a click of this button you can wipe out all the edits you’ve made to a photo and start from scratch.
But sometimes starting over is too much. You don’t need to go back to the beginning, you just want to reset a specific slider, maybe. Sure, you could drag the slider back to zero, possibly overshooting the mark in either direction. Because sliders can be tricky, I guess.
Or you could just double-click the specific setting that you’d like to zero out. Want to reset Contrast? Shadows? Saturation? Double-click and be done.
In Lightroom CC, simply hover over an individual setting until “Reset” appears.

Before And After
It’s good to be able to track your progress as you edit. How does your edited shot look so far in comparison to the raw file? Have you gone too far? Have you overlooked anything?
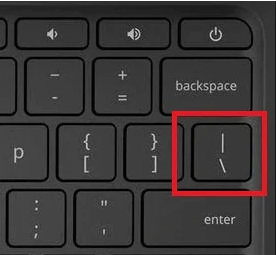
Pressing the backslash key tells Lightroom to toggle the before and after view.
Of course, this shortcut is part of a larger Before/After function that includes options to bring up a split screen and swap settings, all of which you may find useful at some point.
But the beauty of using the backslash key is that it is a quick way to see the totality of changes you’ve made to a single image with a single keystroke.
This functions the same in Lightroom CC.

Reference View
If you are editing a series of photos and want to maintain a consistent look across the set, it would help to be able to refer back to a specific image so that all the others match it.
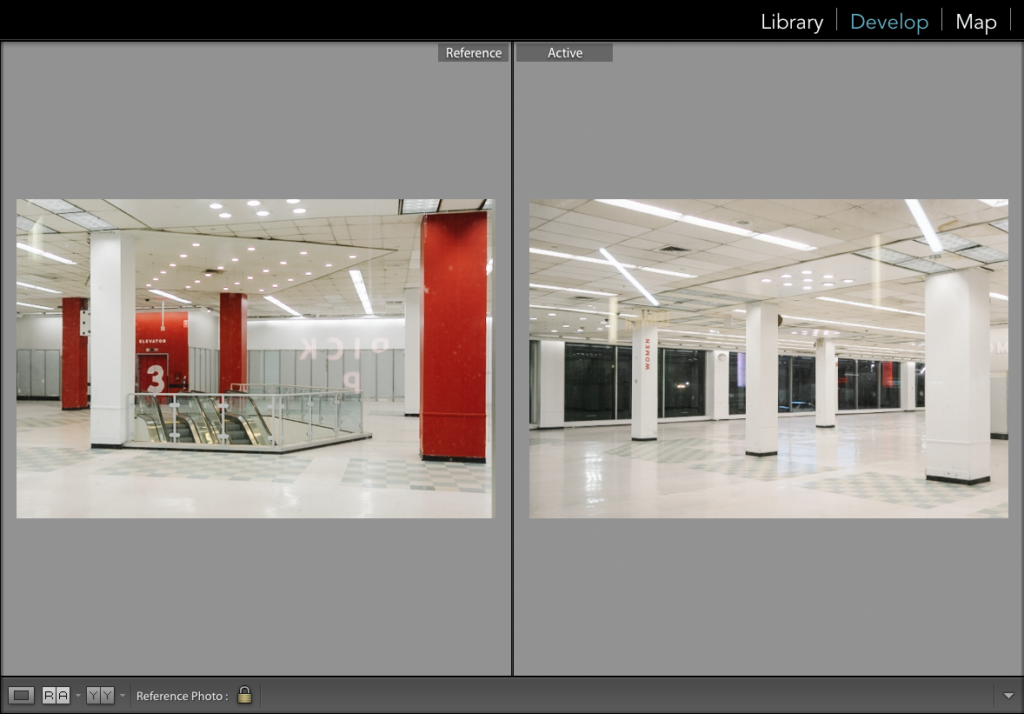
Lightroom gives you this ability in a feature known as Reference View. To enter Reference View, press shift+R.
Choose a photo that you’ve already edited and drag it into the left pane of the Reference View split screen. This will be your Reference image.
When you select a different image from the filmstrip, it will appear on the right half of the Reference View as your Active image. You can edit that image alongside your reference image to ensure consistency of color, exposure, tone, contrast, etc.
This is not available in Lightroom CC.

Solo Mode
The editing Panels in Lightroom’s Develop module contain all the sliders you need to edit a photo. There are nine Panels, each housing numerous adjustment sliders.
By default, Lightroom allows you have all nine Panels expanded at the same time. This means you’ll have to scroll up and down each time you want to get from one Panel to another.
It might not sound like a huge deal, but it can become a terribly inefficient way of working.
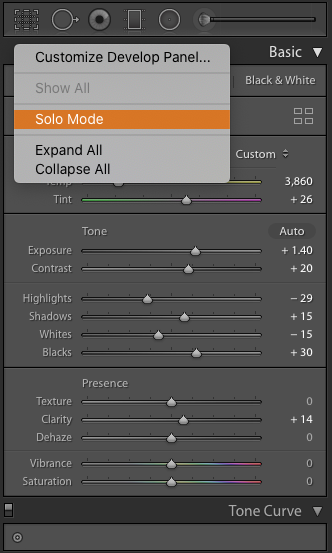
To save some time scrolling through Panels, activate Solo Mode. Right-click on any one of the Panel headings and choose “Solo Mode.”
What does this do?
Solo Mode only allows one Panel at a time to be open. So, for example, if you’re working in the Basic Panel and you go down to the HSL/Color Panel, the Basic Panel will automatically be hidden.
This limits the amount of real estate you have to cover with your mouse and makes it much quicker to get from one Panel to another.
In Lightroom CC, this is called Single-Panel Mode. Go to View > Edit Panels > Single-Panel Mode.

Final Thoughts
There are numerous under-utilized Lightroom tips/tricks that exist to make the user experience more pleasant, but the four listed here are part of the foundation of my editing workflow. Hopefully you find them useful as well.
Further Reading


